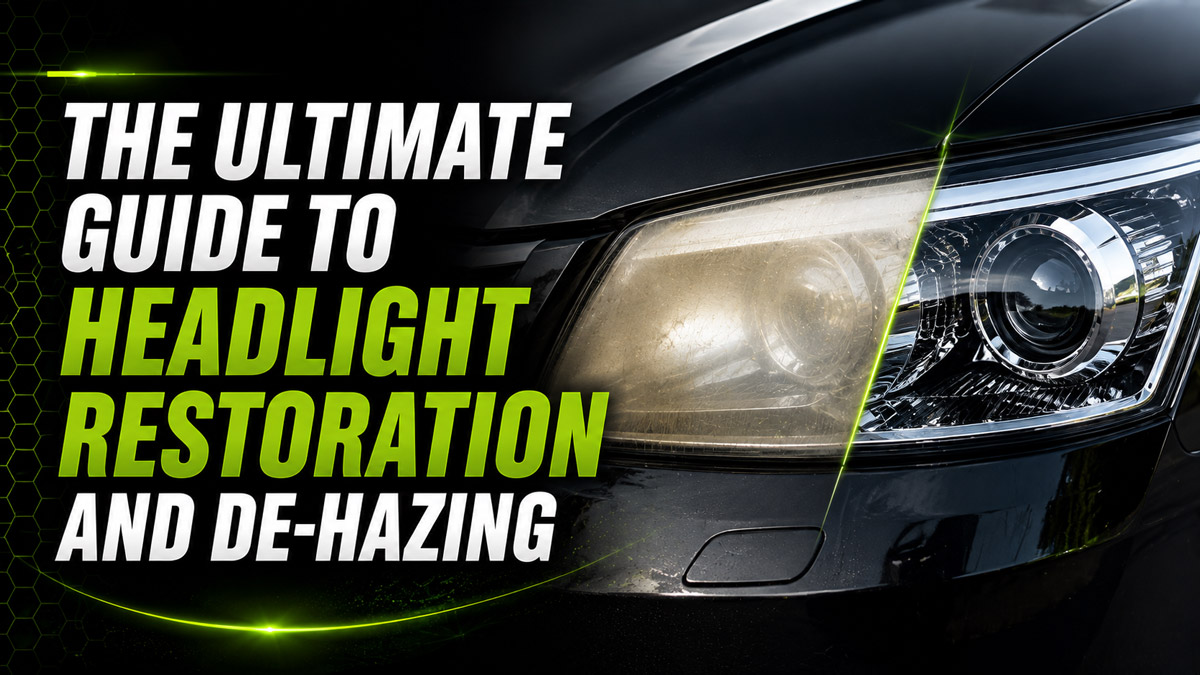
Headlight restoration and de-hazing is the mechanical process of removing oxidized, UV-degraded polycarbonate plastic from vehicle lenses and applying a new UV-resistant clear coat. This process restores optical clarity, increasing light output by up to 80% and drastically improving night driving safety while preventing premature re-oxidation.
Key Facts / At a Glance
- Safety Impact: Severely clouded lenses can reduce forward light projection by 80%, failing safety inspections.
- Time Required: A proper DIY wet-sanding restoration takes 45 to 60 minutes per pair of headlights.
- Average Costs: DIY kits range from $20 to $40, while professional restorations average $100 to $150.
- Replacement Alternative: Restoring original factory headlights delivers ~90% of new-light clarity for less than 5% of the $300–$1,200 replacement cost.
- Critical Requirement: Sanding and polishing alone will fail within 6 weeks without the application of a dedicated, UV-curing ceramic or 2K clear coat.
Why Do Modern Headlights Haze and Turn Yellow?
Modern automotive headlights haze and turn yellow because their porous polycarbonate plastic lenses degrade under prolonged exposure to ultraviolet (UV) radiation. Automakers apply a protective factory hard-coat to the polycarbonate during manufacturing, but this ultra-thin layer (typically 15 to 30 microns thick) breaks down over 3 to 5 years due to environmental exposure.
Three primary factors cause headlight degradation:
- UV Degradation: Ultraviolet sunlight breaks the chemical bonds in the factory hard-coat, causing the underlying polycarbonate to oxidize, turn yellow, and become opaque.
- Physical Erosion: High-speed impacts from road debris, sand, winter road salt, and harsh car wash chemicals create microscopic pits on the lens surface.
- Heat Stress: High-intensity halogen or HID bulbs generate intense internal heat, compounding the external UV damage and accelerating plastic degradation.
To fix hazy headlights permanently, technicians must physically abrade (sand) away the oxidized layer to expose bare, undamaged polycarbonate, polish it to optical clarity, and chemically bond a new UV-resistant coating to the surface.
Headlight Restoration Methods Compared
Evaluating the right headlight restoration method depends entirely on the severity of the oxidation and your budget.
Which Headlight Restoration Kit Should You Choose?
Selecting the correct headlight restoration kit determines the longevity of your results. Choose your kit based on your comfort level with power tools and the desired lifespan of the vehicle.
1. The Sylvania Headlight Restoration Kit – Best for Beginners
Beginners should choose the Sylvania Headlight Restoration Kit because it consistently delivers the highest longevity for hand-applied DIY solutions. It includes a true UV-curing clear coat rather than a temporary protective wax. The kit provides precisely measured abrasives, chemical softeners, and the final sealant, requiring only water and masking tape from the user.
2. The 3M Headlight Lens Restoration System – Best for Power Tool Users
Users comfortable with a household drill should choose the 3M drill-mounted system. Power-assisted sanding drastically reduces the manual labor required and cuts through severe, crusty oxidation that hand-sanding struggles to remove. Ensure your drill operates below 1,500 RPM to prevent heat buildup, which can melt the polycarbonate.
3. Wet Sand & SprayMax 2K Clear Coat – Best for Professionals
Long-term vehicle owners and professionals should bypass boxed kits and purchase individual sheets of automotive sandpaper (400 to 3000 grit) alongside a can of SprayMax 2K Clear Coat. The 2K clear coat features a two-part epoxy system with an internal hardener, providing the thickest, hardest, and longest-lasting UV protection available. Warning: 2K clear coats contain highly toxic isocyanates; operators must wear an activated carbon respirator during application.
How to Restore Headlights: The Gold Standard Process
The gold standard headlight restoration process requires physical wet sanding, compounding, and chemical sealing to achieve permanent results. Quick “wipe-on” chemical treatments skip the abrasive removal step and invariably fail within months.
Before You Start
- Time Required: 45 to 60 minutes per pair.
- Difficulty: Intermediate.
- Tools Needed: Automotive masking tape, spray bottle with soapy water, microfiber towels.
- Materials: Sandpaper (400, 600, 1000, 1500, 2500, 3000 grit), polishing compound (e.g., Meguiar’s PlastX), Isopropyl alcohol (70%), UV-resistant Clear Coat.
Step 1: Preparation and Masking
Preparation prevents irreversible damage to your vehicle’s paintwork during the abrasive stages. Wash the headlights thoroughly with automotive soap and water to remove loose dirt and grease. Once dry, apply 2 to 3 overlapping layers of blue painter’s tape around the entire perimeter of the headlight, covering the adjoining bumper, fenders, and hood.
Step 2: Wet Sanding (The Removal Phase)
Wet sanding mechanically strips away the dead plastic. Keep both the sandpaper and the lens saturated with soapy water (1 drop of dish soap per 16 oz of water) to provide lubrication and prevent plastic dust from clogging the abrasive paper.
- Coarse Sanding (400 or 600 Grit): Sand in a strict, uniform horizontal motion. Continue until the yellow slurry coming off the lens turns completely white. The headlight will look heavily frosted and opaque; this is the intended result.
- Medium Sanding (1000 and 1500 Grit): Switch to medium grit and sand in a vertical motion (cross-hatching). Cross-hatching ensures you level out the deep horizontal scratches left by the coarse grit.
- Fine Sanding (2500 and 3000 Grit): Return to a horizontal motion. Sand until the surface feels incredibly smooth to the touch. The lens will remain uniformly hazy, but individual scratch marks should no longer be visible.
Success Checkpoint: You’ll know Step 2 is complete when the headlight looks like frosted glass with a completely uniform, matte texture and zero deep gouges.
Step 3: Polishing (The Clarity Phase)
Polishing restores optical transparency by smoothing out the microscopic 3000-grit scratches until they are invisible to the human eye. Apply a dime-sized drop of polishing compound (such as Meguiar’s PlastX) to a microfiber towel or a drill-mounted foam polishing pad. Work the compound firmly into the lens using overlapping circular motions. Continue buffing until the frosted lens turns crystal clear. Wipe off excess compound with a clean microfiber towel.
Step 4: UV Sealing (The Protection Phase)
Sealing the bare polycarbonate is the most critical step in headlight restoration; skipping this step guarantees the lenses will re-oxidize and turn yellow within 6 weeks.
- Decontaminate: Wipe the entire lens down with 70% isopropyl alcohol. This strips away residual polishing oils that would otherwise prevent the clear coat from bonding.
- Coat: Apply your chosen UV-resistant clear coat or wipe-on ceramic sealant in a dust-free environment. If using a 2K spray clear coat, apply one light tack coat, wait 3 to 5 minutes, and follow with one wet, medium-heavy pass.
- Cure: Allow the vehicle to sit for at least 24 hours without exposure to moisture or rain.
Common Headlight Restoration Mistakes and Fixes
Even careful DIYers encounter finish defects. Diagnosing the specific visual flaw allows you to correct the error without starting completely over.
- “The headlight looks cloudy immediately after I finished.”You did not sand long enough with the higher grits (1500 and 3000). The compounding phase cannot remove coarse 600-grit scratches. The Fix: Go back to the 1500-grit wet sanding step, re-sand thoroughly, follow up with 3000 grit, and re-polish.
- “The lenses turned yellow again after 2 months.”You skipped the UV sealant phase or applied a standard car wax that washed off during the first rainstorm. Bare polycarbonate has zero UV resistance. The Fix: Lightly re-polish the lens to remove the fresh surface oxidation, wipe with alcohol, and apply a dedicated UV clear coat or ceramic coating.
- “I see ‘orange peel’ (wavy texture) in the reflection of the clear coat.”Orange peel occurs when aerosol spray sealant is applied too heavily, unevenly, or in humid conditions (above 70% humidity) where the solvents cannot flash off properly. The Fix: Let the clear coat cure fully for 48 hours. Lightly wet sand the coated surface with 2000, then 3000 grit paper to flatten the high spots, and polish it back to a high gloss.
- “My headlight looks like shattered glass, but the outside feels smooth.”This condition is called “crazing.” Micro-cracks have formed completely through the polycarbonate substrate due to intense internal heat stress from halogen bulbs. The Fix: Restoration cannot fix internal crazing. You must replace the entire headlight assembly.
Frequently Asked Questions
Can I use toothpaste to restore my headlights?
Toothpaste acts as a mild abrasive that can remove very light, superficial oxidation, but it is not a permanent solution. Because toothpaste does not contain UV sealants, any clarity gained will disappear as the unprotected plastic re-oxidizes within a few weeks.
How long does a professional headlight restoration last?
A professional headlight restoration using a 2K (two-part) automotive clear coat will typically last 3 to 5 years, matching or exceeding the lifespan of the original factory hard-coat. Maintenance with spray waxes can extend this lifespan further.
Are replacement headlights cheaper than restoring them?
Replacement headlights are rarely cheaper than restoration for modern vehicles. While a high-quality restoration kit costs $20 to $40, modern LED or HID factory headlight assemblies routinely cost between $300 and $1,200 per unit, plus installation labor.
Does WD-40 permanently fix hazy headlights?
WD-40 does not permanently fix hazy headlights. The oil in WD-40 temporarily fills the microscopic scratches in the oxidized plastic, making the lens appear clear for a few days, but it washes off immediately in the rain, leaving the headlight yellow and degraded.