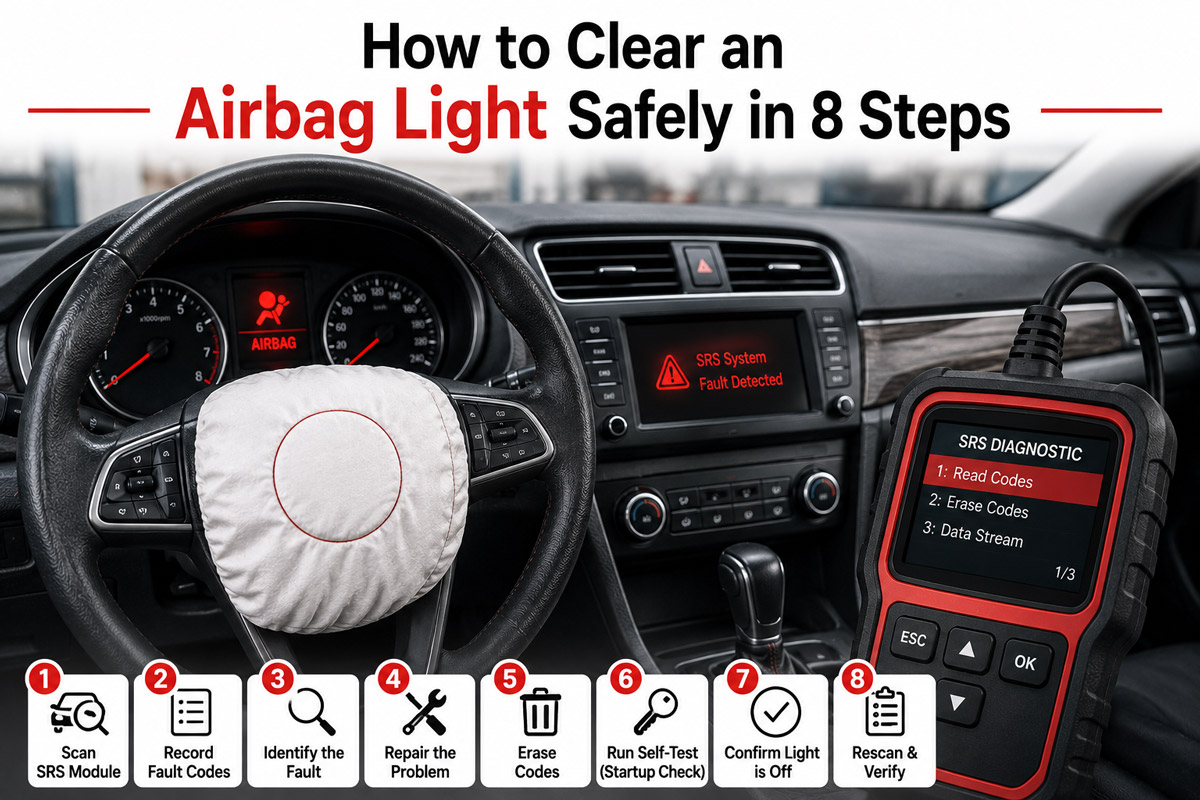
To learn how to clear an airbag light, scan the SRS module, identify and repair the recorded fault, erase the code, and verify the warning-lamp self-test in eight steps. Allow 30–90 minutes for diagnosis, plus repair time. Difficulty ranges from beginner to professional; success depends on correcting the fault rather than repeatedly deleting its code.
Safety warning: An airbag system contains pyrotechnic inflators and seat-belt pretensioners. Do not probe inflator terminals, bypass circuits with resistors, splice SRS wiring, or remove an airbag module without the exact manufacturer service procedure. When the repair involves an inflator, clockspring, control module, crash sensor, pretensioner, occupant-classification system, or damaged SRS wiring, professional service is usually the safer choice.
Before You Start
Time required
- Initial scan and assessment: 15–30 minutes
- Simple verified connector or low-voltage supply repair: 30–90 minutes
- Clockspring, seat sensor, pretensioner, module, or harness repair: 1–4 hours
- Deployed-airbag restoration: Several hours to multiple days, depending on parts and calibration
Difficulty level
Intermediate for diagnosis; advanced or professional for most component repairs.
Reading and recording an SRS code is generally manageable for a careful beginner. Opening restraint-system connectors, testing circuit integrity, removing seats, working near inflators, replacing a clockspring, or performing occupant-detection calibration requires service information and greater skill.
Typical cost
- DIY scan with an existing compatible tool: $0–$30
- Consumer SRS-capable scanner: approximately $50–$250
- Professional diagnostic inspection: commonly about $75–$150
- Simple wiring or connector repair: often $100–$300
- Clockspring, sensor, or pretensioner repair: commonly several hundred dollars
- Single airbag replacement: often $1,000–$2,000
- Multiple deployed restraints and trim repairs: $3,000–$6,000 or more
Prices vary by vehicle, location, parts availability, calibration requirements, and whether crash damage is present. Current retail listings show capable consumer scan tools across a broad price range, while published diagnostic estimates commonly begin around $75–$150.
Tools and materials
- 1 SRS-compatible scan tool that explicitly supports the vehicle’s year, make, model, and airbag module
- 1 vehicle-specific service manual or manufacturer repair procedure
- 1 socket and ratchet set, commonly including 8 mm, 10 mm, 12 mm, and 14 mm sockets
- 1 torque wrench covering the fasteners specified by the manufacturer
- 1 digital multimeter, used only on circuits the service manual specifically authorizes
- 1 fused test light, only where the diagnostic procedure permits it
- 1 trim-removal tool set
- 1 flashlight
- Safety glasses
- Mechanic’s gloves
- Wheel chocks
- Notebook or phone for recording every code and scan result
- Electrical-contact cleaner, only when the approved procedure calls for it
A basic OBD2 reader that handles engine “P-codes” may not communicate with the SRS module. Use a scanner whose coverage list specifically includes SRS or airbag diagnostics for your vehicle.
Prerequisites
Before beginning:
- Park on firm, level ground.
- Apply the parking brake.
- Place the transmission in Park or Neutral.
- Keep people out of the front seats while diagnosing.
- Confirm that the 12-volt battery is adequately charged.
- Obtain the vehicle identification number.
- Locate the correct service information.
- Do not begin physical SRS work when airbags have deployed, wiring is melted, the vehicle has flood damage, or the scan reports crash-event data.
Step 1: Confirm the Airbag Warning Is Abnormal
Start the vehicle and observe the complete airbag-warning-light sequence.
Turn the ignition to ON without starting the engine, or start it normally if the owner’s manual specifies that method. Watch the airbag or SRS indicator from the moment the ignition powers up.
A functioning system normally illuminates the indicator during its self-check and then switches it off. The exact duration varies by vehicle. Treat these patterns as faults:
- The light never illuminates
- The light remains continuously on
- The light flashes in a repeating pattern
- The light switches off and returns
- A “Service Airbag,” “SRS,” or restraint-system message remains displayed
An indicator that fails to illuminate can be as significant as one that remains on because someone may have removed the bulb, covered the warning, altered the cluster, or created a communication fault. Manufacturer recall procedures state that a light which fails to illuminate or remains on indicates an unresolved malfunction or active SRS code.
You’ll know it worked when you have recorded the exact lamp behavior, warning message, and the point in the startup cycle when it appears.
Common mistake: Do not assume a passenger-airbag “OFF” indicator is the same as the main SRS warning. The passenger indicator may respond normally to seat occupancy, occupant weight, child-seat detection, or a manual passenger-airbag switch.
Step 2: Check Battery Condition, Recalls, and History
Check the 12-volt battery, open recalls, and recent vehicle work before disconnecting anything.
Measure battery voltage at the battery posts with the ignition off. A fully charged conventional 12-volt battery commonly rests around 12.6 volts, while a reading near or below 12.2 volts indicates a substantially discharged battery. Do not condemn an SRS component until low system voltage has been addressed.
Ask what happened immediately before the light appeared:
- Was the battery replaced, discharged, or jump-started?
- Was a seat moved, removed, repaired, or reupholstered?
- Was a radio, alarm, remote starter, steering wheel, or dashboard installed?
- Was the vehicle involved in a collision?
- Did water enter the cabin?
- Was an object stored under a front seat?
- Did the light appear while turning the steering wheel?
Enter the VIN in the official recall lookup for the country where the vehicle is registered. In the United States, NHTSA specifically advises owners to check the VIN for open airbag recalls, including Takata-related campaigns.
You’ll know it worked when battery voltage is stable, recall status is documented, and you have a timeline connecting the warning to any recent repair, collision, seat movement, or electrical event.
Common mistake: Do not clear low-voltage or communication codes before recording them. They may explain why several control modules reported faults simultaneously.
Step 3: Scan the SRS Module Before Removing Power
Connect an SRS-capable scanner and save every current, stored, and history code.
Locate the 16-pin diagnostic connector, normally under the driver’s side of the dashboard. With the ignition off, connect the scanner firmly. Turn the ignition to ON without starting the engine unless the scanner or manufacturer instructs otherwise.
Enter the vehicle information manually or confirm that automatic VIN detection identified the correct model. Open the menu labeled one of the following:
- SRS
- Airbag
- Supplemental Restraint System
- Restraints
- Occupant Restraint Controller
- Airbag Diagnosis Sensor Unit
Run a complete module scan. Record:
- The exact alphanumeric DTC
- The manufacturer’s full code description
- Whether it is current, active, stored, history, intermittent, or permanent
- Any fault subtype, such as open circuit, short to ground, short to voltage, high resistance, or low resistance
- Freeze-frame or snapshot data
- Module voltage
- Communication faults in related modules
Take screenshots before clearing anything. Airbag codes are often manufacturer-specific, so a brief generic description may not identify the actual circuit or diagnostic branch.
You’ll know it worked when the scanner communicates directly with the restraint module and you have saved the complete DTC record—not merely a generic code lookup.
Common mistake: Do not confuse “no engine codes” with “no airbag codes.” Basic readers often access only powertrain emissions data and cannot interrogate the restraint controller.
Step 4: Interpret the Code Before Buying Parts
Match the exact SRS code and subtype to the manufacturer’s diagnostic procedure.
Look up the code in service information for the exact model year, body style, restraint configuration, and market. Similar-looking codes can refer to different components across manufacturers.
Use the code as the beginning of the diagnosis, not as an automatic parts order. Common code families include:
- Driver or passenger frontal-airbag circuits
- Side-airbag or curtain-airbag circuits
- Seat-belt buckle switches
- Seat-belt pretensioners
- Clockspring or spiral-cable circuits
- Front or side impact sensors
- Occupant-classification sensors
- Passenger-seat weight sensors
- Control-module power or ground faults
- CAN-network communication faults
- Low-voltage events
- Crash-event or deployment records
- Configuration or calibration errors
For example, a driver-airbag resistance code does not prove that the clockspring is defective. Diagnosis may require checking connector locks, wiring routing, terminal fit, steering-column circuits, previous repairs, and approved substitute-load readings according to the service manual.
Create a repair decision:
- DIY-safe: battery-voltage correction, checking an approved fuse, removing loose objects from under a seat, scanning, visual inspection without disconnecting SRS components, or completing a manufacturer-approved low-risk procedure.
- Professional repair: inflator circuits, pretensioners, clocksprings, crash sensors, control modules, seat removal, occupant-classification calibration, damaged yellow wiring, deployment codes, or intermittent resistance faults.
You’ll know it worked when you can state the affected circuit, fault type, required test sequence, and whether special fixtures or calibration functions are required.
Common mistake: Do not replace the part named in the code without completing the diagnostic tree. A circuit code identifies the monitored circuit, not necessarily the failed component.
Step 5: Disable the SRS Before Physical Service
Turn the vehicle off, disconnect power, and wait the manufacturer-specified discharge time before opening an SRS circuit.
Skip this step when you are only scanning or reading data. Perform it before unplugging a restraint connector, removing a seat, accessing a pretensioner, or working near an airbag module.
Follow this sequence unless the manufacturer specifies otherwise:
- Center the steering wheel and point the front wheels straight ahead.
- Switch the ignition completely off.
- Remove the key or keep the smart key at least 5 metres away.
- Open the hood.
- Record radio presets and settings if necessary.
- Disconnect the negative battery terminal.
- Isolate the cable so it cannot spring back onto the post.
- Disconnect the positive terminal only when the service procedure requires it.
- Wait the exact discharge period stated in the service manual.
Do not treat 15 minutes as a universal rule. Several published Nissan procedures specify waiting at least three minutes after battery disconnection, while other manufacturers or models may require a different interval. The service manual governs the job.
On a hybrid or electric vehicle, disconnecting the 12-volt battery does not automatically make the high-voltage system safe. Follow the manufacturer’s high-voltage shutdown procedure where the work area or restraint system overlaps high-voltage components.
You’ll know it worked when the ignition is off, the battery cable is physically isolated, the specified waiting period has elapsed, and no person is positioned directly in front of an airbag module.
Common mistake: Never disconnect an SRS connector with the ignition on. Also avoid using a memory saver unless the manufacturer confirms that it is permitted, because a memory saver keeps parts of the vehicle energized.
Step 6: Repair the Verified Fault
Complete only the repair specified by the diagnostic procedure for the recorded code.
The correct method depends on the fault.
Repair an under-seat connection
Move the seat to the service-manual position before disconnecting the battery so the fasteners and connector are accessible. After disabling the system:
- Inspect the harness for tension, pinching, abrasion, liquid contamination, or objects pulling on it.
- Release connector locks exactly as illustrated in the manual.
- Inspect for backed-out terminals, spread terminals, corrosion, broken retainers, or previous probing.
- Replace damaged terminals, connectors, or the complete harness using approved parts.
- Route and secure the harness so full seat travel does not stretch it.
- Reconnect all secondary locks.
Do not repeatedly unplug and reconnect a connector merely to make the light disappear. Do not pack terminals with dielectric grease unless the manufacturer specifies it.
Repair a clockspring circuit
Keep the steering wheel and front wheels centered. A clockspring can be damaged if it rotates beyond its designed range while removed.
Replacement normally requires:
- Disabling the SRS
- Removing the driver-airbag module
- Marking steering-wheel alignment
- Removing the steering wheel with the approved tool
- Centering and locking the replacement clockspring
- Torquing all fasteners to specification
- Calibrating the steering-angle sensor when required
Because this work involves the driver inflator and steering controls, it is generally best assigned to a qualified technician.
Repair a seat-belt or pretensioner fault
Inspect the buckle switch, harness, mounting point, and connector according to the diagnostic tree. Replace a deployed pretensioner; do not attempt to reset, dismantle, or electrically bypass it.
Repair damaged SRS wiring
Replace damaged harness sections or complete harnesses as directed. Honda service information warns against modifying, splicing, or repairing damaged airbag wiring; the approved remedy is harness replacement.
Handle occupant-classification faults
Remove all objects from the passenger seat and floor. Confirm that the seat is correctly installed and that upholstery, cushions, seat covers, laptop bags, or aftermarket heaters are not affecting the sensors.
After replacing a seat sensor, control unit, cushion, frame, or related component, perform the specified zero-point calibration or initialization. The vehicle may require an empty seat, level ground, closed doors, a defined temperature range, and a bidirectional scan tool.
Handle deployment or crash-data codes
Stop attempting to erase the code. An inflated airbag or activated automatic seat-belt tensioner requires replacement of the affected components, and the control unit or other related parts may also require replacement under the manufacturer procedure.
You’ll know it worked when the component passes the prescribed test, every connector lock is fully seated, the harness has correct slack through the full seat or steering range, and any required calibration reports “complete” or “successful.”
Common mistake: Never probe an inflator or pretensioner connector with a multimeter, test light, jumper wire, or unfused power source. Use only the diagnostic adapters and substitute loads specified by the manufacturer.
Step 7: Reconnect Power and Clear the SRS Codes
Reconnect the battery, restore communication, and erase the SRS codes with the scan tool.
Before reconnecting power:
- Confirm all SRS connectors are connected and locked.
- Remove tools from the cabin.
- Ensure no one is leaning over the steering wheel, dashboard, seat side bolster, or curtain-airbag area.
- Turn the ignition off.
- Reconnect the positive cable first if it was removed.
- Reconnect the negative cable last.
- Tighten the terminals to the specified torque.
- Stand outside the airbag deployment zones.
- Turn the ignition on.
Reconnect the scan tool and enter the SRS module. Read codes again before erasing them. This confirms whether the repair changed the fault state.
Select Clear Codes, Erase DTCs, or the manufacturer-specific reset function. Some vehicles will not erase a current fault. Others may retain deployment, permanent, configuration, or event data until a component is replaced or programmed.
Do not use manual ignition-key cycling, battery disconnection, fuse removal, or jumper-wire “reset tricks” unless the manufacturer publishes that exact procedure for the exact vehicle. Those methods may temporarily extinguish a lamp without proving that the restraint system is functional.
You’ll know it worked when the scanner confirms that codes were erased and an immediate rescan shows no current SRS DTCs.
Common mistake: Do not interpret “erase successful” as “repair successful.” Many scan tools report a successful erase command even though the module detects the same fault again seconds later.
Step 8: Verify the Repair Through Multiple Self-Tests
Cycle the ignition, rescan the vehicle, and confirm that the airbag light completes its normal self-check.
Turn the ignition off for at least 10 seconds. Turn it on and watch the SRS indicator without touching the seat, steering wheel, or connectors.
The indicator should illuminate for its programmed self-test and then switch off. Repeat the ignition cycle two or three times.
Next:
- Run another complete SRS scan.
- Confirm that no current codes returned.
- Review history codes.
- Move each front seat through its normal adjustment range.
- Turn the steering wheel slowly from side to side if the original fault involved a clockspring circuit.
- Confirm that the passenger-airbag indicator responds normally with the seat empty.
- Complete any required road test without deliberately creating hard braking or collision-like forces.
- Perform post-repair calibrations for windows, steering angle, idle learning, radio, or seat memory as required.
Manufacturer procedures treat a warning light that remains illuminated or fails its normal check as evidence that a fault still exists.
You’ll know it worked when the SRS indicator illuminates during startup, turns off normally, remains off through several cycles, and the restraint module reports no current faults.
Common mistake: Do not return the vehicle to normal use based on one successful startup. Intermittent seat-harness and clockspring faults may reappear only after the seat or steering wheel moves.
Common Mistakes and How to Fix Them
Using an engine-only code reader
Why it fails: Standard OBD2 emissions access does not guarantee communication with the airbag module.
Recovery: Check the scanner’s official vehicle coverage list. Use a tool that specifically supports SRS diagnostics for the exact year, make, and model. A generic Bluetooth adapter may require manufacturer-specific software or may not support the module at all.
Clearing codes before saving them
Why it fails: Erasing codes removes clues about voltage, fault status, frequency, and the affected circuit.
Recovery: Reproduce the warning if it is safe to do so, rescan every module, and document all returned codes. Also inspect low-voltage and communication history in the body-control and gateway modules.
Disconnecting the battery before the initial scan
Why it fails: Battery disconnection can remove history data and may create additional calibration or low-voltage issues.
Recovery: Reconnect the battery correctly, restore voltage, operate the vehicle through a normal startup, and rescan. Do not continue disconnecting power unless physical SRS service requires it.
Cleaning or tightening every yellow connector
Why it fails: Unnecessary connector handling can damage terminal tension, locks, shorting bars, or harness routing.
Recovery: Stop disturbing unrelated connectors. Follow the service-manual diagnostic tree for the specific code and inspect only the identified circuit after safely disabling the system.
Installing a resistor to simulate an airbag
Why it fails: A resistor may hide an open circuit while leaving the occupant without a functioning airbag or pretensioner. It can also create an inaccurate diagnostic condition.
Recovery: Remove the bypass, restore the original circuit with approved components, inspect for altered wiring, and scan the complete restraint system.
Replacing a part without calibration
Why it fails: Occupant sensors, steering-angle sensors, and some control modules require initialization or configuration after installation.
Recovery: Perform every post-installation setup listed in service information. Use a bidirectional scan tool with the correct calibration capability, or have a properly equipped shop complete it.
Process Variations
Clearing a light caused by low battery voltage
Charge and test the 12-volt battery before replacing SRS components. Verify charging-system output and inspect battery connections. Save the low-voltage code, clear it only after voltage is stable, and perform several ignition cycles.
A low-voltage code that does not return may have been caused by a discharged battery or jump-start event. A current inflator-resistance or sensor code should not be dismissed as a battery problem.
Clearing a light after moving a front seat
Do not immediately unplug the under-seat harness. First remove objects from beneath the seat and move it slowly while watching live SRS data if the scanner supports it.
When the fault returns only at one seat position, disable the SRS and inspect harness routing, strain, clips, and terminal retention according to the manual. Secure the harness with the correct amount of travel—not so tightly that seat movement pulls it.
Clearing a light after collision repairs
Scan the complete vehicle, not only the SRS module. Check for deployed restraints, activated pretensioners, damaged crash sensors, altered wiring, replaced seats, module configuration, and crash-event records.
Do not erase evidence and assume the car is repaired. Collision restoration may require component replacement, structural measurement, programming, calibration, and confirmation that the correct airbags and trim panels are installed.
How Long Does It Take and What Does It Cost?
A scan and basic assessment usually take 15–30 minutes. A verified fuse, voltage, or accessible harness-routing problem may take 30–90 minutes. A clockspring, seat-belt pretensioner, occupant sensor, control unit, or damaged harness can require 1–4 hours, plus calibration.
DIY cost may be limited to the scanner when no component has failed. Professional diagnostic evaluations commonly begin around $75–$150, although shop rates vary.
Repairs become much more expensive after deployment. Published consumer estimates place a single airbag replacement around $1,000–$2,000, with multiple airbags and related system repairs reaching $3,000–$6,000 or more.
The price is determined by:
- Number of deployed airbags
- Number of activated pretensioners
- Dashboard, seat, headliner, or steering-wheel damage
- Sensor and module requirements
- Wiring damage
- Programming and calibration
- New, remanufactured, or used parts
- Vehicle age and parts availability
- Local labor rates
- Open recalls or warranty coverage
Frequently Asked Questions
Can I clear an airbag light by disconnecting the battery?
Usually not permanently. Battery disconnection may remove some temporary information, but the SRS controller runs another self-test when power returns. A current wiring, sensor, inflator, pretensioner, calibration, or module fault will normally illuminate the warning again. Disconnect power primarily for safe service, not as the repair.
Can a regular OBD2 scanner clear an airbag light?
Only when the scanner specifically supports the vehicle’s SRS module. Standard OBD2 requirements primarily cover emissions-related powertrain data, so many inexpensive readers cannot access airbag codes. Confirm SRS coverage for the exact model rather than relying solely on “OBD2 compatible” packaging.
Is it safe to drive with the airbag light on?
The vehicle may still move normally, but part or all of the supplemental restraint system may not operate as designed in a crash. Airbags supplement seat belts rather than replacing them, so continue wearing seat belts and arrange diagnosis promptly.
Why did the light return immediately after clearing it?
An immediate return usually means the fault is current. The module detected the same open circuit, short circuit, resistance problem, communication failure, sensor fault, or calibration error during its self-test. Read the code again and compare its status and subtype with the original scan before touching additional components.
Why does my scanner show no codes when the light is on?
The scanner may lack manufacturer-specific SRS access, the wrong vehicle profile may be selected, the module may not be communicating, or the warning could originate from another restraint controller. Check scanner coverage, OBD connector power, module fuses, network codes, and the instrument-cluster message using a full-system scan tool.
Can I clear the light after airbags have deployed?
Not by simply erasing codes. Deployed airbags and activated pretensioners require replacement, and the vehicle may also need sensors, trim, wiring, control-module replacement or programming, and occupant-system calibration. Honda states that an inflated airbag and activated automatic tensioner require replacement of related components.
Conclusion
The correct method for how to clear an airbag light is to document the warning, scan the SRS module, identify the exact circuit failure, complete the manufacturer-approved repair, erase the DTC, and verify several successful self-tests. Never substitute battery resets, resistors, indiscriminate connector cleaning, or code deletion for a functioning restraint system.