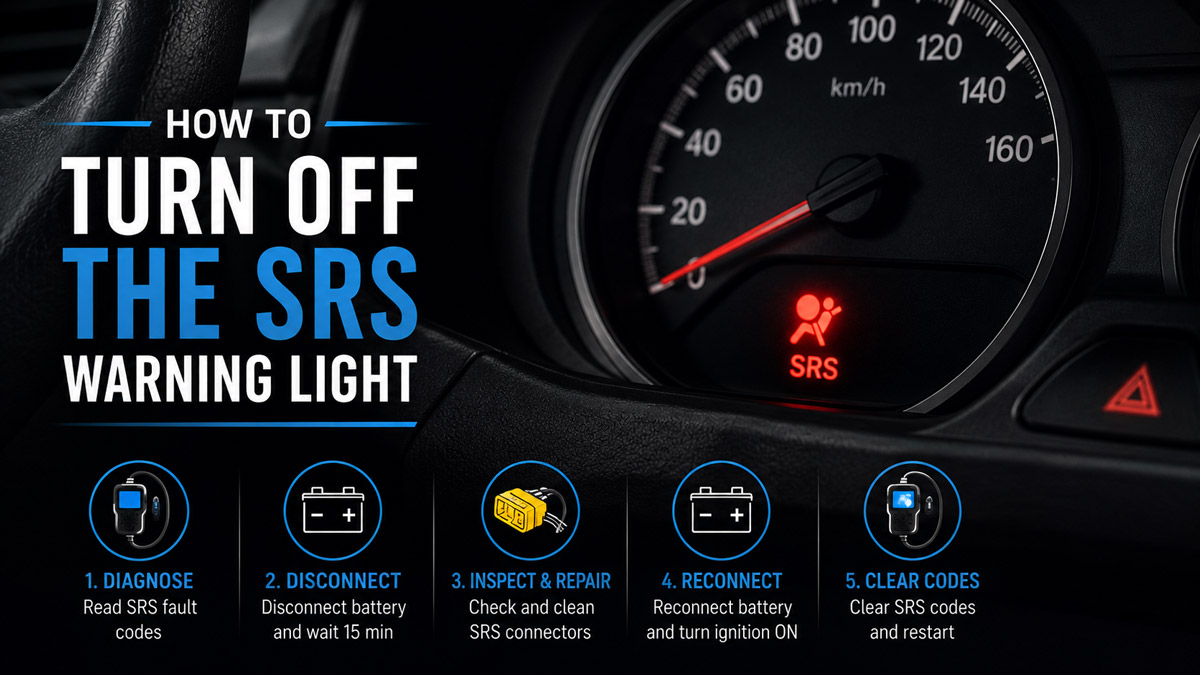
To turn off the SRS warning light safely, you must diagnose the specific airbag fault, mechanically repair the root cause, and use a specialized OBD2 scanner to clear the system memory. In five exact steps taking roughly 30 minutes, you can resolve the issue, but remember: success depends entirely on fixing the underlying hardware fault first.
Before You Start
- Time Required: 30–45 minutes
- Difficulty Level: Intermediate
- Cost: $60–$150 (if purchasing an SRS-capable scanner)
- Tools and Materials:
- 1 OBD2 Scanner with specific SRS/Airbag reset capabilities (e.g., Innova 5210, Autel AutoLink AL619)
- 1 10mm socket and ratchet wrench
- 1 can of CRC Electronic Contact Cleaner
- 1 pair of safety glasses
- Prerequisites: Knowledge of your vehicle’s exact Make, Model, and Year for scanner calibration.
Phase 1: Diagnostics and Safety Prep
Step 1: Connect the SRS Scanner and Read Fault Codes
Plug your SRS-capable OBD2 scanner firmly into the vehicle’s Data Link Connector (DLC) port, usually located directly under the driver’s side dashboard. Turn the ignition key to the “ON” or “RUN” position—two clicks forward, or two presses of a push-to-start button without your foot on the brake—but leave the engine strictly OFF. Navigate your scanner’s menu to the “SRS” or “Airbag” module, initiate a scan, and write down the exact alphanumeric code (e.g., B1081) and its definition.
- You’ll know it worked when: The scanner displays a specific “B” (Body) code rather than returning a “Link Error” or “No Codes Found” message.
- Common Mistake: Using a generic $20 engine code reader. Standard OBD2 readers only read “P” (Powertrain) codes and cannot communicate with the separate SRS computer module.
Step 2: Disconnect the Battery and Wait 15 Minutes
Turn the ignition entirely off and remove the key. Put on your safety glasses, use your 10mm socket to loosen the nut on the negative (-) battery terminal, and pull the black cable completely off the battery post. Tuck the cable securely down the side of the battery so it cannot accidentally spring back and touch the post. Set a timer and wait exactly 15 minutes before touching anything inside the cabin.
- You’ll know it worked when: The dome lights and dashboard remain completely dark when you open the car door.
- Common Mistake: Skipping the 15-minute wait. The SRS control module uses backup capacitors designed to deploy airbags even if the battery is crushed in a crash; touching SRS wiring before these drain risks a catastrophic accidental deployment.
Phase 2: Inspection and Repair
Step 3: Inspect and Clean the Targeted Yellow SRS Connectors
Locate the specific yellow wire harness corresponding to the code you pulled in Step 1 (usually under the driver or passenger seat for seatbelt pretensioners and weight sensors). Unplug the yellow connector by pressing the locking tab, spray both ends lightly with CRC Electronic Contact Cleaner, let it evaporate for 60 seconds, and snap it firmly back together.
- You’ll know it worked when: You hear an audible, sharp click as the plastic locking tab engages.
- Common Mistake: Testing the yellow wires with a standard digital multimeter. Standard multimeters send a small 9V current down the wire to test continuity; this exact voltage is enough to ignite the airbag squib and deploy the airbag in your face.
Phase 3: System Reset
Step 4: Reconnect the Battery and Power the Ignition
Slide the negative (-) battery cable back onto the negative terminal post and tighten the 10mm nut until it is snug (usually around 4–5 lb-ft of torque; do not overtighten and crush the terminal clamp). Return to the driver’s seat, insert your key, and turn the ignition back to the “ON” position without starting the engine.
- You’ll know it worked when: Your dashboard lights up like a Christmas tree, and the scanner screen powers back on.
- Common Mistake: Starting the engine. The engine must remain off so the ECU and SRS modules are in diagnostic mode, allowing the scanner to rewrite the fault memory.
Step 5: Clear the SRS Codes to Turn Off the Light
Navigate back to the “SRS” or “Airbag” menu on your scanner and select the “Erase Codes” or “Clear Faults” command. Confirm the prompt on the screen. Once the scanner reads “Codes Cleared,” turn the ignition completely off, wait 10 seconds, and then start the engine normally.
- You’ll know it worked when: The engine idles smoothly and the red SRS light on the dashboard illuminates for 5 seconds on startup, then completely disappears.
- Common Mistake: Expecting the light to stay off if the physical part is still broken. If the light vanishes but instantly returns with a chime, the system has run its self-check, detected the hard fault is still physically present, and re-triggered the warning.
Common Mistakes and How to Fix Them
- The Battery Disconnect Myth: Many drivers attempt a “hard reset” by leaving the battery unplugged overnight, expecting the SRS light to vanish. Modern SRS data is written into non-volatile EEPROM memory. How to fix it: Stop wasting time with the battery. You must use a bidirectional/SRS scanner to manually send a delete command to the module.
- Scanner Connection Errors: The scanner powers on but says “Cannot communicate with SRS module.” How to fix it: Check your vehicle’s interior fuse box. The OBD2 port often shares a 15A or 20A fuse with the cigarette lighter or 12V accessory port. If that fuse is blown, the scanner cannot read data.
- Ignoring Clock Spring Codes: A code indicates a “driver frontal stage 1 deployment control” issue, and your horn or steering wheel radio buttons have also stopped working. How to fix it: Do not attempt to clean connectors. The internal ribbon cable inside the steering wheel “clock spring” is snapped. You must replace the clock spring unit before the light will clear.
- Deploying the Airbag via Multimeter: A DIYer attempts to probe the yellow harness to check for continuity. How to fix it: Never, under any circumstances, back-probe a yellow wire. If you must check resistance, you must use a specialized SRS diagnostic load tool, not a multimeter.
Variations for Different Situations
Without Owning a High-End Scanner
If you cannot afford a $100+ SRS scanner, drive to an auto parts store like AutoZone or O’Reilly Auto Parts. Their commercial-grade Bosch or Innova scanners can read and clear SRS codes for free. Note: Their store policies usually require you to push the “Clear” button on the device yourself for liability reasons.
Older Honda Vehicles (Pre-2006)
On early 2000s Hondas and Acuras, the SRS light can be cleared without a scanner using the “MES (Memory Erase Signal) jumper trick.” You locate the yellow two-pin MES connector plugged into the driver’s fuse box, use a paperclip to short the two pins together, cycle the ignition following a specific timing sequence, and the light will flash and clear.
How Long Does It Take / What Does It Cost
- DIY Cost: $60–$150 to buy an SRS-capable scanner. The physical fix is often free (cleaning a dirty under-seat connector) or cheap ($40 for a new seatbelt buckle).
- Dealership Cost: A dealership will typically charge 1 hour of diagnostic labor just to hook up their proprietary scanner. Expect to pay $150–$250 just for the scan and reset, exclusive of any parts or labor required to fix the actual fault.
- Time: Scanning, draining the capacitors, and resetting the module takes exactly 25–30 minutes.
Frequently Asked Questions
Will my airbags deploy in a crash if the SRS light is on? Generally, no. When the SRS light is illuminated, the vehicle’s computer disables the entire airbag system as a safety precaution to prevent unpredictable deployment. You are relying solely on seatbelts until the light is resolved.
Can I turn off the SRS light by pulling a fuse? No. Removing the SRS fuse will disable the system entirely, but the dashboard warning light is wired to illuminate automatically if it detects a lack of power from the SRS circuit.
What does the yellow wiring mean? In automotive manufacturing, bright yellow wiring and yellow plastic conduit are the universally adopted visual standards for high-voltage or explosive SRS circuits. Never cut, splice, or probe yellow automotive wires.
Why did my SRS light come on after vacuuming my car? The wire harnesses for the passenger weight sensors and seatbelt pretensioners hang low beneath the front seats. Aggressively shoving a vacuum nozzle under the seat often bumps these yellow connectors, loosening them just enough to break the circuit and trigger a hard fault.
Conclusion
Understanding exactly how to turn off the srs warning light comes down to one fundamental rule: you cannot erase a code if the physical hardware is still broken. There is no battery-disconnect trick or fuse-pulling shortcut that will outsmart a modern vehicle’s safety computer. By using a capable bidirectional scanner to pinpoint the exact fault, safely draining the backup capacitors before touching any yellow wiring, and physically completing the repair, you ensure the code clears permanently. Most importantly, you restore your vehicle’s critical crash protection to full readiness.