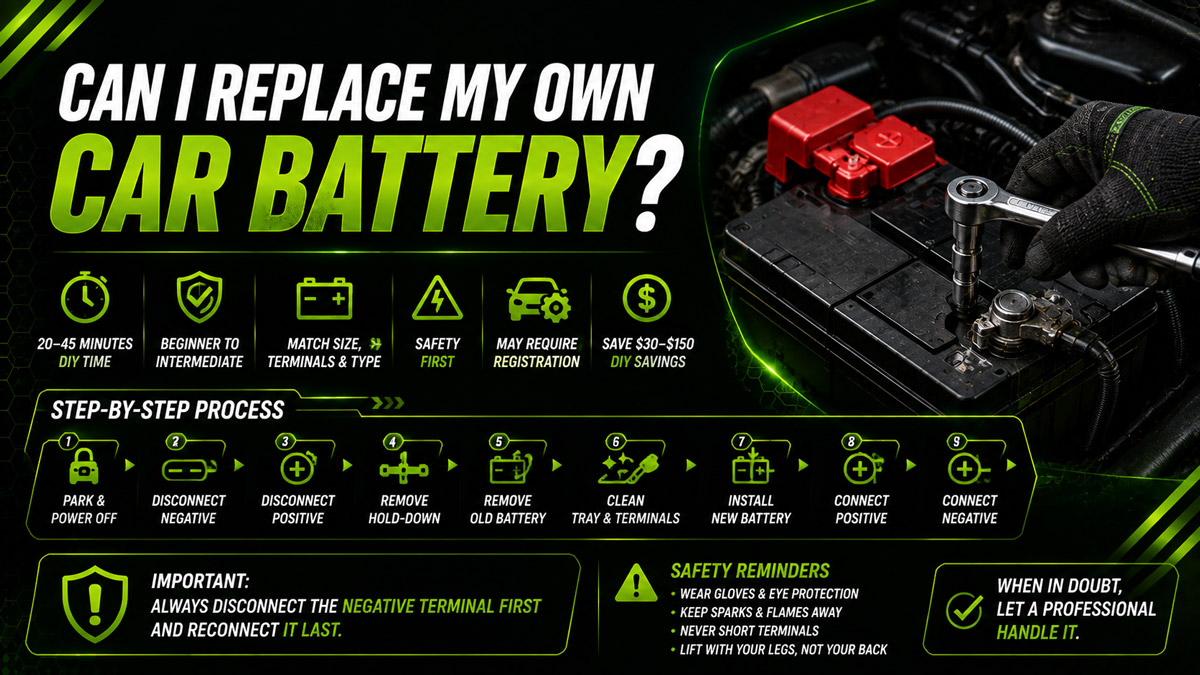
Yes, you can replace your own car battery in most conventional gasoline and diesel vehicles. A basic replacement usually takes 20–45 minutes and requires common hand tools, but professional service is safer when the battery is difficult to access, the vehicle requires electronic registration, or high-voltage hybrid components are nearby.
Key Facts at a Glance
- Most accessible 12-volt car batteries can be replaced by a careful beginner.
- Disconnect the negative terminal first and reconnect it last.
- The replacement must match the required group size, terminal layout, and battery technology.
- Vehicles with start-stop systems commonly require an AGM or EFB battery.
- Some late-model vehicles require battery registration with a compatible scan tool.
- Never work on an electric vehicle’s high-voltage traction battery yourself.
Should You Replace Your Own Car Battery?
You should replace your own car battery when the battery is accessible, you can safely lift it, and the vehicle does not require specialized coding or disassembly. DIY replacement is usually practical for older cars, pickup trucks, and SUVs with a conventional battery mounted visibly under the hood.
Professional installation is the better choice when the battery is under a seat, inside a wheel well, beneath multiple components, or near orange high-voltage cables. You should also consider professional service when the owner’s manual requires battery registration, electronic initialization, or manufacturer-specific procedures.
Quick DIY Suitability Check
DIY replacement is generally reasonable when all of the following are true:
- You have identified the correct replacement battery.
- The battery terminals and hold-down are easy to reach.
- You have safety glasses, gloves, and the correct tools.
- You can lift approximately 30–60 pounds safely.
- The vehicle uses a conventional 12-volt electrical system.
- The owner’s manual does not require dealer-only programming.
- There is no severe acid leakage or damaged battery casing.
Stop and seek professional help if the battery is swollen, frozen, cracked, leaking heavily, or producing a strong sulfur or rotten-egg odor.
Before You Start
Typical time: 20–45 minutes
Complex installation: 45–90 minutes
Difficulty: Beginner to intermediate
Typical DIY battery cost: $100–$450
Typical professional total: $150–$650
Potential DIY savings: Approximately $30–$150
Tools and Materials
- 1 correctly specified replacement battery
- 1 pair of chemical-resistant work gloves
- 1 pair of safety glasses
- 1 ratchet and socket set
- 1 combination wrench set
- 1 battery-terminal cleaning brush
- Baking soda and water for external corrosion
- Shop towels
- Battery carrying strap, if needed
- Terminal protector, optional
- Memory saver, optional
- Compatible diagnostic scan tool, if registration is required
Most terminal clamps use a 10 mm wrench, but the battery hold-down may require a different metric or SAE socket.
Safety Prerequisites
Park on level ground, engage the parking brake, shut off the engine, and remove the key. Keep sparks, cigarettes, flames, and hot tools away from the battery because lead-acid batteries can release flammable hydrogen gas.
Place the key or smart key several feet away from the car. Some vehicles wake electronic modules when a nearby key is detected, which can create unnecessary electrical activity during disconnection.
Do not allow a metal tool to bridge the positive terminal and any grounded metal part. That contact can create a high-current short circuit capable of melting the tool, damaging electronics, or causing burns.
How Do You Choose the Correct Replacement Battery?
Choose a replacement battery by matching the group size, terminal orientation, battery chemistry, cold cranking amps, and manufacturer requirements. A battery that physically fits can still be incorrect if its terminals are reversed or its charging characteristics differ from the original.
Battery Specifications to Match
| Specification | What it determines | Replacement rule |
| Group size | Case dimensions and terminal position | Match the required group code |
| Terminal orientation | Positive and negative post location | Must match the original layout |
| CCA | Cold-starting performance | Meet or exceed the required rating |
| Reserve capacity | Backup operating duration | Match or exceed when practical |
| Battery chemistry | Charging and cycling behavior | Use the manufacturer-required type |
| Vent connection | Routes gases outside enclosed areas | Required for many trunk or cabin batteries |
| Hold-down style | Secures the battery | Battery must fit the original restraint |
A common mistake is buying a battery with adequate power but reversed terminal positions. Stretching cables across the battery can create tension, poor terminal contact, and short-circuit risk.
Can You Replace an AGM Battery With a Regular Battery?
You generally should not replace an AGM battery with a standard flooded battery when the vehicle was designed for AGM technology. AGM batteries tolerate frequent cycling, high electrical loads, regenerative charging, and start-stop operation better than conventional flooded batteries.
Installing a lower-specification flooded battery may cause early failure, start-stop faults, charging problems, or reduced electrical reliability. Replacing a flooded battery with an AGM unit may also require charging-system adaptation on some vehicles, so check the owner’s manual or manufacturer procedure.
Step 1: Confirm That the Battery Is the Problem
Test the battery and charging system before buying a replacement. Slow cranking, repeated jump-starts, dim lights, or clicking can indicate a weak battery, but similar symptoms can come from loose terminals, parasitic drain, starter failure, or alternator problems.
A fully rested conventional 12-volt battery often measures approximately 12.6 volts. A reading near 12.4 volts indicates partial charge, while a reading around 12.0 volts indicates substantial discharge. Voltage alone does not prove battery health because a failing battery may display acceptable voltage without delivering sufficient current under load.
Many auto-parts stores perform battery and alternator tests. Testing is especially important when the battery is less than three years old or the dashboard battery warning light remains on while the engine runs.
Success checkpoint: Testing confirms that the battery has failed or no longer meets its rated starting capacity.
Common mistake: Replacing the battery without checking the alternator, then having the new battery discharge again.
Step 2: Record the Existing Battery Configuration
Photograph the battery, terminal positions, cables, hold-down hardware, vent tube, and any sensor attached to the negative cable. The photograph provides a reference if cable routing or bracket orientation becomes unclear.
Check the battery label for:
- Group size
- Battery type
- CCA rating
- Positive-terminal position
- Production or installation date
- Vent-port configuration
Look for a battery monitoring sensor integrated into the negative cable. Do not remove, bypass, or clamp accessories around this sensor unless the manufacturer specifically allows it.
Success checkpoint: You can identify the positive and negative terminals and know how the hold-down and venting system are installed.
Common mistake: Relying on cable color alone instead of confirming the plus and minus symbols on the battery case.
Step 3: Preserve Electronic Memory When Appropriate
Connect a suitable memory saver only when the vehicle manufacturer permits it and you understand the tool’s limitations. A memory saver can preserve the clock, radio presets, seat positions, and learned settings while the battery is disconnected.
A memory saver keeps parts of the vehicle electrically energized. Because the system may remain live, accidental contact between the positive cable and metal bodywork can still cause a short circuit.
Skipping the memory saver is often acceptable. However, you may need to reset the clock, reinitialize automatic windows, enter a radio security code, or allow the engine computer to relearn idle behavior.
Success checkpoint: The memory saver is securely connected, or you have confirmed that losing stored settings is acceptable.
Common mistake: Assuming a memory saver eliminates the need to follow electrical safety procedures.
Step 4: Disconnect the Negative Terminal First
Loosen the negative terminal clamp, marked with a minus sign, and remove it from the battery post. Move the cable away so it cannot spring back into contact.
The negative terminal is disconnected first because the vehicle body is connected to battery ground. Once the negative connection is removed, accidentally touching grounded metal with a wrench while loosening the positive terminal is less likely to complete a circuit.
Do not hammer or aggressively pry a stuck terminal clamp. Use a battery-terminal puller or gently twist the clamp after loosening it.
Success checkpoint: The negative clamp is completely separated and secured away from the post.
Common mistake: Allowing the loose clamp to rest against the battery terminal.
Step 5: Disconnect the Positive Terminal
Remove any protective red cover, loosen the positive clamp, and lift it straight off the positive post. Keep the positive cable from touching the battery case, negative cable, or vehicle metal.
Inspect the clamp for cracking, severe corrosion, overheated metal, or damaged wiring. A compromised terminal can produce no-start symptoms even with a new battery.
Success checkpoint: Both battery cables are isolated and cannot contact each other or the vehicle body.
Common mistake: Placing a metal tool across the top of the battery where it could contact both posts.
Step 6: Remove the Hold-Down and Old Battery
Remove the top bracket, crossbar, side clamp, or bottom retaining wedge that secures the battery. Keep the fasteners in a container so they do not fall into the engine bay.
Lift the battery vertically and keep it upright. Car batteries commonly weigh 30–60 pounds, and larger AGM or diesel batteries may be heavier. Use the built-in handle or a proper battery strap, bend at the knees, and ask for assistance if the battery exceeds your comfortable lifting capacity.
Do not tilt a conventional flooded battery unnecessarily because liquid electrolyte may escape through its vents.
Success checkpoint: The battery is safely removed without damaging cables, sensors, or nearby components.
Common mistake: Leaving the hold-down partly attached and pulling against it.
Step 7: Clean and Inspect the Battery Tray
Inspect the tray for corrosion, cracks, loose hardware, and acid residue. Neutralize minor external acid corrosion with a small amount of baking soda mixed with water, then wipe and dry the area completely.
Avoid allowing the cleaning solution to enter battery cells or electrical connectors. Baking soda is useful for neutralizing acid residue on external surfaces, but it can contaminate a battery internally.
Clean the inside of each cable clamp with a terminal brush until the contact surface is free of heavy oxidation. Replace terminals that are cracked, excessively thinned, or unable to tighten securely.
Success checkpoint: The tray is dry, the mounting area is sound, and the cable clamps have clean contact surfaces.
Common mistake: Installing a new battery over wet corrosion residue.
Step 8: Install and Secure the New Battery
Lower the new battery into the tray with the terminals in the same orientation as the original. Reconnect any required vent tube and confirm that an unused vent port is capped according to the battery manufacturer’s instructions.
Reinstall the factory hold-down. Tighten it enough to prevent movement but not so aggressively that the battery case cracks or distorts.
Try moving the battery by hand. It should not slide, rock, or lift from the tray. A loose battery can suffer internal plate damage and can pull against the electrical cables during braking or cornering.
Success checkpoint: The battery is upright, correctly oriented, vented when required, and firmly restrained.
Common mistake: Assuming battery weight alone will hold it in place.
Step 9: Connect the Positive Terminal First
Push the positive clamp fully down onto the positive post and tighten it securely. Replace the terminal’s protective cover after the connection is complete.
The positive terminal is connected first because the vehicle is not yet grounded through the negative cable. This sequence reduces the chance of creating a circuit if the wrench touches body metal.
Do not overtighten the terminal nut. Battery posts and clamps are soft metals that can crack or deform. Follow the vehicle’s torque specification when available.
Success checkpoint: The positive clamp sits fully on the post and cannot be rotated by hand.
Common mistake: Tightening a clamp that is sitting too high on the tapered battery post.
Step 10: Connect the Negative Terminal Last
Install the negative clamp onto the negative post and tighten it securely. A small spark may occur as vehicle modules and capacitors receive power, but strong repeated arcing requires investigation.
Stop if the terminal produces heavy sparks, smoke, excessive heat, or an immediate burning odor. Recheck battery polarity and confirm that no accessory was left switched on.
Success checkpoint: The negative clamp cannot be twisted by hand, and no cable is stretched or rubbing against moving components.
Common mistake: Reversing polarity because the replacement battery’s terminal layout differs from the original.
Step 11: Start the Vehicle and Verify Operation
Start the engine and observe cranking speed, dashboard indicators, and electrical accessories. The engine should crank strongly, and warning lights should complete their normal self-check.
Check the following:
- Battery warning light turns off after starting.
- Headlights and interior electronics work normally.
- Automatic windows and sunroof operate correctly.
- Clock and radio settings are restored or reset.
- Start-stop operation shows no persistent fault.
- The battery remains secure with the engine running.
The engine may idle differently for a brief period while the control system relearns stored values. Follow the owner’s manual for throttle, steering-angle, window, or sunroof initialization procedures.
Success checkpoint: The vehicle starts normally and no new electrical warning remains active.
Common mistake: Assuming every warning light will clear instantly without a relearning drive or scan-tool reset.
Step 12: Register the New Battery When Required
Register or code the battery when the manufacturer’s service procedure requires it. Battery registration tells the energy-management system that a new battery has been installed and may record its type, capacity, or serial information.
Registration, coding, adaptation, and programming are not always the same process:
- Registration records that the battery was replaced.
- Coding changes battery specifications such as capacity or chemistry.
- Adaptation resets learned charging values.
- Programming updates or configures control-module software.
Some BMW, Audi, Volkswagen, Mercedes-Benz, Land Rover, Ford, and other late-model vehicles use battery monitoring strategies that may require scan-tool procedures. Requirements vary by model, year, engine, and equipment, so consult service information rather than relying only on the vehicle brand.
Skipping a required procedure may cause incorrect charging behavior, reduced battery life, disabled start-stop operation, or stored fault codes.
Success checkpoint: The vehicle recognizes the replacement battery and shows no energy-management faults.
Common mistake: Assuming battery registration is needed on every modern car—or on none of them.
DIY vs. Professional Battery Replacement
| Situation | DIY suitability | Best choice |
| Visible under-hood battery in an older car | High | DIY |
| Conventional pickup or SUV with easy access | High | DIY |
| Start-stop vehicle using AGM or EFB | Moderate | DIY only after checking registration requirements |
| Battery under the rear seat or in the trunk | Moderate | DIY for experienced owners |
| Battery inside a wheel well | Low | Professional |
| Dual-battery diesel or commercial vehicle | Low to moderate | Professional unless experienced |
| Luxury vehicle with battery coding | Low | Professional or equipped specialist |
| Severe leakage or swollen battery | Low | Professional handling |
| Hybrid 12-volt auxiliary battery | Model-dependent | Follow manufacturer procedures |
| EV high-voltage traction battery | None | Qualified high-voltage technician only |
How Much Money Can You Save?
DIY battery replacement typically saves approximately $30–$150 in installation, diagnostic, or mobile-service charges. The largest part of the bill is usually the battery itself, so the savings may be modest when a retailer includes free installation.
| Expense | Typical range |
| Standard flooded battery | $100–$220 |
| EFB battery | $160–$300 |
| AGM battery | $200–$450 |
| Refundable core charge | $15–$30 |
| Basic professional installation | $30–$100 |
| Complex access or coding | $100–$250+ |
| Battery registration with scan tool | $30–$150 |
Prices vary by battery capacity, warranty, vehicle access, location, and whether diagnostic testing is included.
Free installation can be valuable, but some stores will not install batteries that require extensive trim removal, wheel removal, coding, or work near sensitive electronics.
Common Mistakes and How to Fix Them
The Car Has No Power After Installation
Completely dead electronics usually indicate a loose terminal, incorrect connection, damaged cable, or blown main fuse. Confirm polarity first, then check whether both clamps are fully seated and tight.
If a tool contacted the positive terminal and vehicle body during installation, inspect the main fusible link according to the service manual.
The Engine Clicks but Does Not Crank
Rapid clicking commonly means the connection cannot carry enough current or the new battery is insufficiently charged. Clean and tighten both terminals, verify the battery specification, and test its state of charge.
A single heavy click may indicate a starter or starter-control problem rather than a battery fault.
The Battery Warning Light Stays On
A battery-shaped dashboard light normally indicates a charging-system problem, not simply a defective battery. A failing alternator, damaged wiring, loose drive belt, or broken serpentine belt can cause the warning to remain illuminated.
Stop driving when the warning is accompanied by overheating, heavy steering, or rising engine temperature because one belt may drive several critical accessories.
The Vehicle Runs Poorly After Replacement
Temporary idle fluctuation can occur when learned engine-control values are erased. Allow the vehicle to complete the manufacturer’s relearning procedure and check for disconnected intake hoses or electrical connectors disturbed during the repair.
Persistent stalling, warning lights, or poor performance requires fault-code scanning and diagnosis.
The New Battery Keeps Dying
Repeated discharge indicates that the battery may not be receiving adequate charging or the vehicle has an excessive key-off electrical draw. Test alternator output and perform a parasitic-draw test rather than repeatedly replacing or jump-starting the battery.
Also check for lights that remain on, aftermarket electronics, dash cameras, damaged modules, and vehicles that sit unused for long periods.
The Terminals Corrode Again Quickly
Recurring corrosion may result from acid vapor, a leaking terminal seal, charging-system overvoltage, or inadequate terminal protection. Clean the area, test charging voltage, and inspect the battery case for leakage.
Terminal spray or protective washers can reduce external corrosion, but they will not correct an overcharging alternator or damaged battery.
When Should You Not Replace the Battery Yourself?
Do not attempt DIY replacement when the task exposes you to high-voltage components, requires major disassembly, or involves a physically damaged battery. The cost of professional service is justified when one mistake could damage expensive modules or cause personal injury.
Professional replacement is recommended when:
- Orange high-voltage cables are near the work area.
- The battery is leaking, swollen, frozen, or unusually hot.
- The vehicle requires wheel, seat, or major trim removal.
- Manufacturer-specific battery coding is mandatory.
- Multiple batteries must be isolated in a precise sequence.
- You cannot safely lift the battery.
- Severe terminal or cable damage requires repair.
- You cannot positively identify terminal polarity.
- The vehicle has lost all power after an electrical short.
What Should You Do With the Old Battery?
Return the old battery to a battery retailer, recycling center, or authorized automotive recycler. Lead-acid batteries contain recoverable lead, plastic, and electrolyte and should never be placed in household trash.
Retailers commonly charge a refundable core fee when selling a new battery. Returning the old unit usually recovers that fee and ensures the battery enters an appropriate recycling system.
Transport the battery upright in a stable plastic tray or container. Secure it so it cannot tip over during braking or cornering.
Expert Rules of Thumb
Do Not Diagnose by Battery Age Alone
A battery may fail in two years under severe heat, vibration, deep discharge, or chronic undercharging, while another may remain serviceable for more than five years. Test performance rather than replacing solely by calendar age.
Connection Quality Matters as Much as Battery Quality
A premium battery cannot overcome a loose, oxidized, or damaged cable connection. Many immediate “bad new battery” complaints are actually high-resistance terminal problems.
Battery Registration Does Not Repair Other Faults
Registration resets battery-management data; it does not fix a failing alternator, excessive parasitic draw, damaged sensor, or incorrect battery. Diagnose the electrical system when symptoms continue after registration.
Frequently Asked Questions
Can changing a car battery damage the computer?
Changing a car battery normally does not damage the computer when polarity and disconnection order are correct. However, reverse polarity, short circuits, voltage spikes, or improper jump-starting can damage fuses and electronic modules. Disconnect the negative terminal first, reconnect it last, and never allow tools to bridge powered components.
Will disconnecting the battery reset the check engine light?
Disconnecting the battery may erase some stored data and temporarily turn off the check engine light, but it does not repair the underlying fault. The light will return when the control module detects the problem again. Disconnecting power can also erase diagnostic information that a technician needs.
Can I replace a battery without a memory saver?
Yes, most batteries can be replaced without a memory saver. You may lose the clock, radio presets, seat memory, and learned control-module values. Some vehicles also require radio codes or window initialization. Review the owner’s manual before disconnecting power so you know which settings may need restoration.
Can I install a battery with a higher CCA rating?
A battery with a moderately higher CCA rating is generally acceptable when it has the correct group size, terminal layout, chemistry, and voltage. The starter draws only the current it requires. Physical fit, manufacturer specifications, charging compatibility, and secure mounting matter more than selecting the highest possible number.
How long should I drive after replacing the battery?
A fully charged new battery does not require a special long drive, although 20–30 minutes of normal driving may restore energy used during starting and help vehicle systems relearn. Driving will not properly recover a deeply discharged battery; use an appropriate charger and investigate why it was discharged.
Can I change the 12-volt battery in a hybrid?
Some hybrid 12-volt auxiliary batteries can be replaced by experienced owners, but procedures vary significantly. The 12-volt battery is separate from the high-voltage traction battery, yet high-voltage components may be nearby. Follow model-specific instructions and never touch orange cables or traction-battery components.
The Bottom Line
You can replace your own car battery when the vehicle has an accessible conventional 12-volt battery, you can match the correct specifications, and no specialized registration or high-voltage procedure is required. Disconnect the negative terminal first, install the new battery securely, reconnect the positive terminal first, and verify the charging system afterward.
Professional installation is the safer decision for difficult battery locations, damaged batteries, advanced energy-management systems, and hybrid or electric-vehicle high-voltage work. The best DIY decision is not based only on tool availability; it depends on battery access, electronic requirements, physical safety, and your ability to confirm that the battery—not another electrical component—is the actual problem.