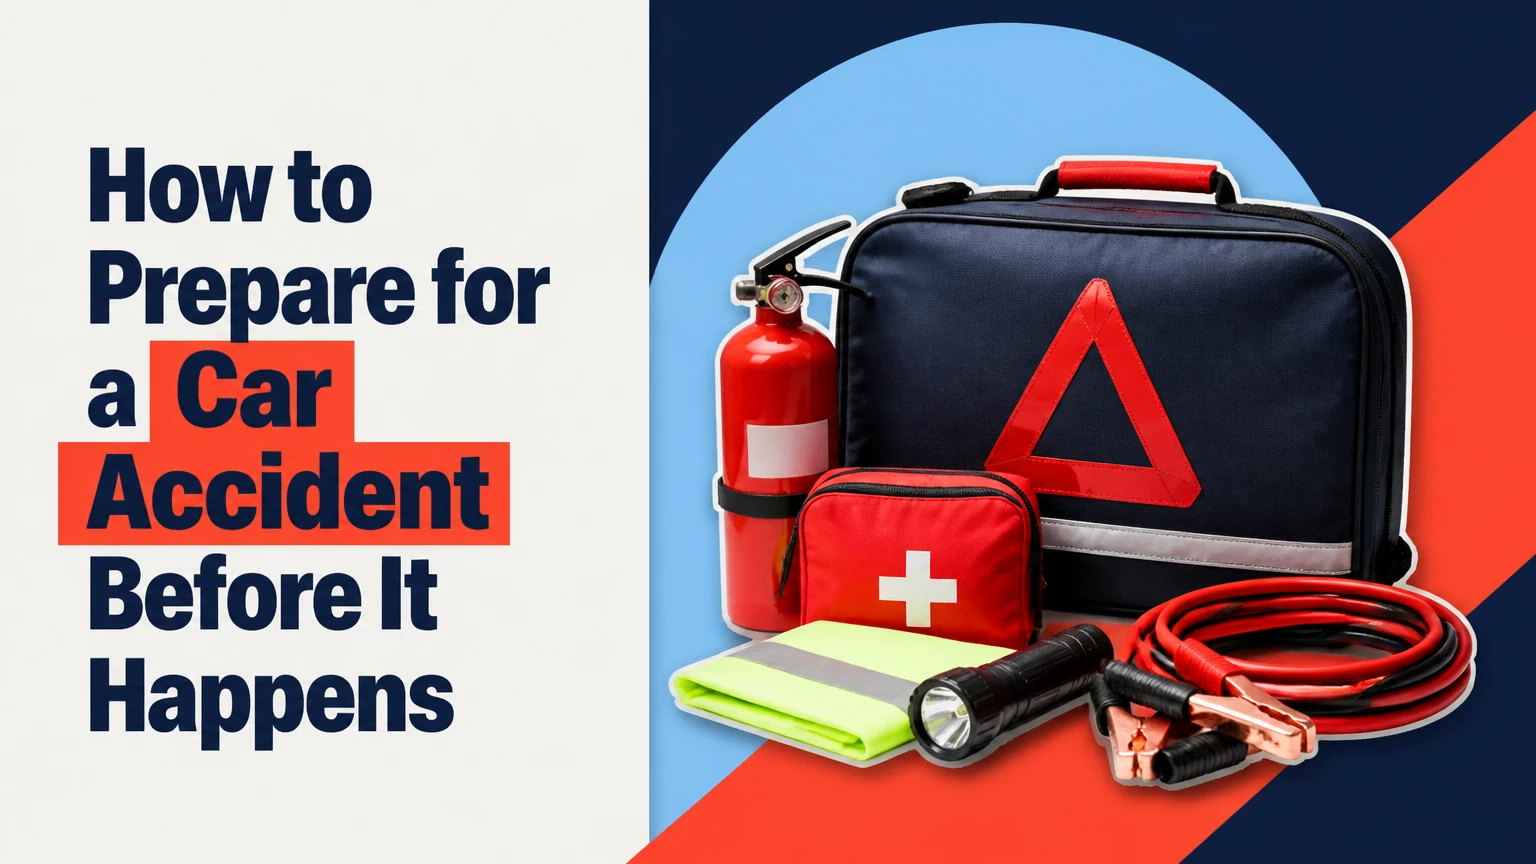
To prepare for a car accident before it happens, organize insurance, vehicle documents, emergency equipment, phone settings, and a response plan. Complete the setup in about 30-60 minutes, then inspect it quarterly. The most important protections are functioning seat belts, appropriate liability and uninsured-motorist coverage, accessible emergency contacts, and equipment you know how to use.
Key Facts at a Glance
- A prepared vehicle should contain current registration, proof of insurance, emergency contacts, a flashlight, reflective equipment, and a tested first-aid kit.
- Offline copies of insurance and registration remain available when a phone has no signal, but physical documents may still be required by local law.
- A dashcam can preserve evidence of vehicle movement and road conditions, but it cannot guarantee fault findings or insurance payment.
- Liability limits should reflect state requirements, household assets, income, and lawsuit exposure rather than one universal dollar amount.
- Seat belts and correctly installed child restraints reduce injury risk before any emergency tool becomes useful.
- Emergency equipment requires maintenance because dead batteries, expired supplies, loose mounts, and full memory cards commonly cause failure.
What Does Car Accident Preparedness Include?
Car accident preparedness is a pre-crash system covering physical safety, financial protection, evidence preservation, communication, and recovery logistics. The system reduces avoidable decisions after impact, but it does not prevent collisions, replace defensive driving, or guarantee a favorable liability decision.
A useful preparation plan has four layers. The first layer prevents or limits harm through seat belts, child restraints, tire maintenance, visibility, and sober driving. The second layer handles immediate survival with a charged phone, first-aid supplies, an escape tool, and a flashlight.
The third layer manages the legal and financial aftermath. It includes insurance documents, policy knowledge, roadside assistance, medical-payment coverage, and a plan for preserving photos and witness details. The fourth layer supports evidence, using a dashcam or written incident record without obstructing the driver’s view or attention.
The National Highway Traffic Safety Administration states that “seat belts are the best defense against impaired, aggressive, and distracted drivers.” A dashcam cannot compensate for an unbuckled occupant, bald tire, or improperly secured child seat.
Before You Start: Time, Cost, and Tools
The minimum setup takes 30-60 minutes and can cost $0-$75 if the driver already owns a phone, flashlight, and basic supplies. A more complete setup with a dual-channel dashcam, high-endurance memory card, escape tool, and upgraded insurance may cost $180-$600 initially, plus recurring premiums.
| Preparation task | Typical time | Typical cost | Required tools or information |
|---|---|---|---|
| Document and contact setup | 10-15 minutes | $0-$10 | Smartphone, paper card, policy number |
| Insurance review | 15-30 minutes | $0 upfront | Declarations page, agent or insurer portal |
| Dashcam installation and test | 20-90 minutes | $150-$450 | Camera, high-endurance microSD card, mount |
| Emergency kit assembly | 10-20 minutes | $35-$120 | Flashlight, gloves, gauze, cutter, water |
| Vehicle safety inspection | 10-20 minutes | $0-$30 | Tire gauge, owner’s manual, charging cable |
Before buying equipment, confirm that the item fits the vehicle. A window breaker may not work on laminated side glass, and some vehicles place the 12-volt battery or USB ports where a camera installation becomes impractical.
Step 1: Prepare Documents and Emergency Contacts
Save current insurance, registration, vehicle identification, medical, and emergency-contact information in two accessible forms. Create offline phone files and carry a small paper card, while excluding unnecessary sensitive data such as full Social Security numbers.
Collect these items:
- Driver’s license information and expiration date
- Vehicle registration and license plate number
- Insurance company, policy number, claims phone number, and roadside number
- Vehicle identification number, preferably from the registration or dashboard
- Primary physician, allergies, medications, blood type if medically confirmed, and emergency contacts
- Lease, loan, warranty, or fleet details when another party owns the vehicle
Store PDFs or screenshots in the phone’s local Files app, not only in email or cloud storage. Test each file by enabling airplane mode and opening it. A cloud backup remains useful, but it is a secondary copy because a damaged phone, locked account, dead battery, or unavailable network can block access.
Place paper copies where passengers can reach them without opening a locked glovebox. Do not leave documents with unnecessary financial data visible in a parked vehicle.
How Should You Configure the Phone?
Add emergency contacts to the phone’s emergency-call feature and lock-screen medical ID, then confirm what information appears while the phone is locked. Apple Medical ID and Android emergency information can differ by model, operating-system version, and regional settings.
Use a strong passcode and reveal only information that helps responders. An allergy, emergency contact, or major medical condition can be useful; a complete medication list may create privacy risks if displayed publicly. Keep a short roadside-assistance number in the contacts list under a recognizable name.
You will know this step worked when the phone opens the files without cellular service and a second person can find the emergency contact from the lock screen. The common mistake is assuming a synced cloud folder is available offline.
Step 2: Review Coverage Limits and Exclusions
Review the declarations page with an insurance agent or licensed representative before changing coverage. Liability, uninsured or underinsured motorist, collision, comprehensive, MedPay, and PIP solve different financial problems, so a single $250,000/$500,000 recommendation cannot apply to every household.
| Coverage | Pays for | Important variable | Review question |
|---|---|---|---|
| Bodily injury liability | Other people’s injury claims when you are liable | State law, assets, income, lawsuit exposure | Could the limit protect household assets after a severe injury? |
| Property damage liability | Damage to another vehicle or property | Repair cost, EV sensors, multiple vehicles | Is the limit at least adequate for a multi-vehicle crash? |
| UM/UIM | Your covered injury or damage from an uninsured or underinsured driver | State rules, exclusions, selected limit | Does the limit match your liability protection where permitted? |
| Collision | Repair or replacement of your vehicle after a collision | Deductible, vehicle value, loan balance | Can you pay the deductible immediately? |
| Comprehensive | Theft, hail, flood, animal strike, and non-collision damage | Deductible and vehicle value | Does the vehicle’s replacement value justify the premium? |
| MedPay or PIP | Specified medical costs, with PIP often broader | State system, health insurance, wage benefits | What pays passengers before fault is resolved? |
State minimum liability limits are legal thresholds, not universal financial recommendations. For example, the Insurance Information Institute reports that liability limits and insurance requirements vary by state, and the National Association of Insurance Commissioners publishes state-specific consumer insurance information.
Ask about exclusions for business use, delivery, permissive drivers, newly acquired vehicles, custom equipment, towing, rental reimbursement, and rideshare periods. A personal policy may not cover a driver while transporting passengers or goods for payment.
An umbrella policy commonly requires underlying auto and home liability limits, often at specified minimums. A $1 million umbrella can add substantial protection, but it does not replace auto coverage and may exclude commercial activity, intentional acts, or particular drivers.
Practitioner rule: compare the cost of increasing liability limits with the assets and future income a lawsuit could reach. Do not copy a limit from a generic checklist without checking the state, household, and policy form.
Step 3: Install and Test a Dashcam
Choose a dashcam with reliable loop recording, a date and time stamp, a wide dynamic range, secure mounting, and a high-endurance microSD card. A front camera is the basic option; a front-and-rear system provides more context for rear-end impacts, lane changes, and hit-and-run events.
| Dashcam feature | Typical specification | Benefit | Limitation |
|---|---|---|---|
| Front resolution | 1440p or 4K | Captures plates and signals at useful distances | 4K creates larger files and more heat |
| Rear camera | 1080p-1440p | Records following traffic and rear impacts | Requires cable routing and clean glass |
| Storage card | 64-256 GB, high-endurance | Better fit for continuous overwriting | Still wears out and can corrupt |
| Parking mode | Buffered motion or impact recording | Captures some parked incidents | May require hardwire kit and battery protection |
| GPS or telemetry | Speed and location metadata | Adds context to video | Data can be inaccurate or disputed |
| Field of view | About 120-170 degrees | Covers more roadway | Very wide views can distort distances |
Mount the camera behind the rear-view mirror without entering the driver’s primary viewing area. Route cables away from airbags, confirm that the lens sees through a clean windshield, and set the correct time zone. Follow local rules concerning windshield obstruction and audio recording, especially in states with stricter consent requirements.
A dashcam does not make footage “indisputable.” Glare, missing rear coverage, incorrect timestamps, overwritten files, editing allegations, and unclear traffic signals can weaken its value. Preserve the original file, copy it to two locations, and avoid posting it publicly before speaking with the insurer or lawyer.
Is a Dashcam Worth the Cost?
A dashcam is usually worthwhile for frequent drivers, people exposed to disputed intersections, owners of newer vehicles, and drivers facing frequent parking damage. It is less useful when the camera is hidden behind a tinted windshield, loses power, records a blurred image, or is operated manually while driving.
Test the camera by reviewing a daytime and nighttime clip. Confirm that the license plate area remains legible at a practical distance and that the rear camera records when the vehicle moves. Reformat the card in the camera according to the manufacturer’s instructions, typically every 30-90 days, and replace it when errors or missing clips appear.
Step 4: Pack Safety and Medical Equipment
Keep emergency equipment secured, reachable, and matched to the occupants and climate. A practical kit includes nitrile gloves, sterile gauze, adhesive dressings, a pressure bandage, cleaning wipes, a flashlight, reflective material, a phone cable, water, and an approved seat-belt cutter.
A tourniquet belongs in a kit only when an adult has learned when and how to use it. Incorrect application can worsen harm, while ordinary first-aid supplies cannot treat every serious crash injury. The American College of Surgeons’ Stop the Bleed program teaches bleeding-control techniques and offers public training resources.
| Item | Quantity | Replacement or test interval | Storage requirement |
|---|---|---|---|
| Nitrile gloves | 2-4 pairs | Inspect every 6 months | Sealed, heat-protected pouch |
| Sterile gauze | 4-8 pads | Check annually | Dry, unopened packaging |
| Adhesive dressings | 10-20 | Check annually | Dry container |
| Flashlight | 1 | Test monthly | Spare batteries or USB charge |
| Seat-belt cutter | 1 | Test visually monthly | Reachable from seated position |
| Window-break tool | 1 | Inspect monthly | Confirm compatibility with glass |
| Water | 2-4 bottles | Replace every 6-12 months | Prevent freezing or heat damage |
| Reflective vest or triangles | 1 set | Inspect annually | Exterior-accessible compartment |
Do not place the kit beneath loose cargo, under a child seat, or in a trunk that cannot open after a rear impact. A window-breaking tool may not work on laminated glass, and breaking glass can create additional injury. Read the vehicle manual and check the tool’s stated glass compatibility.
Step 5: Make the Vehicle Physically Safer
Seat belts, child restraints, tires, lights, mirrors, and brakes form the vehicle’s first protection layer. Inspect tire pressure against the door-jamb label, check tread and sidewalls, confirm that warning lights function normally, and replace damaged wiper blades before poor weather reduces visibility.
The Centers for Disease Control and Prevention identifies motor-vehicle injuries as a major source of preventable injury and recommends correct seat-belt and child-restraint use. Follow the vehicle manufacturer’s instructions and the restraint manufacturer’s installation requirements, because a child seat that is present but loosely fitted does not provide the intended protection.
Keep the cabin free of heavy loose objects. A 10-pound object can strike occupants with much greater force during a sudden stop, depending on speed and deceleration. Store tools low and secure, never on the dashboard or rear shelf.
Check the owner’s manual for battery placement, airbag zones, fuel-system shutoff behavior, and emergency towing points. Electric vehicles need additional awareness around high-voltage damage, charging equipment, and manufacturer instructions after a collision.
Step 6: Create and Practice a Crash Response Plan
Write a short response sequence before an accident, because stress reduces recall and slows decisions. The sequence should be: stop safely if possible, turn on hazard lights, assess immediate danger, call 911 for injury or roadway danger, avoid moving injured people unless fire or another immediate threat requires evacuation, exchange information, document the scene, and notify the insurer.
The first priority after a collision is preventing a second impact. If the vehicle is drivable and the location is dangerous, move to a safe nearby position when local law and physical condition allow it. Do not stand in active lanes to photograph damage.
Call 911 for suspected serious injury, bleeding that does not stop with pressure, breathing difficulty, unconsciousness, fire, fuel leakage, blocked traffic, or a dangerous roadway. Give the dispatcher the road, direction of travel, nearest landmark, number of vehicles, visible hazards, and known injuries.
Exchange names, phone numbers, driver’s-license details, registration, insurance information, and vehicle descriptions. Photograph lane positions, traffic controls, debris, skid marks, weather, road defects, damage, and visible injuries when safe. Ask witnesses for contact details without arguing about fault.
Do not admit liability, speculate about speed, sign a settlement, or post crash details online. Cooperate factually with law enforcement and your insurer. Some jurisdictions require prompt reporting or impose specific exchange obligations, so check local rules before an incident occurs.
How Much Should Preparation Cost?
A no-purchase preparation plan costs $0 and can be completed in roughly 30 minutes. A practical equipment setup typically costs $35-$120, while a dual-camera system commonly costs $150-$450 before professional installation and insurance changes.
| Setup level | One-time cost | Time | Included components | Best use |
|---|---|---|---|---|
| Basic | $0-$25 | 30 minutes | Offline documents, contacts, flashlight, phone cable | Occasional local driving |
| Practical | $35-$120 | 45-75 minutes | Basic medical kit, cutter, reflective gear, paper copies | Daily commuting |
| Evidence-focused | $185-$520 | 1-3 hours | Dual dashcam, high-endurance card, kit, hardwire setup | Frequent or disputed driving |
| Family road-trip | $75-$180 | 60-90 minutes | Larger kit, water, blankets, child supplies, tools | Long-distance travel |
| Commercial or rideshare | $250-$700 | 2-4 hours | Multi-camera system, commercial endorsement review, larger kit | Paid passenger or fleet work |
Insurance premiums vary too widely for a universal annual figure. Request a quote for each limit change and compare the added premium with the deductible, vehicle value, health coverage, umbrella requirement, and potential lost income.
Adapt the Setup to Your Driving Situation
Different driving patterns change which preparation has the highest value. A commuter may prioritize parking-mode recording and roadside assistance, while a family needs passenger-specific medical and child-restraint planning.
Urban Commuters
Use parking mode only if the camera has low-voltage protection and the vehicle battery can support it. Keep a reflective vest and compact flashlight accessible because urban collisions often occur near moving traffic, intersections, and limited shoulders.
Families and Road Trips
Carry water, weather-appropriate clothing, child medication, a paper contact card, and supplies for the expected travel duration. Verify that every child restraint remains correctly installed after luggage is loaded, and do not place hard objects beside a child’s seating position.
Commercial and Rideshare Drivers
Confirm whether the personal policy covers delivery, business travel, and rideshare periods. Ask the platform and insurer about coverage while logged in, waiting for a request, en route to a passenger, and transporting a passenger.
A three-channel camera can record the road, rear traffic, and cabin, but interior audio and video create privacy obligations. Inform passengers where required, secure recordings, and establish a retention policy instead of keeping sensitive footage indefinitely.
Electric Vehicles and Advanced Driver Assistance
Read the manufacturer’s collision and towing instructions before an incident. Do not touch damaged high-voltage components, attempt unauthorized battery repairs, or assume an ADAS event recorder replaces a dashcam. After a serious impact, follow the manufacturer’s guidance and tell responders that the vehicle is electric.
Common Mistakes and How to Fix Them
Storing Documents Only in the Cloud
Failure: The driver cannot open proof of insurance without a signal or account access.
Fix: Save a local PDF, keep a paper copy, and test airplane-mode access every three months.
Using a Low-Endurance Memory Card
Failure: Continuous recording produces corrupted files or silent overwriting.
Fix: Use the manufacturer-approved high-endurance capacity, format in-camera, and review a recent clip monthly.
Mounting Equipment Near an Airbag
Failure: A loose device or cable becomes a projectile or interferes with deployment.
Fix: Keep accessories away from steering-wheel, dashboard, pillar, and curtain-airbag zones.
Treating State Minimums as Full Protection
Failure: A legally valid policy leaves medical bills, vehicle damage, or assets exposed.
Fix: Compare limits with assets, income, household drivers, vehicle value, and local insurance rules.
Carrying an Escape Tool Without Testing It
Failure: The tool does not fit the hand, reach the belt, or work with the vehicle’s glass.
Fix: Practice locating it without using it on live vehicle glass, then confirm compatibility with the owner’s manual and tool documentation.
Letting the Kit Overheat
Failure: Adhesives degrade, batteries leak, and water containers deform after repeated heat exposure.
Fix: Inspect monthly in hot climates and replace damaged or expired items immediately.
A Simple Maintenance Schedule
A preparation system works only when its contents remain current. Assign each review to a recurring calendar reminder rather than relying on memory.
| Review frequency | Inspection action | Pass condition | Recovery action |
|---|---|---|---|
| Monthly | Test flashlight, phone cable, and dashcam recording | Light works, cable charges, new clip exists | Replace battery, cable, or card |
| Quarterly | Open documents offline and review contacts | Policy and registration remain current | Download new files and update card |
| Every 6 months | Inspect kit, mounts, tires, and escape tool | Supplies sealed, mounts firm, tires undamaged | Replace expired or damaged items |
| Annually | Review insurance, vehicle value, deductibles, and usage | Coverage matches household circumstances | Obtain revised quotes |
| After vehicle change | Recheck camera view, glass, airbags, and policy | Equipment fits the new vehicle | Remount and notify insurer |
Frequently Asked Questions
Should I keep my insurance card in the glovebox?
Keep a paper insurance card in the vehicle when local law or your insurer recommends it, and store a current offline copy on your phone as a backup. A glovebox card can become outdated after renewal, so compare its policy dates with the digital version every quarter.
What information should I never post after a crash?
Do not post admissions, guesses about fault, injury details, private medical information, insurance negotiations, or unedited dashcam footage. Public posts can be copied and misunderstood outside the original context. Provide factual information to law enforcement, the insurer, and legal counsel when appropriate.
Does a dashcam record when a car is parked?
A dashcam records while parked only when it supports parking mode and receives power after ignition is off. Some systems need a hardwire kit, an external battery, or a compatible accessory. Check low-voltage protection, storage capacity, local privacy law, and whether the camera records continuously or only after detected motion or impact.
How should I prepare for a hit-and-run?
Use a front-and-rear camera if practical, activate parking mode with battery protection, and keep a written note of the insurer’s claims number. After a hit-and-run, move safely, call police when required, photograph debris and damage, obtain witness contacts, and preserve the original recording immediately.
Should I buy an umbrella policy before changing auto coverage?
Usually, request the umbrella insurer’s required underlying limits before purchasing either policy. An umbrella commonly depends on specified auto and home limits and may exclude business or rideshare activity. Compare the umbrella’s exclusions, retention, and driver requirements with the household’s actual risks.
What is the cheapest effective preparation?
The cheapest effective preparation is a tested phone, offline insurance and registration files, current emergency contacts, properly worn seat belts, a charged flashlight, and a basic escape and first-aid kit. This setup costs about $0-$25 when household items are available, but it does not replace adequate insurance or vehicle maintenance.
The Bottom Line
How to prepare for a car accident before it happens is a practical risk-management task, not a single purchase. Save documents offline, review coverage against your real exposure, secure and test emergency equipment, maintain the vehicle, and rehearse the first minutes after impact. Recheck the system quarterly and update it whenever your vehicle, household, state, or driving purpose changes.