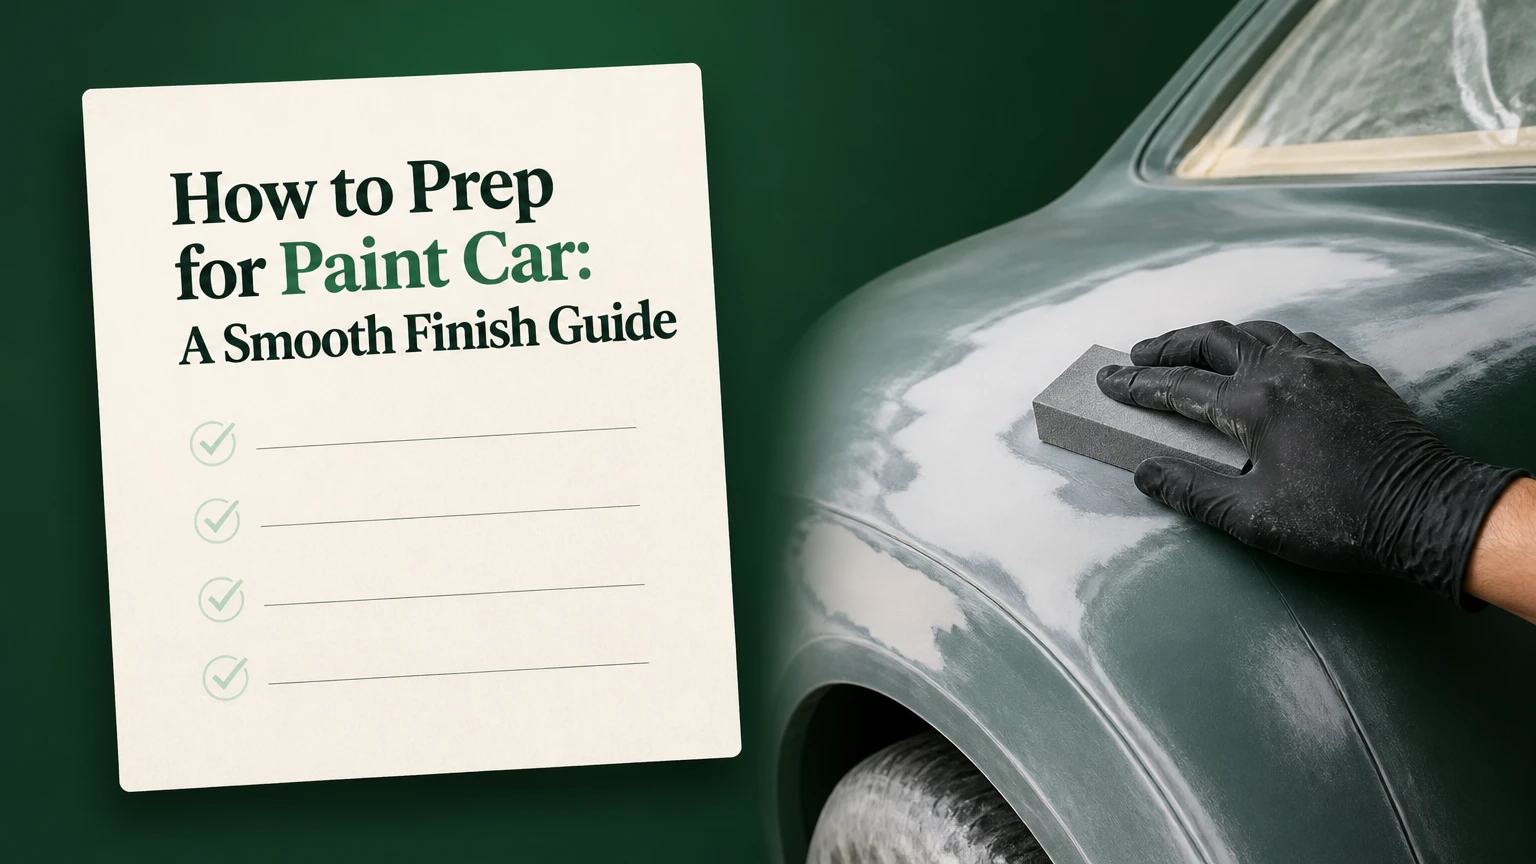
To prep a car for paint, clean and chemically decontaminate the panels, remove or mask trim, repair corrosion and damage, sand the existing finish, apply the correct primer, block-sand it level, and inspect every panel before color. A typical DIY vehicle requires 40-80 labor hours, and surface cleanliness determines adhesion more than paint price.
Key Facts at a Glance
- Automotive paint preparation commonly consumes 80%-90% of the labor behind a durable, straight-looking finish.
- New paint needs a clean surface and a controlled sanding profile, not simply a visibly dull surface.
- Use 80-grit to shape cured body filler, 180-220 grit to feather repairs, 320 grit before primer, and 400-600 grit before color.
- Epoxy primer is the appropriate moisture barrier for exposed steel, while primer surfacer levels minor scratches and surface texture.
- A practical spray environment is 18-27°C, below approximately 65% relative humidity, unless the coating manufacturer specifies different limits.
- Two-part polyurethane, or 2K, coatings require product-specific respiratory protection and ventilation; a garage is not automatically safe because the door is open.
What Does Car Paint Preparation Do?
Car paint preparation creates a clean, mechanically receptive, level substrate for primer and topcoat. Preparation removes wax, silicone, tar, oil, corrosion, and unstable old paint while correcting dents and scratches that would remain visible beneath a glossy finish.
Paint adhesion has two parts. Mechanical adhesion comes from a controlled abrasive profile that gives primer microscopic irregularities to grip. Chemical adhesion depends on compatible, properly cured layers, such as epoxy primer over prepared steel or a basecoat applied within the recoat window specified by its manufacturer.
Glossy factory paint usually needs sanding before repainting because a polished surface provides little texture for the next layer. Sanding alone cannot solve silicone contamination, rust, delamination, or panel distortion. A car can feel smooth and still produce fisheyes, peeling, or waves after painting.
The 3M Automotive Aftermarket abrasive system organizes refinishing work around matching abrasive grade to the repair stage, rather than using one grit everywhere. That principle matters because coarse scratches remain visible through thin topcoat, while excessively fine sanding can reduce primer or paint adhesion.
Which Prep Level Fits Your Car?
Choose scuff-and-shoot only when the existing coating is firmly bonded, corrosion-free, and visually acceptable. Choose standard preparation for most daily drivers, while bare-metal preparation belongs to vehicles with extensive rust, multiple unstable coatings, or restoration requirements.
| Prep level | Suitable vehicle condition | Typical labor | Typical materials | Main limitation |
|---|---|---|---|---|
| Scuff and shoot | Sound paint, no rust, minor cosmetic defects | 15-30 hours | $100-$300 | Does not straighten panels or stop failing clearcoat |
| Standard preparation | Small dents, chips, stable factory finish | 40-80 hours | $200-$600 | Requires repeated inspection and block sanding |
| Partial strip | Peeling areas, rust spots, unknown repairs | 50-100 hours | $350-$900 | Panel transitions require careful feather-edging |
| Bare-metal restoration | Severe rust, incompatible coatings, classic restoration | 80-200+ hours | $600-$2,000+ | Steel must be sealed quickly against flash rust |
Do not scuff over peeling clearcoat. Sand the failed coating until the surrounding edge is stable, then feather the transition into sound paint. A red nonwoven abrasive pad can reach contours, but it cannot level a damaged panel or guarantee a sufficient profile on broad flat surfaces.
Bare metal is not automatically a better substrate. Stripping a sound factory e-coat creates additional corrosion risk and removes a proven protective layer. Strip to metal when inspection requires it, not because raw steel sounds more professional.
Before You Start: Tools, Materials, and Safety
A standard DIY repaint needs a dual-action sander, rigid and flexible blocks, abrasives from 80 to 600 grit, automotive wax and grease remover, lint-free wipes, body filler, glazing putty, primer, masking materials, lighting, and approved respiratory protection.
Before-you-start checklist
| Requirement | Practical specification | Typical quantity or range |
|---|---|---|
| Abrasives | 80, 180, 220, 320, 400, 600 grit | 25-50 sheets or discs |
| Sanding blocks | Rigid block plus contour and soft interface pads | 3-5 blocks |
| Cleaner | Automotive wax and grease remover | 1-2 liters |
| Wipes | Low-lint disposable cloths | 50-100 pieces |
| Body filler | Polyester filler and spreaders | 0.5-2 kilograms |
| Primer | Epoxy and primer surfacer, system-compatible | 2-4 liters mixed |
| Masking | Automotive tape, paper, plastic, masking film | 1-2 rolls each |
| Safety equipment | Organic-vapor respirator, gloves, eye protection, coveralls | 1 complete set |
Use the coating manufacturer’s safety data sheet and technical data sheet before opening a can. OSHA and NIOSH guidance treats spray painting as an exposure-control task, so ventilation, respiratory protection, skin protection, and ignition control matter more than simply wearing a dust mask. Many 2K urethane systems contain isocyanates and are unsuitable for an improvised home booth.
A useful practitioner rule is simple: if you can smell solvent strongly inside your respirator, stop spraying and correct the cartridge, seal, ventilation, or product selection. A particulate-only mask does not protect against solvent vapor.
Step 1: Wash and Decontaminate Every Panel
Wash the vehicle with a clean automotive detergent, rinse thoroughly, and dry it before using wax and grease remover. Dish detergent can remove some wax, but automotive wax and grease remover is the more controlled final cleaner because its formulation and evaporation behavior are intended for refinishing surfaces.
Wash door jambs, fuel-door recesses, wheel openings, trunk gutters, and panel seams. These areas hold silicone dressing, road film, and oily residue that can migrate onto sanded panels during disassembly. Remove tar and adhesive with a compatible automotive solvent, then test it on an inconspicuous area.
Use the two-cloth method: apply cleaner to one cloth or directly to a small panel area, then immediately wipe the dissolved residue away with a second dry cloth before evaporation. Change cloth faces frequently. Do not allow a dirty cloth to redistribute contamination across the vehicle.
You will know Step 1 worked when a clean wipe remains free of yellow, gray, oily, or waxy residue and water no longer beads heavily on the panel. The common mistake is sanding before decontamination, which can grind wax and silicone into the scratch pattern.
Step 2: Remove Trim and Mask the Vehicle
Remove detachable lamps, emblems, handles, mirrors, antenna bases, weatherstripping, license plates, and loose moldings whenever the repair scope allows. Removing trim produces a paint edge in the correct location and exposes corrosion that masking would hide.
Label fasteners and photograph connectors before disassembly. Protect removed parts from sanding dust. If a component cannot be removed, mask its edge with fine-line automotive tape and back-mask the adjacent opening so paint does not build a hard ridge.
Mask glass, tires, suspension components, door openings, and engine-bay areas with automotive-grade tape, paper, and plastic film. Cheap household tape can soften under solvent or leave adhesive, while plastic sheeting can carry static and attract overspray.
The checkpoint is a continuous, sealed boundary with no exposed rubber, glass edge, or cavity facing the spray path. The common mistake is taping directly over weatherstripping and assuming the tape edge will prevent lifting later.
Step 3: Inspect for Rust, Peeling, and Previous Repairs
Inspect every panel in direct and low-angle light before sanding. Mark bubbling, pinholes, cracked filler, solvent-lifted paint, feather-edged collision repairs, and corrosion around seams, wheel arches, windshield openings, and drain holes.
Probe suspicious bubbles with a pick after cleaning. Surface rust can sometimes be abraded to bright metal, but perforation requires cutting out contaminated steel and welding or replacing the affected section. Filler over active rust is a temporary cosmetic patch, not a durable repair.
Check panel shape with a long sanding block or straightedge. Reflections that bend across a door or quarter panel indicate a low or high area that primer surfacer will not reliably correct. Guide coat and block sanding reveal shape more accurately than fingertip inspection.
The checkpoint is a written repair map for every panel. The common mistake is treating rust bubbles as paint defects and burying them beneath epoxy, filler, and color.
Step 4: Repair Dents and Feather-Edge Damage
Sand damaged paint with 180-220 grit until chips, scratches, and paint edges transition smoothly into stable surrounding coating. Feather-edging means each layer ends at a different distance from the damage, preventing a sharp step that telegraphs through primer.
Use polyester body filler only on clean, properly prepared surfaces. Spread thin coats rather than one thick mound; follow the product’s maximum recommended thickness and cure time because filler formulations differ. Shape cured filler with 80 grit on a block, refine with 180 grit, and use glazing putty for pinholes or very shallow imperfections.
Do not use body filler as a structural repair, over damp metal, or over loose paint. Remove dust before applying another material. If a dent has stretched metal, filler alone may shrink, crack, or reveal the original shape under changing light.
The checkpoint is a repair that matches the panel contour when checked with a flexible guide and low-angle light. The common mistake is sanding filler with fingertips, which creates localized hollows instead of a level repair.
Step 5: Sand the Existing Finish With the Correct Grit
Use a dual-action sander on broad panels and a block by hand near body lines, edges, and contours. Keep the tool moving, use moderate pressure, and stop on edges before the abrasive cuts through them. Sanding with bare fingers follows low areas and creates waves.
| Surface or task | Starting abrasive | Refinement abrasive | Readiness checkpoint |
|---|---|---|---|
| Cured body filler shaping | 80 grit | 180 grit | Contour matches adjacent panel |
| Deep scratch feather-edge | 180-220 grit | 320 grit | No sharp paint transition |
| Stable old paint before primer | 180-220 grit | 320 grit | Uniform dull finish |
| Epoxy primer recoat preparation | Product TDS | Commonly 320-400 grit | Clean, cured, compatible surface |
| Primer surfacer before solid color | 320-400 grit | 400-500 grit | No guide-coat defects remain |
| Primer surfacer before metallic basecoat | 400 grit | 600 grit | Uniform scratch pattern with no burn-through |
The exact abrasive sequence belongs to the paint system’s technical data sheet. Some manufacturers approve 400 grit for a basecoat while others specify 500 or 600 grit, and a generic grit chart cannot override that instruction.
You will know the step worked when the panel has an even, matte appearance and no glossy islands remain in the intended paint area. The common mistake is stopping after the panel looks dull while leaving deep random-orbital pigtails that later show through color.
Step 6: Clean Dust Without Recontaminating the Surface
Vacuum or blow sanding dust from seams, jambs, panel gaps, and the floor around the vehicle. Use clean, dry compressed air, and keep the nozzle away from oily compressor condensate. Drain the compressor and install appropriate filtration before spraying.
Wipe the panel with the cleaner approved for the next coating, using fresh cloths. A tack cloth can remove residual dust immediately before spraying, but it does not replace solvent cleaning and can leave residue if pressed aggressively or used on an unsuitable coating.
The checkpoint is a clean wipe, a dust-free seam, and no visible powder under strong inspection lighting. The common mistake is using a household rag, which can contain fabric softener, silicone, or laundry residue.
Step 7: Seal Bare Steel With Epoxy Primer
Apply epoxy primer to exposed steel according to its mix ratio, induction time, pot life, film thickness, and recoat window. One or two coats are common, but the product data sheet controls the number and flash time.
Epoxy primer provides corrosion resistance and a sealed foundation. It is not a substitute for removing rust, and many epoxy products require scuffing after full cure before additional materials are applied. Some systems permit filler over cured epoxy; others specify filler over prepared metal, so confirm compatibility.
| Substrate | Appropriate first coating | Why it fits | Important restriction |
|---|---|---|---|
| Clean bare steel | Epoxy primer | Seals steel and supports corrosion resistance | Steel must be dry and oil-free |
| Aluminum | Aluminum-compatible epoxy | Improves adhesion to nonferrous metal | Follow metal preparation instructions |
| Sound OEM finish | Compatible primer surfacer or sealer | Preserves stable factory substrate | Sand and clean before application |
| Rust converter residue | Only a system-approved primer | Chemistry varies by converter | Do not assume universal compatibility |
The checkpoint is uniform coverage without dry spray, runs, or exposed steel. The common mistake is applying filler or surfacer over uncured epoxy, which can cause solvent entrapment and later shrinkage.
Step 8: Apply Primer Surfacer in Controlled Coats
Spray two or three medium-wet coats of compatible high-build primer surfacer, allowing the specified flash time between coats. Use the spray gun’s technical data sheet for nozzle size, inlet pressure, reduction, and fan adjustment; 20-25 PSI at the cap is a common HVLP starting range, not a universal setting.
Primer surfacer fills fine sanding scratches and minor texture, but it cannot correct major dents or a poorly leveled repair. Keep film thickness controlled because excessive primer can shrink, crack, or retain solvent beneath the color layer.
Allow the primer to cure for the complete stated interval. Cooler temperatures, high humidity, poor airflow, excessive reducer, and thick application can extend curing substantially. A surface that feels dry may remain soft below the skin.
The checkpoint is a fully cured, uniformly covered surface that sands to powder rather than clogging the abrasive. The common mistake is sanding or painting over primer that has only flashed dry.
Step 9: Guide-Coat and Block-Sand the Primer
Apply a contrasting dry guide coat over cured primer, then block-sand with 400-600 grit according to the topcoat system. The guide coat remains in low spots and scratches, allowing the operator to distinguish a level panel from a panel that merely feels smooth.
Use long, overlapping strokes and change sanding direction between passes. Keep the block appropriate to the panel shape: a rigid block levels broad surfaces, while a flexible block follows moderate contours without concentrating pressure at its edges.
If guide coat remains in a low area after surrounding primer is sanded, do not keep removing material until the low spot disappears. Reapply primer or filler as appropriate. If sanding exposes bare metal, clean and re-prime that area rather than applying color over it.
The checkpoint is a consistent scratch pattern with no guide-coat islands, pinholes, glossy spots, or bare-metal breakthroughs. The common mistake is using a soft sponge on a flat door, which follows the defect instead of leveling it.
Step 10: Final Inspection and Spray-Environment Control
Inspect panels under bright, low-angle lighting from several directions before final cleaning. Run a gloved hand over the surface only after confirming the glove is clean, because a fingertip can detect texture but cannot identify every shallow wave.
A typical workable environment is 18-27°C with relative humidity below 65%, low dust, and stable airflow. The coating manufacturer’s technical data sheet remains authoritative because reducer choice, flash time, cure rate, and humidity tolerance vary by product.
| Condition | Typical target | Likely problem outside range | Adjustment |
|---|---|---|---|
| Temperature | 18-27°C | Slow cure below 18°C, rapid flash above 27°C | Change reducer or reschedule |
| Relative humidity | Under 65% | Blushing, moisture, slower cure | Improve climate control |
| Primer gun pressure | 20-25 PSI at cap | Poor atomization or excessive overspray | Follow gun and product TDS |
| Flash time | Product-specific, often 5-15 minutes | Solvent pop or intercoat lifting | Wait for proper surface flash |
| Final dust control | Clean booth or controlled enclosure | Dirt nibs and fisheyes | Clean floor, air lines, and panels |
Spray a test panel or concealed area when changing products, colors, reducers, or gun settings. The checkpoint is a clean, stable surface with no remaining repair decision before color application. The common mistake is painting late in the day and rushing because the weather window is closing.
What Are the Most Common Prep Failures?
Fisheyes usually indicate silicone, oil, wax, or other contamination. Allow the affected coating to cure, sand the defect flat, identify the contamination source, clean with fresh materials, and use an approved fisheye-control product only if the paint manufacturer permits it.
Failure diagnosis table
| Failure | Likely cause | Recovery |
|---|---|---|
| Fisheye craters | Silicone, oil, wax, contaminated air line | Cure, sand flat, remove source, re-clean |
| Visible sanding scratches | Coarse abrasive or insufficient primer | Apply surfacer, guide-coat, sand finer |
| Primer shrinkage | Thick film, uncured filler, insufficient cure | Let cure fully, level stable material, re-prime |
| Solvent pop | Heavy coats, short flash, excessive heat | Cure, sand defects, correct flash schedule |
| Peeling or lifting | Incompatible or glossy substrate | Remove unstable coating, re-prepare, test system |
| Rust bleeding through | Rust left under repair or moisture exposure | Strip affected area, repair corrosion, epoxy-prime |
| Orange peel | Poor atomization, wrong viscosity, fast reducer | Correct gun setup and product mix, re-sand if needed |
A counterintuitive shop rule is that more primer is not always safer. Excess film can hide defects temporarily while increasing shrinkage and solvent-release risk weeks later.
Another rule is to stop sanding when the process stops producing useful information. If a low spot remains after guide coat disappears around it, further sanding makes the panel thinner without making it straighter.
How Should You Adjust the Process for Different Cars?
A sound daily driver usually benefits from standard preparation that preserves stable factory coatings. A classic car with unknown layers needs more investigation, while a temporary track or beater vehicle can accept visible minor defects if adhesion and corrosion control remain sound.
Daily driver with faded clearcoat
Remove all loose clearcoat, feather the stable edge, repair chips and dents, and prime exposed areas. Do not bury delaminated clear under sealer. The repair boundary must end on firmly attached material.
Classic vehicle with unknown paint
Test a small hidden area for solvent reaction and layer compatibility. Consider media blasting, chemical stripping, or controlled DA removal when multiple repairs, lacquer, enamel, filler, and corrosion make the existing stack unreliable. Seal clean steel promptly with epoxy primer.
Budget spray-can project
Use a compatible automotive aerosol system, keep the project to small panels, and expect lower gloss control and durability than a properly mixed professional basecoat and clearcoat system. Spray cans are practical for bumpers, brackets, wheels, and localized repairs, but a whole-car metallic finish magnifies overlap and texture errors.
Collision-repair panel
Match the repair process to the existing OEM finish and blend zone. A panel that looks ready from one angle can still show a repair edge after clearcoat, so inspect with the same directional lighting used for final quality control.
How Much Time and Money Does Car Paint Prep Take?
Typical DIY car paint preparation costs $200-$600 and consumes 40-80 labor hours for a standard daily-driver project. A heavily damaged or bare-metal restoration can exceed $2,000 in materials and 200 labor hours, while a professional shop may allocate $1,500-$3,500 or more to preparation within a larger refinish estimate.
| Project scope | DIY labor | DIY materials | Professional calendar time |
|---|---|---|---|
| Scuff and shoot | 15-30 hours | $100-$300 | 3-7 days |
| Standard sedan preparation | 40-80 hours | $200-$600 | 1-3 weeks |
| Several rust repairs | 60-120 hours | $400-$1,200 | 2-5 weeks |
| Bare-metal restoration | 80-200+ hours | $600-$2,000+ | 3-10 weeks |
Calendar time differs from labor time because filler, primer, and paint require cure periods. Hidden costs include replacement clips, masking film, abrasives consumed during rework, compressor upgrades, waste disposal, lighting, and respiratory equipment.
For a first project, renting a proper spray space or outsourcing the final spray can reduce risk. Surface preparation remains worthwhile even when a shop applies the final color, because a shop can quote and inspect a stable substrate more accurately than an unfinished, contaminated vehicle.
What Should You Check Before Applying Color?
Confirm that every panel is clean, uniformly dull, dry, fully cured, and free of guide-coat remnants, glossy islands, pinholes, sanding scratches, bare-metal breakthroughs, and unstable edges. Confirm also that the primer, reducer, basecoat, clearcoat, and sealer belong to a compatible system.
Use this final checklist:
- Inspect in bright, low-angle light.
- Run a clean gloved hand over each panel.
- Blow seams and gaps free of dust.
- Clean with the approved surface cleaner.
- Replace contaminated wipes and gloves.
- Verify mix ratios and pot life.
- Check temperature and humidity.
- Spray a test panel.
- Confirm flash and recoat windows.
- Keep the vehicle covered until spraying begins.
The final expert insight is that cleanliness has a deadline. Clean a panel too early, then handle trim, filler, or sanding nearby, and the panel may need cleaning again immediately before primer or color.
The Bottom Line
To prep a car for paint successfully, preserve sound factory coatings, remove every unstable or contaminated layer, level repairs with blocks rather than fingers, seal bare metal with compatible epoxy, and guide-coat the cured primer before final sanding. The correct process is slower than a quick scuff, but it prevents peeling, fisheyes, visible scratches, rust bleed-through, and wavy reflections. A careful how to prep for paint car workflow produces a substrate that the paint system can actually support.
FAQ
Can I paint directly over old automotive paint?
You can paint over old automotive paint only when the coating is firmly bonded, chemically compatible, clean, and sanded to the product’s specified profile. Peeling clearcoat, cracked finish, solvent-sensitive layers, and rust must be removed or repaired first. Test an inconspicuous area before committing to the entire vehicle.
Do I need to sand a car before using epoxy primer?
Yes. Bare steel should be clean and abraded according to the epoxy primer technical data sheet, commonly with a coarse mechanical profile that removes oxidation without polishing the metal. Epoxy primer is not intended to adhere reliably to glossy, waxed, or contaminated steel.
Can I use a Scotch-Brite pad instead of sandpaper?
A Scotch-Brite pad works well for scuffing contours, jambs, and sound existing paint, but it is a poor replacement for block sanding on broad panels. The pad can dull the finish without removing waves, deep scratches, peeling edges, or panel distortion. Use it as a supplement, not a complete leveling method.
Should I wet-sand primer before painting?
Wet-sand primer only when the primer system and shop conditions permit it. Wet sanding can reduce dust, but trapped water in seams, holes, and panel gaps can cause adhesion or corrosion problems. Dry sanding is often simpler for primer preparation, provided dust is controlled and the specified final grit is used.
Is 2K automotive paint safe to spray in a garage?
A typical open garage does not automatically provide safe protection from 2K paint exposure. Two-component polyurethane products may contain isocyanates, which require the controls stated in the safety data sheet, including suitable respiratory protection, ventilation, protective clothing, and ignition control. A professional spray facility is the safer choice for full-vehicle application.
How do I know when primer is ready to sand?
Primer is ready when it has reached the manufacturer’s stated cure condition and sands into a consistent powder without clogging, smearing, or rolling. Temperature, humidity, film thickness, reducer, and airflow change curing time, so touch-dry behavior is not a reliable substitute for the product’s technical data sheet.