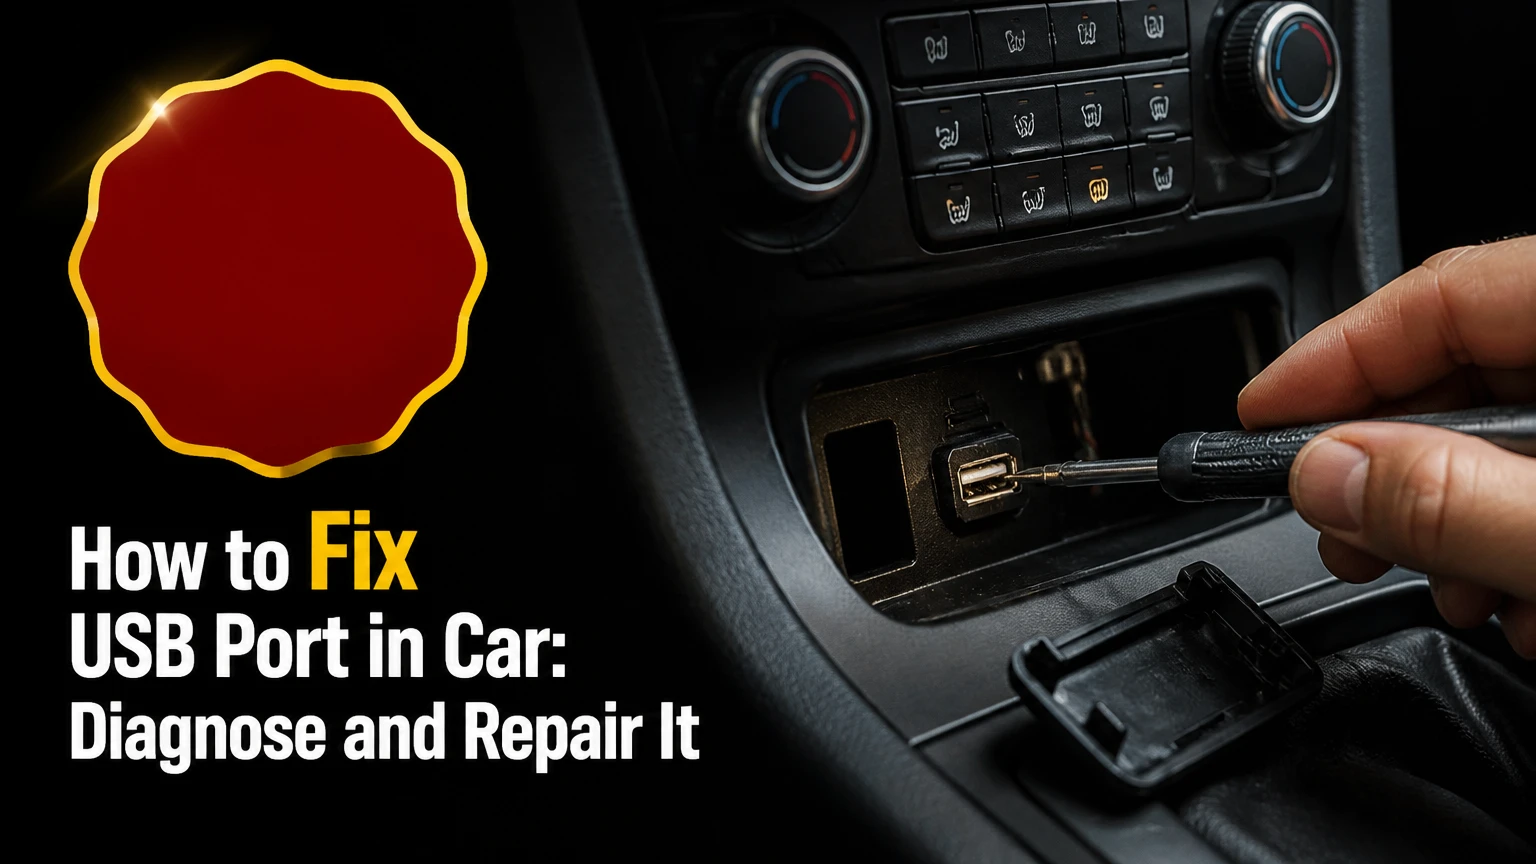
To fix a USB port in a car, first test a known-good cable and device, inspect and clean the socket, then check the vehicle fuse and wiring. If power reaches the connector but charging or data still fails, replace the vehicle-specific USB module or have an automotive electrician diagnose the head unit.
Key Facts at a Glance
- A factory car USB port normally converts the vehicle’s roughly 12-14.7-volt supply into regulated USB power, commonly 5 volts.
- A charging-only USB socket cannot support Apple CarPlay, Android Auto, music-file access, or other data functions.
- A new cable and second device should be tested before dashboard trim is removed.
- A replacement fuse must have exactly the same amperage and type as the original fuse.
- A repeatedly blown USB or accessory fuse indicates an unresolved short circuit or overloaded circuit.
- A 12V USB adapter can restore charging without repairing the factory data port, but it normally cannot restore wired CarPlay or Android Auto.
How Does a Car USB Port Work?
A car USB port contains a connector, wiring harness, protection components, and usually a voltage converter that changes vehicle battery voltage into USB voltage. The port may connect only to an accessory-power circuit, or it may connect to both the vehicle’s infotainment head unit and a power supply.
A vehicle battery supplies approximately 12.0-12.7 volts when the engine is off. With the alternator charging, system voltage commonly rises to about 13.5-14.7 volts. USB electronics generally require regulated 5-volt power unless a negotiated USB-C Power Delivery system supports higher voltage. The socket’s internal electronics perform that conversion.
USB-A commonly uses four functional contacts: 5-volt power, ground, data negative, and data positive. USB-C has more contacts and can support reversible insertion, higher current, alternate modes, and Power Delivery negotiation. A USB-C connector alone does not guarantee fast charging or data compatibility.
The USB Implementers Forum describes USB Type-C as a connector and cable system rather than a guarantee of every USB feature. That distinction matters in cars because the vehicle module, cable, phone, and infotainment software must all support the intended function.
Which Car USB Port Do You Have?
The port’s location and markings usually reveal its purpose, but the owner’s manual is the final authority. A port beside the radio or marked with a smartphone or media icon is more likely to carry data, while a rear passenger socket marked with a charging symbol may provide power only.
| Port type | Typical output | Data capability | Common location |
|---|---|---|---|
| Infotainment USB-A | 5V, 0.5-1.5A | CarPlay, Android Auto, media | Dashboard or center console |
| Infotainment USB-C | 5V, 1.5-3A typical | Data only if vehicle module supports it | Dashboard or console |
| Rear charging USB-A | 5V, 2.1-2.4A typical | Usually none | Rear console or second row |
| Rear charging USB-C | 5V, 3A typical | Usually none | Rear console or seatback |
| 12V USB adapter | 5V, 2.4A or USB-PD output | Usually none | Cigarette-lighter socket |
Output values are typical ranges, not universal specifications. Some newer vehicles provide USB-C Power Delivery, while other USB-C sockets remain limited to ordinary 5-volt charging.
Before You Start
Use the following preparation limits before removing a panel or fuse.
| Item | Typical requirement | Why it matters |
|---|---|---|
| Initial diagnosis | 10-20 minutes | Separates cable, device, power, and data faults |
| Cleaning | 5-10 minutes | Removes lint and oxidation without disassembly |
| Fuse inspection | 10-15 minutes | Identifies circuit protection failure |
| Module replacement | 30-90 minutes | Time varies with trim clips and access |
| Replacement USB module | $20-$150 typical | OEM modules often cost more than generic parts |
| Basic tools | $10-$40 typical | Plastic picks, flashlight, fuse puller, meter |
Prepare a flashlight, a known-good cable compatible with the phone, a second phone or USB device, plastic trim tools, a fuse puller, and a digital multimeter. Add 90% or higher isopropyl alcohol and a wooden or plastic pick only when the socket contains visible contamination.
Park safely, switch the ignition off, and keep loose tools away from exposed terminals. Check the service manual before disconnecting the battery because some vehicles require radio codes, window initialization, steering-angle calibration, or infotainment reset procedures afterward.
Step 1: Establish the Failure
Test the same vehicle port with a known-good cable and a second compatible device before assuming the socket is defective. Record whether the phone charges, whether the infotainment screen detects it, whether the fault changes with ignition position, and whether another USB port works.
Perform these checks in order:
- Start the vehicle or switch the ignition to the accessory position specified by the owner’s manual.
- Try a short, undamaged cable that supports data, not a charge-only cable.
- Test a second phone or USB storage device.
- Try the cable and phone in another known-working vehicle port.
- Check whether the port has a power or charging indicator.
- Restart the phone and infotainment system if the port supplies power but does not connect.
- Check the manual for a data-port designation and supported phone requirements.
You will know the cable or phone is the likely fault when the replacement combination works in the car. You will know the vehicle port is implicated when multiple known-good combinations fail in the same socket.
A common mistake is testing only with one long or inexpensive cable. Long cables can have higher resistance, damaged data conductors, or poor shielding, so they may charge slowly while failing data communication.
Step 2: Clean the Port Safely
Clean a car USB port only after switching off the ignition and removing the cable. Pocket lint can prevent the plug from seating fully, while liquid residue can create corrosion or an intermittent short.
Use a flashlight first. If debris is visible, loosen it with a dry wooden toothpick or plastic dental pick, working along the side walls rather than scraping the contact springs. Apply short bursts of compressed air from outside the socket, keeping the can upright and avoiding prolonged pressure that can drive debris deeper.
For light oxidation, dampen the tip of a plastic pick with a small amount of high-concentration isopropyl alcohol. Do not pour alcohol into the port. Allow the socket to dry completely for at least five minutes before reconnecting a cable.
The cleaning step is successful when the plug seats fully, feels stable, and the phone maintains a connection when the cable is moved gently. Stop immediately if a contact is bent, the port smells burnt, or moisture is present behind the trim.
Never insert a needle, paper clip, screwdriver, or other metal object into a USB socket. A metal tool can bridge power and ground, bend contacts, and blow the accessory fuse.
Step 3: Test the Correct Fuse
A blown fuse can disable a factory USB socket, accessory outlet, radio, or an entire infotainment circuit. Fuse labels vary by vehicle, so identify the exact fuse through the owner’s manual rather than replacing a fuse based only on its location.
Search the manual for labels such as USB, AUX, RADIO, AUDIO, INFOTAINMENT, ACC, P/OUTLET, CIG, or POWER OUTLET. The USB port may share a fuse with another system, and some vehicles protect front and rear ports separately.
Follow this procedure:
- Switch off the ignition and all accessories.
- Locate the interior or instrument-panel fuse box.
- Identify the specified fuse by number, label, and amperage.
- Remove it with a fuse puller.
- Inspect the metal link, or test both test points with a multimeter.
- Install the same fuse type and amperage if the link is open.
- Retest the port and every system listed on that fuse circuit.
A multimeter can test a blade fuse without removing it. With the circuit energized as directed by the manual, touch the meter probes to the fuse’s two exposed test points; matching voltage on both sides generally indicates continuity, while voltage on one side indicates an open fuse.
You will know the fuse repair worked when the new fuse remains intact and the USB port powers a known-good device. Do not install a higher-rated fuse. A 10-amp fuse replaced with a 15- or 20-amp fuse can allow wiring to overheat before the fuse opens.
| Fuse result | Likely meaning | Correct response |
|---|---|---|
| Fuse link open, replacement survives | Temporary overload or short event | Retest all functions |
| New fuse opens immediately | Active short circuit | Stop replacing fuses and inspect wiring |
| Fuse tests good, port remains dead | Module, harness, converter, or ground fault | Measure connector power |
| Correct fuse cannot be identified | Manual or wiring diagram required | Use manufacturer documentation |
| Several accessory systems fail | Shared circuit or body-control fault | Professional diagnosis is appropriate |
Step 4: Measure Power at the Connector
Measure voltage at the rear connector only if you can expose it without disturbing airbag wiring or other safety systems. The factory wiring diagram is necessary because connector pin positions and voltage paths differ between vehicles.
Set a digital multimeter to DC voltage and use the manufacturer’s connector pinout. A powered circuit may show approximately 12 volts on the vehicle-side supply before the USB module converts it, while the module’s USB output should be close to 5 volts. Do not assume the visible USB contacts are safe probe points.
A power reading with no data connection points toward damaged data conductors, a defective USB module, incompatible software, or an infotainment fault. No power at the module input points toward the fuse, ground, wiring harness, connector, or body-control module.
Never back-probe connectors containing yellow airbag wiring or work near an airbag connector without the required service procedure. Shorting an infotainment connector can damage a head unit, and a shorted module can produce symptoms beyond a dead USB socket.
Step 5: Replace the USB Module
Replace the factory USB module when the correct fuse is good, the connector receives the specified supply and ground, and a known-good cable and device still fail. Buy a module matched by vehicle year, trim, connector shape, port count, data capability, and original-equipment part number.
Typical replacement steps are:
- Obtain the wiring diagram and trim-removal instructions for the exact vehicle.
- Save radio presets and confirm any battery-disconnection requirements.
- Switch off the ignition, remove the key or disable the vehicle’s proximity key system, and disconnect the negative battery terminal when the service procedure requires it.
- Wait the manufacturer-specified discharge period before handling connectors.
- Use nylon trim tools to release the console or dashboard bezel.
- Remove retaining screws or clips without pulling on the wiring harness.
- Press the connector lock and unplug the old USB module.
- Compare the replacement module’s housing, pins, and connector with the original.
- Connect the replacement until the locking tab clicks.
- Reinstall the module and trim, reconnect the battery, and complete any required initialization.
The module replacement is successful when the part sits flush, the connector locks, the port charges, and the infotainment system recognizes a supported phone or media device. A common mistake is buying a visually identical charging module that lacks the data circuitry required for CarPlay or Android Auto.
Some vehicles use a USB socket module that communicates directly with the head unit. Others route the socket through a separate hub, media interface, or body-control module. Replacing the visible socket will not repair a damaged upstream hub.
What If Charging Works but CarPlay Does Not?
Charging without Apple CarPlay or Android Auto usually indicates a data-path problem rather than a total power failure. The most common causes are a charge-only cable, damaged data conductors, an unsupported port, phone permissions, infotainment software, or a failed data section inside the USB module.
Use a short, manufacturer-certified data cable and remove adapters, splitters, and extensions. Confirm that the phone unlocks, accepts the vehicle prompt, and has CarPlay or Android Auto enabled. Test the port identified in the manual as the primary smartphone interface because rear charging sockets frequently lack data lines.
If a second phone also charges but fails to connect, inspect the port for bent data contacts and check the module or head-unit connection. A wireless CarPlay vehicle may reserve the USB port for setup, updates, or charging, while a charging-only port cannot be converted into a data port by changing the cable.
The diagnostic boundary is simple: power proves that the power circuit works, not that the data circuit works.
How Do You Fix an Intermittent Port?
An intermittent car USB port usually has a loose socket, partially disengaged connector, damaged cable, oxidized contact, or wiring harness that moves with console vibration. A connection that fails when the plug moves but works when held in one position strongly suggests mechanical contact or harness damage.
With the vehicle parked, observe whether the plug fits loosely compared with another port. Gently move the cable near the connector without forcing the socket; if charging or data drops out, stop using the port until it is repaired because continued movement can worsen a cracked solder joint or loose module.
Inspect the rear connector after removing the trim according to the service manual. Look for pushed-back terminals, broken locking tabs, stretched wires, green corrosion, and harness tension. Do not tape over a loose terminal as a permanent repair. The terminal may need correct re-pinning or the complete module may be more reliable.
A port that fails only during engine cranking may be responding to normal voltage interruption or a weak battery. A port that fails while driving requires mechanical inspection.
Why Does Only One USB Port Work?
One working port usually means the vehicle uses separate modules, separate fuses, or different power and data functions. For example, the front console port may support media data while the rear ports provide charging only, so identical-looking sockets can have different capabilities.
| Symptom pattern | Most likely area | First test |
|---|---|---|
| Front data port dead, rear charging works | Front module or shared infotainment fuse | Test front-port fuse |
| Rear ports dead, front works | Rear module or rear accessory fuse | Check rear fuse |
| All ports dead, radio also fails | Shared fuse, head unit, or body module | Check manual fuse map |
| One port charges slowly | Cable, low-current module, contamination | Test certified cable |
| One port disconnects over bumps | Loose socket or harness | Inspect mechanical fit |
Compare the port symbols and manual descriptions before assuming a replacement is needed. Replacing a rear charging-only socket with a data-capable part may still fail if the vehicle wiring lacks a connection to the infotainment head unit.
Can You Upgrade to USB-C?
A USB-A socket can be replaced with USB-C only when the vehicle module, wiring, data protocol, mounting, and power requirements are compatible. A USB-C-shaped replacement does not automatically provide USB Power Delivery, faster charging, or Apple CarPlay.
| Upgrade type | Typical cost | Data support | Main limitation |
|---|---|---|---|
| USB-C charging adapter in 12V socket | $15-$45 | No factory data | Occupies accessory socket |
| Vehicle-specific USB-C module | $40-$150 | Depends on harness and head unit | Requires exact compatibility |
| Universal flush-mount USB-C charger | $25-$80 | Usually no infotainment data | May require wiring modification |
| OEM retrofit with hub | $100-$400 | Possible, vehicle dependent | Coding and trim work may be needed |
Check the replacement manufacturer’s wiring diagram and the vehicle’s supported current before installing a retrofit. A higher-output USB-C module can overload a circuit designed for a lower-rated factory converter, while an incompatible module may create noise, heat, or communication faults.
Which Repair Option Makes Sense?
The best repair depends on whether the goal is charging, factory data, appearance, or minimum risk. Cleaning and fuse replacement are appropriate first steps, while a 12V adapter is a practical charging solution when factory data is unnecessary.
| Option | Typical cost | Time | Restores factory data? | Best use |
|---|---|---|---|---|
| Clean existing port | $0-$10 | 5-10 minutes | Yes, if contamination caused fault | Visible debris or poor seating |
| Replace fuse | $1-$5 | 10-15 minutes | Yes, if fuse was the fault | Sudden total power loss |
| Replace USB module | $20-$150 | 30-90 minutes | Usually, with exact part | Failed socket or converter |
| Repair harness | $50-$250 | 1-3 hours | Yes, if correctly repaired | Loose or damaged wiring |
| Install 12V adapter | $15-$45 | 2-5 minutes | No, usually | Charging without dashboard work |
| Dealer or auto electrician | $100-$300 typical | 1-3 hours | Diagnosis dependent | Complex electronics or warranty |
The 12V adapter is not a repair for a failed infotainment port. It is an alternative power source that may deliver faster charging than an old factory socket but generally cannot carry the vehicle’s CarPlay or Android Auto data connection.
How Much Does Repair Cost?
A fuse or cleaning repair typically costs $0-$15 in parts, while a factory USB module commonly costs $20-$150 before labor. Professional diagnosis and installation often totals $100-$300, with premium vehicles, coded modules, damaged trim, or inaccessible wiring increasing the bill.
Typical cost factors include the vehicle’s age, whether the port is a replaceable module, access time, OEM versus aftermarket part quality, and whether the fault is upstream in the head unit. A USB socket integrated into a large media hub can cost substantially more than a simple console insert.
Ask a repair shop whether the quoted diagnosis includes a wiring test. Replacing a port without checking the fuse, ground, and data path can produce a second parts bill without resolving the fault.
Common Mistakes and How to Fix Them
Installing a larger fuse
A larger fuse does not make a weak USB circuit safer or more powerful. Remove the incorrect fuse, install the specified rating, and investigate any repeated failure.
Probing USB contacts with metal
Metal probes can short the 5-volt output or bend contact springs. Use the vehicle connector pinout and insulated meter probes instead.
Buying a charging-only replacement
A charging module may fit the dashboard while eliminating factory data functions. Match the original part number and verify CarPlay or Android Auto compatibility.
Pulling trim with a screwdriver
Metal tools scratch soft dashboard plastics and can damage clips or wiring. Use nylon trim tools and consult the vehicle’s panel sequence.
Disconnecting the battery without preparation
Battery disconnection can erase settings and may require initialization. Save settings, follow the service manual, and avoid connectors associated with restraint systems.
Replacing a fuse repeatedly
A new fuse that opens immediately signals a short, damaged module, or wiring fault. Repeated replacement increases risk and does not diagnose the cause.
When Should You Stop DIY Work?
Stop DIY work when a replacement fuse blows immediately, the port is hot, the harness smells burnt, water has entered the console, or yellow restraint-system wiring must be moved. Professional diagnosis is also appropriate when the head unit reboots, several unrelated accessories fail, or a battery-disconnection procedure requires security coding.
A competent automotive electrician can trace supply voltage, ground integrity, harness continuity, and data communication using a wiring diagram and suitable test equipment. An infotainment specialist may be needed when the port tests correctly but the head unit cannot enumerate a known-good device.
Do not attempt to repair a damaged USB module while the vehicle is wet or while exposed connectors are energized. The cost of a diagnostic visit is lower than the cost of a damaged head unit, body-control module, or electrical fire.
Frequently Asked Questions
Can a dead car USB port drain the battery?
A failed USB module can contribute to battery drain if an internal converter or control circuit remains active after the vehicle shuts down. A normal port should enter its vehicle-defined sleep state. If the battery goes flat overnight after USB failure, measure parasitic draw rather than replacing fuses at random.
Why does the car USB port work only when the engine runs?
Some vehicles power accessory circuits only in the accessory or run position, while others reduce or remove power during startup to protect the battery. If the port works with the engine running but not in accessory mode, check the owner’s manual before treating the behavior as a fault.
Can a phone charger blow the car USB fuse?
A defective cable, damaged phone connector, incompatible adapter, or shorted USB accessory can open the fuse. A normal phone should not blow the correctly rated circuit. Disconnect every accessory, install the specified fuse once, and identify which device causes the failure.
Is a wireless charger a replacement for a broken USB port?
A wireless charging pad can replace the charging function but not necessarily the wired data function. Wireless CarPlay or Android Auto requires vehicle and phone support, and many wireless pads still need a working USB connection for power or setup.
Can water damage to a USB port be repaired?
Minor surface moisture may dry safely after power is removed, but liquid that reaches the module or harness can cause corrosion later. Disconnect power, do not test repeatedly, and have the connector and module inspected if the port becomes hot, intermittent, or discolored.
Does a new cable fix Android Auto or Apple CarPlay?
A new certified data cable fixes many connection failures caused by broken data conductors or poor shielding, but it cannot repair a failed vehicle module, unsupported port, phone permission problem, or infotainment software fault. Test the cable with a second device before replacing hardware.
Conclusion: How to Fix USB Port in Car
To fix a USB port in a car, begin with a known-good data cable and second device, inspect and clean the socket, identify and test the correct fuse, and then measure the module’s power and ground when necessary. Replace the exact USB module only after those checks, or use a 12V adapter when charging is the only requirement.