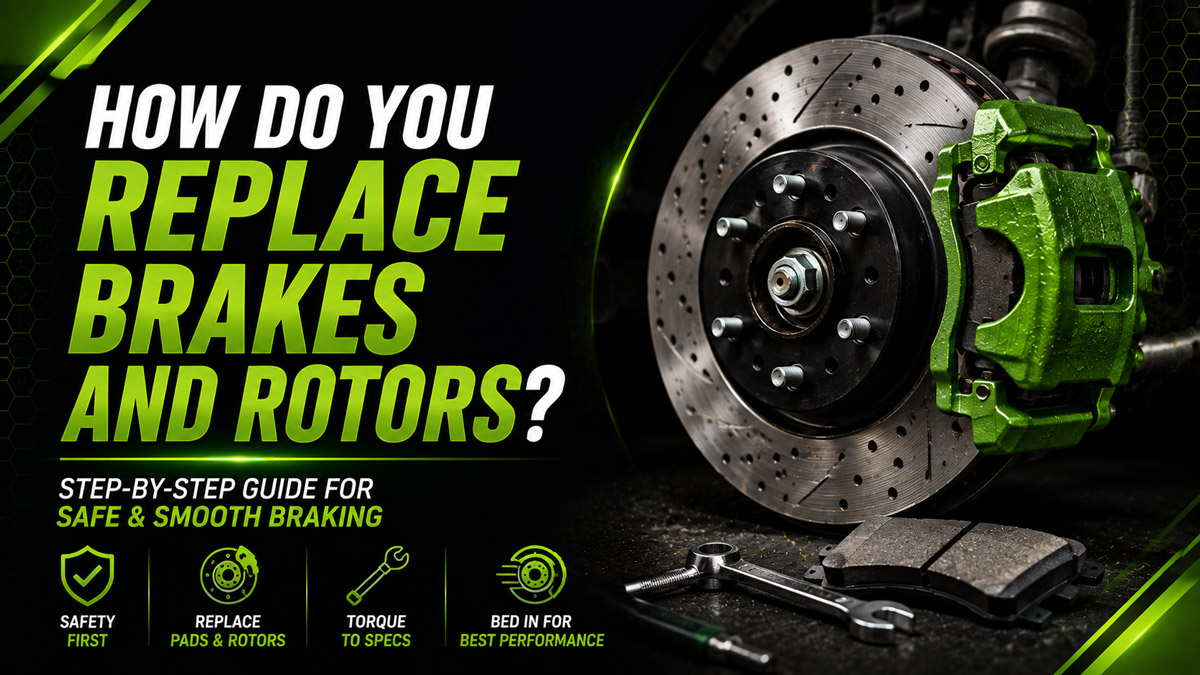
To replace brakes and rotors, secure the vehicle on jack stands, remove the wheel and caliper, replace the rotor and pads, reset the caliper piston, torque every fastener to the vehicle manufacturer’s specification, pump the brake pedal, and bed the new friction surfaces. A first-time brake job usually takes 1.5–3 hours per axle, with correct torque and clean hub preparation determining whether the repair stops smoothly.
Key Facts at a Glance
- Brake pads and rotors should normally be replaced in axle pairs, not on only one side.
- A vehicle must rest on correctly positioned jack stands before brake components are removed.
- Caliper bracket, caliper, and wheel-lug torque values are vehicle-specific.
- The caliper must never hang from its flexible brake hose.
- Rust trapped between the hub and rotor can cause lateral runout and pedal pulsation.
- The brake pedal must be pumped until firm before the vehicle moves.
Before You Start
Typical time: 1.5–3 hours per axle for a first-timer
Difficulty: Intermediate
Typical DIY cost: $100–$300 per axle
Professional cost: Approximately $350–$600 per axle at many independent shops and $600–$1,200 or more at some dealerships
Brake work is safety-critical. Stop and use a qualified technician when the vehicle has damaged brake hoses, leaking calipers, severely corroded hydraulic fittings, an unidentified electronic parking-brake procedure, or a pedal that remains soft after the repair.
Tools and Materials
- 1 vehicle-specific set of brake pads
- 2 matching rotors for one axle
- 1 floor jack with adequate capacity
- 2 properly rated jack stands
- 2 wheel chocks
- 1 lug wrench or impact wrench
- 1 calibrated torque wrench
- Ratchets, sockets, hex bits, or Torx bits as required
- 1 caliper piston compression tool or suitable clamp
- 1 brake-piston wind-back tool for applicable rear calipers
- 1 caliper hanger, S-hook, or strong wire
- 1 wire brush or hub-cleaning tool
- 1 can of non-chlorinated brake cleaner
- High-temperature brake lubricant
- Silicone-based brake grease for compatible slide pins
- Safety glasses, mechanic’s gloves, and a dust mask
- Vehicle service information containing exact torque values
Do not rely on broad torque ranges when exact specifications are available. Caliper bracket bolts, guide-pin bolts, rotor-retaining screws, and wheel lugs can require substantially different torque values between vehicles.
Confirm That Pads and Rotors Need Replacement
Inspect the system before buying or installing parts. Typical new brake pads measure approximately 10–12 mm, while many pads require replacement around 2–3 mm, although manufacturer limits take priority.
Replace a rotor when it is below the minimum or discard thickness stamped on the rotor, deeply scored, cracked, heat-spotted, severely rusted, or unable to remain within runout specifications. A rotor that looks smooth may still be too thin to reuse safely.
How Do Disc Brakes Stop the Vehicle?
A disc-brake system converts the vehicle’s kinetic energy into heat. Pressing the pedal creates hydraulic pressure in the master cylinder, the pressure moves the caliper piston, and the piston clamps the pads against both sides of the rotating rotor.
The resulting friction slows the rotor, hub, wheel, and vehicle. Because braking creates substantial heat, pad material, rotor condition, caliper movement, installation accuracy, and cooling capacity all affect stopping performance.
Step 1: Park and Secure the Vehicle
Park on flat, solid concrete, shift into Park or first gear, switch off the ignition, and chock the wheels that will remain on the ground. Consult the owner’s or service manual for approved lifting and support points.
Loosen each wheel lug nut about one-half turn before raising the vehicle. Do not fully remove the lug nuts while the tire is supporting the vehicle.
Raise the vehicle with a floor jack and lower it securely onto jack stands. Give the vehicle a controlled push at a solid body point to confirm stability before working near or beneath it.
Success checkpoint: The vehicle remains stable, the stands sit squarely on solid ground, and the raised wheel is clear of the surface.
Common mistake: Supporting the vehicle with only a hydraulic jack. A jack can leak down or move unexpectedly and is not a substitute for jack stands.
Step 2: Check the Brake Fluid Reservoir
Open the hood and inspect the brake fluid level before compressing any caliper piston. Pushing the piston inward returns fluid to the master-cylinder reservoir and may cause an overfilled reservoir to spill.
Remove a small amount of fluid with a clean fluid extractor only when the level is near the cap and piston compression would cause overflow. Do not reuse extracted fluid, and prevent brake fluid from touching painted surfaces.
Do not leave the reservoir open longer than necessary because brake fluid absorbs moisture from the air.
Success checkpoint: The fluid level leaves enough space for displaced fluid without dropping below the minimum mark.
Common mistake: Removing fluid automatically when the level is already low. Low fluid may indicate pad wear or a leak that requires diagnosis.
Step 3: Remove the Wheel and Inspect the Brake
Remove the loosened lug nuts and wheel. Place the wheel flat beneath a safe section of the vehicle as secondary protection without interfering with your work.
Inspect the brake hose, caliper, rotor, dust shield, bleeder screw, and surrounding area. Look for wet fluid, torn slide-pin boots, uneven pad wear, blue heat marks, broken hardware, or a piston dust boot that is torn or displaced.
Compare the inner and outer pad thicknesses. A large difference often indicates seized guide pins, a sticking piston, or binding pad hardware rather than ordinary wear.
Success checkpoint: No hydraulic leak, structural damage, or condition requiring professional repair is present.
Common mistake: Installing new pads over a seized caliper. New friction material will wear rapidly and may overheat.
Step 4: Remove and Support the Caliper
Locate and remove the caliper guide-pin bolts using the correct socket, hex bit, or Torx bit. Hold the guide pin with a backup wrench when it spins.
Lift the caliper away without twisting or stretching the brake hose. Hang it from the suspension with a caliper hook or strong wire.
Never allow the caliper to hang by its rubber hose. The caliper’s weight can damage the hose internally even when the exterior still looks normal.
Success checkpoint: The caliper hangs securely with no tension, sharp bend, or twist in the brake hose.
Common mistake: Pressing the brake pedal while the caliper is removed. The piston may be forced out of its bore, causing fluid loss and requiring caliper repair.
Step 5: Remove the Old Pads and Bracket
Photograph the pad, clip, spring, and wear-indicator positions before disassembly. Remove the pads and stainless hardware from the bracket.
Unbolt the caliper mounting bracket when it blocks rotor removal. Bracket bolts are often tight and may require a breaker bar, penetrating oil, and careful counter-support.
Inspect the guide pins. Each pin should move smoothly, remain straight, and have an intact rubber boot. Clean reusable pins and replace corroded, pitted, bent, or seized parts.
Success checkpoint: The bracket and hardware are removed without damaging the brake hose, bleeder screw, or surrounding components.
Common mistake: Mixing guide pins. Some vehicles use different upper and lower pins, including one with a rubber damping sleeve.
Step 6: Remove the Old Rotor
Remove any rotor-retaining screw or clip. These fasteners hold the rotor during assembly but may be rusted and require an impact driver or penetrating oil.
Slide the rotor from the hub. When corrosion holds it in place, apply penetrating oil around the hub center and strike the rotor hat between the wheel studs with a dead-blow hammer.
Do not strike wheel studs, threaded surfaces, the dust shield, or reusable braking surfaces with a steel hammer. Some rear rotors contain a drum-style parking brake that must be retracted before the rotor can slide off.
Success checkpoint: The rotor comes off without damaging the hub, studs, parking-brake components, or wheel-speed sensor wiring.
Common mistake: Forcing off a rear rotor while the parking brake is applied or the internal shoes are caught on a wear ridge.
Step 7: Clean the Hub Face
Remove rust, scale, and debris from the wheel-hub face with a wire brush or hub-cleaning tool. Concentrate on the flat mounting surface and the hub’s center pilot.
The rotor must sit completely flush against the hub. Even a thin rust deposit can tilt the rotor enough to produce lateral runout, uneven pad transfer, steering-wheel shake, or pedal pulsation.
A very thin corrosion-resistant film may be used on the hub pilot when permitted by the manufacturer. Keep all lubricant away from the rotor face, wheel studs, lug seats, and friction surfaces.
Success checkpoint: The hub face is flat, clean, and free from raised rust deposits.
Common mistake: Cleaning only the visible outer area while leaving a rust ring around the center pilot.
Step 8: Clean and Install the New Rotor
Clean both sides of the new rotor with non-chlorinated brake cleaner and a lint-free towel. New rotors may carry protective oil that can contaminate pads and reduce initial braking.
Fit the rotor over the studs and against the clean hub. Reinstall the retaining screw when equipped, using the specified torque.
Temporarily hold the rotor flush with two lug nuts installed backward by hand. This prevents the rotor from shifting while the bracket and caliper are installed.
Success checkpoint: The rotor sits flat with no rocking, visible gap, or trapped debris.
Common mistake: Touching the cleaned friction surface with greasy gloves.
Step 9: Service the Bracket and Hardware
Clean rust from the caliper bracket beneath the stainless pad clips. Rust expansion under the clips can pinch the pad ears and prevent the pads from sliding freely.
Install new hardware when supplied. Apply a thin layer of approved high-temperature brake lubricant only where the pad ears contact the hardware and where the pad backing plates contact designated caliper points.
Use compatible silicone brake grease on guide pins when required. Do not put lubricant on the rotor face, pad friction material, wheel studs, lug-nut seats, rubber parts not approved for that lubricant, or the inside of the rotor hat.
Success checkpoint: The pads can move in their bracket contact points without excessive looseness or binding.
Common mistake: Applying a thick layer of grease. Excess lubricant attracts debris and can migrate onto friction surfaces.
Step 10: Reset the Caliper Piston
Place an old pad against the piston and compress a conventional front-caliper piston slowly with a piston tool or clamp. Watch the reservoir to prevent overflow.
Some rear pistons must be rotated while being pressed inward. Vehicles with an electronic parking brake may require a scan tool, dashboard sequence, or manufacturer-defined brake service mode before piston retraction.
Never force an electronic parking-brake piston with a clamp. Incorrect retraction can damage the actuator, gear mechanism, or caliper.
Open the bleeder only when following a proper fluid-control and bleeding procedure. If opened, prevent air from entering and use the manufacturer-specified brake fluid.
Success checkpoint: The piston retracts smoothly, the dust boot does not twist, and no fluid leaks appear.
Common mistake: Forcing a piston that resists movement. Strong resistance may indicate corrosion, a seized caliper, an unreleased parking brake, or the wrong retraction method.
Step 11: Install the New Pads and Caliper
Install the pads in the correct inner and outer positions. Place wear indicators, shims, springs, and clips exactly as specified for the vehicle.
Reinstall the caliper over the pads without pinching the piston boot. Clean the guide-pin bolt threads when required and start every bolt by hand to prevent cross-threading.
Torque guide-pin bolts to the vehicle-specific specification. Do not substitute a generic 20–35 ft-lb estimate unless that range is confirmed for the exact vehicle.
Success checkpoint: The caliper sits squarely, the hose is untwisted, and the guide pins move as designed.
Common mistake: Installing the caliper with a full twist in the hose after rotating it during removal.
Step 12: Torque the Caliper Bracket
Clean and inspect the bracket bolts before installation. Replace stretched, damaged, heavily corroded, or manufacturer-designated single-use bolts.
Apply thread-locking compound only when the service procedure calls for it. Some replacement bolts arrive with pre-applied locking compound, while other applications specify clean, dry threads.
Torque the bracket bolts with a calibrated torque wrench to the exact specification. Although many passenger vehicles fall somewhere near 70–110 ft-lb, trucks, performance cars, and compact vehicles may differ substantially.
Success checkpoint: Both bracket bolts reach specification smoothly without thread damage or movement in the mounting ears.
Common mistake: Tightening critical fasteners only with an impact wrench. Impact output is inconsistent and can under-tighten, over-tighten, or damage threads.
Step 13: Reinstall and Torque the Wheel
Remove temporary lug nuts, reinstall the wheel, and hand-thread every lug nut. Tighten them lightly in a star or crisscross pattern.
Lower the vehicle until the tire touches the ground enough to prevent rotation, then torque the lug nuts in stages using the specified pattern and value. Typical passenger-vehicle specifications may fall near 80–120 ft-lb, but the owner’s manual or service data controls.
Avoid oil, grease, or anti-seize on wheel studs unless the vehicle manufacturer specifically requires it. Lubricated threads can increase clamping force beyond the intended value at the same torque setting.
Success checkpoint: Every lug nut is torqued to specification and the wheel sits flush against the hub.
Common mistake: Fully tightening the first lug before seating the remaining lugs, which can prevent the wheel from centering correctly.
Step 14: Pump the Brake Pedal
Before starting the engine or moving the vehicle, press and release the brake pedal repeatedly until it becomes firm. The first few strokes move the retracted pistons and pads back toward the rotors.
Check the fluid reservoir and adjust the level with the exact specified brake fluid. Inspect every serviced caliper, hose, bleeder, and fitting for leakage.
Do not drive when the pedal remains soft, sinks toward the floor, or fails to become firm. A persistent soft pedal may indicate air, a leak, incorrect assembly, excessive mechanical clearance, or a hydraulic fault.
Success checkpoint: The pedal becomes consistently firm and no leaks appear.
Common mistake: Selecting Drive or releasing the parking brake before restoring pedal pressure.
Step 15: Test and Bed the New Brakes
Begin with a low-speed test in a safe, traffic-free area. Confirm that the vehicle stops straight without grinding, severe vibration, smoke, abnormal heat, or warning lights.
Follow the pad or vehicle manufacturer’s bedding procedure. A common procedure uses several controlled decelerations from moderate speed without coming to a complete stop, followed by a cooling drive, but required speeds and repetitions vary.
Avoid holding the hot pads against the rotors immediately after repeated hard stops. Stationary contact can create uneven pad deposits that feel similar to a warped rotor.
Success checkpoint: Braking remains smooth, predictable, quiet, and straight after the system cools.
Common mistake: Performing aggressive emergency stops immediately without checking the manufacturer’s bedding instructions or surrounding traffic.
Common Mistakes and How to Fix Them
| Problem | Likely cause | Corrective action |
| Pedal remains soft | Air, leak, open bleeder, or incorrect assembly | Do not drive; inspect for leaks and bleed the system correctly |
| Pedal pulsates | Rust beneath rotor, runout, uneven deposits, or damaged rotor | Clean the hub, measure runout, and correct rotor seating |
| Vehicle pulls during braking | Binding pad, seized slide pin, sticking caliper, or contamination | Compare both sides and repair the mechanical fault |
| One wheel becomes extremely hot | Seized piston, pin, pad, hose, or parking-brake mechanism | Stop driving and diagnose the dragging brake |
| Grinding continues | Pad installed incorrectly, backing plate contact, or foreign material | Disassemble and inspect before further driving |
| Pads wear unevenly | Restricted caliper movement or damaged hardware | Service or replace the affected caliper, pins, boots, and clips |
| Rotor will not come off | Rust, retaining screw, or internal parking-brake shoes | Remove retainers, retract shoes, and break corrosion carefully |
Expert Rule: Uneven Wear Is a Symptom
Installing pads and rotors does not repair a sticking caliper. When one pad is significantly thinner than its partner, find the restricted component before installing new friction parts.
Expert Rule: Rotor “Warp” Is Often Misdiagnosed
Brake pulsation is frequently caused by lateral runout or uneven friction-material deposits rather than a rotor physically bending from heat. A clean hub, correct wheel torque, and proper bedding reduce these problems.
Expert Rule: More Grease Is Not Better
Brake lubricant belongs only on approved moving or contact surfaces. Excess grease can swell incompatible rubber, collect abrasive grit, reduce friction, and contaminate pads.
How Does the Process Change on Rear Brakes?
Rear brake replacement may require piston rotation, parking-brake adjustment, or electronic service mode. Identify the caliper design before applying compression force.
Rear Screw-In Pistons
Some rear calipers use a threaded piston connected to the parking-brake mechanism. Retract these pistons with the correct wind-back tool while aligning any piston notches as required by the pad design.
Electronic Parking Brakes
Electronic parking brakes may require a scan tool or a vehicle-specific dashboard sequence. Enter service mode before removal and complete the prescribed initialization after reassembly.
Drum-in-Hat Parking Brakes
Some rear rotors contain small parking-brake shoes inside the rotor hat. Release the parking brake and retract the shoe adjuster when a wear ridge prevents rotor removal.
Which Pads and Rotors Should You Choose?
The best combination depends on vehicle use, noise tolerance, heat load, dust preference, and manufacturer requirements.
| Combination | Best use | Advantages | Limitations |
| Ceramic pads with blank rotors | Commuting and daily driving | Quiet operation, low visible dust, long service life | Often costs more and may provide less initial cold bite |
| Semi-metallic pads with blank or slotted rotors | Trucks, towing, repeated heavy braking | Strong heat tolerance and braking response | More noise, dust, and rotor wear |
| Performance pads with slotted rotors | Spirited road use | Consistent response under elevated temperatures | Greater noise, cost, and wear |
| Track pads with performance rotors | Closed-course driving | High-temperature friction capability | Poor street manners and potentially weak cold performance |
Drilled or drilled-and-slotted rotors are not automatically an upgrade for normal street driving. Low-quality drilled rotors may crack around the holes, and many commuters gain more from a high-quality blank rotor and vehicle-appropriate pad compound.
How Much Does Brake and Rotor Replacement Cost?
DIY brake-pad and rotor replacement typically costs approximately $100–$300 per axle for common passenger vehicles. Larger trucks, premium vehicles, performance brake packages, and high-end coated rotors may cost substantially more.
Independent-shop replacement commonly falls around $350–$600 per axle, while some dealership repairs reach $600–$1,200 or more. Calipers, hoses, parking-brake parts, damaged wheel bearings, seized bolts, brake-fluid service, and electronic calibration can increase the final price.
When Should You Not Replace Brakes Yourself?
Do not perform a first-time DIY brake replacement when the procedure requires opening hydraulic lines, programming brake modules, repairing stripped mounting threads, handling severe corrosion, or diagnosing a pedal that sinks under steady pressure.
Professional service is also appropriate when you lack a safe lifting surface, rated stands, a calibrated torque wrench, exact service information, or a reliable method for retracting an electronic parking brake.
A brake repair is not successful merely because the parts fit. The vehicle must produce a firm pedal, leak-free hydraulics, balanced stopping, correct fastener clamping, and normal wheel temperature.
Frequently Asked Questions
Should brake pads and rotors be replaced on both sides?
Brake pads and rotors should normally be replaced on both sides of the same axle. Matching left and right friction components helps maintain balanced stopping force, consistent heat capacity, even bedding, and predictable stability during hard braking.
Do you need to bleed brakes after changing pads and rotors?
Brake bleeding is usually unnecessary when no hydraulic fitting or bleeder screw was opened and the system did not run low on fluid. Bleeding is required when air entered the system, a hose or caliper was disconnected, or the pedal remains soft because of trapped air.
Can you replace brake pads without replacing rotors?
Brake pads may be replaced without rotors when the rotors remain above minimum thickness, have an acceptable surface, meet runout limits, and comply with the manufacturer’s reuse criteria. Deep grooves, cracks, severe corrosion, heat damage, excessive runout, or insufficient thickness require rotor replacement.
How long do new pads and rotors take to bed in?
Initial bedding can occur during a manufacturer-defined series of controlled stops, but complete stabilization may require additional normal driving and heat cycles. Avoid unnecessary emergency braking during the early period, but never compromise safety to protect new friction surfaces.
Why does the brake pedal feel low after replacement?
A low pedal immediately after replacement usually means the caliper pistons have not yet moved the pads against the rotors. Pump the pedal before moving the vehicle. A pedal that remains low or soft after repeated pumping may indicate air, leakage, incorrect assembly, or excessive clearance.
Should the brake fluid cap be open when compressing pistons?
The cap does not normally need to remain fully open. Monitor the reservoir and prevent overflow as fluid returns from the caliper. Brake fluid absorbs moisture, so minimize exposure and reinstall the cap after confirming the correct level.
The Bottom Line
How do you replace brakes and rotors correctly? Secure the vehicle, inspect the complete braking system, remove and support the caliper, clean the hub, install clean rotors and properly lubricated hardware, reset the pistons using the correct method, torque every fastener to specification, restore pedal pressure, check for leaks, and complete the required bedding procedure.
The most important details are not speed or tool count. Clean rotor seating, unrestricted caliper movement, correct vehicle-specific torque, and a firm pedal determine whether the vehicle stops safely and smoothly.