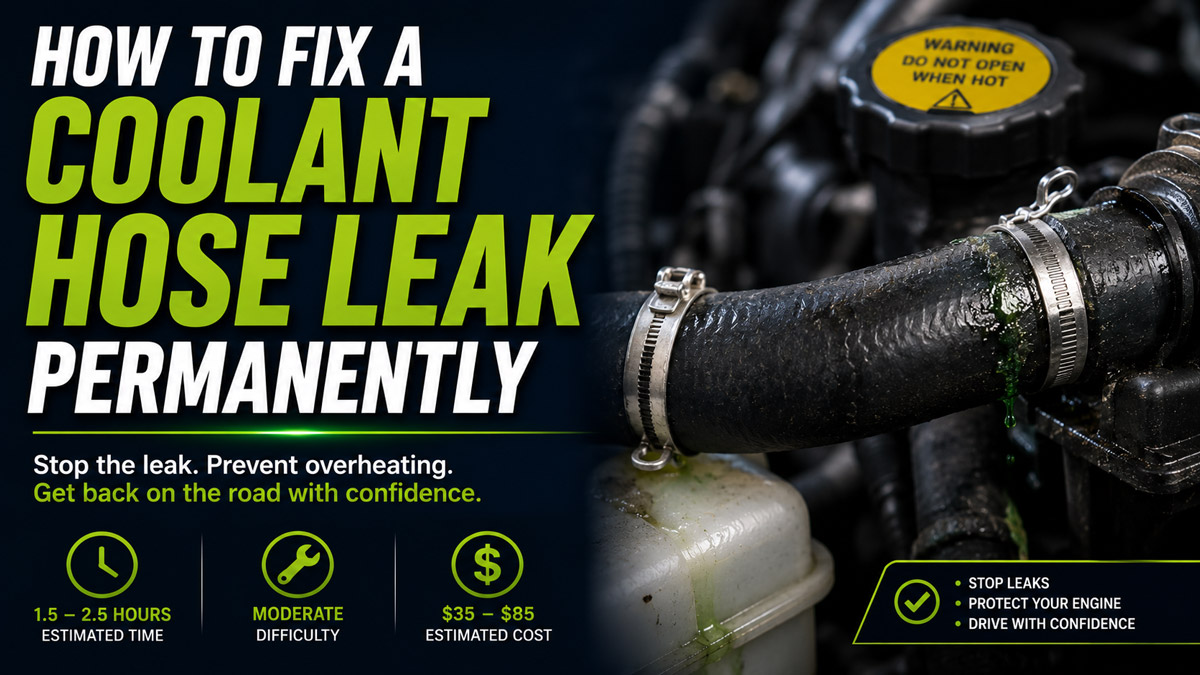
To fix a coolant hose leak, you must replace the damaged rubber, secure new clamps, and properly bleed the system of trapped air. This six-step process takes roughly two hours and moderate mechanical skill, with success depending entirely on ensuring an airtight seal and a perfectly bled cooling system.
Before You Start
Time Required: 1.5 to 2.5 hours (includes 60–90 minutes of required cool-down time). Difficulty Level: Moderate (4/10). Estimated Cost: $35 to $85.
Tools and Materials:
- [ ] 1 Exact-fit OEM or vehicle-specific replacement coolant hose.
- [ ] 2 New clamps (constant-tension spring clamps preferred, or 100% stainless steel worm-gear clamps).
- [ ] 1–2 Gallons of vehicle-specific 50/50 pre-diluted antifreeze.
- [ ] 1 Large, low-profile drain pan (minimum 2-gallon capacity).
- [ ] 1 Set of flexible hose clamp pliers (or a 5/16-inch socket / flathead screwdriver).
- [ ] 1 Utility knife with a fresh blade.
- [ ] 1 Funnel (a spill-free cooling system funnel kit is highly recommended).
- [ ] Nitrile gloves and ANSI-rated safety glasses.
- [ ] 3–5 Shop towels and kitty litter (for spill management).
Prerequisites: You must be working on a flat, level surface. Do not attempt this on a hot engine.
Step 1: Cool the Engine and Clear Obstructions
Park the vehicle on a level surface, turn off the ignition, and let the engine sit for at least 60 to 90 minutes. Open the hood to expedite cooling and use an 8mm or 10mm socket to remove any plastic engine covers, splash shields, or air intake tubes blocking access to the leaking hose. Verify the leak is actually the hose—look for white crusty residue or wet spots directly on the rubber, ensuring it isn’t dripping down from a cracked thermostat housing above it. You’ll know it worked when: You can rest your bare hand on the radiator cap and the leaking hose without flinching, and you have a clear line of sight to both hose clamps. Common mistake: Assuming the system is depressurized just because the gauge reads “Cold.” Always squeeze the upper radiator hose; if it feels rock-hard, the system is still pressurized.
Step 2: Drain the Coolant Safely
Slide your 2-gallon drain pan directly beneath the radiator’s petcock (drain valve) located at the bottom corner of the radiator. Twist the petcock counterclockwise by hand or with pliers to initiate the flow, then slowly unscrew the radiator cap up top to break the vacuum and speed up the draining process. If your radiator lacks a petcock, position the pan under the lower radiator hose, loosen its clamp, and carefully pry the hose back just enough to let fluid steadily weep out. You’ll know it worked when: The coolant level drops completely below the level of the hose you intend to replace, and the flow slows to an occasional drip. Common mistake: Splashing toxic coolant onto the ground. Coolant is deadly to pets and wildlife. Place cardboard under the pan, use kitty litter on spills immediately, and never leave open pans unattended.
Step 3: Remove the Damaged Hose
Use hose clamp pliers to squeeze and slide the old spring clamps 2 to 3 inches toward the center of the hose, entirely off the connection fittings. Grip the hose near the fitting, twist it firmly left and right to break the heat-cycled rubber seal, and pull it straight off. If it refuses to budge, use your utility knife to cut a 2-inch lengthwise slit in the rubber starting at the tip, then peel the hose open like a banana. You’ll know it worked when: The old hose is completely detached, and the engine/radiator connection stubs are fully exposed. Common mistake: Prying against a plastic radiator neck with a flathead screwdriver. Plastic fittings become extremely brittle from engine heat; levering a tool against them will snap the neck, instantly turning a $30 hose job into a $300 radiator replacement.
Step 4: Clean and Inspect the Fittings
Wipe down the exposed metal or plastic connection stubs with a clean, dry shop towel to remove old rubber deposits, scale, and greasy residue. Inspect the bare fittings closely with a flashlight; metal fittings should be free of heavy pitting, and plastic fittings must not have hairline cracks or missing chunks on the retaining lip. You’ll know it worked when: The fitting is completely smooth to the touch, ensuring the new rubber will mate perfectly flush against the surface. Common mistake: Using sandpaper, wire brushes, or abrasive pads on plastic radiator necks. This scores the plastic, creating microscopic channels that coolant will leak through under pressure.
Step 5: Install the New Hose and Clamps
Slide your two new clamps onto the center of the replacement hose, then firmly push each end of the hose onto its respective fitting until it bottoms out past the raised retaining ridge. Slide the clamps into position exactly 1/4 inch from the absolute ends of the hose. If using worm-gear clamps, rotate them so the screw heads point upward or outward before tightening, ensuring you can reach them with a socket later if they need adjustment; tighten them with a 5/16-inch socket until the rubber just begins to bulge slightly through the clamp slots. You’ll know it worked when: Both ends are seated past the retaining lips, the clamps are perfectly straight, and the hose routes naturally without kinks or rubbing against serpentine belts. Common mistake: Reusing old constant-tension spring clamps. They lose their clamping force after being expanded past their original resting point, guaranteeing a slow drip when the system pressurizes.
Step 6: Refill and Bleed the Cooling System
Insert a funnel into the radiator filler neck and slowly pour in the 50/50 pre-diluted coolant until it reaches the base of the neck, then leave the radiator cap off. Start the engine, turn the cabin heater to its Maximum Heat setting with the fan on Low, and let the vehicle idle. As the engine warms up and the thermostat opens (usually around 195°F/90°C), the coolant level will suddenly drop as the block gulps fluid; immediately top it off, watching for large air bubbles to burp out of the funnel. You’ll know it worked when: The cabin vents blow consistently scorching hot air, the upper radiator hose feels hot and pressurized to the touch, the cooling fans cycle on, and no more bubbles appear at the radiator neck. Common mistake: Skipping the heater step. If you leave the climate control off, the heater core valve stays shut, trapping a massive pocket of air inside the dashboard that will later cause erratic overheating.
Common Mistakes and How to Fix Them
The new hose is kinking when installed If the hose collapses or kinks sharply, you likely have the orientation backwards, or you bought a “cut-to-fit” universal flex hose instead of a molded OEM-style hose. Remove the hose, flip it end-to-end, and try again. If it still kinks, you must purchase the exact molded part for your engine code.
The connection leaks immediately upon filling If fluid weeps before the engine is even started, the clamp is either seated directly on top of the raised retaining ridge (rather than behind it) or the clamp is skewed at an angle. Drain fluid below the fitting, loosen the clamp, push the hose fully flush, align the clamp parallel to the hose end, and retighten.
The engine overheats after the repair This is the most common post-repair failure and indicates trapped air, not a faulty hose. Shut the engine off immediately and let it cool completely. Elevate the front of the vehicle safely on ramps to make the radiator neck the absolute highest point in the system, then repeat the 30-minute bleeding process in Step 6.
Stripping a worm-gear clamp If you tighten a worm-gear clamp with a screwdriver and it suddenly “pops” and spins freely, you have stripped the internal threading. The clamp is now useless. You must remove it entirely and replace it with a fresh clamp, tightening it with a nut driver or socket instead of a screwdriver to better gauge the torque.
Variations for Specific Situations
Replacing Heater Core Hoses Heater core hoses run from the engine block straight into the firewall. Access is notoriously tight. Because you are pulling against fragile copper or aluminum pipes hidden inside the dashboard, never twist violently or pull aggressively. Always use the “slit and peel” method (Step 3) to remove these, as snapping a heater core pipe requires removing the entire dashboard to fix.
Working with Constant-Tension Spring Clamps If your vehicle uses OEM spring clamps, standard pliers will slip and cause bloody knuckles. You must use specialized “remote action hose clamp pliers,” which feature a heavy-duty cable attached to a clamping mechanism. This allows you to squeeze the handle in open space while the tool compresses a clamp hidden deep in the engine bay.
How Long Does It Take and What Does It Cost?
- Total Time: Plan for a dedicated 1.5 to 2.5 hours. Actual labor is only 30 to 45 minutes. The remaining time consists of waiting for the hot engine to cool (60+ minutes) and waiting for the engine to idle up to operating temperature to properly bleed the system (20–30 minutes).
- Cost Range: $35 to $85. A high-quality molded radiator hose costs $15 to $35. Two gallons of pre-mixed, vehicle-specific OEM coolant will run $20 to $40. High-quality replacement clamps cost $5 to $10.
Frequently Asked Questions
Can I use tape to temporarily fix a coolant hose leak? Never use tape, sealants, or patches on a coolant hose. The cooling system operates at 15 to 20 PSI and reaches temperatures over 200°F (93°C). Heat and pressure will instantly blow out standard adhesives, causing a catastrophic coolant loss and potential engine failure.
Should I use 100% concentrated antifreeze or 50/50 mix? Always use a 50/50 mix of coolant and distilled water. Pure 100% antifreeze actually freezes at a higher temperature and transfers heat poorly. Buying pre-diluted 50/50 is easiest, but if you buy concentrate, you must dilute it yourself using strictly distilled water, never tap water.
Do I have to drain all the coolant to replace one top hose? No. You only need to lower the fluid level just beneath the physical location of the hose you are replacing. If you are replacing an upper radiator hose, draining about a half-gallon from the petcock is usually enough to clear the upper neck.
Why is my lower radiator hose collapsing when I rev the engine? A collapsing lower hose typically indicates a vacuum issue, usually caused by a failing radiator cap that isn’t allowing coolant to flow back from the expansion tank. Alternatively, the internal wire spring inside older lower hoses may have rusted away. Replace both the hose and the radiator cap.
How do I safely dispose of the old coolant? Pour the drained coolant into a sealable, clearly marked plastic container (like the empty jugs your new coolant came in). Take it to a local auto parts store, municipal hazardous waste facility, or quick-lube shop. Pouring it down the drain or into the soil is illegal and environmentally disastrous.
Knowing how to fix a coolant hose leak safely empowers you to handle one of the most common causes of automotive breakdowns. By taking the time to thoroughly clean your fittings, correctly index your new clamps, and patiently burp the air from the system, your repair will easily last the lifespan of the vehicle.