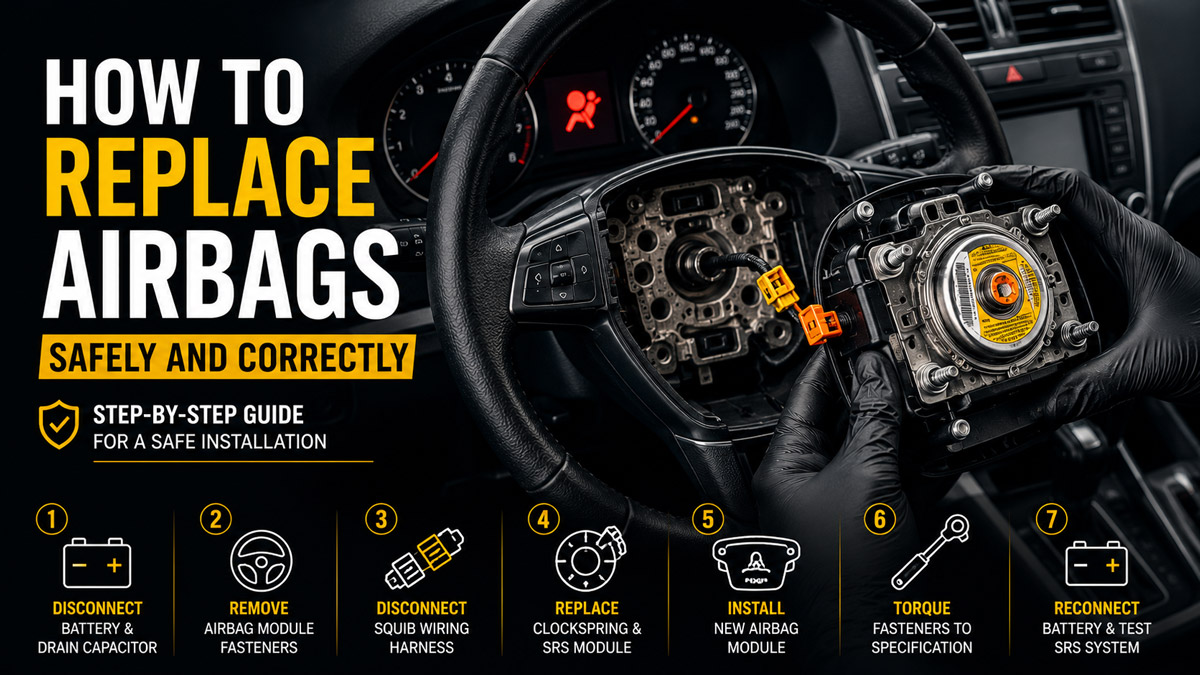
Learn how to replace airbags in seven exact steps, covering system deactivation, module removal, squib wiring disconnection, clockspring replacement, installation, and safe re-energization. This process takes roughly two hours and requires strict adherence to safety protocols. The single factor that most determines success is allowing the SRS backup capacitor to drain completely before starting.
Before You Start
- Time Required: 2 to 2.5 hours
- Difficulty: Advanced / Expert (Hazardous pyrotechnic task)
- Estimated Cost: $400–$1,200+ (Parts only; modules vary heavily by VIN)
- Tools and Materials Required:
- 1x Replacement Airbag Module (OEM certified matching your exact VIN)
- 1x Airbag Clockspring (If driver-side deployment occurred)
- 1x Airbag Control Module (SRS) (If deployment occurred)
- 1x 10mm Battery Terminal Wrench (Insulated)
- 1x Socket Set with Tamper-Proof Torx Bits (T25, T27, T30)
- 1x Low-range Torque Wrench (Capable of 5–10 Nm / 44–88 in-lbs)
- 1x OBD2 SRS Diagnostic Scan Tool (Bi-directional)
- 1x Pair Safety Glasses and Ear Protection
- Prerequisites: You must have the exact factory service manual for your specific year, make, and model to confirm torque specs and hidden clip locations. Wear 100% cotton clothing to prevent static electricity.
Phase 1: Deactivation and Removal
Step 1: Drain the SRS Backup Capacitor
Park the vehicle on level ground, point the wheels dead straight, and lock the steering wheel perfectly centered. Disconnect the negative battery cable using your 10mm insulated wrench, isolate the cable end with electrical tape, and set a timer for exactly 30 minutes.
You’ll know it worked when the 30-minute timer expires, guaranteeing the internal SRS backup capacitor has bled off all stored voltage.
Common Mistake: Beginning work immediately after disconnecting the battery. The SRS capacitor retains enough charge to deploy the airbag for up to 30 minutes, turning the module into a lethal projectile if you trigger a circuit.
Step 2: Release the Module Fasteners
Insert a flathead screwdriver or T25/T30 Torx bit into the access holes located on the rear plastic housing of the steering wheel. Press inward on the internal spring clips, or unthread the retaining bolts, until the airbag module pops forward from the wheel hub.
You’ll know it worked when the airbag module is loose and resting gently in the steering wheel cavity, held in place only by the rear electrical wires.
Common Mistake: Pulling the module violently toward you once the clips release. This will rip the delicate clockspring ribbon wires out of the squib connectors.
Step 3: Disconnect the Squib Wiring Harness
Touch a bare metal ground point on the door chassis to discharge your body’s static electricity, then use a small flathead pick to gently pull up the brightly colored (usually yellow or orange) Connector Position Assurance (CPA) locking tabs on the back of the module. Squeeze the sides of the harness and pull it straight backward to separate it from the inflator pins.
You’ll know it worked when the wiring harness pulls away smoothly with zero resistance, leaving the inflator pins exposed and undamaged.
Common Mistake: Prying against the fragile plastic connector body. Always carry the removed module with the manufacturer’s logo facing your chest, and place it on a workbench with the trim side facing UP.
Phase 2: Core Component Replacement
Step 4: Replace the Clockspring and SRS Module
Remove the central steering wheel nut, pull the steering wheel off the splines, and swap out the melted clockspring by unclipping it from the steering column. Bolt down the new SRS control module—typically located under the center console armrest—ensuring the metal casing makes direct contact with the bare chassis metal.
You’ll know it worked when the new clockspring’s alignment arrows point perfectly at 12 o’clock, and the SRS module is firmly torqued to the floor pan.
Common Mistake: Rotating the new clockspring before the steering wheel is installed. If the clockspring is not perfectly centered, the internal ribbon will snap the first time you turn the wheel to full lock.
Step 5: Install the New Airbag Module
Push the vehicle’s electrical harness squarely into the rear pins of the new airbag module, then press the yellow/orange CPA locking tab down until it sits completely flush with the connector housing. Align the module with the steering wheel cavity and push it straight in until the spring clips snap, or thread in your retaining bolts.
You’ll know it worked when you hear a definitive mechanical “click” from both the wiring harness CPA tabs and the structural spring clips.
Common Mistake: Leaving the CPA tab partially elevated. An unseated CPA tab creates an open circuit, triggering an instant SRS dashboard light.
Phase 3: Finalization and Testing
Step 6: Torque Fasteners to Specification
Tighten all retaining bolts using your low-range torque wrench to the exact specification listed in your factory manual. Torque settings typically range between 5 to 10 Newton-meters (44 to 88 inch-pounds).
You’ll know it worked when the torque wrench clicks at the specified load, and the panel gaps around the airbag trim sit completely flush with the steering wheel or dashboard.
Common Mistake: Over-tightening the bolts, which can crack the plastic module housing or warp the horn contact plates, causing the horn to stick on.
Step 7: Re-energize the System from Outside the Cabin
Turn the vehicle’s ignition key to the “ON” (Run) position while the battery is still disconnected. Stand completely outside the vehicle, reach into the engine bay, and firmly reconnect the negative battery cable to the terminal.
You’ll know it worked when the vehicle powers up and the SRS warning light illuminates on the dash for 5–7 seconds, then turns completely off, indicating a passed self-diagnostic check.
Common Mistake: Sitting in the driver’s seat while reconnecting the battery. If a pinched wire causes a short circuit and accidental deployment, you must be entirely clear of the deployment zone.
Common Mistakes and How to Fix Them
- Failure Mode: The SRS Light Stays On After Replacement
- Cause: High resistance / Open circuit. The yellow wiring connector is not fully seated, or the CPA locking tab is still open.
- Fix: Repeat Step 1 (drain capacitor). Unclip the module, inspect the tiny inflator pins to ensure they aren’t bent, and push the connector in firmly until the CPA tab locks flush.
- Failure Mode: “Component Incompatible” OBD2 Code
- Cause: The replacement module does not precisely match the vehicle’s VIN or specific trim-level option code.
- Fix: You cannot bypass this. You must obtain the correct part number verified against your VIN via an authorized dealership parts department.
- Failure Mode: Snapping Sound When Turning the Wheel
- Cause: The clockspring was misaligned during installation and the ribbon cable just snapped.
- Fix: The clockspring is permanently destroyed. You must purchase a new one, center the steering rack, and install the new unit without rotating the inner hub.
- Failure Mode: Standard Multimeter Triggers Deployment
- Cause: Checking continuity on the airbag pins with a standard digital multimeter sends a 9V current through the squib.
- Fix: Irreversible. Never test resistance across an airbag inflator. Only probe the vehicle-side wiring harness using an SRS-safe low-current DMM, never the module itself.
Variations for Different Vehicle Scenarios
- Passenger Side Dashboard Airbags: Instead of rear access holes, passenger modules require removing the glovebox assembly, A-pillar trim, and lower dash panels. The module is held by structural bolts firing upward from a heavy metal bracket into the dash pad.
- Side Curtain / Roof Airbags: Replacing these requires full removal of the interior headliner and upper pillar trims. The battery drain time remains exactly the same, but you must replace the one-time-use headliner clips, as standard clips will fail to hold the trim during a secondary deployment.
- Replacing Seat-Mounted Airbags: Requires completely unbolting the seat from the floorboard to access the underside wiring harness. The seat cover upholstery must often be replaced or restitched by a certified automotive upholsterer using specific breakaway thread.
How Long Does It Take and What Does It Cost?
- Time: A professional can replace a steering wheel module in 45 minutes. A first-timer should allocate 2 to 2.5 hours to account for the mandatory 30-minute power-down, careful trim removal, and reading the service manual.
- Cost:
- Steering Wheel Airbag: $200–$600 for the module.
- Passenger Dash Airbag: $400–$1,000+.
- Clockspring & SRS Module: $150–$400 combined.
- Scanner Tool: $100–$300 (must be capable of SRS module resetting).
Frequently Asked Questions
Can I reuse an airbag that didn’t fully deploy? No. Once the pyrotechnic squib receives an electrical charge, its chemical composition is compromised. Even if the bag did not burst through the trim, the inflator is unsafe and must be replaced entirely.
How do I dispose of a deployed or faulty airbag? Never throw an un-deployed module in the standard trash. It is classed as hazardous explosive waste. Take it to a local dealership, certified scrap yard, or fire department that has protocols for safe detonation and recycling.
Do I have to replace the seatbelts if the airbags deployed? Yes, in almost all modern vehicles. Seatbelts contain pyrotechnic pretensioners that fire simultaneously with the airbags to pull you tightly into the seat. Once fired, they lock permanently and must be replaced.
Can I clear crash data from an SRS module myself? Standard OBD2 scanners cannot wipe “hard” crash data written to the SRS module’s EEPROM chip during a collision. You must either buy a new module or mail the locked unit to a specialized automotive programming facility for a factory reset.