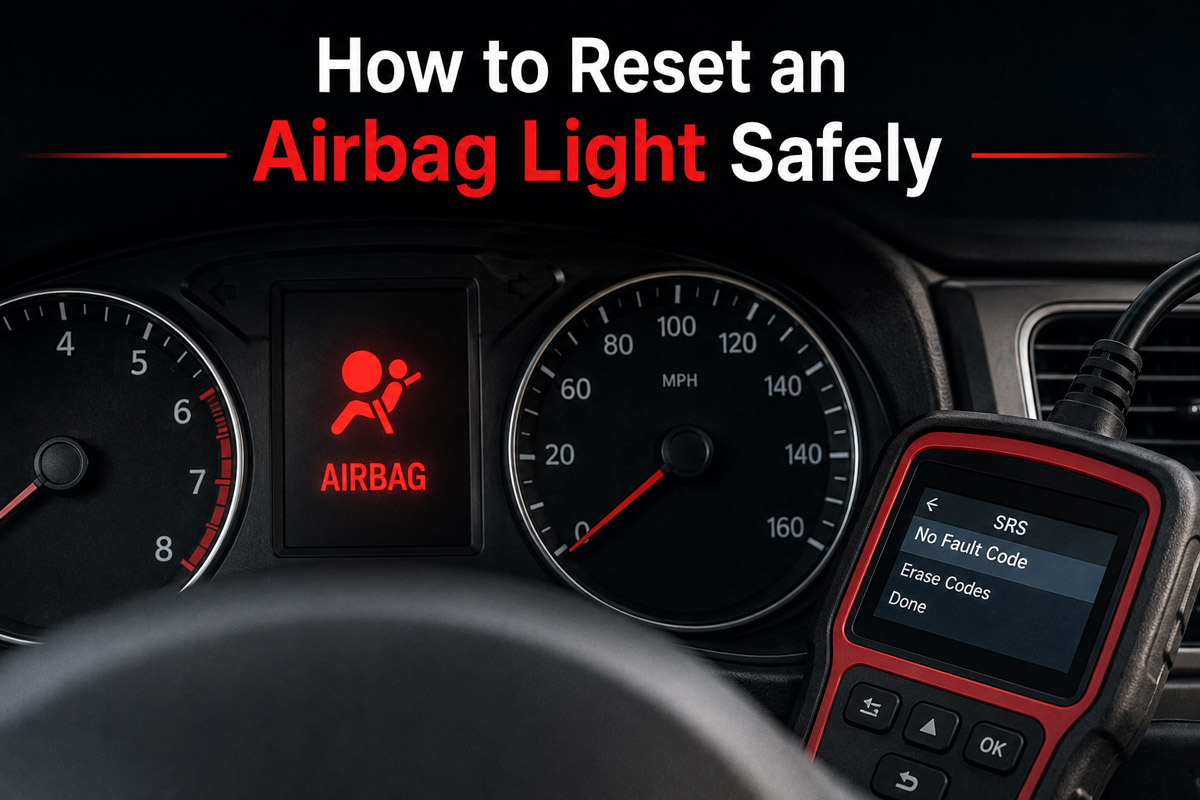
To learn how to reset an airbag light correctly, complete nine steps: confirm the warning, check battery voltage, scan the SRS module, interpret the code, disable the system if necessary, repair the fault, clear the code, run the startup self-test, and rescan. Allow 20–60 minutes for diagnosis; the identified fault determines success.
Safety warning: An illuminated SRS light can mean that one or more airbags, seat-belt pretensioners, occupant sensors, or related safety functions may not operate correctly. Manufacturer guidance commonly advises prompt inspection when the warning remains on.
Before You Start
Time required
- Code scan and reset after a completed repair: 10–20 minutes
- Simple inspection or connector-related repair: 30–90 minutes
- Clock spring, buckle, sensor, or wiring repair: 1–3 hours
- Post-collision restraint repair: Several hours or longer
Difficulty level
- Scanning and documenting codes: Beginner
- Clearing a repaired code: Beginner to intermediate
- Inspecting accessible harnesses: Intermediate
- Testing or repairing SRS circuits: Advanced professional work
- Replacing airbags or pretensioners: Professional only
Typical cost
- SRS-capable scan tool: Approximately $80–$300
- Professional diagnostic scan: Approximately $100–$200
- Simple connector or wiring repair: Approximately $100–$350
- Seat-belt buckle or clock spring repair: Approximately $200–$800
- Occupant sensor or control-module work: Approximately $400–$1,500+
- Post-deployment repair: Often $1,500–$6,000+, depending on how many restraint and interior components deployed or were damaged
These are broad planning ranges rather than quotes. Vehicle design, labor rates, calibration requirements, part availability, and the number of deployed components can move the final price substantially.
Tools and materials checklist
- One SRS-capable diagnostic scanner with coverage for the exact make, model, and year
- Vehicle-specific service information or repair manual
- Digital multimeter for ordinary battery and approved harness tests only
- 10 mm wrench or the correct battery-terminal tool
- Insulated trim tools if a panel must be removed
- Safety glasses
- Nitrile or mechanic’s gloves
- Flashlight
- Notebook or phone camera for recording codes and connector positions
- Battery maintainer, optional, when the scan session will be lengthy
- OEM-specified terminal cleaner or lubricant, only when the repair procedure calls for it
- Replacement connector locks, terminals, or harness sections, when required by the repair manual
Prerequisites
Before beginning, obtain:
- The vehicle identification number
- The exact year, make, model, and engine
- The owner’s manual
- The correct repair procedure for the stored code
- Radio or navigation security codes, when applicable
- Any settings that may be lost after battery disconnection
Do not begin restraint-system wiring work when you have only a generic engine-code reader. Generic OBD-II coverage normally focuses on emissions-related powertrain codes; your tool must list SRS, airbag, restraints, or supplemental inflatable restraint coverage for the vehicle.
Phase 1: Diagnose the Warning
Step 1: Confirm the Airbag Warning Pattern
Turn the ignition on and observe the airbag warning light from startup until the self-test ends.
Sit in the driver’s seat without touching anything under either front seat. Turn the ignition to ON or READY according to the vehicle’s normal starting procedure. Watch whether the SRS light:
- Never illuminates
- Illuminates briefly and turns off
- Remains illuminated
- Flashes in a repeating pattern
- Turns off initially but returns while driving
A healthy system generally illuminates the warning for several seconds during its startup check and then switches it off. For example, manufacturer documents for some Kia and Honda vehicles describe an approximately six-second check, but the exact timing varies by vehicle.
You’ll know this step worked when you have written down the precise behavior rather than merely recording “the light is on.”
Common mistake: Do not confuse the main SRS malfunction warning with the Passenger Airbag OFF indicator. The latter may operate normally when the passenger seat is empty, occupied by a light person, or affected by the occupant-classification system.
Step 2: Check Battery Voltage and Recent Events
Test the 12-volt battery and record what happened immediately before the warning appeared.
With the engine off and the vehicle rested, measure voltage across the battery posts. A fully charged conventional 12-volt battery is generally near 12.6 volts at rest. A substantially lower reading calls for battery testing or charging before further diagnosis.
Then record whether the warning appeared after:
- A dead battery or jump-start
- Battery replacement
- Alternator work
- Interior cleaning
- Moving a front seat
- Removing a seat
- Steering-wheel or column work
- Water intrusion
- A collision
- Airbag or seat-belt deployment
- Dashboard or audio installation
Check that the battery terminals are tight and free from obvious corrosion. Do not disconnect the battery yet; disconnecting power before scanning can erase useful non-SRS data or alter the conditions that caused an intermittent fault.
You’ll know this step worked when battery condition is acceptable and you have identified any event that may point toward a specific circuit.
Common mistake: Do not assume that disconnecting the battery will reset the airbag light. The restraint controller often retains fault information in nonvolatile memory, and an active failure will be detected again during the next self-test.
Step 3: Scan and Record Every SRS Code
Connect an SRS-capable scanner and save every code before clearing anything.
Locate the 16-pin diagnostic connector, normally beneath the driver’s side of the dashboard. With the ignition off, plug in the scanner. Turn the ignition to ON with the engine off unless the tool or manufacturer instructs otherwise.
Select the correct vehicle manually or allow VIN identification. Enter the menu labeled one of the following:
- SRS
- Airbag
- Restraints
- Supplemental Inflatable Restraint
- Supplemental Restraint System
- Occupant Classification System
Choose Read Codes, Read DTCs, or Health Scan. Record:
- The complete alphanumeric code
- The module that reported it
- Current, active, stored, history, or intermittent status
- Subcode or failure type
- Resistance, voltage, short-to-ground, or open-circuit description
- Freeze-frame or event information
- Battery voltage displayed by the tool
Photograph the scanner screen before leaving the code menu.
You’ll know this step worked when you can identify the exact module, code, subcode, and status without rescanning the vehicle.
Common mistake: Do not erase the codes as a diagnostic experiment. Clearing first can remove intermittent-fault information and make the original cause harder to reproduce.
Step 4: Match the Code to OEM Service Information
Look up the complete code and subcode in service information for the exact vehicle.
Do not diagnose by code title alone. A description such as “driver squib resistance high” identifies a circuit, not necessarily a failed airbag. Depending on the vehicle, that circuit may include:
- The steering-wheel airbag
- Clock spring or spiral cable
- Steering-column harness
- Intermediate connectors
- Connector locks and shorting bars
- Airbag control module
- Wiring between those components
Follow the diagnostic tree in order. Check technical service bulletins and recalls by VIN before purchasing parts. Clock springs, occupant-detection systems, wiring terminals, and control modules have been covered by manufacturer campaigns on some vehicles.
You’ll know this step worked when you have an OEM diagnostic sequence and know which connectors, tests, specifications, and replacement components apply.
Common mistake: Do not replace the component named in a generic code description without testing the rest of the circuit. A loose connector lock can produce the same resistance code as a damaged clock spring or inflator circuit.
Phase 2: Make the Repair Safely
Step 5: Decide Whether the Repair Is DIY-Safe
Stop and assign the repair to a qualified technician when it involves an inflator, pretensioner, control module, crash sensor, or deployment circuit.
A careful owner may reasonably:
- Read and document SRS codes
- Check 12-volt battery condition
- Inspect for visible objects interfering with seat wiring
- Confirm that an accessible connector is fully latched when the OEM procedure permits it
- Clear and verify a code after a properly completed repair
Use a trained technician for:
- Airbag module removal
- Seat-belt pretensioner replacement
- Clock spring diagnosis involving deployment-circuit testing
- Occupant-classification calibration
- Crash-sensor replacement
- SRS module programming
- Post-collision repair
- Damaged deployment-loop wiring
- Water-damaged SRS modules or connectors
Never use a test light, ordinary voltmeter, or ohmmeter directly across an airbag inflator or pretensioner connector. Manufacturer restraint procedures explicitly warn against testing pyrotechnic components with those instruments.
You’ll know this step worked when the planned repair remains within your tools, training, and the limits stated by the service manual.
Common mistake: Do not follow online advice that substitutes a resistor for an airbag, buckle, or pretensioner. That disables safety monitoring rather than repairing the vehicle.
Step 6: Disable the SRS Before Touching Its Wiring
Turn the ignition off, disconnect the battery as specified, and wait the manufacturer’s minimum reserve-energy time.
Complete this step only when the approved repair requires unplugging an SRS or occupant-detection connector.
- Park on level ground.
- Center the steering wheel.
- Switch the ignition completely off.
- Remove the key or move the smart key away from the vehicle.
- Open the driver’s window so the vehicle cannot lock you out.
- Record radio presets and security information.
- Disconnect the negative battery cable.
- Isolate the cable so it cannot spring back onto the terminal.
- Wait the exact period specified in the repair manual.
Many manufacturer service procedures specify at least three minutes after battery disconnection, but this is not universal. Use the interval for the exact vehicle rather than copying a generic time from another model.
Do not unplug an SRS or occupant-detection connector while the battery remains connected. Manufacturer guidance specifically warns against doing so.
You’ll know this step worked when the negative cable is physically isolated and the full OEM waiting period has elapsed.
Common mistake: Do not treat the waiting period as the reset itself. Its purpose is to allow restraint-system reserve energy to dissipate before wiring is handled.
Step 7: Repair the Diagnosed Fault
Repair only the component, connector, or wire identified by the diagnostic procedure.
For an under-seat connector fault
Slide the seat to the position specified in the manual without crushing or stretching the harness. Look for:
- A connector that is not fully seated
- A displaced secondary lock
- Wiring trapped beneath a seat rail
- An object pulling the harness
- Water, drink residue, or corrosion
- A terminal pushed backward in the housing
- Chafed insulation
- Evidence of an earlier seat removal
Release the connector only by its locking mechanism. Never pull on the wires. Inspect the terminal position and connector lock using the manual’s illustrations.
Reconnect the plug until both the primary latch and connector-position-assurance lock engage. Some manufacturer repairs require a specified dielectric lubricant, terminal replacement, or new connector retainer. Use only the listed material and procedure; generic grease is not automatically interchangeable.
For a seat-belt buckle code
Inspect the buckle wiring and connector according to the diagnostic tree. A buckle-switch fault may require replacement of the buckle or pretensioner assembly rather than cleaning.
For a clock spring code
Confirm whether the horn, steering-wheel controls, or cruise switches also malfunction. These symptoms can support a clock spring diagnosis, but they do not prove it. Do not rotate a removed clock spring away from its centered position.
For an occupant-sensor code
Remove all objects from the passenger seat and floor. Check for aftermarket seat covers, cushions, electronic devices, cargo, wet upholstery, or seat modifications that may affect classification. Follow the OEM procedure for initialization or calibration after repair.
For damaged SRS wiring
Replace the specified harness or use only the manufacturer-approved terminal and splice procedure. Honda body-repair guidance, for example, instructs repairers to replace damaged airbag-system harnesses rather than perform an improvised repair.
You’ll know this step worked when the connector locks positively, the harness is routed clear of moving parts, and the diagnosed defect has been corrected according to the service procedure.
Common mistake: Do not spray cleaner blindly into every yellow connector. Yellow commonly identifies restraint wiring, but approved cleaning, lubrication, terminal replacement, and connector handling differ by manufacturer.
Phase 3: Clear and Verify the SRS System
Step 8: Reconnect Power and Clear the Code
Re-enable the restraint system, reconnect the battery, and erase the repaired fault with the SRS scanner.
Confirm that all connectors are installed, all secondary locks are engaged, tools are removed, and nobody is positioned directly in front of an airbag.
Reconnect and tighten the negative battery terminal. Do not overtighten a small battery clamp; secure it so it cannot rotate by hand.
Stand outside the vehicle when practical and turn the ignition to ON. Reconnect the scan tool if necessary. Enter the SRS module and choose:
- Clear DTCs
- Erase Fault Memory
- Clear Fault Data
- Delete Codes
Read and follow any prompts. Some vehicles will not clear a current fault. Others require an initialization, zero-point calibration, seat-weight reset, or module configuration before the warning can be extinguished.
Manufacturer repair procedures commonly direct technicians to repair the system first, clear the DTC with a scan tool, and then perform diagnostic verification.
You’ll know this step worked when the scanner reports that fault memory was cleared and a fresh code read shows no active SRS fault.
Common mistake: Do not keep pressing “Clear Codes” when the same current code returns immediately. Return to the diagnostic tree; the circuit is still faulty or the required calibration has not been completed.
Step 9: Run the Self-Test and Rescan
Cycle the ignition, observe the warning-light self-test, and perform a second SRS scan.
Turn the ignition off for at least 10 seconds. Disconnect the scan tool only if its instructions permit. Start the vehicle normally and watch the SRS indicator.
A successful repair normally produces this pattern:
- The warning illuminates during the startup bulb check.
- It remains on for several seconds while the module tests the system.
- It switches off.
- It stays off while the engine is running.
Allow the vehicle to idle for two minutes. Move both front seats through the positions that previously triggered the light, but keep hands and tools away from moving tracks. Drive for 5–10 miles over normal roads if the vehicle is otherwise safe.
Return, rescan the SRS module, and check for current, pending, stored, or intermittent codes.
You’ll know it worked when the warning completes its normal startup check, remains off during the drive, and the final scan shows no returning fault.
Common mistake: Do not judge success solely by the dashboard lamp. A history code may remain, and some intermittent faults return only when the seat, steering wheel, temperature, or vehicle vibration changes.
Common Mistakes and How to Fix Them
The Code Was Cleared Before It Was Recorded
Rescan the complete vehicle and save every code that remains. Reproduce the original condition by carefully moving the seat or steering wheel only when safe. If no code returns, do not disturb SRS wiring unnecessarily. Wait for the fault to recur and record it before attempting a repair.
The Light Returns Immediately
An immediate return usually means the module still detects an active open circuit, short circuit, resistance fault, internal module fault, or missing calibration.
Read the code again and compare it with the original:
- Same code: The original fault remains.
- Different code: A connector may have been left unplugged or another problem was introduced.
- Calibration code: Perform the required OEM initialization.
- Control-module code: Follow the module power, ground, communication, programming, and replacement procedure.
The Scanner Cannot Communicate With the SRS Module
First confirm that the scanner actually supports the vehicle’s restraint module. Then check:
- Scan-tool software version
- Correct vehicle selection
- Diagnostic connector power
- Battery voltage
- Relevant fuses
- Network communication codes in other modules
Do not replace an SRS fuse by color. Use the owner’s manual or wiring diagram to identify the exact fuse rating and position. If the replacement fuse opens again, stop; the circuit may be shorted.
The Scanner Shows No Codes but the Light Stays On
Run a complete vehicle scan rather than entering only one airbag menu. Some vehicles divide restraint functions among separate modules, including the:
- Main SRS controller
- Occupant-classification module
- Passenger presence module
- Steering-column control module
- Seat modules
- Gateway module
A low-cost tool may report “no codes” because it cannot access the manufacturer-specific controller. Confirm coverage using the scanner manufacturer’s vehicle list or use an OEM-level tool.
The Light Appeared After Moving a Seat
Do not immediately unplug the yellow connector. Scan first and identify whether the code concerns the buckle, pretensioner, side airbag, seat-position sensor, or occupant sensor.
After disabling the SRS correctly, inspect the named circuit for tension, pinching, loose locks, contamination, or terminal damage. Reroute the harness so full seat travel does not pull it tight.
The Vehicle Was in a Collision
Do not attempt a code-only reset. Inspect the complete restraint system using the manufacturer’s post-collision procedure.
The required work may include:
- Replacing deployed airbags
- Replacing fired seat-belt pretensioners
- Replacing damaged belts, buckles, seats, trim, and wiring
- Inspecting or replacing impact sensors
- Replacing or programming the SRS controller
- Calibrating occupant sensors
- Verifying the steering column and clock spring
- Clearing or resolving deployment records as the manufacturer permits
A module-reset service alone does not prove that the vehicle’s restraint system has been restored.
Variations for Different Situations
Resetting the Light Without an SRS Scanner
Some older vehicles provide a manufacturer-specific manual procedure using a diagnostic connector, service-check connector, key cycle, or dash controls. These procedures are not universal and should never be guessed.
Use a manual method only when all three conditions are met:
- The factory procedure exists for the exact model and year.
- The underlying fault has already been repaired.
- The procedure does not require bypassing a restraint component.
Do not use random key-on/key-off timing instructions copied from a different vehicle. On many modern vehicles, an SRS-capable scanner is the only practical method.
Resetting the Light After Battery Replacement
A battery replacement can coincide with low-voltage, lost-calibration, or communication codes. It can also reveal a fault that already existed.
Proceed as follows:
- Test and fully charge the new battery.
- Confirm that both terminals are tight.
- Scan every module.
- Save the SRS code and voltage history.
- Clear only low-voltage or communication codes after confirming stable power.
- Complete any steering-angle, window, seat, or occupant-system initialization specified by the manufacturer.
- Rescan after a road test.
A battery disconnect may cause other indicators to appear temporarily. For example, some Honda models direct the driver to travel a short distance after reconnection so certain systems can relearn, but that instruction should not be generalized to an active SRS warning.
Resetting the Light After Interior Cleaning
If the light appeared after vacuuming, shampooing, or moving a front seat:
- Stop moving the affected seat.
- Allow wet carpet or upholstery to dry.
- Remove objects from beneath the seat.
- Scan the SRS and occupant-detection modules.
- Identify the exact circuit before disconnecting anything.
- Inspect that circuit using the battery-disconnection procedure.
- Repair damaged or contaminated terminals as the manufacturer directs.
- Clear the code and move the seat through its full travel during verification.
Moisture in an occupant sensor or connector may require component replacement or calibration rather than simple drying.
Resetting the Light After Airbag Deployment
Treat this as a complete post-collision restoration, not a dashboard-light reset. An ordinary handheld scanner may erase some repaired faults, but it cannot replace deployed hardware or make structurally damaged wiring safe.
Use OEM post-collision instructions to determine which airbags, pretensioners, sensors, modules, belts, fasteners, trim pieces, and seat components must be replaced. Complete all programming and calibration before final verification.
How Long Does It Take and What Does It Cost?
A code scan and successful reset after a completed repair usually takes 10–20 minutes. Diagnosis takes longer because the warning lamp identifies a system fault, not a single failed part.
The low end applies when the fault is accessible, parts are inexpensive, and no calibration is needed. The high end applies to integrated seat components, manufacturer programming, multiple deployed devices, expensive trim, or labor-intensive interior removal.
Frequently Asked Questions
Will Disconnecting the Battery Reset the Airbag Light?
Usually not. Disconnecting the battery is primarily a safety step before handling approved SRS wiring. Most restraint controllers retain fault information after power loss, and an unrepaired active fault will be detected again at startup. Diagnose and repair the problem, then clear the module with an SRS-capable scanner or the exact factory procedure.
Can a Regular OBD-II Scanner Clear an Airbag Light?
Only when it specifically supports the vehicle’s SRS module. A basic reader designed for emissions-related engine codes may connect to the diagnostic port yet remain unable to read airbags, pretensioners, occupant sensors, or manufacturer-specific restraint codes. Verify coverage for the exact year, make, and model before buying or borrowing a tool.
Is It Safe to Drive With the Airbag Light On?
The vehicle may remain physically drivable, but its restraint protection cannot be assumed to work correctly. The fault may affect one airbag, multiple airbags, seat-belt pretensioners, or occupant classification. Manufacturer guidance advises prompt inspection when the warning remains on or fails its normal startup check.
Why Does the Airbag Light Return After I Clear It?
The SRS controller reruns electrical checks whenever the ignition is switched on. If it still detects excessive resistance, an open circuit, short circuit, low voltage, calibration problem, or internal-module failure, it stores the code again and turns the warning back on. Clearing fault memory cannot repair the circuit that triggered it.
Can a Low Battery Turn On the Airbag Light?
Yes, low or unstable voltage can contribute to voltage and communication faults, especially during starting, jump-starting, or battery replacement. Test the battery and charging system, record all codes, and repair the power problem first. Do not assume every warning after a dead battery is harmless; rescan and confirm that no active SRS fault remains.
Can I Test an Airbag With a Multimeter?
Do not measure resistance directly across an airbag inflator, seat-belt pretensioner, or other pyrotechnic component. Manufacturers warn against using ordinary test lamps, voltmeters, and ohmmeters on these components. Approved diagnostics use specified adapters, simulators, breakout tools, or harness-side tests described in the factory service information.
Conclusion
The correct way to reset an airbag light is to read the SRS code, identify and repair the exact fault, clear the restraint controller with a compatible tool, and verify that the startup self-test and final scan both pass. Battery disconnection alone is not a repair, and repeated code clearing should never replace proper diagnosis.