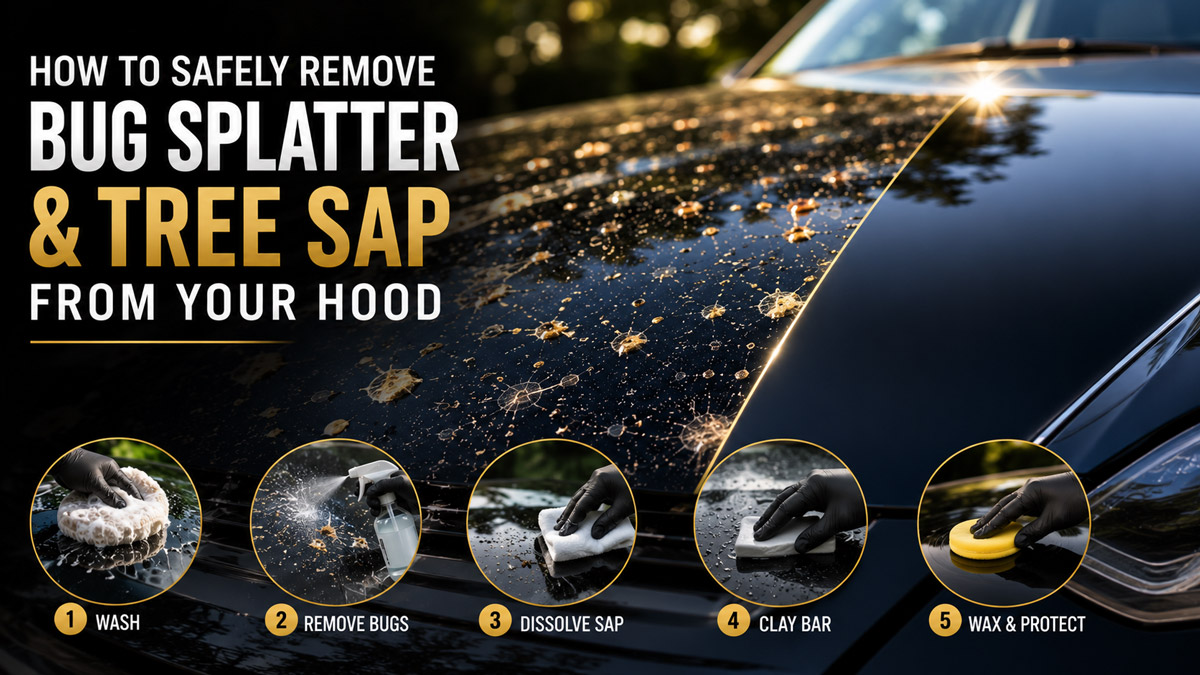
Learning how to safely remove bug splatter and tree sap from your hood restores your clear coat in five straightforward steps: cooling and washing, chemical bug removal, alcohol sap dissolution, clay bar extraction, and waxing. Expect about an hour of medium-difficulty work. Your ultimate success depends on working on a completely cool surface.
Before You Start
- Time Required: 45–60 minutes.
- Difficulty: Medium (requires patience and tactile sensitivity).
- Cost: $35–$60 (if purchasing all materials).
- Prerequisites: Vehicle must be parked in total shade. The engine must have been turned off for at least 3 hours so the hood is cool to the touch.
Materials Checklist:
- [ ] Microfiber Towels: 5 clean, edgeless towels (350+ GSM preferred).
- [ ] Wash Supplies: 2 standard 5-gallon buckets, 2 oz pH-neutral car wash shampoo, 1 microfiber wash mitt, hose with fan-spray nozzle.
- [ ] Chemical Removers: 1 bottle commercial bug remover spray, 1 bottle 70% Isopropyl Alcohol (do not use 91% or 99%).
- [ ] Decontamination: 1 detailing clay bar (100g, fine grade), 1 spray bottle of dedicated clay lubricant.
- [ ] Protection: 2–3 oz of liquid car wax or synthetic paint sealant, 1 foam applicator pad.
Step 1: Cool the Hood and Perform an Initial Wash
Park in the shade, ensure the hood is physically cool to the back of your hand, and wash the surface to remove loose abrasive dirt.
Fill one 5-gallon bucket with plain water (rinse bucket) and the second with water and 2 ounces of car wash shampoo (wash bucket). Spray the hood using a wide-fan hose setting, then glide a soapy microfiber mitt over the paint using straight back-and-forth lines. Rinse the hood completely, but leave the surface wet.
Success Checkpoint: You will know this worked when the hood is free of loose dust and road grime, leaving only the bonded bugs and sap spots behind. Common Mistake: Washing a hot hood. If the engine is still hot, the metal will flash-dry the soapy water, leaving calcium water spots that are harder to remove than the bugs.
Step 2: Neutralize and Wipe Away Bug Splatter
Apply an alkaline commercial bug remover to break down the acidic proteins in the bug splatter without aggressive scrubbing.
Spray the bug remover directly onto the splatters until they are thoroughly saturated. Let the chemical dwell for exactly 2 to 3 minutes without letting it dry on the paint. Fold a clean, damp microfiber towel in half twice (creating a thick square), and wipe the splatters away using only the weight of the towel. Rinse the treated area thoroughly with your hose.
Success Checkpoint: You will know this worked when the organic bug mass easily lifts off the paint without requiring any fingernail pressure or heavy scrubbing. Common Mistake: Scrubbing in circles. Circular scrubbing with bug shells traps abrasive chitin against the clear coat, resulting in deep “swirl mark” scratches.
Step 3: Dissolve Tree Sap with Isopropyl Alcohol
Break down sticky, resinous tree sap using a targeted solvent application rather than broad spraying.
Pour a quarter-sized puddle of 70% isopropyl alcohol directly onto a fresh, dry microfiber towel. Press the alcohol-soaked section of the towel firmly against the sap droplet and hold it absolutely still for 30 to 60 seconds. Once the alcohol softens the resin, wipe gently inward toward the center of the sap spot to lift it. Repeat this process for each individual droplet, then immediately rinse the hood with water.
Success Checkpoint: You will know this worked when the sap loses its hardened shell and smears onto the towel, leaving the paint underneath smooth and flat. Common Mistake: Using 91% or 99% isopropyl alcohol. These high-concentration solvents evaporate too quickly to dissolve the sap and can chemically soften weak clear coats.
Step 4: Pull Embedded Contaminants with a Clay Bar
Use a detailing clay bar to mechanically shear away microscopic remnants of sap and bugs that chemicals left behind.
Knead your 100g clay bar into a flat, circular disc about 2 inches wide. Generously mist a 2×2 foot section of the hood with clay lubricant until the surface is dripping wet. Slide the clay disc back and forth over the wet area using light, two-finger pressure until the rough drag turns into a frictionless, silent glide. Wipe the cloudy lubricant residue off with a dry microfiber towel.
Success Checkpoint: You will know this worked when you place your hand inside a thin plastic sandwich bag and lightly rub the paint; it should feel as perfectly smooth as a glass mirror. Common Mistake: Dropping the clay bar. If the clay touches the ground, it immediately picks up microscopic gravel. You must throw it away; using dropped clay is equivalent to rubbing sandpaper on your hood.
Step 5: Rinse, Dry, and Apply Protective Wax
Clear all remaining chemical and lubricant residues before sealing the microscopically clean paint with a protective wax barrier.
Perform one final rinse of the hood with your hose, then dry it completely with a clean microfiber towel. Apply 3 dime-sized drops of liquid wax to a foam applicator pad. Spread the wax over the entire hood in a very thin, even layer using overlapping circular motions. Allow the wax to haze over for 5 to 10 minutes (per bottle instructions), then buff the haze away using a fresh, dry microfiber towel until the paint shines.
Success Checkpoint: You will know this worked when the paint has a deep, glossy reflection and a dry towel effortlessly slides across the surface without grabbing. Common Mistake: Skipping the wax step. The chemicals and clay just stripped away all existing protection; leaving the clear coat bare guarantees that the next bug splatter will etch directly into the paint.
Common Mistakes and How to Fix Them
Etched Outlines Remain After Removal
- The Problem: The physical bug or sap is gone, but a ghost-like outline of the splatter remains visible in the paint under direct light.
- The Fix: The acidic bug guts or sap etched into the top layer of your clear coat. Apply a dime-sized drop of dual-action polishing compound to a microfiber pad. Rub it gently over the outline in a cross-hatch pattern (up/down, then left/right) for 30 seconds to safely level the surrounding clear coat, then wipe clean and wax.
Sap is Hardened and Won’t Dissolve
- The Problem: The tree sap has crystallized into a rock-hard amber shell over several months and the alcohol merely evaporates off it.
- The Fix: Place a thick dollop of standard alcohol-based hand sanitizer gel directly over the sap dome. The gel suspension prevents the alcohol from evaporating. Let it sit for 5 full minutes to break down the hardened outer shell, wipe away the gel, and return to Step 3.
Clay Bar Sticks or Leaves Streaks
- The Problem: The clay bar catches on the paint, chatters, or leaves rubbery streaks behind.
- The Fix: You lack surface lubrication. Spray twice as much clay lubricant onto the paint. To remove the streaks left behind, mist them heavily with lubricant and gently re-run a freshly kneaded side of the clay bar over them.
Wax Smears Instead of Buffing Clear
- The Problem: When trying to remove the dried wax, it pushes around like greasy butter instead of leaving a high-shine finish.
- The Fix: The wax was either applied too thickly or the surface wasn’t fully cleared of alcohol/clay lube beforehand. Mist the smeared area lightly with a quick detailer spray or plain water, and buff immediately with a new, dry towel.
Variations for Different Situations
Matte or Satin Paint Finishes
Do not use a clay bar, polish, or traditional carnauba wax on matte or satin finishes. The abrasion of the clay and the fillers in the wax will polish the microscopic peaks of the matte clear coat, leaving permanent glossy blotches. Use only a dedicated matte paint cleanser for bug and sap removal, and seal with a matte-specific ceramic spray.
Vehicles with Paint Protection Film (PPF)
If your hood is covered in clear bra or PPF, skip the 70% isopropyl alcohol for sap removal, as solvent can dry out and yellow the polyurethane film. Instead, use hot water (roughly 120°F / 49°C) on a microfiber towel held against the sap for 2 minutes to soften it. You may safely use a clay bar on PPF, but use zero downward pressure.
Frequently Asked Questions
Can I use a magic eraser on tree sap?
Never use a Magic Eraser on automotive paint. They are constructed from melamine foam, which acts like ultra-fine sandpaper. While it will remove the sap quickly, it will also permanently scuff your clear coat, leaving a dull, hazy patch that requires machine compounding to fix.
How often should I clay bar my hood?
You should only clay bar your vehicle when the paint feels rough to the touch after a thorough wash, typically once or twice a year. Over-claying can induce micro-marring in the clear coat. If the paint feels as smooth as glass, skip the clay bar step entirely.
Will 91% rubbing alcohol damage my clear coat?
Yes, isopropyl alcohol concentrations of 91% or 99% can soften and compromise modern automotive clear coats if left to dwell. Always stick to 70% isopropyl alcohol for detailing tasks. It provides enough solvent power to break down organics without risking chemical burning or immediate clear coat degradation.
Why does the wax smear instead of buffing off?
Wax smearing occurs when you apply the product too thickly, do not allow sufficient flash time, or apply it in high humidity. To fix this, mist the smeared area lightly with a quick detailer spray or plain water, then buff immediately with a fresh, dry microfiber towel.
Knowing exactly how to safely remove bug splatter and tree sap from your hood is the difference between preserving a showroom shine and permanently etching your vehicle’s clear coat. By keeping the surface cool, letting the right chemicals do the work, and following up with proper protection, you ensure your paint remains flawless.