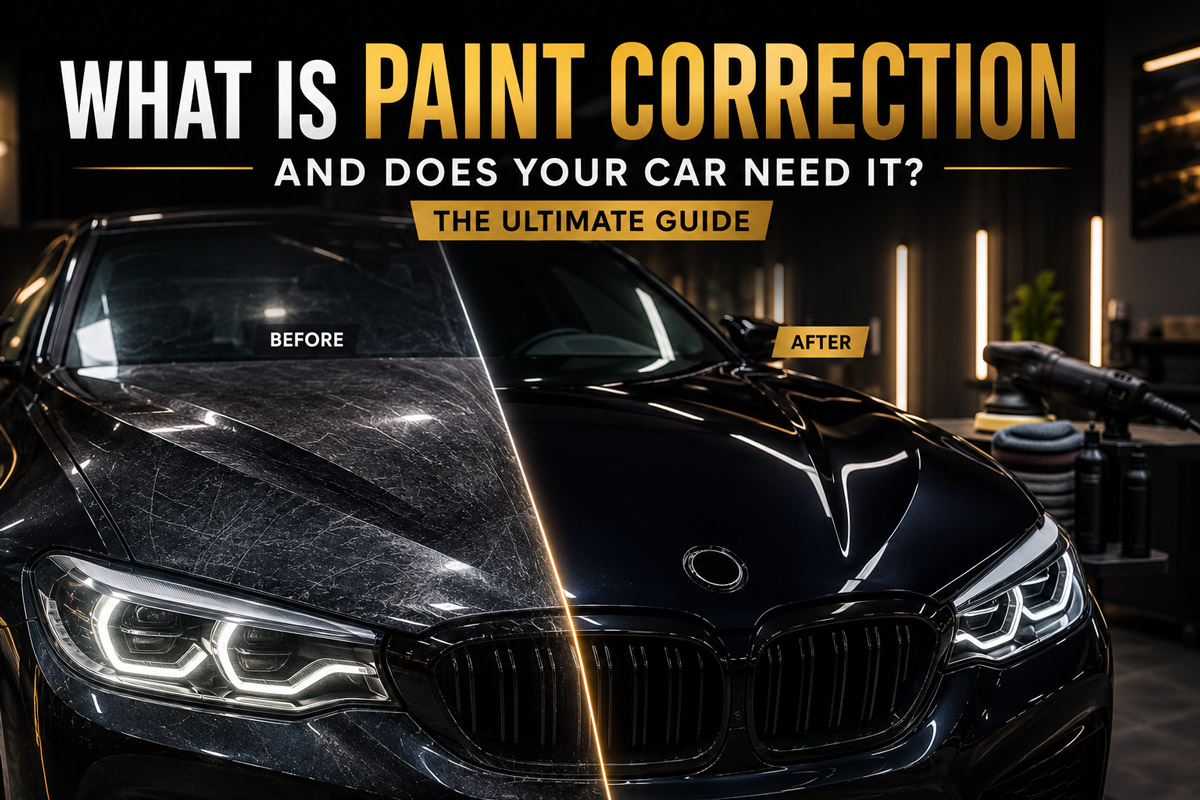
Imagine washing your car on a bright sunny afternoon. You step back expecting a dazzling display of reflective gloss, but as the sunlight hits the hood, you notice a web of fine circular scratches, dull hazy patches, and faint white etchings scattering the light. Your paint looks clean, yet it lacks that crisp, mirror reflection seen on showroom vehicles.
This frustrating visual phenomenon affects millions of vehicle owners daily. Standard car washes, spray waxes, and quick detailing sprays fail to fix these defects because they only clean or temporarily mask the surface. To permanently eliminate scratches, swirl marks, oxidation, and water spots, your vehicle requires professional paint correction.
Paint correction is both an art and a precise automotive science. It is the skilled process of permanently removing surface defects from a vehicle clear coat, restoring original depth, clarity, and gloss. Whether you just bought a brand new vehicle off the dealership lot, plan to install a protective ceramic coating, or wish to revive an older prized automobile, understanding paint correction is essential.
In this comprehensive guide, you will learn exactly how paint correction works, the anatomy of automotive paint, common paint defects, the three stages of correction, realistic time and cost expectations, and how to inspect your car paint at home to decide if your vehicle needs it.
What is Paint Correction? Demystifying Clear Coat Leveling
Paint correction is the specialized process of permanently eliminating surface imperfections within a vehicle clear coat layer to achieve a flawless, high gloss finish. Unlike temporary car polishes, glazes, or waxes that rely on fillers to hide scratches for a few weeks, true paint correction uses precision machine polishers, specialized buffing pads, and engineered abrasive compounds to microscopically level the clear coat.
Automotive clear coat is the transparent top layer of paint applied over the colored base coat. When light strikes a smooth, level clear coat, it reflects back in straight, uniform lines, creating intense gloss, visual depth, and mirror reflections. However, when scratches, swirl marks, and etchings exist in the clear coat, incoming light scatters in all directions. This light diffusion makes the vehicle paint appear dull, faded, and scratched.
Through controlled mechanical abrasion, paint correction carefully shaves down a tiny fraction of a micron of damaged clear coat until the surrounding surface matches the depth of the deepest acceptable scratch. Once the surface is completely flat and level again, light reflects uniformly, bringing back incredible clarity.
Visual Representation: Light Reflection on Automotive Paint
Damaged Paint Surface (Scratched Clear Coat)
Incoming light hits uneven scratches, swirls, and micro ridges, scattering light rays in random directions. Result: Dull gloss, heavy haze, visible spiderweb lines.
Corrected Paint Surface (Leveled Clear Coat)
Machine polishing levels the clear coat flat. Light hits a smooth surface and reflects in direct parallel lines. Result: Crisp reflections, maximum color depth, mirror finish.
Paint Correction versus Standard Car Polishing and Waxing
Many vehicle owners confuse paint correction with traditional car polishing or waxing. While all three services improve vehicle appearance, they work through entirely different mechanisms:
- Car Waxing and Glazes: Waxes and glazes contain oils, polymers, and synthetic fillers designed to fill in microscopic scratches. They act as a temporary mask. While your paint may look glossy initially, the fillers wash away after a few rains or car washes, revealing the exact same scratches underneath. Wax provides surface protection, not paint restoration.
- Standard Detail Polishing: Polishing uses light abrasives to enhance gloss and clean the surface. It removes very mild oxidation and adds temporary shine, but it lacks the cutting power required to remove physical scratch valleys in the clear coat.
- Professional Paint Correction: Paint correction permanently alters the physical surface by removing damaged clear coat material. It does not hide defects; it removes them completely. Once paint correction is complete, the defects are gone forever unless new scratches are introduced through improper washing.
Understanding Vehicle Paint Anatomy and Clear Coat Thickness
To appreciate how paint correction works without damaging your vehicle, it helps to understand modern automotive paint construction. Modern vehicles feature a multi-layer factory paint system designed for durability, color accuracy, and UV protection.
Modern Vehicle Paint Layer Structure
The Micron Scale: How Much Clear Coat Can Be Safely Removed?
Automotive paint thickness is measured in microns, where one micron equals one thousandth of a millimeter. For perspective, a standard sheet of copy paper is approximately 100 microns thick, and a single strand of human hair measures roughly 70 microns thick.
Total factory paint thickness across modern vehicles usually measures between 100 and 150 microns total. However, the top clear coat layer accounts for only 35 to 50 microns of that overall measurement. UV blocking inhibitors concentrate heavily in the upper half of this clear coat.
Professional detailers adhere to a strict safety rule: never remove more than 25 percent of the original factory clear coat (roughly 5 to 8 microns) over the lifetime of a vehicle. Removing excessive clear coat weakens UV protection, leading to premature clear coat failure, peeling, and permanent paint destruction. This is why detailers use digital paint depth gauges to measure clear coat thickness before turning on a polishing machine.
Hard Paint versus Soft Paint Dynamics
Different vehicle manufacturers use varying paint formulations:
- Soft Paints (Common in Japanese Manufacturers like Honda, Subaru, Nissan, and Toyota): Soft clear coats scratch very easily from simple hand washing, but they respond quickly to light polishing compounds. However, soft paint requires ultra fine finishing pads to avoid leaving micro marring during correction.
- Hard Paints (Common in German Manufacturers like BMW, Audi, Mercedes Benz, and Porsche): Hard clear coats resist micro scratches better, but when deep swirls do occur, they require aggressive cutting compounds, microfiber pads, and extra polishing passes to level.
Common Paint Defects Paint Correction Can Fix
Daily driving, weather exposure, and improper car wash techniques take a heavy toll on automotive finishes. Professional paint correction addresses a wide array of clear coat defects:
Swirl Marks and Spiderweb Micro Scratches
Swirl marks are the most common automotive paint defect. Under direct sunlight or point source lighting, swirl marks appear as hundreds of fine concentric circles or spiderwebs covering every panel. They are caused primarily by automatic car washes with abrasive spinning brushes, using dirty sponges or towels during hand washing, or wiping a dusty car with dry microfiber cloths.
Clear Coat Oxidation and Environmental Fading
When a car sits outside exposed to solar ultraviolet radiation without protective wax or ceramic coatings, UV rays break down clear coat chemical bonds. Over time, the clear coat oxidizes, turning chalky, dull, and cloudy. Paint correction shaves away this oxidized outer skin, uncovering glossy clear coat underneath.
Water Spot Mineral Etching and Acid Rain Damage
When tap water, sprinkler spray, or rain evaporates on hot paint, calcium, magnesium, and mineral salts remain. If left unaddressed in heat, these minerals react with moisture to form mild acids that etch physical craters into the clear coat. Light water spots wipe off, but deep etchings require machine compounding to level out the craters.
Bird Dropping Acid Etchings and Tree Sap Stains
Bird droppings contain concentrated uric acid with pH levels between 3 and 4. When sun heats the vehicle bonnet or roof, clear coat expands around the acidic dropping. As paint cools down at night, it contracts and traps acid inside the clear coat structure, leaving dull, wrinkled etch marks.
Buffer Holograms and Rotary Buffer Marring
Holograms, often called buffer trails, are caused by inexperienced detailers using high speed rotary polishers with dirty wool pads or coarse compounds. Holograms look like ghostly 3D ribbons or bands floating across paint when viewed in direct sunlight. Fortunately, dual action polisher clear coat leveling easily removes holograms in a single refining pass.
What Paint Correction Cannot Fix (Knowing the Limits)
While paint correction yields remarkable transformations, it cannot perform miracles. Understanding physical limitations prevents unrealistic expectations or costly clear coat destruction.
Critical Safety Warning: Understanding Clear Coat Limits
Paint correction relies strictly on having sufficient clear coat thickness to safely level the surface. Attempting aggressive correction on failing, thin, or excessively damaged clear coat will result in burning through to the base coat color, requiring a complete body shop repainting job costing thousands of dollars.
Paint correction cannot fix:
- Scratches Deep Enough to Catch Your Fingernail: Drag your fingernail gently across a scratch at a 90 degree angle. If your nail catches in the groove, the scratch has penetrated completely through the clear coat and reached the base color coat or primer layer. Machine polishing cannot level surrounding clear coat down that far without destroying the panel. These deep scratches require touch up paint, wet sanding, or panel repainting.
- Clear Coat Failure and Peeling: When clear coat turns white, blisters, bubbles, or peels off in flakes (crow feet checking), the clear coat bond to the base coat has completely disintegrated. Paint correction cannot repair missing clear coat; body shop refinishing is mandatory.
- Extremely Thin Clear Coat: If a paint depth gauge reveals total paint thickness under 80 microns, previous heavy polishing or poor factory application has left insufficient clear coat. Professional detailers will refuse aggressive correction on thin panels to protect the vehicle.
Does Your Car Need Paint Correction? Key Scenarios
Every vehicle encounters environmental wear, but specific signs and ownership situations indicate when paint correction is highly beneficial:
5 Key Indicators Your Car Needs Paint Correction
- 1. Direct Sunlight Inspection Reveals Heavy Haze: Vehicle looks clean under shadow but displays spiderwebs and dullness under direct sun or bright streetlights.
- 2. You Plan to Install a Ceramic Coating or PPF: Paint correction is essential prior to applying long term protection to avoid locking in scratches permanently.
- 3. You Just Took Delivery of a Brand New Car: Factory transit, rail dust, and dealership pre delivery washes frequently leave micro marring on new vehicles.
- 4. Preparing to Sell or Lease Return: Eliminating paint defects dramatically improves visual appeal, allowing higher asking prices and preventing lease damage penalties.
- 5. Dark Colored Paint Finish (Black, Navy Blue, Charcoal): Dark colors absorb and reflect light intensely, making minor scratches instantly visible to the eye.
Scenario 1: Paint Looks Dull or Hazy in Direct Sunlight
If your vehicle appears shiny in the shadow of a garage but looks washed out, scratched, or hazy under bright afternoon sun, clear coat micro scratching is scattering light. Paint correction restores crisp optical clarity.
Scenario 2: Preparing for Ceramic Coating or Paint Protection Film (PPF)
Ceramic coatings and clear PPF act as permanent, crystal clear magnifying glass layers over your paint. Applying a 5 year ceramic coating directly over scratched paint seals those defects underneath for years, making them even more noticeable. Professional ceramic coating paint preparation always requires at least a single stage light polish to ensure pure gloss before bonding.
Scenario 3: Restoring a Brand New Vehicle Purchase
Many new car buyers assume factory fresh vehicles arrive in flawless condition. In reality, new cars endure transport via ocean freighters, open air trains, and car haulers, absorbing industrial fallout and iron dust. Furthermore, dealership preparation teams often use rapid, dirty wash brushes during pre delivery inspections, inflicting swirl marks on brand new paint. A single stage polish restores factory gloss.
Scenario 4: Maximizing Resale Value and Collector Appeal
First impressions dictate used car sales values. Prospective buyers inspect exterior paint condition to gauge how well the rest of the vehicle was maintained. Investing in professional paint correction prior to listing a sports car or luxury vehicle often yields multiple times the service cost in higher sale prices.
The Three Professional Stages of Paint Correction Explained
Professional auto detailing categorizes paint correction into three primary stages based on defect severity, process complexity, and time involved:
Stage 1 Paint Correction (Single Step Enhancement Polish)
Stage 1 correction utilizes a dual action orbital polisher paired with a finishing polish or one step compound and a medium cut foam pad. The entire vehicle receives a single meticulous polishing pass.
- Target Defect Removal: Eliminates 50 to 70 percent of light micro swirls, minor hazing, and light towel marks.
- Best Suited For: Brand new vehicles, modern fleet cars with light wear, or paint receiving routine annual maintenance polishing.
Stage 2 Paint Correction (Two Step Cut and Polish)
Stage 2 correction is the industry standard for daily driven vehicles. It involves two distinct machine polishing steps across every square inch of paintwork:
- Step 1 (The Cutting Phase): Detailers use an aggressive cutting compound with wool or firm microfiber pads to level moderate scratches, deeper swirl marks, and water spot etchings. This step leaves the paint scratch free but slightly hazy.
- Step 2 (The Refining Phase): Detailers switch to a fine finishing polish and soft foam pad to remove cutting haze, restoring intense reflection, deep color clarity, and high gloss finish.
- Target Defect Removal: Removes 80 to 90 percent of clear coat imperfections.
Stage 3 Paint Correction (Multi Step Heavy Restoration)
Stage 3 correction is a complex restoration service designed for severely weathered paint or elite show cars. It combines localized wet sanding (using ultra fine 2000 to 3000 grit sandpapers) with heavy rotary compounding passes and multiple fine finishing polish steps.
- Target Defect Removal: Achieves 95 percent or higher defect elimination, approaching absolute visual perfection.
- Best Suited For: Vintage restoration projects, neglected luxury automobiles, dark colored collector cars, or show vehicles demanding flawless mirror reflection.
Time and Cost Breakdown Chart: What to Expect
Paint correction is highly labor intensive. Unlike quick drive through car washes, professional correction requires meticulous panel prep, surface inspection, and hours of steady machine polishing.
Estimated Time & Investment Matrix
Factors Influencing Paint Correction Duration and Pricing
- Vehicle Size and Complexity: Large SUVs, full size trucks, and vans feature significantly more surface area than compact sports coupes. Complex body lines, steep curves, and intricate aero scoops require smaller polishing pads and extra maneuvering time.
- Paint Hardness: Hard German clear coats demand slower machine passes and multiple compounding cycles to achieve defect removal compared to softer paints.
- Current Paint Condition: Neglected finishes covered in deep water spot etchings, heavy oxidation, and industrial fallout take far longer to decontaminate and correct safely.
- Desirable Surface Finish Goal: Aiming for 90 percent defect removal on a daily driver requires less time than chasing 99 percent perfection on a jet black show car.
Step by Step: How Professional Detailers Perform Paint Correction
True paint correction involves much more than simply picking up a polisher. Professional detailers follow a systematic, 8 step process to ensure safe, flawless results:
The 8 Step Professional Paint Correction Workflow
Step 1: Chemical Decontamination Wash
Before machine polishing begins, paint must be completely free of surface contaminants. Detailers perform a strip wash using high pH degreasers to remove old waxes, road oils, and tree sap. Next, an iron remover spray is applied to dissolve microscopic brake dust particles embedded in the clear coat.
Step 2: Mechanical Clay Bar Treatment
Even after washing, paint often feels rough to the touch. Detailers glide an automotive clay bar with dedicated lubricant across all panels. Clay pulls out embedded bonded contaminants, tar spots, and industrial fallout, leaving the clear coat completely smooth.
Step 3: Digital Paint Depth Audit
Using an ultrasonic digital paint depth gauge, the detailer measures total paint thickness across multiple points on every body panel. This audit identifies previously repainted areas, thin factory clear coat sections, and safe boundaries for machine compounding.
Step 4: Surface Masking and Delicate Area Protection
Detailers apply green automotive painter tape over sensitive trim, rubber window seals, plastic moldings, badging, and washer nozzles. Taping prevents polishing compound from staining black plastics or burning thin paint on sharp body creases.
Step 5: Test Spot Execution
No two vehicle paints behave identically. Detailers select a isolated 2 foot by 2 foot section (usually on the vehicle hood) to test various combinations of polishers, pads, and abrasive compounds. Once a test spot achieves desired defect removal while finishing cleanly, that exact pad and compound recipe is applied across the whole vehicle.
Step 6: Machine Compounding and Polishing Phases
Working in small controlled sections, detailers perform the heavy cutting pass using dual action polishers. Polishers move slow arm passes with moderate pad pressure. Once compounding is complete, the detailer switches pads and polish for the final refining pass.
Step 7: Panel Wipe Down and Inspection
Polishing compounds contain lubricating oils that can temporarily fill micro scratches. Detailers spray panels with an isopropyl alcohol (IPA) solution or dedicated panel wipe to dissolve polishing residues. They inspect the bare paint using 5000K daylight LED swirl finder lights to confirm defects are permanently gone.
Inspecting Your Vehicle Paint at Home: The 4 Step Audit
You do not need specialized shop equipment to evaluate your car paint condition. Follow this straightforward 4 step home inspection audit:
Home Paint Inspection Checklist
DIY versus Professional Paint Correction: Risks and Realities
With modern dual action random orbital polishers available to consumers, many car enthusiasts consider attempting DIY paint correction. While rewarding, DIY paint correction carries distinct risks:
If you decide to try DIY correction, start with a light finishing polish and soft foam pad on a random orbital polisher. Never start with aggressive wool pads or rotary machines on your primary vehicle without prior practice on spare junkyard panels.
How to Maintain Corrected Paint: Long Term Care Rules
After investing in paint correction, proper maintenance is vital to prevent reintroduced swirl marks and keep your vehicle looking showroom fresh for years:
Rules for Maintaining Flawless Paint
- Adopt the Two Bucket Wash Method: Use one bucket for soapy water and a separate second bucket with clean water for rinsing your wash mitt. Insert grit guard buckets inserts in both.
- Never Use Automatic Brush Car Washes: Spinning plastic bristles acts like sandpaper across your clear coat. Stick to touchless washes or gentle hand washing.
- Apply Ceramic Coating Protection: Lock in your corrected paint with a high grade ceramic coating or Paint Protection Film to guard against UV rays, bird drop etching, and chemical staining.
- Use Touchless Drying Methods: Dry paint using forced air blowers or ultra plush, edgeless 500 GSM microfiber drying towels paired with slick drying aids.
Frequently Asked Questions About Paint Correction
FAQ 1: Does paint correction ruin or thin your clear coat?
When performed by a trained professional using digital paint depth gauges, paint correction does not ruin clear coat. Professional correction removes only 2 to 5 microns of clear coat, leaving over 80 percent of factory clear coat completely intact to protect your paint for the life of the vehicle.
FAQ 2: How often can a vehicle undergo paint correction?
Because factory clear coat is finite, heavy Stage 2 compound correction should only be performed 1 to 2 times during a vehicle lifetime. However, light Stage 1 finishing polishes can be safely performed every 2 to 3 years if proper hand washing habits are maintained.
FAQ 3: Can you paint correct matte or satin finish paint?
No. Standard paint correction uses abrasives to level paint and create gloss. Attempting to polish a matte or satin finish will permanently ruin the finish by creating shiny, glossy splotches. Matte finishes require specialized matte cleansers and dedicated matte ceramic coatings.
FAQ 4: Is paint correction worth it on an older daily driver?
Yes. Paint correction dramatically revives older vehicles by removing years of built up oxidation, light scratches, and water spots. It restores pride of ownership, enhances curb appeal, and significantly boosts private sale value when listing the car.
Restoring Mirror Shine and Protecting Your Investment
Automotive paint correction is the definitive solution for eliminating swirl marks, buffer trail holograms, oxidation, and clear coat etchings. By replacing temporary fillers with mechanical clear coat leveling, paint correction reveals pure optical depth, vibrant color, and breathtaking mirror gloss.
Whether you own a brand new sports car needing ceramic coating prep or a daily driver deserving a visual refresh, understanding clear coat anatomy, correction stages, and inspection techniques empowers you to make informed decisions for your vehicle.
Ready to Transform Your Vehicle Exterior?
Do you want to know if your vehicle paint is a ideal candidate for paint correction? Contact our certified paint restoration team today for a complimentary paint depth audit and custom vehicle consultation. Let us bring back that true showroom shine your automobile deserves!