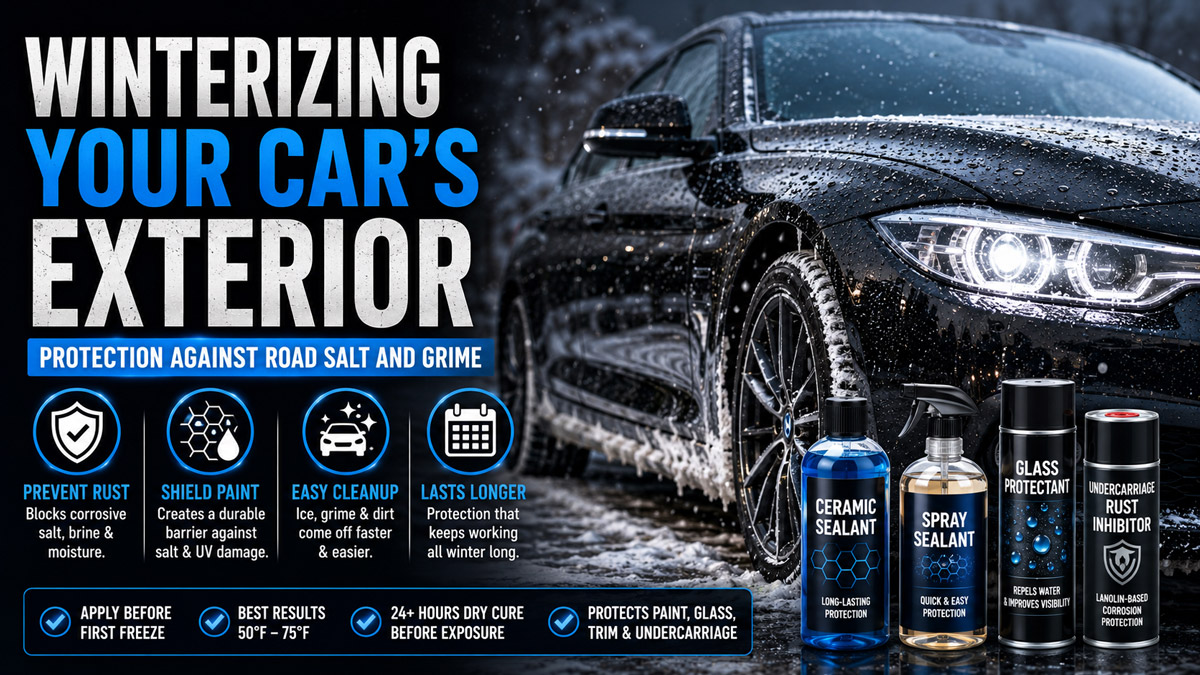
Winterizing your car’s exterior is the systematic process of applying sacrificial chemical barriers and rust inhibitors to shield automotive paint, glass, and undercarriage metal from corrosive road salt, liquid brine, and freezing temperatures. Proper winterization prevents the electrochemical reactions that cause rust, blocking moisture and corrosive ions from penetrating the vehicle’s surfaces while making ice and grime easier to remove.
Key Facts / At a Glance
- Application Window: Winterization chemicals require ambient temperatures between 50°F and 75°F (10°C–24°C) to cure properly; apply before first freeze.
- Primary Enemy: Liquid magnesium chloride brines are stickier and activate at lower humidity levels than traditional rock salt, requiring stronger chemical resistance.
- Best Paint Protection: Synthetic polymer sealants offer the best cost-to-durability ratio for winter (4–6 months), while ceramic coatings provide multi-year maximum resistance.
- Undercarriage Rule: Never use hard, rubberized undercoatings; they trap moisture and accelerate hidden rust. Use self-healing, lanolin-based or oil-based rust inhibitors instead.
- Cure Times: Advanced coatings require at least 24 hours of dry curing and up to 7 days before exposure to car wash detergents.
How Road Salt and Brine Corrode Vehicles
Road salt (sodium chloride) and liquid brines (calcium or magnesium chloride) lower the freezing point of water to keep roads clear, but they drastically accelerate automotive rust. These chemicals establish an electrochemical corrosive cell on exposed metal. When moisture mixes with salt, it creates a highly conductive electrolyte solution. This solution facilitates the transfer of electrons from the vehicle’s steel (the anode) to oxygen in the air (the cathode), rapidly oxidizing the metal into iron oxide (rust).
Liquid brines are significantly more destructive than traditional rock salt. Magnesium chloride remains active at a relative humidity of just 30%, meaning the salt on your car continues eating through the clear coat and metal even when parked inside a dry, heated garage. Winterization disrupts this process by installing a dielectric (non-conductive) and hydrophobic (water-repelling) barrier between the environment and the vehicle.
Comparison of Main Winter Protection Types
Selecting the right sacrificial barrier dictates the success of your exterior winterization. The table below evaluates the primary exterior protection options based on winter durability.
Which Protection Strategy Should You Choose?
- The Budget DIYer / Daily Commuter: Choose a synthetic polymer sealant (e.g., Jescar Power Lock, Turtle Wax Hybrid Solutions) applied in October, paired with aerosol cans of Fluid Film for the undercarriage. Total Cost: ~$60.
- The Automotive Enthusiast: Choose a DIY ceramic or graphene coating (e.g., CarPro CQuartz) for the paint and glass, applied after a full machine polish, ensuring touchless washes easily blast away winter grime. Total Cost: ~$150-$200.
- The No-Time / Lease Driver: Choose professional services. Pay for an annual oil-based undercoating (like Krown or Rust Check) and rely on a high-quality ceramic spray sealant applied by a detailer. Total Cost: $300-$500.
The Step-by-Step Winterization Process
Before You Start
- Total Time Required: 4 to 8 hours of active labor.
- Difficulty: Intermediate (Requires attention to detail and temperature control).
- Total Cost: $50 to $150 (DIY).
- Prerequisites: A shaded, temperature-controlled environment (50°F to 75°F) out of direct sunlight.
- Tools/Materials Needed: Strip wash shampoo, iron remover spray, clay bar and lubricant, isopropyl alcohol (IPA) panel wipe, chosen paint sealant/coating, lanolin-based undercarriage spray (4-6 aerosol cans), microfiber towels, safety goggles, and a respirator mask.
Step 1: Execute a Deep Decontamination Wash
Applying winter protection over embedded dirt guarantees the coating will fail prematurely. You must strip the vehicle down to bare, uncontaminated clear coat.
- Wash with Strip Soap: Wash the vehicle top-down using a high-pH strip soap (or adding 2 ounces of all-purpose cleaner to your wash bucket) to remove old waxes and traffic film.
- Apply Iron Remover: Spray a dedicated iron-removing chemical across the paint and wheels. Let it dwell for 3–5 minutes until it turns purple, dissolving embedded metallic brake dust and rail dust, then rinse thoroughly.
- Clay the Surface: Spray a clay lubricant and gently rub a detailing clay bar over the wet paint to physically lift remaining bonded contaminants like tree sap and industrial fallout.
- Success Checkpoint: You’ll know this step worked when you place your bare hand inside a thin plastic sandwich bag and glide it over the dried paint; the surface should feel as smooth as glass, with no granular resistance.
- Common Mistake: Neglecting the wheel wells and fender liners. Grime packs tightly behind these plastics and will leach out to ruin your coating application. Flush them heavily with a pressure washer.
Step 2: Surface Prep and Paint Correction
Protective coatings require a chemically pure surface to bond mechanically or cross-link with the clear coat.
- Polish the Paint (Optional but Recommended): Use a dual-action polisher with a finishing polish to remove micro-scratches and restore gloss. Winter exposes every paint defect; polishing ensures you aren’t sealing in swirl marks.
- Perform an IPA Wipe-Down: Spray a diluted isopropyl alcohol solution (15-25% alcohol) or a dedicated panel prep spray onto a microfiber towel and wipe every painted surface.
- Success Checkpoint: You’ll know this step worked when the paint looks slightly “squeaky” clean and dry, with zero oily residue from polishing compounds remaining on the surface.
- Common Mistake: Using standard household glass cleaner for the wipe-down. Glass cleaners contain ammonia and surfactants that leave films behind, preventing sealants from bonding.
Step 3: Apply the Base Paint Protection
The base layer serves as the primary shield against corrosive brines. This step must be executed in a dry environment.
- Apply the Product: If using a polymer sealant, apply a thin, even layer using a foam applicator pad. If using a ceramic coating, apply a few drops to a suede applicator and work in 2-foot by 2-foot sections using a cross-hatch motion.
- Level and Buff: Wait for the product to “flash” (sweat or bead up, typically 1 to 5 minutes depending on the coating and humidity). Gently level the coating with a clean microfiber towel, then immediately buff to a high shine with a second, fresh microfiber towel.
- Respect Cure Times: Keep the vehicle completely dry for at least 24 hours.
- Success Checkpoint: You’ll know this step worked when water immediately forms tight, spherical beads and rolls off the surface without leaving flat puddles.
- Common Mistake: Applying coatings in temperatures below 50°F (10°C). Cold temperatures prevent the carrier solvents from evaporating, leaving a smeared, cloudy mess that will not cure.
Step 4: Seal Glass, Trim, and Wheels
Winter visibility is critical, and porous rubber trims will freeze or crack if left untreated.
- Coat the Windshield: Polish the exterior glass, then apply a dedicated hydrophobic glass coating (e.g., Aquapel or Gtechniq G1). This forces sleet and dirty road spray to fly off the windshield at driving speeds.
- Condition Rubber Seals: Wipe all door jambs and rubber weatherstripping with a silicone-based rubber conditioner (e.g., Gummi Pflege). This prevents doors from freezing shut when melted snow turns to ice overnight.
- Protect Alloy Wheels: Apply a high-temperature wheel wax or ceramic coating to the wheel barrels and faces. Wheels take the direct impact of hot brake dust mixed with wet salt, creating rapid pitting if unprotected.
- Success Checkpoint: You’ll know this step worked when your wipers glide silently over the glass and snow easily brushes off your side windows.
- Common Mistake: Applying paint sealants to the windshield. Paint sealants often cause severe wiper judder and dangerous hazing when hit by oncoming headlights at night.
Step 5: Apply Undercarriage Rust Inhibitor
The frame, suspension components, and floor pans bear the brunt of winter driving. Paint protection does not save the chassis.
- Dry the Undercarriage: Ensure the underbody is 100% dry. Even slight moisture will prevent oil-based sprays from adhering to the metal.
- Spray the Inhibitor: Put on a respirator and safety glasses. Using aerosol cans or a pneumatic spray gun, apply a heavy coat of lanolin-based or oil-based rust inhibitor (e.g., Fluid Film, Woolwax, or NH Oil) to the vehicle frame, subframes, control arms, and inside frame cavities using an extension wand.
- Avoid Heat Sources: Do not spray the exhaust pipes, muffler, catalytic converter, or brake rotors. The product will smoke violently and poses a fire risk if applied to high-heat components.
- Success Checkpoint: You’ll know this step worked when the metal components possess a translucent, wet, greasy appearance that remains sticky to the touch.
- Common Mistake: Using hard, rubberized undercoating sprays (often sold in auto parts stores). These products dry hard, eventually crack, and allow salty water to seep underneath. Because the water cannot evaporate through the rubber, it rots the metal invisibly from the inside out.
Common Mistakes and Troubleshooting
- Troubleshooting Coating Hazing (High Spots): If a ceramic coating or heavy sealant flashes too fast and leaves a dark, streaky high spot, do not scrub it. Reapply a small amount of the active liquid product directly over the high spot immediately. The fresh solvents will re-liquefy the cured spot, allowing you to buff it clear with a clean towel.
- Washing Too Soon: Exposing a fresh synthetic sealant or ceramic coating to high-alkaline car wash soaps before the 7-day chemical cure window closes will severely degrade the coating’s lifespan.
- Neglecting to Reapply Undercarriage Oils: Oil-based inhibitors wash away over time, especially in high-spray areas behind the front wheels. Annual reapplication in late autumn is mandatory to maintain the anodic protection.
Mid-Winter Maintenance Rules
Applying winterization is only half the battle; maintaining it dictates its survival until spring.
- Use Touchless Washes Only: Friction car washes utilize stiff brushes that act like sandpaper when coated in winter grit, instantly stripping synthetic sealants and scratching ceramic coatings. Use touchless automated washes.
- Wash Above Freezing: Only run your car through a wash when ambient temperatures are above 32°F (0°C). Washing in freezing temperatures forces water into door latches and window tracks, causing mechanical lockouts.
- Flush the Undercarriage Weekly: Pay for the undercarriage flush at the automated wash. Even with an oil coating, blasting the heavy salt accumulations off the frame weekly limits the corrosive electrolyte exposure.
Frequently Asked Questions
How long does a winter car prep take?
A thorough exterior winterization takes a DIYer roughly 4 to 8 hours to complete. This includes 2 hours for decontamination washing and claying, 1 to 2 hours for chemical prep and sealant application, and 1 to 2 hours for undercarriage oil spraying.
Can I apply winter wax below freezing temperatures?
No. Traditional waxes, polymer sealants, and ceramic coatings require an ambient temperature of at least 50°F (10°C) to cure. Below this temperature, carrier solvents cannot evaporate, resulting in a hazy, unbonded layer that wipes away at the first wash.
Are rubberized undercoatings good for winter?
Rubberized undercoatings are highly destructive for winter driving. While they look clean initially, they eventually micro-crack. Saltwater penetrates these cracks and becomes trapped against the bare metal beneath the rubber, accelerating catastrophic, invisible rust. Always use self-healing oil or lanolin films.
How often should I wash my car during the winter?
You should wash your car every 1 to 2 weeks during the winter using a touchless car wash. Frequent washing removes accumulated salt and magnesium chloride brines, preventing the buildup of highly concentrated corrosive cells on your paint and chassis.
Does a ceramic coating prevent rock chips from winter sand?
No. Ceramic coatings provide immense chemical resistance against road salt and bird droppings, but they are measured in nanometers of thickness. They do not possess the physical mass required to absorb kinetic impacts from flying rocks, sand, or winter road debris. For impact protection, Paint Protection Film (PPF) is required.