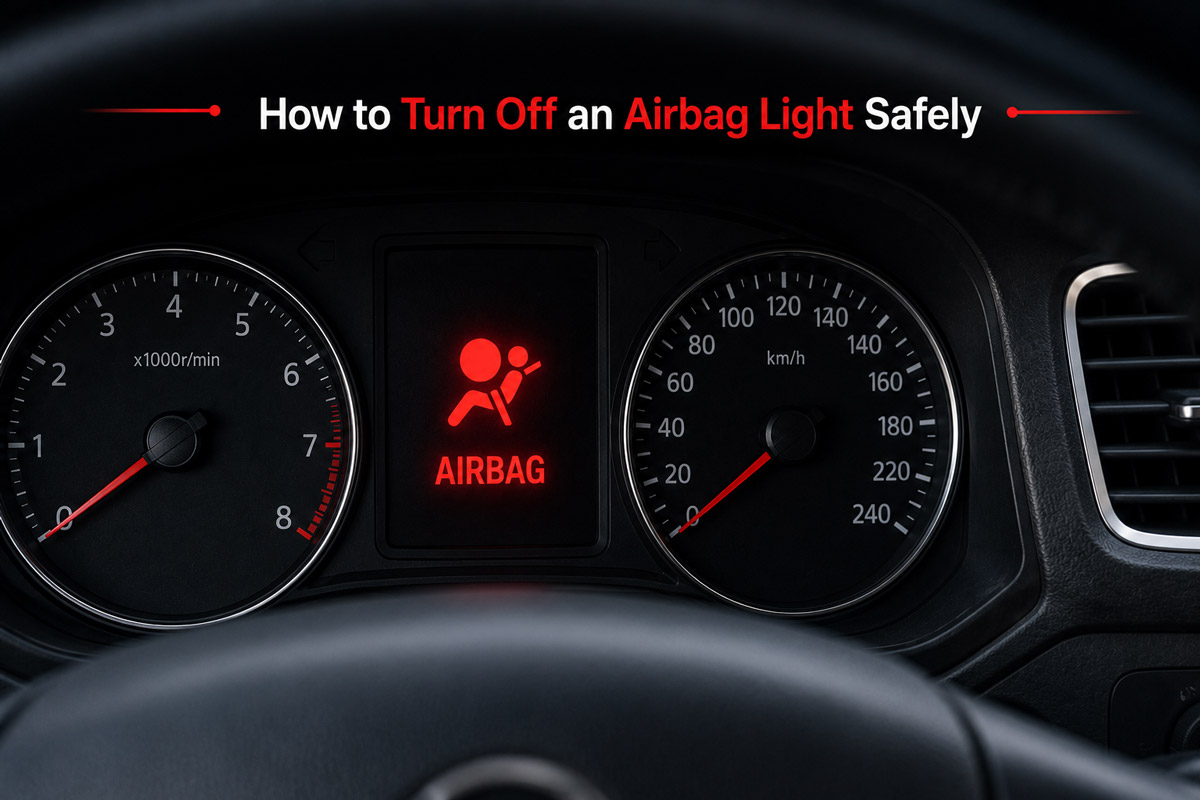
To turn off an airbag light permanently, read the Supplemental Restraint System fault code with a vehicle-compatible SRS scanner, repair the identified fault, clear the code and confirm that the warning light completes its normal startup self-test. Disconnecting the battery or erasing the code without repairing the problem normally provides no lasting result.
Key Facts at a Glance
- An airbag warning light indicates that the SRS control module has detected a restraint-system fault.
- One affected airbag circuit, several restraints or the entire supplemental restraint system may be unavailable; the result varies by vehicle and fault.
- A basic engine-code reader usually cannot read or erase airbag codes.
- Battery disconnection does not repair broken wiring, a failed clock spring, crash data or a defective sensor.
- Never test an airbag inflator circuit directly with an ordinary multimeter or test light.
- The correct repair ends with a normal self-test: the airbag light illuminates briefly after startup and then turns off.
Before You Start
The most important success factor is repairing the condition represented by the code, not finding a way to erase the dashboard light. Ford, Honda and Toyota describe a light that remains on, flashes or fails its startup check as evidence of a restraint-system malfunction requiring inspection.
Check for recalls before buying parts
Search the vehicle identification number through the manufacturer or the relevant national recall database before diagnosing an airbag light. Airbag warning lights can be associated with recalled spiral cables, control modules, sensors or inflators, and a covered repair may be performed without charge.
This check is especially important for a used vehicle with prior collision repairs. NHTSA warns that previously deployed airbags must be replaced correctly and has issued urgent warnings concerning dangerous non-genuine replacement inflators found in repaired vehicles.
What Does the Airbag Light Mean?
The airbag light means the Supplemental Restraint System has failed its readiness check or has stored a fault affecting a monitored component. The monitored network may include front, side, curtain and knee airbags; seatbelt pretensioners; crash sensors; occupancy sensors; seat-position sensors; wiring circuits and the restraint control module.
The warning does not prove that every airbag is disabled. Depending on the vehicle architecture and code, the module may suppress one deployment circuit, a group of restraints or broader system operation. Because the driver cannot determine the remaining protection from the lamp alone, the vehicle must be treated as having reduced crash protection until diagnosed.
Ford describes the warning indicator as a readiness monitor for airbags, crash sensors and occupant sensors. A warning lamp, message or repeating tone may remain active until the underlying problem is repaired.
Is the light normal for a few seconds?
Yes. The airbag indicator normally illuminates briefly when the ignition is switched on while the control module performs its self-test.
A fault is indicated when the light:
- Never illuminates during startup
- Remains illuminated after the self-test
- Begins flashing
- Turns on while driving
- Reappears after being cleared
- Is accompanied by an “SRS,” “Service Airbag” or restraint-system message
A failed warning lamp is also a fault because the vehicle can no longer communicate SRS readiness normally. Some vehicles use an audible warning if the lamp circuit itself fails.
Is “Passenger Airbag Off” the same warning?
No. A passenger-airbag-off indicator can be a normal status light showing that the occupant-classification system has intentionally suppressed the passenger airbag because the seat is empty, carries a light object or meets another manufacturer-defined condition.
The main SRS warning light indicates a malfunction. The passenger-off indicator becomes suspicious when it behaves contrary to the owner’s manual—for example, it remains off with an adult correctly seated or illuminates together with the main SRS warning.
Federal requirements specifically address a passenger-airbag status telltale, which is separate from the general malfunction indicator.
Step 1: Record Exactly How the Light Behaves
Start the vehicle and observe the airbag indicator from ignition-on through engine startup. Record whether it stays solid, flashes in a repeating pattern, disappears and returns, or changes when either front seat is moved.
These details help separate an active electrical fault from an intermittent connection or a manufacturer-specific diagnostic pattern.
You will know this step is complete when you can describe:
- When the light first appears
- Whether it is solid or flashing
- Whether seat movement affects it
- Whether another restraint message appears
- What repair, collision or battery event occurred immediately beforehand
Common mistake: Assuming a flashing light means the same thing on every vehicle. Some older systems communicate codes through flash patterns, while many newer vehicles require a scan tool.
Step 2: Check Battery Voltage and Recent Power Problems
Test the 12-volt battery before interpreting several low-voltage or communication codes. With the engine off and the battery rested, approximately 12.6 volts represents a fully charged conventional lead-acid battery; readings near or below 12.0 volts indicate substantial discharge. Specifications and testing procedures vary for AGM, EFB and hybrid auxiliary batteries.
Low voltage can interrupt module self-tests or create historical communication codes, particularly after jump-starting, battery replacement or extended storage. However, replacing or charging the battery will not repair a broken deployment circuit.
After restoring stable voltage:
- Switch the ignition off.
- Charge or replace the battery as required.
- Start the vehicle.
- Read the SRS codes before clearing anything.
- Record whether each code is current, pending, intermittent or historical.
Success checkpoint: Battery voltage remains stable and the scanner communicates with the SRS module.
Common mistake: Replacing the battery and assuming the illuminated light will automatically erase. Many SRS modules retain codes until the fault passes defined self-tests or is cleared with an appropriate scanner.
Step 3: Perform Safe Visual Checks
Inspect only components that can be checked without disconnecting or electrically testing an airbag circuit. Look for obvious seat-track damage, water intrusion, disconnected non-SRS plugs, loose battery terminals and objects interfering with seat movement.
Safe owner-level observations include:
- Items pushed beneath the front seats
- Liquid spills near seat wiring
- Wiring stretched by repeated seat movement
- Recently removed or replaced seats
- Damp carpet after rain, flooding or heater-core leakage
- Steering-wheel buttons or horn failing with the warning light
- A battery, dashboard, radio or steering-column repair immediately preceding the fault
- Evidence of a previous collision or deployed restraint
Do not pull apart yellow or orange SRS connectors merely to inspect them. Connector-locking mechanisms differ, and accidental terminal damage can introduce a new high-resistance fault.
Success checkpoint: You have identified any recent event or physical condition that corresponds with the scanned code.
Common mistake: Moving a powered seat repeatedly with the ignition on while disturbing its harness. That can make an intermittent fault active or store additional codes.
Step 4: Connect a Scanner That Supports SRS
Connect a scan tool that explicitly lists airbag or SRS coverage for the vehicle’s year, make, model and market. An inexpensive generic OBD-II reader designed only for engine emissions codes will usually not access the restraint control module.
The OBD-II connector is commonly beneath the driver’s side of the dashboard. With the ignition off, connect the tool, then follow its instructions—typically switching the ignition to ON without starting the engine.
Select a menu such as:
- SRS
- Airbag
- Supplemental Restraint
- Restraints Control Module
- Occupant Restraint Controller
- Sensing and Diagnostic Module
Coverage matters more than the scanner’s advertised number of functions. A tool may support SRS on one manufacturer but offer only engine functions on another.
Success checkpoint: The scanner identifies the restraint module and displays codes with descriptions or circuit references.
Common mistake: Buying a tool labeled “OBD2 scanner” without checking the manufacturer’s compatibility list for SRS access.
Step 5: Read and Save Every SRS Code
Read all SRS diagnostic trouble codes before disconnecting the battery, moving connectors or erasing memory. Save the complete alphanumeric code, status, subcode and freeze-frame or event data where available.
A description such as “driver airbag circuit resistance high” is not enough by itself. The code number and subcode may distinguish among:
- Open circuit
- Short to ground
- Short to voltage
- Resistance above specification
- Resistance below specification
- Sensor communication failure
- Occupant-classification calibration fault
- Deployment command recorded
- Internal control-module failure
Do not apply a universal “2–3 ohm” target to every circuit. Airbag modules monitor circuits using manufacturer-specific strategies, and service specifications depend on the inflator, pretensioner, wiring design and diagnostic adapter.
Success checkpoint: You possess the original code record and can consult vehicle-specific service information.
Common mistake: Clearing the code immediately to “see whether it comes back.” That can erase clues about when the fault occurred while doing nothing to restore protection.
Step 6: Match the Code to the Most Likely Cause
Use the exact code and factory diagnostic sequence to determine which component, connector or circuit requires testing. A code names the affected system or circuit; it does not automatically prove that the named component is defective.
Toyota’s documentation, for example, lists the airbag sensor assembly and multiple impact-sensor circuits among the systems monitored by the SRS warning lamp. Honda documentation also identifies seat-position sensor faults as capable of illuminating the SRS indicator.
Step 7: Repair the Underlying Fault
Repair the cause identified by the factory diagnostic process before clearing the code. The correct repair may involve securing a harness, replacing a clock spring, installing a buckle or pretensioner, correcting water intrusion, replacing a sensor or performing occupant-system calibration.
Repairs a careful owner may handle
Owner-level work should be limited to low-risk supporting problems such as:
- Charging or replacing a weak 12-volt battery
- Removing objects obstructing seat travel
- Repairing a water leak without touching SRS components
- Restoring a fuse only after determining why it opened
- Checking whether a recall applies
- Arranging a diagnostic scan
Repairs normally requiring a qualified technician
Professional service is the safer choice for:
- Steering-wheel or clock-spring removal
- Airbag-module removal
- Pretensioner replacement
- Crash-sensor diagnosis
- SRS wiring repair
- Occupant-classification calibration
- Post-collision restoration
- Module programming or configuration
- Water-damaged restraint modules
- Deployment-recorded codes
An airbag inflator contains an explosive pyrotechnic charge. A seatbelt pretensioner is also a pyrotechnic device. Correct disabling time, handling orientation, static protection, storage and disposal procedures must come from the manufacturer’s service information.
Success checkpoint: The physical fault is corrected, required connectors are locked and any calibration or programming procedure has completed successfully.
Common mistake: Installing a used airbag control module because its connector fits. Modules may contain crash data, vehicle-specific configuration or incompatible calibration.
Step 8: Clear the SRS Code
Clear the codes only after the repair has been completed and the system is fully reassembled. Use the scanner’s SRS erase function, then switch the ignition off for the period specified by the tool or service procedure.
A typical sequence is:
- Confirm battery voltage is stable.
- Reconnect all components according to service instructions.
- Turn the ignition on.
- Enter the SRS module.
- Clear diagnostic trouble codes.
- Switch the ignition off.
- Wait at least 10–30 seconds or follow the specified procedure.
- Restart the vehicle without anyone or anything interfering with the seats.
Some codes will not erase while the fault remains current. Deployment codes, internal module faults and configuration errors may require component replacement, authorized reset procedures or programming rather than a simple erase command.
Success checkpoint: The scanner reports no active SRS codes.
Common mistake: Treating “erase successful” as proof of repair. A scanner can accept an erase command even though the module detects the same fault during the next self-test.
Step 9: Verify the Warning-Light Self-Test
Switch the ignition off, wait briefly and restart the vehicle while watching the airbag indicator. The normal pattern is for the light to illuminate during the startup check and then switch off.
Complete at least two or three ignition cycles. Where the original fault was intermittent, carefully operate the affected seat or steering wheel only as normal use requires, then re-scan the SRS module.
The repair is verified when:
- The light performs its normal self-test
- No SRS warning message appears
- No current or pending restraint codes return
- Occupant indicators behave according to the owner’s manual
- Seat movement does not reactivate the fault
- Steering-wheel controls function normally when relevant
Ford states that a readiness light that remains illuminated, flashes or does not illuminate after ignition-on can indicate a disabled or malfunctioning restraint system.
Can You Reset the Airbag Light by Disconnecting the Battery?
Disconnecting the battery is not a dependable method for turning off an airbag light. It may power-cycle the module or prevent a temporary low-voltage condition from recurring, but it cannot repair an active circuit fault and often does not erase stored SRS memory.
Battery disconnection may also:
- Erase clock and radio settings
- Reset window or steering-angle initialization
- Create low-voltage communication codes
- Trigger anti-theft or radio security procedures
- Interrupt diagnostic evidence
- Require idle, transmission or power-window relearning
Where battery disconnection is required before SRS service, the specified waiting time is a safety procedure, not a reset technique. Airbag modules can contain reserve-energy capacitors, and the manufacturer’s exact disabling procedure must be followed.
When can a power cycle appear to work?
A power cycle may make the light disappear when the original event was temporary, the system completes its next self-test successfully and the module treats the code as self-clearing or historical. That outcome does not make battery disconnection a universal reset.
Re-scan the module even when the warning disappears. A history code can expose an intermittent connector, weak battery or network problem before it returns.
Can You Turn Off the Light With Ignition Cycling?
Ignition cycling only works when the manufacturer has designed a specific diagnostic or initialization procedure for that model. Randomly switching the key on and off does not repair a modern airbag fault.
Some older vehicles use timed ignition cycles to display flash codes or clear particular historical codes after the fault is gone. The timing and eligibility rules are model-specific, so generic online instructions can create confusion or mask a continuing problem.
Use ignition cycling only when the exact factory procedure applies to the vehicle’s model year and code. Otherwise, read the SRS module with a compatible scanner.
Can an Airbag Fuse Turn Off the Light?
Replacing a blown SRS fuse may restore module power, but removing the fuse cannot safely turn off the warning. A missing fuse normally disables the restraint system and can create another warning, message or audible alert.
A blown fuse is a symptom, not a diagnosis. Before replacing it repeatedly, inspect the protected circuit for shorts, water intrusion, incorrect accessory wiring or a failed module.
Never install a higher-amperage fuse. The specified fuse rating protects the wiring from overheating and fire.
Why Does the Airbag Light Come Back Immediately?
An airbag light that returns immediately indicates that the control module detects a current fault during startup. Re-read the code rather than clearing it repeatedly.
Common reasons include:
- The diagnosed component was not the actual cause.
- A connector was not fully locked.
- A damaged wire remains open or shorted.
- The replacement part is incompatible.
- Occupant-classification calibration was omitted.
- The module contains deployment data.
- A second code was overlooked.
- Battery voltage falls during startup.
- A fault occurs only when the seat or steering wheel moves.
A loose spiral-cable connection can illuminate the warning and prevent the driver airbag from deploying, illustrating why the circuit must be repaired rather than merely erased.
Why Does the Light Turn On When the Seat Moves?
An SRS warning that reacts to seat movement commonly points to an intermittent under-seat harness, connector, side-airbag circuit, pretensioner circuit or seat-position sensor. The movement stretches or shifts an already weakened connection.
Do not push the plug together, apply household contact cleaner or tie the connector in a position that merely keeps the light off. The approved repair may require a revised connector, terminal repair, harness replacement or manufacturer service kit.
A code captured while the fault is active is more useful than one read after the seat has returned to a position where continuity is temporarily restored.
Can You Drive With the Airbag Light On?
A vehicle may continue to run normally with the airbag light on, but its crash protection cannot be assumed to function as designed. Seatbelts remain essential, yet one or more airbags or pretensioners may fail to deploy correctly during a collision.
Drive only as necessary to reach a repair facility unless the vehicle has an active safety recall, visible collision damage, exposed wiring, a recently deployed restraint or a manufacturer-issued do-not-drive warning. NHTSA has issued do-not-drive warnings for specific high-risk airbag defects and dangerous replacement inflators.
Common Causes of an Airbag Warning Light
Weak or recently disconnected battery
Low voltage can interrupt module communication or self-testing. The warning may appear after a dead battery, jump-start, charging-system problem or battery replacement.
Test the battery and charging system, but do not assume voltage is the only fault until the SRS codes are read.
Damaged clock spring
The clock spring, also called a spiral cable, maintains electrical connections while the steering wheel rotates. A fractured ribbon cable can affect the driver airbag, horn, cruise-control switches and steering-wheel buttons.
A warning that appears with simultaneous horn or steering-control failure makes the clock spring a strong suspect, but the code and circuit tests must confirm it.
Loose or damaged under-seat wiring
Seat movement, stored objects, cleaning equipment and liquid spills can strain harnesses beneath the front seats. A poor connection may affect a side airbag, pretensioner, buckle switch or occupant sensor.
Intermittent faults are common because the circuit may reconnect when the seat returns to another position.
Failed seatbelt buckle or pretensioner
A buckle switch reports belt status, while a pretensioner tightens the belt during certain crashes. Either component can produce a restraint fault when its electrical circuit fails.
A pretensioner that activated in a collision requires replacement; clearing its code does not restore the pyrotechnic device.
Occupant-classification problem
The passenger-seat classification system estimates whether the seat is empty or occupied and controls passenger-airbag behavior. Seat replacement, wet upholstery, objects beneath the seat, incorrect cushions or lost calibration can create faults.
Calibration may require a level floor, an empty seat, specified test weights and a manufacturer-compatible scan tool.
Crash sensor or control-module fault
Impact sensors and the control module depend on correct mounting, communication, power and ground. Corrosion, floodwater, collision damage or incorrect installation can generate warning codes.
A water-damaged module should not be assumed safe merely because it can still communicate with a scanner.
Previous collision or deployment
After deployment, the repair may require airbags, pretensioners, sensors, wiring, trim, the control module and manufacturer-specified structural inspections. Replacing only the visible airbag does not restore the entire restraint system.
NHTSA recommends replacing deployed airbags and warns owners of previously crashed vehicles about unsafe counterfeit or substandard replacement components.
Reset Methods Compared
Common Mistakes and How to Fix Them
Clearing codes before recording them
Problem: Diagnostic evidence disappears before the affected circuit is identified.
Recovery: Re-scan after the light returns, save every code and note whether it is current or historical before further work.
Replacing the part named in the description
Problem: “Driver airbag circuit” may refer to wiring, connectors, the clock spring or the inflator—not automatically the airbag module.
Recovery: Follow the code’s factory pinpoint test and confirm powers, grounds, connectors and circuit integrity with approved diagnostic methods.
Testing an inflator with an ordinary meter
Problem: A test light, jumper wire or inappropriate meter can damage the module or introduce current into a pyrotechnic circuit.
Recovery: Stop work and use manufacturer-approved simulators, breakout leads and procedures. Do not probe inflator terminals directly.
Installing bypass resistors
Problem: A resistor may deceive the module into seeing an acceptable electrical load while the airbag or pretensioner remains absent.
Recovery: Remove the bypass and restore the correct manufacturer-approved restraint component and wiring.
Disconnecting yellow connectors with power available
Problem: Reserve energy, static discharge or incorrect handling creates deployment and injury risks.
Recovery: Follow the exact battery-disconnection, waiting and static-control procedure in the vehicle’s service manual before SRS disassembly.
Ignoring water intrusion
Problem: Drying the carpet does not reverse corrosion inside low-mounted connectors, sensors or modules.
Recovery: Locate and repair the leak, inspect affected circuits and replace components that fail the manufacturer’s water-exposure criteria.
How Much Does Airbag-Light Repair Cost?
Airbag-light diagnosis commonly costs $100–$200 at a U.S. repair facility, while the final repair can range from a minor wiring correction to several thousand dollars after a collision. Prices vary substantially by vehicle, labor rate, component location, programming needs and parts availability.
These are planning ranges rather than quotes. Luxury vehicles, dashboard-mounted passenger airbags, integrated seat airbags and vehicles requiring extensive interior disassembly can cost substantially more.
How long does the repair take?
A scan and preliminary diagnosis may take 30–90 minutes. A connector repair or battery correction may be completed the same day, while clock-spring, sensor and pretensioner replacement commonly requires one to three labor hours.
Post-collision work can take days because parts, programming, calibration, interior replacement and structural inspection must be coordinated.
Expert Rules That Prevent Misdiagnosis
The code identifies a circuit, not necessarily a failed part
Experienced technicians avoid “parts cannon” diagnosis. An airbag-circuit code can be caused by the inflator, clock spring, intermediate connector, terminal tension, harness damage or the control module.
Replacing the most expensive named component first is often the least efficient strategy.
An intermittent connection can pass while stationary
Under-seat wiring may test correctly until a person sits down, the seat moves or the vehicle travels over a bump. Good diagnosis reproduces the operating condition without manipulating live pyrotechnic connectors.
A history code plus a seat-position pattern can be more revealing than a static resistance measurement.
A warning light that disappears is not proof of full readiness
Some modules extinguish the warning after a fault is absent for a defined number of ignition cycles. The historical code may remain and can reveal a developing failure.
A final scan is therefore valuable even after the dashboard appears normal.
Honest Limitations of DIY Diagnosis
A capable DIYer can observe symptoms, stabilize battery voltage, check recalls, retrieve codes and identify obvious environmental causes. DIY work is not well suited to inflator testing, post-collision restoration, occupant-classification calibration or internal module diagnosis.
The main limitation is not access to hand tools; it is access to vehicle-specific procedures, approved test adapters, programming functions and safe handling knowledge. When the diagnostic path requires disconnecting an airbag, pretensioner or crash sensor, professional service is usually the rational boundary.
Frequently Asked Questions
Will an airbag code clear itself?
Some temporary or historical SRS codes may become inactive after the fault disappears and the vehicle completes successful self-tests. Many codes remain stored, and current circuit faults normally reactivate the warning immediately. Scan the module even when the light turns off, because the stored history may identify an intermittent safety problem.
Can AutoZone or another parts store clear an airbag light?
Some parts stores can read engine-emissions codes but may not offer SRS scanning because airbag access requires different software and vehicle coverage. Ask specifically whether the tool supports the restraint module for your exact vehicle. Even when a code can be erased, the store cannot make an unresolved fault safe.
Will replacing the clock spring turn off the light?
Replacing a genuinely failed clock spring can resolve a driver-airbag circuit fault, but the code may still require clearing afterward. A clock spring should not be replaced solely because the airbag light is on; under-seat wiring, pretensioners, crash sensors and module faults can produce the same dashboard warning.
Can a seat cover cause an airbag warning?
A seat cover can interfere when it is incompatible with seat-mounted airbags, occupant sensors or seat-position systems. Thick cushions, wet upholstery and objects placed on or beneath the passenger seat can also affect classification. Use only covers approved for the vehicle’s seat-airbag design and follow the owner’s manual.
Does an airbag light fail a vehicle inspection?
Inspection rules vary by country, state and testing program. Some jurisdictions fail an illuminated SRS warning, while others do not include the restraint system in routine inspection. Regardless of the legal result, the warning still indicates uncertain crash protection and should be diagnosed promptly.
Can removing the dashboard bulb solve the problem?
Removing the bulb only conceals the warning and may cause a failed-lamp code, audible alert or inspection failure. The restraint fault remains present, and a future driver may falsely assume the system is operational. Restore the indicator circuit and repair the SRS fault instead of hiding it.
The Bottom Line
The only reliable way to turn off an airbag light is to retrieve the SRS code, diagnose the specified circuit, repair the actual failure, clear the module and verify a normal startup self-test. Battery disconnection, fuse removal, ignition tricks and resistor bypasses cannot restore crash protection and may create additional safety or diagnostic problems.
Treat the illuminated light as evidence of reduced or uncertain restraint performance. Start with a recall check, stable battery voltage and a vehicle-compatible SRS scan; leave pyrotechnic components, calibration and post-collision restoration to technicians equipped for restraint-system work.