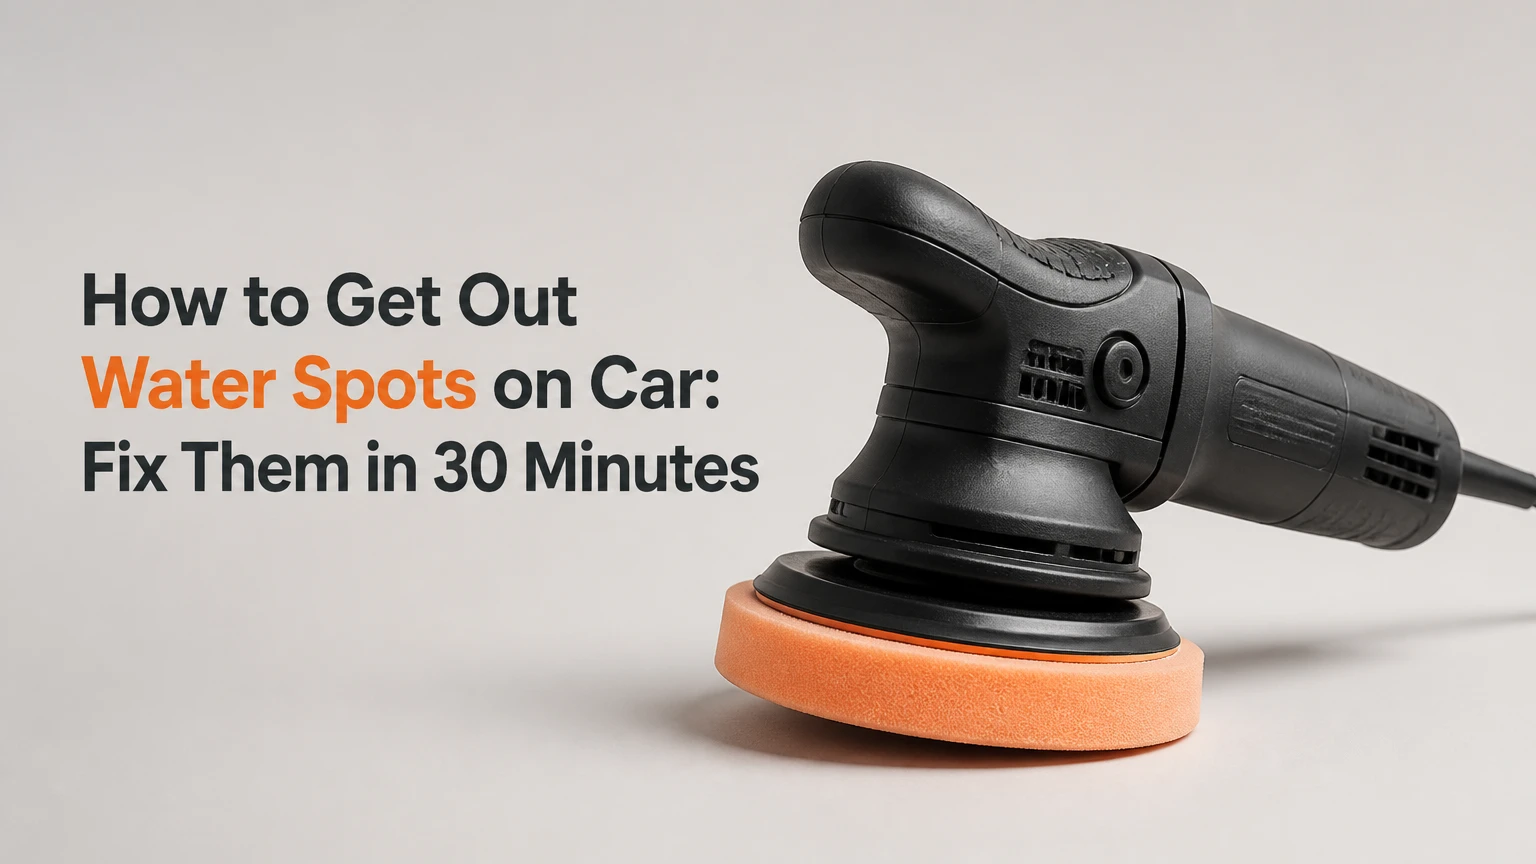
To get out water spots on a car, wash and dry the cool vehicle, dissolve surface minerals with diluted white vinegar or a dedicated water-spot remover, then polish only the marks etched into the clear coat. Fresh deposits usually take 20-30 minutes per panel; etched defects require paint correction and more care.
Key Facts
Automotive water spots are concentrated mineral deposits left when hard water evaporates from paint or glass.
A rough deposit that disappears when wet is usually removable without polishing.
A pale ring that remains after cleaning is likely clear-coat etching, not leftover dirt.
Vinegar can dissolve fresh mineral residue, but it cannot replace clear coat removed by chemical etching.
Clay bars remove bonded contamination and may create marring if used with inadequate lubricant.
A cool, shaded surface and immediate drying prevent most new water spots.
What Causes Water Spots on a Car?
Water spots form when dissolved minerals remain after water evaporates from a vehicle. Calcium, magnesium, bicarbonate, carbonate, silica, road dust, and soap residue can concentrate at the edge of each droplet, creating a visible ring or chalky deposit.
Hardness varies by water supply. The United States Geological Survey classifies water containing 121-180 milligrams per liter of calcium carbonate as hard and water above 180 milligrams per liter as very hard. A car washed with very hard water can develop spotting after one wash, especially when the panel is hot.
Sunlight does more than make spots visible. Heat evaporates water faster, increasing mineral concentration and shortening the time available for drying. Repeated exposure can allow acidic or alkaline contaminants to react with the clear coat, leaving a shallow depression around the original droplet.
The deposit is not always ordinary water scale. Sprinkler water may contain fertilizer, iron, or well-water sediment, while rain can carry industrial particles and acidic compounds. Identification matters because mineral residue, iron fallout, and paint etching need different remedies.
How Can You Tell Deposit From Etching?
A deposit sits above the finish and can often be dissolved or mechanically lifted. Etching is a change in the clear coat itself, so no liquid cleaner can restore the missing material.
Use this inspection sequence:
- View the panel in shade and direct sunlight.
- Run a clean, dry microfiber towel across the surface.
- Wash a small area with car shampoo.
- Apply a small amount of water-spot remover to a test spot.
- Inspect the dried area from several angles.
A gritty, raised ring indicates surface contamination. A smooth but visible circle that remains after chemical cleaning indicates etching. If a fingernail catches on a sharp edge, the defect may be deeper than ordinary polishing can safely correct.
Which Type of Water Spot Does Your Car Have?
Most automotive water spots fit one of three practical categories: removable surface residue, clear-coat etching, or severe paint-system damage. The categories determine whether the correct response is cleaning, polishing, or professional refinishing.
| Condition | Typical age or cause | Surface appearance | Correct first treatment |
|---|---|---|---|
| Type I deposit | Hours to several days, hard water or wash water | White, gray, or tan raised ring | Wash, vinegar solution, or chemical remover |
| Type II etching | Several days to weeks in heat and sunlight | Faint circular shadow or shallow crater | Test-spot polish with a dual-action machine |
| Type III severe etching | Long exposure, acidic fallout, sprinkler chemicals | Chalky, faded, pitted, or discolored patch | Professional paint inspection and refinishing |
| Contamination mix | Well water, iron, road film, soap residue | Rough orange, brown, or white speckling | Decontamination, then spot treatment |
A water-spot remover should be the first escalation for Type I deposits. A clay bar is appropriate only when the surface remains rough after chemical cleaning, because clay removes bonded particles rather than repairing a depression.
Are All White Rings Actually Water Spots?
No. Bird droppings, tree sap, overspray, alkaline soap, iron fallout, and mineral scale can produce similar marks. A white ring that feels gritty may be calcium residue, while orange dots that bleed purple with an iron remover are usually ferrous contamination.
Do not identify a defect from color alone. Test a small, inconspicuous area, and avoid mixing chemicals on the same panel without rinsing between products.
Before You Start: Tools, Time, and Safety
A basic paint treatment needs 60-90 minutes for a midsize vehicle, while one affected panel usually takes 20-30 minutes. The minimum equipment is a pH-neutral car shampoo, two buckets or a rinseless-wash system, clean microfiber towels, distilled water, gloves, and one mild chemical treatment.
Before You Start Checklist
| Item | Typical quantity or specification | Purpose |
|---|---|---|
| Car shampoo | 30-60 milliliters per 15 liters of wash water | Removes road film without household detergents |
| Microfiber towels | 4-8 towels, 300-500 GSM | Washing, drying, and residue removal |
| Distilled water | 1-2 liters for testing or final rinse | Avoids adding new minerals |
| White vinegar | 250 milliliters, diluted 1:1 | Dissolves light mineral residue |
| Water-spot remover | 30-60 milliliters for several panels | Treats stubborn deposits |
| Nitrile gloves | 1 pair | Protects skin from acidic products |
| Dual-action polisher | 8-15 millimeter throw, speed 3-4 | Corrects shallow etching |
| Finishing polish | 10-20 milliliters per test section | Refines haze after compounding |
Work in shade with the paint below approximately 32°C, and never allow an acidic product to dry on the panel. Do not use vinegar on unsealed stone, sensitive aftermarket finishes, or a surface that has not been spot-tested.
Step 1: Wash and Diagnose the Surface
Wash the vehicle before treating water spots, because rubbing mineral deposits through road grit can create scratches. Use a cool panel, pH-neutral shampoo, a clean wash mitt, and a drying towel that has not touched wheels or lower rocker panels.
Rinse the car thoroughly from top to bottom. Wash one panel at a time, beginning with the roof and glass, then the upper doors, hood, and lower panels. Dry immediately with a plush microfiber towel or a filtered air blower rather than allowing rinse water to evaporate.
After drying, mark a 30 by 30 centimeter test area with low-tack masking tape. A test spot prevents an aggressive chemical or polish from being applied across the entire vehicle before the defect is understood.
You will know the step worked when: the panel feels clean, the visible rings remain identifiable, and no loose grit is present.
Common mistake: using a dry towel to scrub a dusty panel. Rewash the area before continuing.
Step 2: Test Plain Water and Shampoo
Rewet the test area with distilled water and wipe it once with a clean microfiber towel. If the marks disappear while wet and return after drying, surface minerals are still present. If the ghosted outline remains visible while wet, the clear coat may already be etched.
Use car shampoo first when the spots are less than 24 hours old or followed a normal wash. Shampoo will remove surfactant residue and loose minerals without adding acid. It will not dissolve every baked-on calcium deposit.
Do not begin with clay or compound merely because the paint feels rough. Chemical dissolution is safer than mechanical abrasion when the problem is sitting above the clear coat.
You will know the step worked when: the test area has either cleared or clearly shows a persistent outline that identifies etching.
Common mistake: judging the surface under one light source. Check both shade and angled sunlight.
Step 3: Dissolve Surface Minerals
A 1:1 mixture of distilled white vinegar and distilled water is a reasonable short-contact treatment for fresh Type I deposits on conventional automotive paint. Apply it to a microfiber applicator or towel, not to a large hot panel, and keep the dwell time around 30-60 seconds.
Work on a 30 by 30 centimeter section. Wipe gently in straight passes, then rinse with clean water and dry. Repeat once if the deposit softens but does not disappear. Stop if the finish becomes cloudy, sticky, discolored, or unusually dull.
Vinegar contains acetic acid, so it can weaken or remove wax and some sealants. It is not a universal cleaner, and prolonged contact increases risk without improving results. Never combine vinegar with bleach, chlorine products, or unknown detailing chemicals.
You will know the step worked when: the rough ring is gone and the surface feels smooth after rinsing.
Common mistake: letting the vinegar solution dry. Rewet the area, remove it immediately, and inspect for streaking before proceeding.
Step 4: Use a Dedicated Water-Spot Remover
Use a dedicated automotive water-spot remover when diluted vinegar fails on a clean, uncoated panel. Product chemistry varies, but many removers use acidic ingredients to dissolve alkaline mineral scale; label instructions take priority over generic dwell times.
Apply a small amount to a microfiber applicator, treating only one section at a time. Use light pressure and short cross-hatch movements, allow the stated reaction time, then wipe the residue and rinse the panel. Wear nitrile gloves and protect polished metal, anodized trim, rubber, and matte surfaces unless the product label specifically approves them.
Rewash the panel after treatment. Chemical removers may strip wax or a paint sealant, and residue left around badges or panel gaps can continue reacting after the visible spot disappears.
You will know the step worked when: the surface is smooth, the mineral ring has vanished, and no oily or chalky film remains after rinsing.
Common mistake: using more product and pressure instead of more controlled dwell time. Stronger application can stain trim without improving an etched defect.
Step 5: Clay Only Bonded Contamination
Clay a panel only when chemical cleaning removes the visible ring but leaves a rough, gritty feel. Spray clay lubricant generously, flatten a small piece of clay, and glide it lightly across the surface without pressing down.
Fold the clay when its working face becomes dirty. If the clay touches the ground, discard it. A contaminated clay bar can drag grit across clear coat and produce linear marring.
Clay will not remove a below-surface crater. It can make the paint feel smooth while the circular shadow remains, which is a useful diagnostic result rather than proof that the spot has been repaired.
You will know the step worked when: the paint feels glassy under a clean plastic bag or fingertip, with no abrasive drag.
Common mistake: using clay as the first treatment for hard scale. Dissolve the minerals first to reduce marring.
Step 6: Polish Clear-Coat Etching
Polish only after chemical removal has confirmed that a remaining mark is below the surface. A dual-action polisher is safer for most beginners than a rotary machine because its motion reduces the chance of concentrated heat and rotary holograms.
Begin with the least aggressive combination: a polishing foam pad and a finishing polish. Prime the pad with a thin film of product, add approximately four small drops, and work a 60 by 60 centimeter section at a moderate speed, commonly 3-4 on a consumer DA polisher.
Make four overlapping passes, two horizontally and two vertically, using moderate arm speed and light-to-medium pressure. Wipe the residue with a clean towel, inspect under an LED or angled sunlight, and repeat only if the defect is improving.
If the etching remains, move one step more aggressive, such as a medium-cut foam or microfiber pad with compound. Follow with finishing polish if haze appears.
| Paint-correction stage | Pad and product | Typical passes | Main risk |
|---|---|---|---|
| Light etching | Soft foam plus finishing polish | 2-4 section passes | Insufficient correction |
| Moderate etching | Medium foam plus one-step polish | 4-6 section passes | Haze or marring |
| Heavy shallow etching | Microfiber cutting pad plus compound | 3-5 section passes | Clear-coat removal |
| Deep crater | Professional assessment | Not DIY-standard | Burn-through or exposed base coat |
You will know the step worked when: the circular outline is reduced under multiple light angles without exposing a dull or thin-looking patch.
Common mistake: chasing one spot until the panel becomes visibly thinner. Paint correction removes material, so preservation is more important than absolute perfection.
Which Removal Method Should You Choose?
The least aggressive effective method is the correct choice. Chemical removal is preferable for raised deposits, clay is reserved for bonded contamination, and machine polishing is necessary only when the clear coat has been etched.
| Method | Best use | Typical time | Typical DIY cost | Limitation |
|---|---|---|---|---|
| Shampoo wash | Fresh residue under 24 hours | 20-40 minutes | $5-$15 | Cannot dissolve baked scale |
| Vinegar solution | Light Type I deposits | 20-30 minutes per panel | $3-$8 | May strip protection |
| Dedicated remover | Stubborn surface minerals | 30-60 minutes per panel | $15-$35 | Can damage trim if dried |
| Clay bar | Bonded rough contamination | 45-90 minutes | $15-$40 | Cannot fix etching |
| DA polishing | Type II shallow etching | 2-6 hours | $80-$250 for tools | Removes clear coat |
| Professional correction | Extensive or uncertain damage | 4-12 hours | $250-$900 typical | Higher cost, variable result |
| Refinishing | Type III paint-system damage | 1-3 days | $500-$1,500+ | Color matching may vary |
The table uses typical North American consumer and detailing ranges, not fixed prices. Local labor rates, vehicle size, paint hardness, product brand, and the number of panels affected can shift the total substantially.
Is Vinegar Better Than a Commercial Remover?
Vinegar is the lower-cost option for fresh, light deposits on ordinary clear coat. A commercial product is usually more convenient for stubborn scale because its formulation, dwell guidance, and applicator compatibility are designed for automotive surfaces.
Neither option repairs etching. If the cleaned test area still shows a circular shadow, additional acid usually increases risk rather than improving the finish.
Does a Ceramic Coating Change the Process?
Yes. A ceramic coating can resist contamination, but it does not make a vehicle immune to water spots or etching. Use only a remover approved by the coating manufacturer, begin with the shortest label dwell time, and avoid clay or polishing unless you accept that the coating may be removed.
A coated car with persistent spots may need coating-safe chemical treatment or professional inspection. Polishing the panel can remove the coating and expose the underlying clear coat.
How Do You Remove Water Spots From Glass?
Automotive glass requires a separate process because mineral film, wiper residue, and etched glass can look similar to paint spots. Start with glass cleaner and a clean towel, then use a dedicated mineral-deposit remover or glass polish if the film remains.
Mask adjacent paint and test a small lower corner. Apply the product according to its label, keep the surface lubricated, and remove all residue before operating the wipers. A fine 0000-grade steel wool pad is sometimes used by experienced detailers on conventional glass, but it should not be used on tinted film, coated glass, delicate trim, or a dry surface.
Never polish a windshield aggressively enough to distort vision. If the mark catches a fingernail, lies in the driver’s viewing area, or produces glare at night, replacement or professional glass correction may be safer than further abrasion.
What Changes for Matte Paint, Vinyl, and Plastic?
Matte paint and vinyl wraps should not be treated like glossy clear coat. Polishing creates uneven gloss on matte finishes, while aggressive acid can stain vinyl, satin film, textured plastic, or unapproved protective coatings.
Use the material manufacturer’s cleaner first. Avoid clay unless the wrap manufacturer permits it, and do not use compound on matte or satin surfaces. For black textured trim, apply a product labeled for that plastic because mineral haze can be trapped in the texture.
| Surface | Safe starting point | Avoid | Escalation |
|---|---|---|---|
| Gloss clear coat | Shampoo, test spot, mild remover | Dry scrubbing | DA polish |
| Ceramic coating | Coating-approved remover | Unapproved acid or clay | Installer inspection |
| Matte paint | Manufacturer-approved cleaner | Polish, compound, wax | Specialist detailer |
| Vinyl wrap | Wrap-safe cleaner | Strong solvents, abrasive clay | Wrap installer |
| Windshield glass | Glass cleaner and polish | Dry steel wool, harsh abrasives | Glass professional |
Why Do Water Spots Reappear?
Water spots reappear when the same mineral-rich water continues drying on the vehicle. Removing the old mark without changing the wash, drying, sprinkler, or storage routine solves the symptom but leaves the source active.
Use one of these controls:
- Wash in shade when panels are cool.
- Dry immediately, starting with horizontal surfaces.
- Use filtered, deionized, or distilled final-rinse water when practical.
- Keep the car away from irrigation spray.
- Apply a compatible sealant or coating after correction.
- Remove fresh rain or wash droplets before sunlight evaporates them.
A sealant does not eliminate mineral deposits, but it can reduce bonding and make routine cleaning easier. Ceramic coatings improve water behavior and chemical resistance, yet concentrated minerals can still etch a neglected coated surface.
Is a Water-Repellent Coating Enough?
No. Hydrophobic behavior changes droplet shape, not the mineral content of the water. Small beads can evaporate more slowly or leave concentrated rings, especially on a warm horizontal panel.
The most reliable prevention is controlled drying. Protection is a backup, not permission to let sprinkler water bake on the paint.
Common Mistakes and How to Fix Them
Scrubbing With a Dry Towel
Dry friction can create micro-marring while leaving the mineral chemistry unchanged. Rewash the panel, lubricate the surface, and use a clean microfiber towel with minimal pressure.
Using Bathroom Limescale Cleaner
Household scale removers may contain stronger acids, solvents, or additives that attack trim, coatings, and paint protection. Rinse the area if such a product was used, then inspect for staining and switch to automotive-approved chemistry.
Applying Baking Soda
Baking soda is mildly abrasive and alkaline. It may scratch clear coat without dissolving the mineral ring, especially when mixed into a dry paste and rubbed by hand.
Polishing Before Washing
Compound cannot safely remove embedded grit and mineral crust at the same time. Wash and chemically clean first, then polish only the remaining defect.
Letting Chemical Remover Dry
A dried product can leave streaks or trim staining. Rewet the residue with the same product if the label permits, remove it promptly, rinse thoroughly, and inspect the panel in shade.
Ignoring the Paint’s Remaining Protection
Acid treatment and polishing can remove wax or sealant. After the surface is clean and dry, apply a compatible spray sealant, wax, or coating topper according to its instructions.
When Is Professional Refinishing Necessary?
Professional refinishing becomes appropriate when etching extends through the clear coat, the base color looks faded or chalky, polishing produces no improvement, or the defect is deep enough to catch a fingernail. Wet sanding and repainting remove or replace material, so they should not be the next casual step after vinegar.
A detailer can measure paint thickness, inspect edges, and perform a controlled test spot. Body-shop refinishing may be required when the clear coat is breached, because polishing cannot recreate missing clear coat or restore pigment that has chemically degraded.
What Does Professional Removal Cost?
Typical professional correction costs range from $250-$900 for a whole vehicle, while severe refinishing commonly ranges from $500-$1,500 or more per affected area. A single hood or roof usually costs less than a full correction, but hard paint, large SUVs, multiple correction stages, and coating removal increase labor.
| Service | Typical scope | Typical duration | Typical price |
|---|---|---|---|
| Spot chemical treatment | One to three panels | 1-2 hours | $75-$200 |
| One-step correction | Whole vehicle, light etching | 4-8 hours | $250-$600 |
| Multi-stage correction | Moderate to heavy etching | 8-16 hours | $500-$1,200 |
| Glass mineral correction | Windshield or side glass | 1-3 hours | $100-$300 |
| Panel refinishing | Severe clear-coat or color damage | 1-3 days | $500-$1,500+ |
Ask the provider whether the quoted service includes decontamination, paint protection, trim protection, and an inspection under multiple lights. A low quote may cover washing only, not correction.
Water-Spot Troubleshooting
The spots vanished, but faint circles remain in sunlight. The minerals were removed, but the clear coat is etched. Perform a controlled polishing test spot, or book paint correction if you lack a machine and inspection lighting.
White streaks appeared after chemical treatment. The product probably dried or remained in a panel gap. Reapply only as directed, wipe immediately, rinse the panel, and check whether the streak is residue or permanent staining.
The paint feels smooth, but the circles remain. Clay solved surface contamination, not etching. Stop claying and evaluate a mild polish.
Spots return after every wash. Test the water source, prevent sprinkler exposure, dry the vehicle immediately, and consider a deionized final rinse.
The windshield still has glare after cleaning. Mineral film may have etched the glass or contaminated the wiper blades. Replace damaged blades and seek glass correction if visibility is affected.
FAQ
Can I remove water spots without polishing?
Yes, if the marks are raised mineral deposits rather than clear-coat etching. Wash first, then use a short-contact vinegar solution or automotive water-spot remover on a cool test area. If a clean circular shadow remains after chemical treatment, polishing is the appropriate next step.
How long can water spots stay on car paint?
Fresh deposits can appear within minutes when hard water dries in sunlight. Visible etching may develop over days or weeks, depending on mineral concentration, temperature, acidity, paint condition, and exposure. There is no universal deadline, so remove sprinkler and wash-water residue as soon as possible.
Can rain cause permanent water spots?
Rain can cause permanent spots when it contains dissolved minerals or airborne acidic contamination and then dries repeatedly on warm paint. Ordinary clean rain is less problematic than irrigation or hard tap water, but every droplet should still be dried from horizontal panels when practical.
Will wax prevent water spots?
Wax can reduce mineral bonding and make deposits easier to remove, but wax cannot prevent water spots completely. A vehicle still needs prompt drying and protection from sprinklers. Sealants and ceramic coatings generally last longer than wax, although neither makes paint immune to etching.
Can water spots damage a car’s clear coat?
Yes. Mineral deposits can chemically etch or physically alter clear coat when they remain under heat and sunlight. Surface deposits are usually reversible, while deep craters require controlled polishing. If the defect reaches the base color or exposes paint layers, refinishing may be necessary.
Should I remove water spots from a leased car myself?
Use only washing and a mild, label-approved chemical treatment unless the lease return inspection is close and you understand the finish. Avoid sanding, rotary polishing, or aggressive compounds because those actions can create measurable paint damage. A documented professional detail is safer for severe etching or coated paint.
The Bottom Line
The safest way to get out water spots on a car is to identify whether the mark is residue or etching, then use the least aggressive method that works. Wash and dry first, dissolve fresh minerals with a controlled chemical treatment, clay only bonded contamination, and polish clear-coat damage with a test spot. Finish by replacing protection and preventing mineral-rich water from drying on the vehicle.