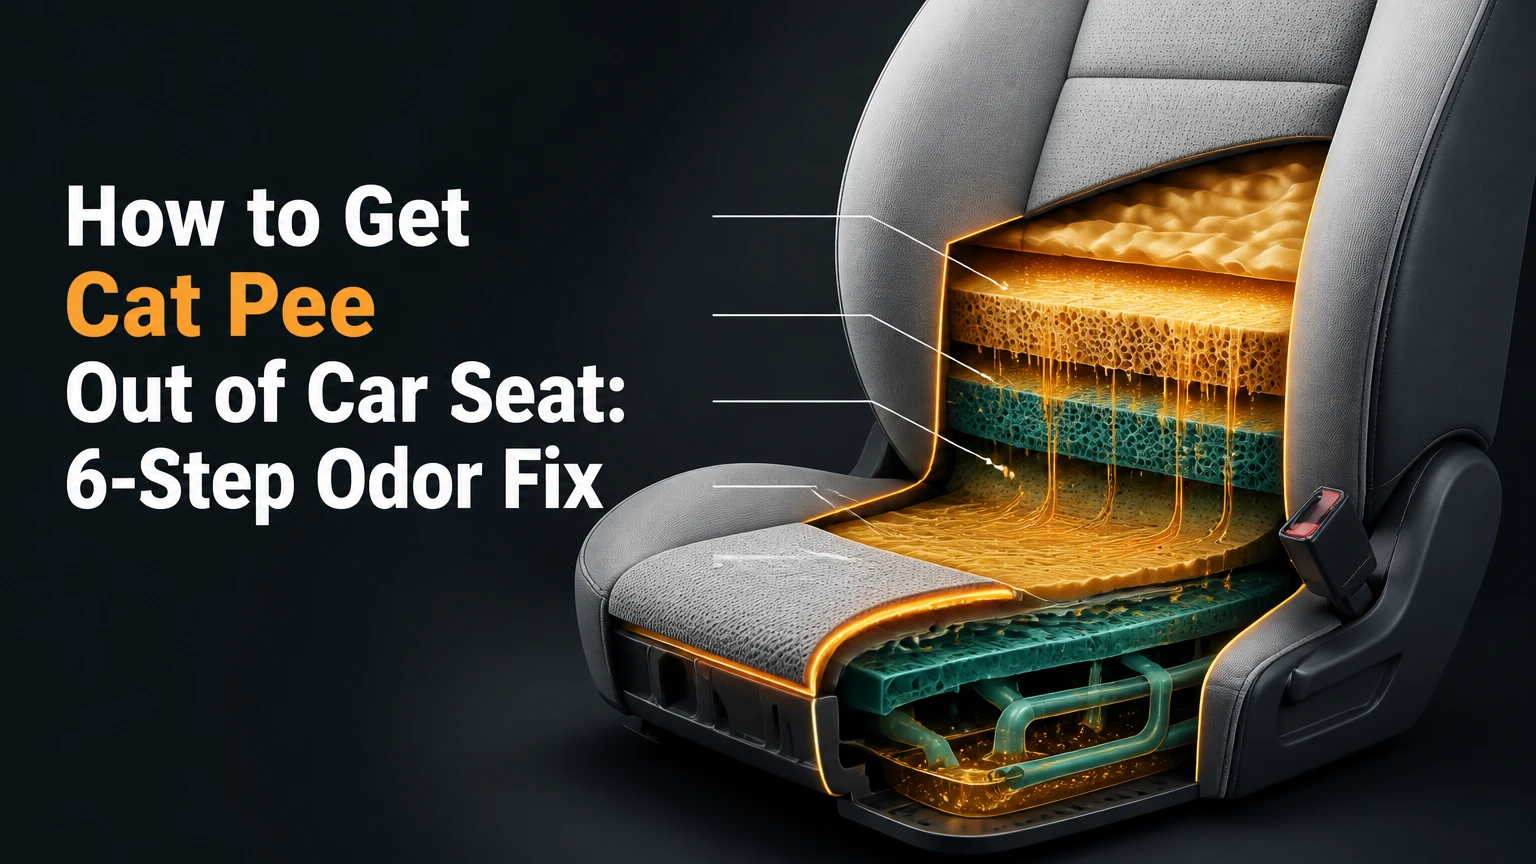
To get cat pee out of a car seat, blot fresh liquid, flush only as needed, apply a fabric-safe enzymatic urine cleaner deep enough to reach the padding, then extract and air-dry completely. Success depends on treating the full urine path, including foam and seams, rather than deodorizing only the visible surface.
Key Facts at a Glance
Cat urine odor persists because uric-acid residue can remain in upholstery foam after the liquid evaporates.
An enzymatic urine cleaner needs direct contact and sufficient dwell time; fragrance alone does not remove the residue.
Cloth seats usually need deeper treatment than leather or vinyl, but seat electronics make uncontrolled saturation unsafe.
Typical DIY material cost is $10-$35, while professional interior remediation commonly costs $150-$400.
A car seat may need 12-48 hours to dry, depending on humidity, foam thickness, ventilation, and liquid volume.
Never mix enzyme cleaner with bleach, ammonia, vinegar, peroxide, or another chemical product.
Before You Start: Identify the Seat and the Risk
Cat urine removal takes 1-3 hours of active work and 12-48 hours of drying. The typical DIY cost is $10-$35 for cleaner, towels, gloves, and disposable absorbent material, although a wet vacuum can add $80-$200 if purchased.
Check the seat material first. Cloth and microfiber upholstery can absorb urine into foam; leather and vinyl usually retain more contamination at seams, perforations, stitching, and the junction between the seat cushion and backrest. Manufacturer care instructions override general cleaning advice, particularly for aniline leather, suede-like microfiber, and coated automotive leather.
Inspect for side airbags, seat-occupancy sensors, heating elements, ventilation fans, power controls, and electrical connectors beneath the cushion. Do not remove a seat, disconnect a yellow airbag connector, inject liquid near wiring, or flood a seat with a syringe unless the vehicle manufacturer or a qualified technician provides the procedure.
Materials and quantities
| Item | Typical quantity | Purpose | Important limit |
|---|---|---|---|
| Nitrile gloves | 1 pair | Hand protection | Replace after handling saturated towels |
| Microfiber towels | 6-12 towels | Blotting and wiping | Avoid dyed towels that may bleed |
| Enzymatic urine cleaner | 250-1,000 mL | Residue treatment | Use a product labeled for the seat material |
| Distilled or clean lukewarm water | 250-500 mL | Controlled rinsing | Do not flood powered seats |
| Wet/dry vacuum or extractor | 1 machine | Liquid removal | Use low moisture passes |
| Plastic sheet or absorbent pads | 1-2 pieces | Protect floor and catch runoff | Do not seal a damp seat for days |
| Soft upholstery brush | 1 brush | Work cleaner into cloth | Do not scrub leather aggressively |
Test every cleaner on an inconspicuous area for 10-15 minutes, then blot and inspect after drying. A color-change, sticky finish, lightened patch, or rough texture means the product is unsuitable.
How Does Cat Urine Create a Persistent Car Odor?
Cat urine smells persistent because evaporated liquid leaves concentrated salts and organic residue in porous materials, while humidity can make remaining residue odor noticeable again. Bacteria can convert urea into ammonia, and sulfur-containing compounds contribute to the sharp smell associated with feline urine.
Uric acid is poorly soluble in plain water, so wiping the visible wet patch can leave residue in fabric backing and cushion foam. Enzymatic products are designed to break down biological residues, but the phrase “permanent elimination” is too broad: performance depends on complete contact, adequate dwell time, product formulation, and removal of the resulting residue.
Enzymes also do not magically reach every contaminated molecule. A cleaner sprayed lightly onto the seat surface may never penetrate the foam, while excessive liquid can remain trapped above an impermeable backing. The correct balance is enough product to contact the contamination, followed by controlled extraction and thorough drying.
Humidity is a useful diagnostic clue. If the odor disappears when dry and returns on rainy or hot days, the seat, carpet underneath, or nearby carrier may still contain urine residue.
Step 1: Blot Fresh Cat Urine Immediately
Press clean, dry microfiber towels into the wet area and replace them as soon as they become damp. Do not scrub, because lateral friction spreads urine across the upholstery and can drive liquid farther into the cushion.
Place folded towels over the stain and apply firm downward pressure for 30-60 seconds at a time. On a removable, unpowered floor cushion, additional pressure can improve extraction, but do not kneel forcefully on a powered automotive seat or press around side-airbag seams.
If the urine has soaked through, place an absorbent pad beneath the affected removable cushion. For a fixed seat, work from the surface and use a wet vacuum rather than attempting to lift or disconnect the seat.
You will know Step 1 worked when a fresh towel picks up little or no moisture after several pressure cycles.
Common mistake: rubbing the stain with a dry brush. Dry brushing distributes the contamination and can abrade upholstery fibers before the chemical treatment begins.
Step 2: Remove Loose Surface Contamination
Vacuum dry debris around the stain before applying liquid. If the area is still wet, skip a standard household vacuum because liquid can reach the motor and create an electrical hazard.
Use a small amount of lukewarm water only when urine has dried into a concentrated surface patch or when the cleaner’s directions specify pre-dilution. Apply approximately 30-60 mL to a small cloth-seat spot, press with towels, and extract immediately. The goal is controlled dilution, not a complete rinse at this stage.
For leather or vinyl, wipe the surface with a barely damp microfiber cloth. Do not pour water onto perforations, stitching, seat controls, or seams. Surface contamination that has entered perforations requires careful professional-style extraction, not repeated soaking.
You will know Step 2 worked when loose residue has been removed without creating a larger wet halo around the original spot.
Common mistake: using a household carpet shampoo before the enzyme treatment. Detergent residue can interfere with the urine product and leave surfactants that attract dirt.
Step 3: Apply an Enzymatic Urine Cleaner
Choose an enzymatic cleaner labeled for automotive upholstery or the specific material on your seat. Apply enough to reach the contaminated layer, but follow the product label because formulas vary in concentration, pH, and required dwell time.
For a cloth spot approximately 15 centimeters wide, begin with 60-120 mL, then increase only if the urine clearly penetrated the foam and the seat can be safely extracted. Estimate the urine volume rather than using an arbitrary gallon of cleaner: a lightly misted surface does not treat a soaked cushion, while flooding an electronic seat can create a larger repair problem.
Press the product into cloth with a clean towel or soft upholstery brush. Do not use a hard brush. Keep the area visibly damp for the label’s stated dwell period, typically 15-60 minutes, and extend contact only when the manufacturer permits it.
For dried urine, a second treatment is often safer than one uncontrolled saturation. Allow the first application to dry, evaluate the odor in humid conditions, and repeat if necessary.
You will know Step 3 worked when the cleaner has contacted the stain’s perimeter, seams, and apparent penetration path rather than only the central discoloration.
Common mistake: applying air freshener immediately afterward. Fragrance can conceal odor temporarily and makes it harder to determine whether the biological residue remains.
Step 4: Extract the Cleaner and Dissolved Residue
Use a wet/dry vacuum or upholstery extractor to remove liquid after the dwell period. Make slow extraction passes, then several suction-only passes, because leaving cleaner and dissolved urine in the foam can produce a sticky surface and renewed odor.
A practical technique is one light rinse with clean water followed by repeated suction, but only when the seat material and vehicle electronics permit it. Use approximately 100-250 mL of water for a small cloth area, not enough to saturate the entire cushion. Professional detailers may use heated extraction equipment, but heat is not a substitute for enzyme contact and can damage adhesives, dyes, leather finishes, or sensitive seat components.
Do not inject cleaner through the seat with a syringe as a default DIY method. Deep injection can place liquid beside occupancy sensors, heating pads, airbag wiring, or dense foam that cannot dry quickly.
You will know Step 4 worked when the extractor collects little liquid and the upholstery feels damp, not saturated, after the final suction passes.
Common mistake: making repeated wet passes without extraction. More cleaner does not improve treatment once the contaminated area is already saturated.
Step 5: Dry the Seat Completely
Open the car doors or windows in a secure, dry, ventilated location and use a fan outside the vehicle to move air across the seat. Do not use a hair dryer, heat gun, or steam cleaner as the first treatment; high heat can set some stains, soften adhesives, damage coatings, and accelerate odor release into the cabin.
Typical drying times vary considerably:
| Seat situation | Active treatment | Typical drying time | Recommended approach |
|---|---|---|---|
| Small fresh cloth spot | 30-60 minutes | 12-24 hours | Fan, open doors, repeated towel pressure |
| Dried cloth contamination | 60-120 minutes | 24-48 hours | Enzyme treatment, extraction, low-humidity airflow |
| Perforated leather or vinyl | 20-45 minutes | 6-18 hours | Damp wiping, seam attention, gentle ventilation |
| Deeply soaked foam | 2-4 hours | 48-72 hours | Professional extraction or seat removal by a technician |
Check the seat at its thickest point and beneath the cushion edge if accessible without dismantling the vehicle. The upholstery should feel uniformly dry, have no cool damp center, and produce no musty smell after the car remains closed for several hours.
Do not cover a damp seat with plastic for an extended period. A short, label-approved contact cover may slow evaporation during enzyme dwell, but sealing wet foam overnight can encourage microbial growth and delay drying.
Step 6: Recheck the Odor and Deodorize the Surface
Close the car for 2-4 hours after the seat has dried, then inspect the cabin on a warm or moderately humid day. Smell the seat, floor carpet, seat belt, carrier, and door-side trim separately because the visible stain is not always the source.
Sprinkle a thin layer of baking soda only on fully dry, compatible fabric if a mild surface odor remains. Leave it for 8-24 hours, then vacuum thoroughly. Baking soda can absorb or neutralize some surface odors, but it does not replace enzymatic treatment for uric-acid residue and should not be pushed into perforated leather or seat mechanisms.
If the smell returns, do not add fragrance. Repeat the inspection and determine whether the contaminated material is the cushion foam, carpet under the seat, a child-seat cover, or the cat carrier.
Which Cat Urine Cleaning Method Should You Choose?
An enzymatic cleaner plus controlled extraction is the best first-line method for most cloth seats. Professional remediation becomes the better choice when urine reached thick foam, electronics, multiple interior surfaces, or a seat that cannot be dried safely.
| Method | Typical cost | Contact or processing time | Main benefit | Main limitation |
|---|---|---|---|---|
| Enzymatic upholstery cleaner | $10-$25 | 15-60 minutes per application | Breaks down biological residue | Requires complete contact and drying |
| Wet/dry vacuum rental or purchase | $20-$200 | 30-90 minutes | Removes liquid from foam | Can over-wet powered seats |
| Oxygen-based oxidizer | $5-$15 | 10-30 minutes | May reduce surface staining | Can bleach dyes and does not suit every material |
| Vinegar and water | $2-$5 | 10-20 minutes | Reduces some surface alkalinity | Does not reliably remove uric-acid residue |
| Professional detailer | $150-$400 | 2-4 hours onsite | Strong extraction and material knowledge | May require 24 hours before vehicle pickup |
When are vinegar, peroxide, or bleach appropriate?
Vinegar is not a dependable cure for cat urine in car-seat foam. Its acidity may reduce ammonia odor temporarily, but it does not provide the same biological treatment as a purpose-made urine product, and mixing vinegar with other cleaners creates avoidable chemical risk.
Hydrogen peroxide and oxygen cleaners may lighten a fabric stain, but they can discolor upholstery and damage leather finishes. Chlorine bleach should not be used on automotive seats because it can damage dyes, coatings, stitching, and metal components while producing hazardous vapors when mixed with acidic or ammonia-containing products.
Ammonia-based cleaners are especially poor choices for cat urine. Ammonia resembles part of the urine odor profile and can encourage repeat marking in some cats, while the cleaner itself may damage seat materials.
Which option fits each situation?
| Situation | Best first choice | Avoid first | Escalation threshold |
|---|---|---|---|
| Fresh spot on cloth | Blot, enzyme cleaner, extraction | Scrubbing and fragrance | Odor remains after two dry cycles |
| Dried stain on cloth | Enzyme treatment with controlled rinse | Steam and heavy shampoo | Foam remains odorous after two treatments |
| Leather or vinyl surface | Material-safe cleaner and damp wipe | Flooding perforations | Odor comes from seams or cushion beneath |
| Powered, heated, or ventilated seat | Surface treatment and professional extraction | Syringe injection and soaking | Any liquid reaches wiring or controls |
| Cat carrier leaked over seat and floor | Treat seat, carpet, and carrier together | Treating only the visible patch | Cabin odor returns after ventilation |
Material-Specific Variations
How should cloth car upholstery be cleaned?
Cloth upholstery needs enough enzymatic cleaner to reach the backing or foam, followed by extraction that removes both product and dissolved residue. Test the cleaner, treat beyond the visible edge by 5-10 centimeters, and avoid saturating the entire cushion when the contamination is localized.
Cloth seats are the most forgiving material for a careful DIY process, but foam is also the hardest part to dry. A seat can feel dry on top while retaining moisture underneath, especially in cool weather or high humidity.
How should leather or vinyl be cleaned?
Leather and vinyl should be wiped rather than saturated. Apply a small amount of compatible cleaner to a towel, not directly into perforations, then clean seams with a soft brush and dry the surface immediately.
Finished automotive leather has a protective coating, but that coating can crack, discolor, or become tacky after strong alkaline cleaners, solvents, peroxide, or prolonged wet contact. After the surface dries, apply only a manufacturer-compatible leather conditioner if the care guide permits it.
What if the seat has perforations or electronics?
Perforated seats require reduced liquid volume and controlled towel application because fluid can pass directly through the holes. Occupancy sensors, heating elements, ventilation fans, and wiring may sit beneath the upholstery, so professional extraction is safer when urine visibly soaked the cushion.
A dashboard warning light, inoperative seat heater, seat ventilation failure, unusual electrical smell, or airbag warning after contamination requires inspection by a qualified automotive technician. Do not continue wet cleaning around the fault.
Common Mistakes and How to Fix Them
| Mistake | Why it fails | Recovery action | Escalate when |
|---|---|---|---|
| Surface spray only | Foam remains contaminated | Reapply to the actual penetration depth and extract | Odor returns after drying |
| Scrubbing wet urine | Spreads liquid and enlarges the stain | Blot perimeter inward, then extract | Fabric becomes visibly abraded |
| Steam or hair-dryer treatment | Heat may damage finishes and adhesives | Cool the area, then use a compatible enzyme product | Leather coating bubbles or changes color |
| Mixing cleaners | Creates residue or hazardous vapors | Stop, ventilate, and wipe with clean water if material allows | Fumes, irritation, or discoloration appears |
| Baking soda on damp foam | Traps moisture and becomes difficult to remove | Vacuum, then dry fully before reassessing | Powder remains in perforations |
| Excessive enzyme solution | Over-saturates foam and electronics | Extract immediately and increase airflow | Seat remains wet beyond 48 hours |
One practitioner rule is to treat the odor map, not the stain map. Cat urine can wick sideways through foam and downward into carpet, so a small visible patch may represent a larger contaminated area.
A second rule is to judge success after drying, not while the cleaner’s fragrance is present. Many products smell strong when wet and can temporarily conceal residual urine.
A third rule is to use the least liquid that can reach the contamination. More moisture improves contact only until the seat’s drainage and extraction capacity are exceeded.
What If the Smell Returns?
A returning odor usually means residue remains in foam, carpet, a seam, or a nearby object, rather than proving that the cleaner failed chemically. Close the vehicle, warm it naturally if safe, and identify the strongest odor source before repeating treatment.
Inspect these locations in order:
- Seat cushion edges and the gap between cushion and backrest.
- Carpet beneath the seat and the plastic seat-side trim.
- Seat belt webbing and buckle recess.
- Cat carrier, blanket, towel, or protective liner.
- Door panel, floor mat, and cargo-area fabric.
Use an ultraviolet flashlight only as a locating aid. UV fluorescence is not specific to urine, and some cleaners, fibers, and food residues also glow. Confirm the suspected area by odor, material history, and a controlled cleaning test.
If two complete enzyme-and-extraction cycles fail, professional detailers can use moisture meters, stronger extraction systems, and trim-access methods. Ozone may reduce some airborne odors, but it does not remove urine residue from foam and can damage rubber, dyes, and sensitive materials if misused. The cabin must be unoccupied during any professional ozone treatment.
How Much Time and Money Should You Expect?
A small fresh cloth spot commonly costs $10-$25 and takes 30-60 minutes of active work plus overnight drying. Deep contamination, leather perforations, seat electronics, multiple surfaces, or failed DIY attempts can raise professional costs to $150-$400 or more.
| Project scope | DIY supply cost | Active labor | Total calendar time |
|---|---|---|---|
| Fresh cloth spot | $10-$25 | 30-60 minutes | 12-24 hours |
| Dried cloth stain | $15-$40 | 60-120 minutes | 24-48 hours |
| Leather or vinyl seam contamination | $10-$35 | 30-75 minutes | 6-18 hours |
| Multiple seats and floor carpet | $25-$75 | 2-4 hours | 24-72 hours |
| Professional interior remediation | $150-$400 typical | 2-4 hours | 24-48 hours |
Pricing varies by vehicle size, geographic labor rates, contamination depth, seat removal, and whether the shop treats carpet, headliner, door panels, and the carrier. Ask whether the quoted service includes extraction, drying, and odor-source inspection rather than an ozone-only deodorizing treatment.
How Can You Prevent Repeat Soiling?
Prevent repeat soiling by cleaning the carrier and transport bedding, checking the cat for illness, and making the vehicle inaccessible until all odor residue is gone. Cats may revisit an odor-marked location even after humans can barely detect it.
A sudden change in urination can have a medical cause, including urinary inflammation, infection, pain, or stress. The American Society for the Prevention of Cruelty to Animals recommends veterinary evaluation for inappropriate urination, especially when the behavior is new, frequent, painful, or accompanied by blood, straining, or vocalization.
Use a leak-resistant carrier liner, place an absorbent pad beneath the carrier, and keep a spare sealed bag and towels in the vehicle. Do not transport a cat loose in the cabin, where another accident can contaminate seat gaps and carpet before the first cleanup is complete.
FAQ
Can I use a carpet cleaner on a car seat?
A carpet extractor can remove urine from cloth upholstery when the seat is compatible and the operator controls moisture. Use upholstery-safe solution, make short wet passes, follow with suction-only passes, and dry with ventilation. Do not use a household carpet cleaner on leather, perforated seats, or powered cushions without confirming material and electrical compatibility.
How do I remove old cat urine from a car seat?
Remove old cat urine by locating the full contaminated area, applying a label-approved enzymatic cleaner, allowing the required dwell time, extracting the liquid, and drying for 24-48 hours. Old odor may require two treatment cycles because dried residue can remain in foam, carpet, seat seams, and the carrier.
Will cat pee smell disappear when the seat dries?
Cat pee smell may disappear temporarily when a seat dries, but drying alone does not remove residue trapped in porous foam. Odor that returns during humid weather indicates an untreated source or contaminated neighboring material, so inspect the cushion edges, carpet, belt, and carrier before repeating treatment.
Can I put baking soda on a leather car seat?
Do not spread baking soda over leather as a primary treatment. Baking soda can lodge in stitching and perforations and may leave powdery residue; instead, use a compatible leather cleaner on a cloth, wipe the affected area, and address deeper cushion contamination with controlled professional extraction.
Is cat urine dangerous inside a car?
A small cleaned urine spot is usually a sanitation and odor problem, but fresh urine can contain microorganisms and irritants. Wear gloves, ventilate the cabin, wash contaminated fabric, and avoid mixing cleaners. Seek medical advice after significant exposure or if cleaning fumes cause breathing, eye, or skin symptoms.
Should I replace the car seat after cat urine contamination?
Replacing the seat is usually unnecessary when contamination is superficial and the upholstery and foam can be safely cleaned and dried. Replacement or professional remediation becomes reasonable when urine soaked inaccessible foam, damaged seat electronics, caused persistent odor after repeated treatment, or contaminated a seat with an integrated safety system.
The Bottom Line
The reliable way to get cat pee out of car seat upholstery is to remove liquid quickly, treat the actual contamination depth with a compatible enzymatic cleaner, extract excess moisture, and dry the seat completely. Baking soda and fragrance may help with surface odor, but they cannot substitute for residue treatment. If urine reached powered-seat electronics or the smell returns after two complete cycles, use a qualified automotive detailer or technician rather than adding more liquid.