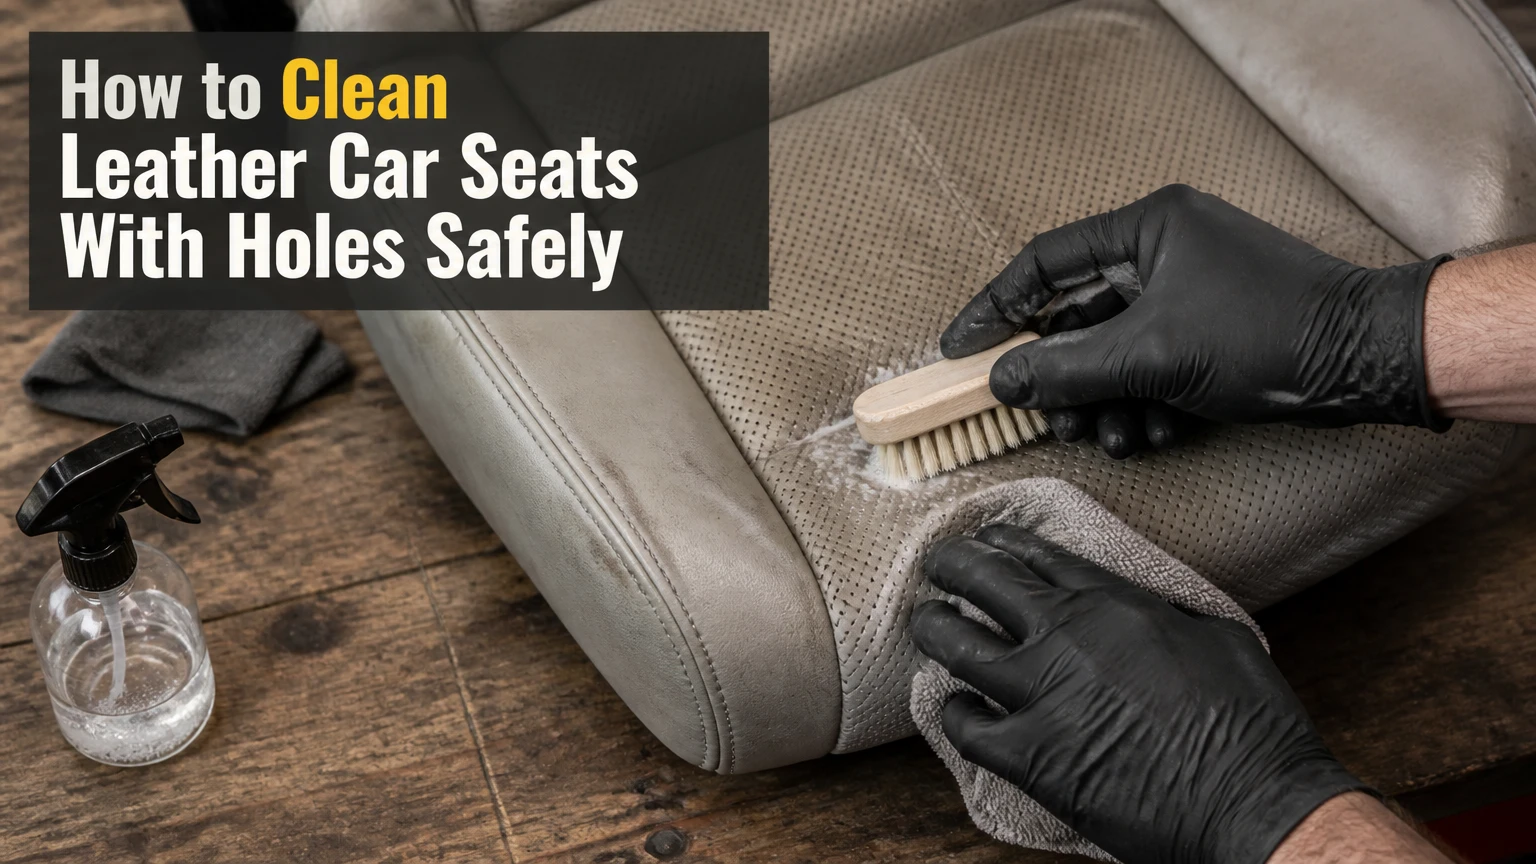
To clean leather car seats with holes, vacuum the perforations first, apply a small amount of foam or pH-neutral cleaner to a soft brush or cloth, agitate a small section, and wipe immediately. Avoid spraying the seat directly or soaking the holes, then dry fully before applying a thin, compatible conditioner.
Key Facts at a Glance
Perforated automotive leather has tiny holes that can carry liquid, dirt, and conditioner into the seat cushion.
A soft brush, controlled foam, and immediate microfiber wiping are safer than direct spraying.
Typical DIY cleaning takes 30-45 minutes per front seat and costs $10-$40 for consumables.
Vacuuming must come before wet cleaning because liquid turns loose crumbs into paste inside the perforations.
Conditioner is optional for many modern coated leather seats and should never fill the holes.
Never use a magic eraser, needle, toothpick pushed vertically, household degreaser, or high-pressure steam on the seat surface.
What Are Leather Seats With Holes?
Leather seats with holes are usually perforated leather, a sheet of leather or synthetic upholstery stamped with a regular pattern of small openings. Vehicle manufacturers use perforation to improve airflow through ventilated seats, reduce heat buildup, or create a particular trim appearance.
Perforated upholstery is usually coated automotive leather rather than unfinished hide. A thin protective finish carries much of the color and stain resistance, so aggressive scrubbing can damage the coating before the leather itself appears worn. Synthetic materials such as polyurethane-coated vinyl can look nearly identical and require the same low-moisture approach.
Hole diameter, spacing, seat construction, and ventilation hardware vary by vehicle. A BMW ventilated seat, Ford perforated leather seat, and Lexus synthetic-leather seat may respond differently to solvents and heat. The vehicle owner’s manual and upholstery manufacturer’s care instructions override generic detailing advice.
How Are Perforated and Smooth Leather Different?
Smooth leather gives excess cleaner a continuous surface to sit on, while perforated leather gives liquid a direct route into foam, felt, heating elements, and ventilation channels. The cleaning chemistry can be similar, but the application method must use less product and shorter dwell time.
Perforations also trap abrasive particles. Sand, grit, food crumbs, and dried skin oils can sit inside the holes and become grinding material when a brush is pressed too hard. Dry extraction is therefore the first cleaning stage, not an optional finishing step.
Why Does Moisture Control Matter?
Moisture control prevents cleaner, dissolved grime, and conditioner from entering the cushion beneath perforated leather. Liquid inside the foam dries slowly, especially in humid weather, and can produce persistent odor, staining, mildew growth, or corrosion around seat wiring.
Capillary action pulls liquid through narrow perforations more efficiently than most people expect. A seat may feel dry on top while the foam underneath remains damp. That hidden moisture is why a wet towel pressed repeatedly against the surface can cause more trouble than a lightly dampened brush.
The goal is surface transfer. Cleaner loosens soil on the coated upholstery, and a towel receives the suspended soil before it migrates into the holes. Work slowly enough to control moisture, but quickly enough that dirty foam does not dry back onto the surface.
What Does a Safe Cleaning Session Control?
A safe session controls four variables: product volume, agitation pressure, dwell time, and drying. A practical starting point is one or two sprays onto a brush for a 30-by-30-centimeter section, followed by wiping within 15-30 seconds.
These figures are typical practitioner limits, not universal manufacturer specifications. A heavily soiled seat may require several passes, but repeated light passes are safer than one saturated pass. Test the method on a hidden side bolster first, because color transfer or finish damage can occur even with products labeled for leather.
Which Cleaner and Method Should You Use?
A dedicated low-moisture foam cleaner is usually the safest choice for perforated automotive leather because foam limits runoff. A pH-neutral interior cleaner applied to a cloth or brush works for light soil, while a diluted leather cleaner can handle moderate grime when the product label permits automotive upholstery use.
Do not select a product solely because it says “leather.” Furniture saddle soap, mink oil, petroleum-based dressing, disinfectant, alkaline kitchen degreaser, and silicone-heavy dashboard products may leave residue or alter the finish. Automotive leather is commonly finished and does not absorb conditioning products like an unfinished boot or handbag.
| Method | Typical moisture level | Best use | Main limitation |
|---|---|---|---|
| Dry vacuum with soft brush | 0 mL added | Crumbs, grit, loose dust | Does not remove bonded oils |
| Foam cleaner on horsehair brush | 2-5 mL per 30 cm section | Routine and moderate soil | Requires immediate towel removal |
| Cleaner misted onto microfiber | 1-3 sprays per towel face | Light maintenance and transfer marks | Limited agitation |
| Wet extractor | 100-300 mL recovered per seat | Professional deep cleaning | High seepage risk through holes |
| Steam with covered head | Variable, often 1-5 mL condensed moisture | Trained restoration work | Heat can damage finish and wiring |
Is Foam Better Than Liquid Cleaner?
Foam is generally better for a first deep-cleaning attempt because it remains more localized and gives the operator visual control. Liquid cleaner can work when applied to the tool rather than the seat, but a runny formula increases the chance of pooling in the perforations.
Foam is not automatically safe. A foam that collapses into watery residue, a brush overloaded with product, or a seat cleaned in direct sun can still create seepage and finish damage. Dispense a small amount, spread it across the brush, and remove the soil before adding more product.
What Tools and Materials Do You Need?
Use a vacuum with a soft brush attachment, two or three clean microfiber towels, a soft horsehair or upholstery brush, a compatible leather or interior cleaner, and a thin water-based protectant if the manufacturer recommends one. Keep cotton swabs, a soft toothbrush, nitrile gloves, and a small inspection light available for the holes.
A crevice nozzle is useful around seat seams, but hard plastic should not be dragged across the leather. Do not use compressed air at high pressure because it can drive grit deeper into the cushion and distribute debris into the ventilation system.
How to Clean Leather Car Seats With Holes Step by Step
The following four-step process cleans one front seat with controlled moisture in approximately 30-45 minutes. The most important factor is immediate removal of loosened soil, because allowing wet grime to sit increases both residue and seepage.
Before You Start
| Requirement | Typical specification |
|---|---|
| Time for one front seat | 30-45 minutes |
| Drying time before normal use | 1-2 hours, longer in humidity |
| DIY consumable cost | $10-$40 |
| Cleaner amount | 5-15 mL per front seat |
| Towel supply | 2-3 microfiber towels |
| Working temperature | 15-30°C, 59-86°F |
| Difficulty | Low to moderate |
Park in shade with the doors open or windows lowered. Switch off seat heating and ventilation, remove child seats and personal items, and read the cleaner label. If the upholstery is cracked, peeling, loose, or torn around the holes, cleaning cannot restore the damaged finish.
Step 1: Vacuum the Perforations
Vacuum the seat, seams, piping, bolsters, and perforated panels using a soft brush attachment. Hold the nozzle close enough to collect debris without pressing the hard plastic body into the leather, then stretch a seam gently with your fingers while vacuuming its edge.
Use several slow passes in different directions. A small inspection light helps identify crumbs lodged in individual holes. Stop if the vacuum pulls loose coating, thread, or foam through a damaged perforation.
You will know it worked when: loose crumbs no longer move under light brushing and the holes show their original dark or colored interior.
Common mistake: applying cleaner to dusty upholstery. Moisture binds grit into a paste that is harder to extract.
Step 2: Test and Prime the Cleaning Tool
Apply one or two sprays of cleaner to the brush or microfiber towel, never directly onto the seat. Test a 5-centimeter hidden area, wait approximately five minutes, and check for dye transfer, tackiness, darkening, or finish softening.
Spread the product through the brush bristles before touching the leather. A lightly damp brush is safer than a wet brush because it distributes cleaner across the surface instead of depositing a concentrated puddle over one hole.
You will know it worked when: the test area looks unchanged after drying and the brush produces a light, controlled lather.
Common mistake: choosing a strong alkaline cleaner because the seat looks greasy. Strong chemistry can strip a protective finish while leaving the perforation problem unsolved.
Step 3: Clean Small Sections and Wipe Immediately
Divide the seat into sections no larger than 30 by 30 centimeters. Agitate with light pressure for 10-20 seconds, using short overlapping strokes rather than forceful circular scrubbing, then wipe the section immediately with a dry microfiber towel.
Rotate to a clean towel face as soon as the cloth becomes visibly dirty. For a glossy oil mark, make two or three light passes instead of increasing pressure. Keep cleaner away from seat controls, belt buckles, stitching gaps, and electrical connectors.
You will know it worked when: the leather has an even appearance, the towel removes visible soil, and no wet ring remains around the perforations.
Common mistake: letting foam dry on the seat. Dried surfactant leaves a dull film and may require another damp pass that adds unnecessary moisture.
Step 4: Inspect and Dry the Seat
Inspect every perforated panel under angled light. If a hole contains wet residue, blot around it with a dry microfiber towel and use a soft, dry brush to lift surface material. Do not insert a needle or push a toothpick into the opening.
Leave the vehicle ventilated for at least one hour in dry, warm conditions. Allow two hours or more in cool or humid conditions before activating seat heating or ventilation. A seat that feels cool or clammy after an hour needs more drying time.
You will know it worked when: the surface feels dry and uniform, the holes remain open, and no musty smell appears after the doors are closed briefly.
Common mistake: using high heat from a hair dryer. Concentrated heat can shrink, harden, or distort the coating and may affect foam adhesives.
Step 5: Condition Only If the Finish Needs It
Condition perforated leather only when the manufacturer allows it or the cleaned surface feels dry, stiff, or unusually dull. Many modern automotive leather finishes need protection rather than heavy oil, and some synthetic leather products should not receive a conventional conditioner.
Apply a pea-sized amount to an applicator pad, work it into the pad first, and spread an extremely thin coat over one panel. Avoid putting conditioner directly over the holes. After five minutes, buff the surface and inspect the perforations with a soft dry brush.
You will know it worked when: the finish feels smooth without being greasy, and no hole contains white or glossy residue.
Common mistake: using too much product. Excess conditioner attracts dust, blocks airflow, and creates a sticky surface that becomes dirty faster.
How Do the Main Cleaning Methods Compare?
Foam brushing offers the best balance for most DIY owners, while damp microfiber wiping is safest for frequent light maintenance. Wet extraction can remove deeper soil but belongs with a trained detailer who understands upholstery recovery, seat electronics, and controlled drying.
| Cleaning approach | Typical cost | Typical time | Risk to perforations | Recommended user |
|---|---|---|---|---|
| Damp microfiber maintenance | $0-$10 | 10-15 minutes per seat | Low | Weekly or biweekly cleaner |
| Foam and soft brush | $15-$40 | 30-45 minutes per seat | Low to moderate | Most DIY deep cleaning |
| Indirect liquid brush | $10-$30 | 25-40 minutes per seat | Moderate | Experienced DIY detailer |
| Professional low-moisture cleaning | $75-$200 for an interior | 1-3 hours | Low to moderate | Valuable vehicles or heavy soil |
| Extractor restoration | $100-$300 professionally | 2-4 hours | Moderate to high if misused | Seats with embedded contamination |
The comparison changes when the seat contains a fan, heating mat, pressure sensor, or side-airbag assembly. In that situation, moisture risk outweighs the small speed advantage of an extractor.
What Changes for Heated or Ventilated Seats?
Heated and ventilated seats require the same surface-cleaning method but stricter drying and equipment limits. Ventilated seats contain airflow channels and fans beneath the perforations, while heated seats contain electrical heating elements that should not be exposed to unnecessary liquid or concentrated heat.
Never activate a seat heater to “bake out” cleaner. Do not direct a steam nozzle into the holes, and do not use an extractor until you have confirmed that the equipment can recover moisture without flooding the cushion. Manufacturer service information should guide any work near wiring, seat occupancy sensors, or side airbags.
A trained professional can use low-moisture vapor with a towel barrier, but a consumer steam cleaner often produces more condensation than the seat can safely shed. Steam is a technique, not a guarantee of dry cleaning.
How Should You Handle Common Stains?
Identify the stain before choosing chemistry. Water-based coffee residue, oily sunscreen, ink, and blue denim transfer do not respond equally to the same cleaner, and repeated scrubbing can permanently alter a light-colored finish.
| Stain or soil | First treatment | Contact time | Avoid |
|---|---|---|---|
| Coffee or soft drink | pH-neutral cleaner on microfiber | 10-15 seconds | Flooding the perforations |
| Sunscreen or skin oil | Leather-safe foam and soft brush | 15-20 seconds | Kitchen degreaser |
| Blue denim transfer | Approved leather cleaner, repeated light passes | 15 seconds per pass | Acetone and aggressive rubbing |
| Ballpoint ink | Professional leather ink treatment | Product-specific | Alcohol without a spot test |
| Grease or food oil | Blot, then foam cleaner | 10-20 seconds | Cornstarch left inside holes |
| Mold or persistent odor | Professional inspection and cushion drying | 24-48 hours may be needed | Masking odor with fragrance |
How Do You Remove Blue Jean Dye?
Remove blue jean dye from perforated leather by testing a leather-safe cleaner on an inconspicuous area, applying it to a microfiber towel, and making several short, light passes. Dye transfer often sits in the topcoat, but aggressive solvent use can remove the seat color with the denim pigment.
If the transfer does not improve after two or three controlled passes, stop. A leather repair specialist can identify whether the blue color is removable contamination or finish discoloration. White and cream seats show transfer sooner because contrast makes small amounts of pigment visible.
How Do You Clean White Perforated Leather?
Clean white perforated leather with dry vacuuming followed by small sections of low-moisture foam. Use a clean towel face for each section, because a gray or blue towel can redeposit soil onto light upholstery.
Do not use a magic eraser. Melamine foam is abrasive and can dull or remove the clear protective layer, particularly on high-contact bolsters. A clean soft brush with repeated light passes is slower but preserves the finish.
What Mistakes Damage Perforated Leather?
The most damaging mistakes are direct spraying, excessive water, abrasive tools, unsuitable solvents, and forced clearing of holes. These errors either push contamination below the surface or remove the protective coating that makes automotive leather durable.
- Direct spraying: Cleaner collects in the perforations and may wet the foam.
- Saturated towels: Repeated pressing transfers water below the upholstery.
- Magic erasers: Melamine abrades the finish instead of safely lifting soil.
- Needles and vertical toothpicks: Hard points can enlarge holes, puncture backing, or contact heating components.
- Household disinfectants: Alcohol, bleach, and strong alkaline agents may discolor or harden the coating.
- High-pressure air: Compressed air can drive grit into the cushion and ventilation channels.
- Thick oils and waxes: Residue attracts dust and can obstruct airflow.
- Sun drying or heat guns: Excessive heat can create uneven gloss, shrinkage, or cracking.
One practitioner rule is worth remembering: if a product requires a large amount of rinsing, it is poorly suited to perforated seats unless professional extraction follows. Low-rinse chemistry reduces the amount of water that must be recovered.
How Do You Unclog the Holes Safely?
Clear clogged perforations only after the seat is completely dry. Brush the surface with a soft dry toothbrush or horsehair brush, then vacuum with a soft attachment; for residue near the opening, use a microfiber-wrapped brush edge rather than a sharp object.
A sideways wooden toothpick can sometimes lift a hard surface fleck, but pushing it into the hole is unsafe. Never use a metal needle. If dozens of holes contain hardened conditioner, wax, or dirt, professional low-moisture cleaning is safer than clearing each opening manually.
What If Conditioner Is Stuck in the Holes?
Remove conditioner residue with a dry soft brush first. If the residue remains, lightly dampen a microfiber corner with compatible cleaner, touch only the affected opening, and vacuum or blot immediately before the moisture spreads.
Work in groups of five to ten holes. If the residue has hardened deep inside the cushion, surface tools may not remove it without damage. A detailer can assess whether the panel needs controlled extraction or whether blocked perforations require upholstery repair.
What If Water Seeped Through the Seat?
If water or cleaner seeped through a perforated seat, stop using the seat heater and ventilation, open the doors or windows, blot the surface, and allow extended airflow before testing the electronics. A damp cushion may need 24-48 hours to dry in a cool or humid environment.
Do not dismantle a powered seat unless you understand automotive restraint systems. Seek a technician if warning lights appear, the seat heater stops working, the ventilation fan changes sound, or a musty odor persists after drying. Moisture near seat wiring and occupancy sensors is an electrical and safety concern, not merely a cosmetic problem.
How Often Should You Clean Perforated Leather?
Wipe high-contact areas every two weeks and perform a low-moisture deep clean every three to six months. Drivers who carry food, transport pets, park outdoors, or use sunscreen heavily may need monthly cleaning, while lightly used vehicles may need only two deep cleans per year.
| Vehicle use | Light wipe | Deep clean | Conditioning or protectant |
|---|---|---|---|
| Daily commuter | Every 2 weeks | Every 3 months | Every 6 months if finish allows |
| Family vehicle | Weekly | Every 2-3 months | Every 4-6 months |
| Pet or work vehicle | Weekly | Every 4-8 weeks | After cleaning if approved |
| Stored or occasional vehicle | Monthly | Every 6 months | Every 6-12 months if needed |
The best maintenance intervention is often a dry wipe before grime becomes oily. Heavy rubbing later removes more finish than light cleaning performed regularly.
How Long and How Much Does It Take?
A typical DIY session costs $10-$40 for cleaner, towels, and a brush, and takes 30-45 minutes per front seat. A full interior generally requires 1.5-3 hours, followed by one to two hours of ventilation before ordinary driving.
Professional interior cleaning typically costs $75-$200, depending on vehicle size, region, stain severity, and whether odor treatment is included. Leather repair, dye transfer correction, mold remediation, and seat removal cost extra because they require different processes.
| Job type | Typical duration | Typical DIY cost | Professional range |
|---|---|---|---|
| Light wipe of one seat | 10-15 minutes | $0-$5 | $20-$50 |
| Routine deep clean, one seat | 30-45 minutes | $5-$15 | $40-$90 |
| Full five-seat interior | 1.5-3 hours | $15-$40 | $75-$200 |
| Odor or moisture remediation | 24-48 hours | $20-$100 | $150-$500 |
| Leather color or perforation repair | 2-6 hours | Usually not recommended | $150-$600 |
When Should You Hire a Professional?
Hire a professional when perforations contain mold, the cushion remains wet, the finish is peeling, dye transfer covers a large panel, or a powered seat develops a warning light or electrical fault. Cleaning cannot repair torn leather, stretched holes, broken heating elements, or damaged ventilation fans.
Ask the detailer whether the process is low-moisture, how moisture will be recovered, and whether the technician has worked on ventilated seats. A professional who proposes flooding the panel and leaving it to air-dry has not addressed the main risk.
FAQ
Can I Use Dish Soap on Perforated Leather Seats?
Dish soap can remove grease, but it is not the preferred cleaner for automotive leather because its surfactants may leave residue and require rinsing. If an emergency requires it, use a highly diluted amount on a cloth, test first, wipe immediately, and follow with a clean barely damp cloth. A labeled automotive leather cleaner is safer.
Can I Use Baby Wipes on Leather Seats With Holes?
Baby wipes are not a reliable routine cleaner because preservatives, fragrance, alcohol, or excess water vary by brand. A single wipe may not cause visible damage, but repeated use can leave residue in perforations. Use a dry microfiber towel for dust and a compatible low-moisture cleaner for soil.
Should I Put Leather Conditioner in the Holes?
Do not put conditioner into the holes. Apply a very thin layer to the finished surface only when the vehicle manufacturer or product label permits conditioning, then remove any residue from perforations with a dry soft brush. Many coated automotive seats need little conditioning compared with unfinished leather goods.
Can a Wet-Dry Vacuum Clean Perforated Leather?
A wet-dry vacuum can assist with professional moisture recovery, but it does not make flooding safe. The operator must control the cleaner volume, protect seat electronics, avoid high suction at damaged holes, and dry the cushion fully. For most home users, foam and microfiber cleaning carry less seepage risk.
How Do I Remove a Musty Smell From Perforated Seats?
First determine whether the smell comes from damp foam, spilled liquid, mold, or an air-conditioning system. Ventilate the vehicle, stop using seat heating, and seek professional inspection if the odor returns after 24-48 hours of drying. Fragrance sprays mask the odor but do not remove moisture or contamination.
Can I Repair a Torn Perforation at Home?
A torn or stretched perforation needs leather or vinyl repair, not deeper cleaning. Adhesive, stitching, or filler placed over the hole can block ventilation and may interfere with the original seat design. Have a repair specialist match the material, color, grain, and perforation pattern before attempting cosmetic restoration.
The Bottom Line
The safest way to clean leather car seats with holes is to vacuum first, apply low-moisture cleaner to a soft tool, work in small sections, wipe immediately, and dry the seat completely. Use minimal conditioner, keep every perforation open, and stop when moisture, electrical symptoms, peeling finish, or persistent odor indicates a problem beyond surface cleaning.