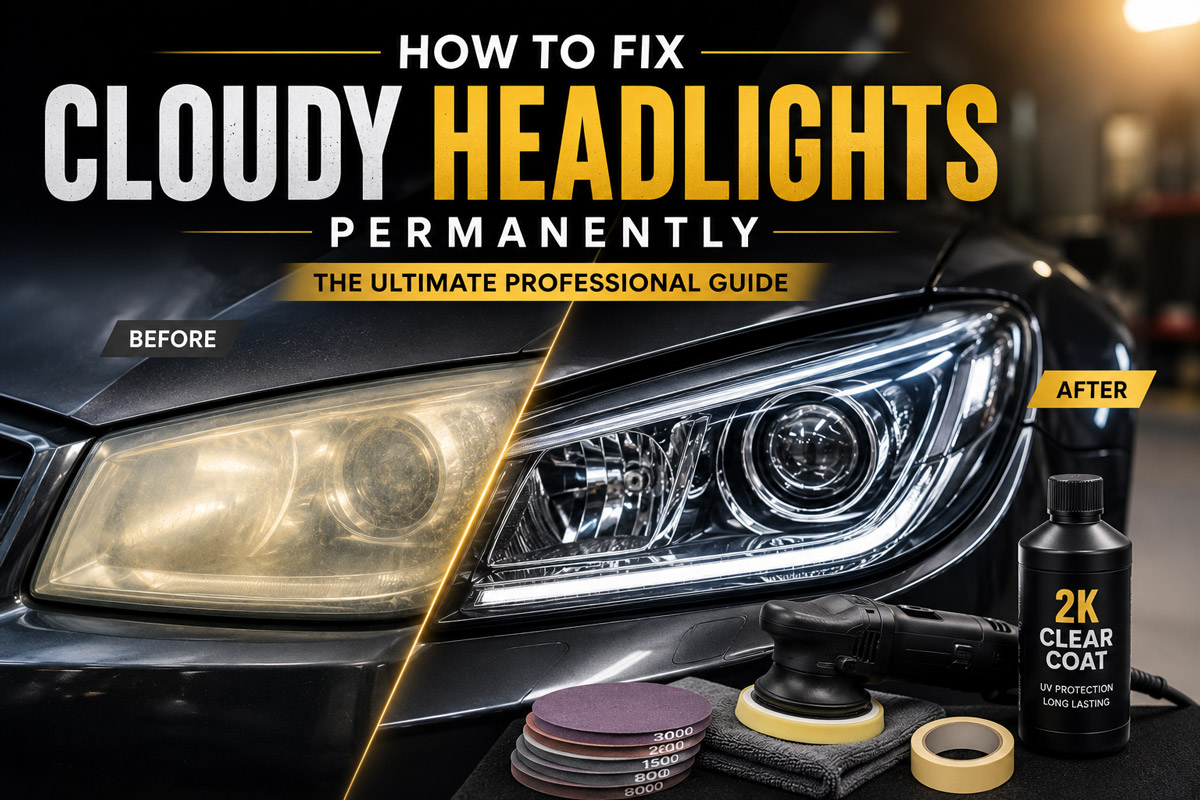
Driving at night with hazy, yellowed headlight lenses is more than an aesthetic eyesore. It is a severe safety risk that can reduce your front road illumination by up to eighty percent. Thousands of vehicle owners attempt fast DIY hacks like scrubbing their lenses with toothpaste, spraying insect repellent, or rubbing baking soda paste onto the plastic. While these household tricks might yield a temporary clarity boost for a few days, the cloudy haze inevitably returns with a vengeance.
To achieve a permanent solution, you must understand the material chemistry of modern vehicle light assemblies. Modern headlights are constructed from thick polycarbonate plastic. Manufacturers coat this plastic with a protective factory layer to shield it from solar rays. Over time, heat, solar exposure, and road debris destroy that original coating, causing the underlying plastic to oxidize and turn opaque.
To fix cloudy headlights permanently, you must completely remove the degraded outer polycarbonate layer through controlled wet sanding, polish the surface back to optical clarity, and seal the bare plastic with a high grade UV resistant 2K clear coat or ceramic shield. This detailed guide covers every tool, technique, safety precaution, and technical phase required to restore factory brightness for years to come.
Understanding Why Headlights Turn Yellow and Cloud Over Time
Modern vehicle light housings no longer use heavy glass. Instead, auto manufacturers rely on polycarbonate plastic because it is light, highly impact resistant, and easy to mold into complex aerodynamic shapes. Polycarbonate plastic possesses outstanding structural integrity, but it has one major vulnerability: extreme sensitivity to ultraviolet solar radiation.
To protect the raw polycarbonate lens from sun damage, factories apply a thin clear hard coat during manufacturing. Over several years of driving in harsh sunlight, exposure to ozone, atmospheric pollutants, acid rain, and automatic car wash chemicals degrades this factory sealant. Once the initial clear coat breaks down, solar rays strike the raw polycarbonate, breaking down its chemical polymer chains.
Headlight Lens Degradation Layers
How UV radiation and road debris break down factory headlight assemblies
Degraded OEM Clear Coat (Flaking)
Top Protective LayerOxidized Polycarbonate Layer (Yellow)
Middle Damaged LayerIntact Polycarbonate Plastic Base
Core Structural SubstrateThis chemical deterioration forms a rough, yellowish, porous film over the headlight lens. Light emitted from the internal bulb strikes this yellowed surface and scatters in random directions rather than projecting straight ahead onto the road. As a result, your nighttime vision drops dramatically, and your vehicle appearance suffers.
Internal Condensation Versus External Oxidation
Before spending money on sanding supplies, you must determine whether the cloudiness resides on the outer surface or inside the headlight housing.
- External Oxidation: The lens feels rough, scratchy, or chalky when you run your fingernail across the outer plastic. The yellow discoloration is uniform across the exterior face. This condition responds perfectly to wet sanding and refinishing.
- Internal Moisture or Film: The outer glass feels perfectly smooth, but you observe water droplets, white streaks, or fine dirt inside the assembly. Internal condensation occurs when the rubber perimeter seal perishes or housing vent tubes get blocked. External sanding will not resolve internal moisture issues; the assembly must be unsealed, dried, and resealed.
The Truth About Quick DIY Fixes: Why Toothpaste and WD40 Fail
Internet forums and social media videos frequently promote quick household remedies for cloudy headlights. Before investing your effort into these shortcuts, it is important to analyze why they fail to deliver long term results.
Headlight Restoration Methods Comparison
Evaluating DIY quick fixes against professional 2K restoration
| Restoration Method | Mechanism | Expected Longevity | Primary Downside |
|---|---|---|---|
| Toothpaste Scrubbing | Mild hydrated silica abrasives strip superficial haze | 1 to 3 Weeks | Lacks UV protective barrier; yellowing returns faster |
| WD-40 or Household Oil | Fills surface micro-pits with temporary lubricant | 2 to 5 Days | Attracts road dust; washes off in first rainstorm |
| Insect Repellent (DEET) | Chemical solvent melts top plastic layer flat | Permanent Damage | Permanently warps polycarbonate structural clarity |
| Baking Soda & Lemon Juice | Weak acid combined with mild physical abrasive | 1 to 2 Weeks | Uneven abrasion; leaves raw plastic exposed to sunlight |
| Professional 2K Wet Sanding | Complete oxidation removal plus chemical clear coat coat | 3 to 5 Years | Requires precise prep work and safety equipment |
Toothpaste contains mild abrasives such as hydrated silica or calcium carbonate. While buffing with toothpaste can shave away the thinnest upper layer of oxidation to produce a brief improvement, it leaves raw, unsealed polycarbonate open to sunlight exposure. Without a durable UV barrier, sun damage accelerates rapidly, leaving the lens cloudier than before.
Insect sprays containing DEET are even more destructive. DEET acts as a solvent on polycarbonate plastic. When sprayed onto a light housing, it melts the top plastic surface into a smooth film. As the chemical evaporates, the melted plastic hardens into a smeared, optical disaster that permanent sanding may not be able to fix.
To fix yellowed headlights permanently, you cannot rely on oil slick cover ups or mild pastes. You must perform progressive abrasive leveling and apply a permanent chemical clear coat.
Essential Tools and Materials for Permanent Headlight Restoration
Executing a professional grade headlight restoration requires collecting the correct automotive refinishing supplies beforehand. Using lower quality wood sandpapers or incorrect clear sprays will ruin your finished appearance.
Headlight Restoration Material & Tool Checklist
Recommended specifications and primary functions for professional-grade results
| Material / Tool | Recommended Specification | Primary Purpose |
|---|---|---|
| Automotive Sandpaper | Silicon carbide wet/dry (600, 1500, and 3000 grit) | Progressively strips oxidation and levels surface scratches |
| Masking Protection | High-adhesion automotive painter’s tape (2-inch width) | Protects surrounding body paint clear coat from sanding slips |
| Lubricating Agent | Clean water spray bottle with 2 drops car wash soap | Flushes away plastic slurry and prevents paper clogging |
| Rubbing Compound | Fine diminishing abrasive polish compound | Removes 3000 grit micro-scratches to restore optical clarity |
| Surface Sterilizer | 70% to 90% Isopropyl Alcohol (IPA) wipe solution | Strips polishing oils and wax to ensure coating adhesion |
| UV Protective Coating | 2K Polyurethane Aerosol or Cerakote Ceramic Wipe | Forms an unbreakable chemical shield against solar radiation |
| Personal Safety Gear | N95 Mask, Nitrile Gloves, Safety Goggles, Organic Vapor Respirator | Shields lungs and eyes from plastic dust and aerosol fumes |
Selecting the Right Protective Sealant: 2K Clear Coat Versus Ceramic Wipe
The sealant you choose dictates whether your restoration lasts six months or five years. There are two primary professional options:
- Two Component (2K) Aerosol Clear Coat: This product features a internal chemical activator button at the bottom of the can. When pressed, an internal glass tube releases a hardener containing isocyanate resins into the acrylic paint. When sprayed, it forms a hard, thick, factory quality clear shell over the lens. It offers maximum resistance against gravel impact and solar degradation.
- Ceramic Headlight Coatings: Premium restoration kits like Sylvania or Cerakote utilize liquid ceramic coatings (silica or organosilazane formulas). Applied via saturated wipes, ceramic sealants bond chemically with raw plastic. They are easier to apply than aerosol paint because they present zero risk of overspray on vehicle body panels.
Step by Step Permanent Headlight Restoration Process
Follow this comprehensive workflow carefully. Taking shortcuts during sanding or cleaning phases will ruin the final finish.
Headlight Restoration Execution Process
Standardized 4-step workflow for optical clarity and UV protection
Prep & Tape
Mask surrounding body paint clear coat with painter’s tape.
Wet Sanding
600 ➔ 1500 ➔ 3000 grit progressive leveling.
Compounding
Polish with fine diminishing abrasive to restore crystal shine.
UV Sealant
Apply 2K clear coat or ceramic shield against solar rays.
Step 1: Surface Preparation and Paint Protection
Start by washing the vehicle front fascia and light housings thoroughly with automotive soap and warm water. Remove bugs, tar spots, and road grime. Dry the area completely using a clean microfiber cloth.
Next, open the vehicle hood to gain better access to the top perimeter of the headlight housings. If your hood covers the top of the lights, working with an open hood gives your hand free movement around the corners.
Precision Masking & Paint Protection Setup
Diagram of double-layer border isolation with the vehicle hood raised
Apply double layers of automotive masking tape around the entire perimeter of each headlight housing. Cover all painted fender edges, bumper plastic, and chrome trim within three inches of the lens. Sanding paper slips happen quickly; proper masking prevents accidental gouging of your car paint clear coat.
Step 2: Progressive Wet Sanding Strategy
Wet sanding is the most important step in the restoration procedure. Water acts as a crucial lubricant, carrying away abraded plastic slurry and preventing coarse grit particles from carving deep gouges into the soft plastic.
Stage A: Coarse Abrasion with 600 Grit Sandpaper
Fold your 600 grit wet dry sheet around a firm foam backing block. Never use bare fingers alone, as uneven finger pressure creates wave patterns across the plastic face.
Sanding Stroke Direction Protocol
Cross-hatch directional sanding sequence to monitor scratch elimination
Horizontal Strokes
Vertical Strokes
║
▼ Up-and-Down Motion
Horizontal Strokes
- Soak the lens and sandpaper generously with your soapy water spray bottle.
- Begin sanding using firm, steady horizontal strokes across the lens face.
- Keep the surface dripping wet continuously. The runoff water will start as a dark yellow or brown slurry, indicating the removal of dead oxidized material.
- Continue sanding until the runoff water turns completely white. Wipe the lens clean with a microfiber cloth. The entire lens should now look uniformly cloudy with horizontal sanding marks.
Stage B: Intermediate Leveling with 1500 Grit Sandpaper
Switch to your 1500 grit paper. Spray water liberally over the lens.
- Change your sanding direction to straight vertical strokes.
- Alternating stroke orientation makes it easy to visually track when the finer 1500 grit scratches replace the deeper 600 grit horizontal lines.
- Sand steadily until all horizontal lines vanish entirely, leaving a refined hazy surface.
Stage C: Final Smoothing with 3000 Grit Sandpaper
Attach your 3000 grit micro finishing sheet. Spray the lens with clean water.
- Revert to horizontal sanding strokes using moderate hand pressure.
- Sand continuously until the lens surface feels glass smooth under your fingers.
- Wipe the lens dry. The plastic will still possess a faint satin haze, but yellowing and pitting will be gone.
Step 3: Compounding and Polishing the Lens Surface
Now that coarse scratches are eliminated, you must polish out 3000 grit micro haze to achieve crystal clear optical translucency.
- Place a nickel sized drop of automotive rubbing compound onto a clean microfiber towel or foam buffing wheel attached to a power drill.
- Work the polish into the lens using tight circular motions under moderate hand pressure.
- Continue working across the entire surface until the compound breaks down into a clear film.
- Wipe off residue using a dry microfiber cloth. The headlight lens should appear completely clear.
Surface Clarity Evolution Matrix
Visual and textural progression across each stage of restoration
| Restoration Stage | Expected Lens Appearance & Texture |
|---|---|
| After Initial Prep | Heavy Yellowing & Pitted Texture |
| After 600 Grit | Uniform Frosted Haze (All yellowing removed) |
| After 1500 Grit | Finer Opaque White Sheen |
| After 3000 Grit | Semi-Translucent Smooth Texture |
| After Compounding | Crystal Clear Glass Appearance |
| After 2K Clear Coat | Glossy Deep Factory Finish |
Step 4: De-greasing and Surface Sterilization
Before applying your permanent protective sealant, the lens must be chemically clean. Polishing compounds contain mineral oils and lubricants that block clear coats from bonding to plastic.
- Saturate a lint free microfiber cloth with 70% to 90% Isopropyl Alcohol (IPA).
- Wipe the lens surface thoroughly to lift all remaining polish oils, wax, and fingerprints.
- Allow the alcohol to evaporate for three minutes. Do not touch the bare plastic lens with un-gloved fingers after this cleaning step.
Step 5: Applying the Permanent UV Protective Barrier
This final stage seals raw plastic, providing years of resistance against solar damage and weather exposure.
Spray Can Coating Distance Protocol
Proper application positioning for 2K clear coat & protective aerosol sprays
Causes heavy paint runs, sagging, and orange peel texture.
Ensures even atomization, uniform wet film depth, and clear flow.
Dry spray aerosol droplets land prematurely, creating a dusty haze.
Method A: Aerosol 2K Polyurethane Clear Coat Application
If you choose a two component 2K aerosol clear coat:
- Put on an organic vapor respirator mask and safety goggles. Perform spraying in a well ventilated garage or protected outdoor space free of wind and dust.
- Shake the 2K aerosol can vigorously for two minutes. Remove the red activator button from the top cap, place it over the pin on the bottom of the can, and press down hard on a flat surface to break the internal glass seal. Shake for two more minutes to mix hardener and resin.
- Mask off the entire front end of your car using old newspapers or plastic drop sheets to guard against aerosol paint mist drifting onto your bodywork.
- Hold the aerosol can 12 to 16 inches away from the headlight face.
- Apply the first coat using a smooth, overlapping horizontal pass. This first layer should be a light tack coat (50% coverage opacity).
- Allow the paint to flash off for 10 minutes.
- Apply a second medium wet coat moving horizontally at a steady speed. The paint will lay down cloudy for ten seconds before flowing out into a deep, crystal clear glossy layer.
- Allow the clear coat to dry untouched for at least one hour before moving the vehicle. Full curing requires 24 hours of warm solar exposure.
Method B: Ceramic Shield Wipe Application
If you choose a pre-packaged ceramic restoration wipe:
- Put on clean nitrile gloves.
- Tear open the sealed ceramic wipe pouch.
- Starting at the top corner of the headlight, wipe across the plastic in smooth, horizontal strokes with a 50% overlap on each pass. Work from top to bottom in a single sweep.
- Do not re-wipe areas that have already begun to dry, as this drags the setting ceramic layer and leaves streak marks.
- Let the ceramic sealant cure undisturbed in direct sunlight for 30 minutes. Avoid water contact for 24 hours.
Pre Made Restoration Kits Versus Standalone Custom Supplies
Car owners often debate whether to purchase an all in one commercial kit or source individual supplies from an auto paint retailer.
Headlight Restoration Kit & Setup Comparison
Evaluating top commercial restoration kits against custom 2K DIY setups
| Option Type | Typical Cost | Inclusions | Expected Life | Best Suited For |
|---|---|---|---|---|
| Sylvania Kit | $22 to $28 | Pre-cut paper discs, compound, liquid clear coat, tape | 2 to 3 Years | Beginners seeking a complete kit solution |
| Cerakote Kit | $18 to $25 | Oxidation remover wipes, sanding discs, ceramic wipes | 3 to 4 Years | Fast application without aerosol spray risks |
| 3M Drill Kit | $25 to $35 | Drill arbor pad, Trizact discs, compound pad, wax wipe | 1 to 2 Years | Severely yellowed, cracked lens surfaces |
| Custom 2K DIY Setup | $35 to $50 | Full sandpaper sheets, pro compound, 2K aerosol clear can | 4 to 6 Years | Maximum durability and factory finish goals |
All in one restoration packages offer convenience because they contain exact paper quantities and pre measured chemical packages. However, purchasing custom standalone supplies (full size wet dry sandpaper sheets and a dedicated 2K aerosol clear coat) provides superior durability. Commercial kits often supply single stage synthetic wax wipes that wash away within months, whereas a 2K spray clear coat builds a permanent barrier that withstands weather exposure for over four years.
Power Drill Versus Hand Restoration: Which Approach Is Superior?
Deciding whether to perform sanding and buffing by hand or with a power tool depends on your experience level and how severely damaged your light housings are.
Method Comparison Metrics
Hand Sanding vs. Rotary Drill Advantages for Headlight Restoration
Hand Sanding Advantages
- ✓ Zero risk of friction heat burn or plastic warping
- ✓ Precise control near paint trim and body panels
- ✓ Perfect uniform flat leveling across lens contours
Rotary Drill Advantages
- ✓ Fast correction speed for heavy oxidation removal
- ✓ Less physical hand fatigue during multi-stage work
- ✓ Superior compounding gloss depth and surface clarity
Hand Wet Sanding
Hand sanding gives you complete tactile feedback. You can easily adjust your hand pressure around curves and tight edges, preventing inadvertent sand-through on plastic housing corners. Hand wet sanding is recommended for beginners because it eliminates friction heat that can melt polycarbonate.
Drill Motorized Restoration
Utilizing a cordless drill fitted with a 3 inch Hook and Loop backing pad speeds up sanding on heavily pitted lenses. Power tools process large surfaces rapidly, but they require caution. You must keep the drill speed low (under 1500 RPM) and ensure the plastic surface stays dripping wet. Pausing in one spot while running a drill pad at high speeds will generate excessive friction heat, scorching cloudy burn marks into the lens that cannot be polished out.
Long Term Maintenance: How to Preserve Crystal Clarity for Years
Once you complete a full restoration, implementing a simple preventive care routine will keep your light assemblies looking brand new.
Maintenance Timeline for Restored Headlights
Recommended care intervals to preserve clarity and prevent premature re-oxidation
Routine Cleaning
Wash with pH-neutral car shampoo to remove road grime without stripping UV protection.
Top-Up UV Protection
Apply synthetic polymer sealant or paste wax to maintain hydrophobic barrier and solar defense.
Clear Coat Inspection
Inspect clear coat layer for stone chips, micro-cracks, or flaking edges that need spot sealing.
Paint Protection Film (PPF)
Install clear Paint Protection Film (PPF) over restored lenses for ultimate self-healing impact and UV protection.
- Wash with pH Neutral Shampoos: Avoid aggressive dish detergents or industrial degreasers when cleaning your car. Strong alkaline cleaners accelerate sealant degradation.
- Apply Synthetic Polymer Waxes: Every three months, apply a coat of synthetic car sealant or paste wax onto your headlights. Wax adds a sacrificial barrier that sheds water and blocks UV rays.
- Park in Shaded Locations: Whenever possible, park your vehicle in a covered garage, under a carport, or away from direct afternoon sun to minimize thermal stress on the plastic.
- Install Paint Protection Film (PPF): For ultimate protection against flying highway gravel, install pre cut transparent Paint Protection Film over your newly restored headlights. The self healing film absorbs rock impacts while preserving your clear coat underneath.
Frequently Asked Questions About Headlight Restoration
Can you fix cloudy headlights permanently without wet sanding?
No. Surface yellowing and fogging represent physical destruction of the outer polycarbonate layer. Chemicals, waxes, or household pastes only sit on top of dead plastic. The oxidized layer must be physically removed through wet sanding to expose fresh plastic before sealing.
How long does a 2K clear coat headlight restoration last?
A proper restoration using 600 to 3000 grit wet sanding followed by two coats of 2K polyurethane aerosol clear coat typically lasts between four and six years. Longevity depends on sun exposure, local climate, and vehicle storage conditions.
Why do headlights turn cloudy again after using commercial kits?
Most consumer restoration kits include temporary paste sealants or acrylic wipes that wash off after several rainstorms or automatic car washes. Without a dedicated 2K clear coat or professional ceramic seal, raw plastic oxidizes again within three to six months.
Is 2K aerosol clear coat dangerous to apply at home?
Two component (2K) clear coats contain isocyanate hardeners that can irritate the respiratory system if inhaled. Always wear an organic vapor respirator mask, nitrile gloves, and eye protection while spraying in a well ventilated garage or outdoor area.
Can I clear coat my headlights without polishing them first?
Yes. In fact, if you plan to apply a aerosol 2K clear coat, you should stop sanding at 2000 or 3000 grit and skip the polishing compound stage. The microscopic scratch pattern created by 2000 to 3000 grit sandpaper gives the 2K clear coat mechanical grip to adhere to the plastic. Applying paint over a slick polished surface can cause the clear coat to peel over time.
Conclusion: Restoring Night Visibility and Vehicle Appearance
Fixing cloudy headlights permanently is one of the most rewarding DIY projects you can perform on your vehicle. By avoiding temporary quick fixes like toothpaste or oil sprays and applying a proper wet sanding workflow, you eliminate dead, yellowed plastic for good.
The secret to long term clarity lies in your final protective barrier. Stripping away damaged factory film exposes bare polycarbonate. Applying a durable 2K polyurethane clear coat or ceramic shield locks out ultraviolet rays and road contaminants, restoring bright night visibility and giving your vehicle a clean, fresh look.
Next Step: Take Control of Your Automotive Maintenance
Ready to restore your headlights to factory clarity? Download our printable Headlight Restoration Checklist and shopping list to ensure you have every tool, grit paper, and protective gear item ready before you start your project.
Inspect your vehicle headlights today. If you notice yellowing or surface roughness, gather your sanding blocks and 2K clear coat to tackle this weekend DIY project and drive safely with full night visibility.