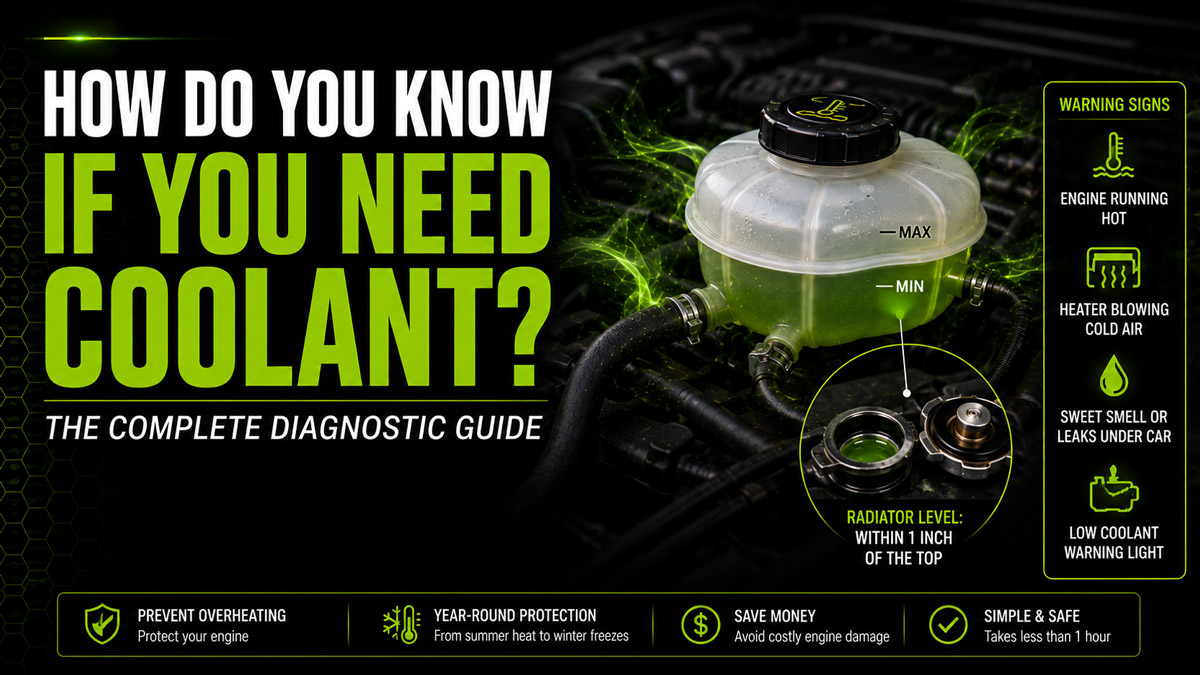
You can confidently determine how do you know if you need coolant by recognizing driving symptoms, visually checking the reservoir levels, and testing the fluid’s specific gravity. This five-step process takes under an hour, requires zero mechanical experience, and relies entirely on one absolute rule: never attempt to open a hot, pressurized cooling system.
Before You Start
- Time Required: 45–60 minutes (includes 30–45 minutes of mandatory engine cooling).
- Difficulty: Beginner.
- Estimated Cost: $10–$35 (if tools or fluid are needed).
- Tools & Materials Checklist:
- Safety glasses (ANSI Z87.1 rated preferred).
- Thick shop rag or heavy towel.
- LED flashlight.
- Antifreeze hydrometer or refractometer.
- Vehicle owner’s manual (for exact coolant specification).
- Premixed 50/50 coolant (or concentrated coolant + distilled water).
- Prerequisites: Vehicle must be parked on level ground with the engine turned off.
Step 1: Identify Active Driving Symptoms
Monitor your dashboard and climate control system for the three primary indicators of cooling system distress.
Check the temperature gauge on your dashboard to see if the needle is climbing past the halfway mark, and pay attention to sensory clues like a sweet, maple-syrup smell inside the cabin or a heater that blows cold air. Cold air from the heater core is a massive red flag; it means the coolant level has dropped too low to circulate warm fluid into the cabin.
- Success Checkpoint: You’ll know you need to proceed to an under-hood inspection if the vehicle runs hot, smells sweet, drops fluid on the driveway, or illuminates a low-coolant dashboard light.
- Common Mistake: Ignoring a cold heater. Many drivers assume the climate control is broken, when in reality, the engine is critically low on coolant and close to overheating.
Step 2: Let the Engine Cool Down Completely
Wait a minimum of 30 to 45 minutes after driving before attempting to touch any cooling system components.
Open the hood to let heat escape, wait the allotted time, and then squeeze the upper, thick rubber radiator hose with your hand. The hose must feel soft and squishy. If the hose feels rock-hard or too hot to squeeze comfortably, the system is still pressurized and boiling water will erupt if you open it.
- Success Checkpoint: You’ll know it is safe to proceed when the upper radiator hose collapses easily under your grip and the engine block emits no radiating heat.
- Common Mistake: Relying solely on the dashboard temperature gauge to determine if the engine is “cool.” A cold gauge does not mean the system is depressurized.
Step 3: Perform a Visual Level Check on the Reservoir
Locate the correct translucent plastic tank under the hood and read the molded level lines.
Find the coolant reservoir, usually located on the passenger side, featuring a cap with a warning icon of a thermometer over fluid. Shine your flashlight directly against the side of the plastic tank to illuminate the fluid inside. The liquid line must sit exactly between the molded “MIN/COLD” and “MAX/HOT” lines.
- Success Checkpoint: You’ll know your volume is correct if the fluid rests steadily at the midpoint between the two indicator lines.
- Common Mistake: Confusing the windshield washer fluid tank with the coolant reservoir. Never put coolant in a tank marked with a windshield wiper icon.
Step 4: Inspect the Radiator Cap and Neck
Remove the radiator cap to verify the fluid level at the highest point of the cooling system.
Place your thick rag completely over the radiator cap, press down firmly with your palm, and turn counter-clockwise one quarter-turn until it stops. Let any residual hiss of pressure escape, then press down again and turn it fully to remove it. Look inside the metal filler neck; the fluid should sit no more than 1 inch below the top rim.
- Success Checkpoint: You’ll know the radiator is full if you can easily see the bright green, orange, or pink fluid sitting right at the base of the cap’s spring mechanism.
- Common Mistake: Opening the reservoir cap but ignoring the radiator cap. A reservoir can look full while a leak in the radiator leaves the actual engine dry. (Note: Skip this step if your vehicle has a pressurized expansion tank and no radiator cap).
Step 5: Test Fluid Quality and Protection Level
Extract a sample of the coolant using a hydrometer to measure its freezing and boiling protection limits.
Insert the rubber hose of your hydrometer into the coolant (via the radiator neck, not the reservoir) and squeeze the bulb to draw fluid into the testing chamber until it reaches the fill line. Tap the plastic housing lightly to dislodge any air bubbles. Read the floating specific-gravity discs or the internal pointer against the printed temperature scale on the tool.
- Success Checkpoint: You’ll know your coolant is healthy if a 50/50 mix tests to protect down to at least -34°F (-36°C) and the fluid is translucent and brightly colored.
- Common Mistake: Reading the hydrometer without tapping out the air bubbles. Bubbles clinging to the internal dial or discs will artificially lift them, giving you a falsely high protection reading.
Common Mistakes and How to Fix Them
A simple coolant check can turn into an expensive repair if you introduce the wrong variables. Watch for these failure modes:
- Using Tap Water to Top Off: Tap water contains calcium and minerals that will rapidly scale and clog the tiny tubes inside your radiator.
- How to fix it: If you added more than a cup of tap water, schedule a complete system flush within the next 3,000 miles. Always use distilled water for dilution.
- Mixing Coolant Colors: Mixing an older IAT (green) coolant with a modern OAT (orange/pink) coolant causes a chemical reaction that turns the fluid into a thick, corrosive gel.
- How to fix it: If you accidentally mix incompatible coolants, do not start the engine. The system must be professionally power-flushed immediately to remove the gel before it clogs the water pump.
- Overfilling the Reservoir: Pouring coolant past the “MAX” line leaves no room for thermal expansion.
- How to fix it: Use a clean turkey baster or a fluid extractor syringe to pull out the excess fluid until the level drops back to the midpoint. Dispose of the extracted coolant safely; it is highly toxic to animals.
- Milky or Opaque Fluid: If the fluid looks like a brown milkshake, engine oil or transmission fluid is breaching the cooling system.
- How to fix it: This requires immediate mechanical intervention. Perform a cooling system pressure test and inspect the engine for a blown head gasket.
Variations for Different Vehicles and Climates
Your specific testing tools and requirements will change based on your car’s design and your local weather.
- Using a Refractometer vs. Hydrometer: For the highest precision, a mechanic uses an optical refractometer instead of a floating-disc hydrometer. You place two drops of coolant on the glass lens, close the plastic flap, and look through the eyepiece toward a light source to read the exact freezing point on a reticle scale.
- Pressurized Expansion Tanks: Many modern European vehicles (and newer domestics) do not have a metal radiator cap. Instead, the plastic reservoir is pressurized (indicated by a thick, screw-on cap with pressure ratings like “15 PSI” printed on it). In these vehicles, you will perform Step 4 and Step 5 directly at the reservoir tank.
- Extreme Cold Climates: While a standard 50/50 mixture (50% antifreeze, 50% distilled water) protects down to -34°F, vehicles in sub-arctic climates may require a 60/40 or 70/30 ratio to push the freezing point down to -84°F. Never exceed 70% antifreeze; pure antifreeze actually freezes at a higher temperature than a water mixture.
Time and Cost Estimates for Coolant Maintenance
- Diagnostic Check: $0 and 45 minutes (doing it yourself).
- Hydrometer Tester: $5 to $12 at any local auto parts store.
- Top-off Fluid: $15 to $25 for a 1-gallon jug of 50/50 prediluted, vehicle-specific coolant.
- Professional Flush: $100 to $200 if your test reveals sludge, rust, or degraded specific gravity requiring a total fluid replacement.
Frequently Asked Questions
Can I use pure water if I am stranded and overheating? Yes, in an absolute emergency, you can use distilled or bottled water to get home. However, water boils at a lower temperature and lacks anti-corrosives. You must flush the system and restore the proper 50/50 coolant ratio as soon as you reach civilization.
How often should I check my coolant level? You should perform a visual check of the reservoir tank once a month or before any major road trip. The specific gravity (chemical protection level) should be tested with a hydrometer once a year, ideally in late autumn before freezing temperatures arrive.
Why does my coolant look brown or rusty? Brown coolant indicates severe rust and scale build-up inside the cast iron engine block, meaning the anti-corrosion additives in your fluid have completely failed. The system needs to be chemically flushed to remove the scale before adding fresh fluid.
Does coolant expire sitting in the bottle? Sealed, unused coolant generally has a shelf life of up to five years. Once poured into an engine, IAT (green) coolants degrade in about two years, while modern OAT/HOAT (orange/pink/gold) extended-life coolants can last up to five years or 100,000 miles.
Understanding how do you know if you need coolant is a fundamental maintenance skill that protects your engine from catastrophic thermal failure. By trusting your dashboard, checking the physical levels safely, and verifying the chemical mixture, you guarantee your vehicle survives both summer traffic and winter freezes.