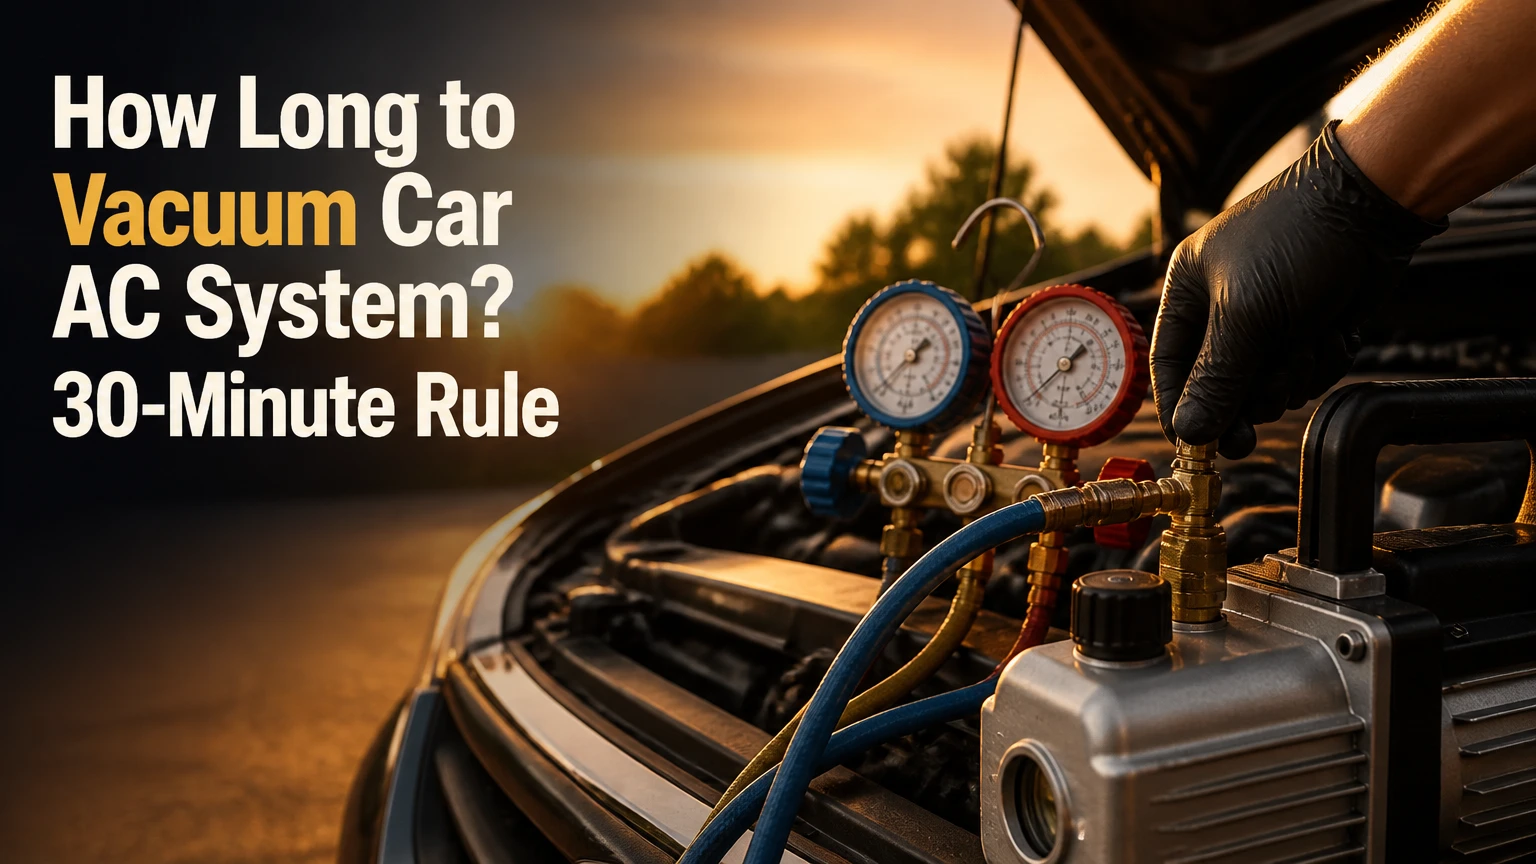
A car AC system typically needs 30-45 minutes of active evacuation, followed by a 15-30-minute vacuum decay test, making the complete process about 45-75 minutes. For a system that remained open to humid air, a contaminated circuit, or a repair involving major components, evacuate longer and judge completion by a stable micron reading rather than time alone.
Key Facts at a Glance
A typical automotive AC evacuation takes 30-45 minutes before testing.
A vacuum decay test usually adds 15-30 minutes after the pump is isolated.
A professional target is commonly 500 microns or lower, verified with a micron gauge.
An analog manifold gauge cannot reliably confirm a deep, dry vacuum.
Refrigerant must be recovered with approved equipment before a vacuum pump is connected.
A rising vacuum can indicate a leak, moisture outgassing, hose leakage, or a faulty connection.
What Does Vacuuming a Car AC System Do?
Vacuuming a car AC system removes air, non-condensable gases, and water vapor before refrigerant charging. A vacuum pump lowers the pressure inside the sealed refrigerant circuit, allowing moisture to evaporate at a lower temperature so the pump can remove it through the service hoses.
The procedure does not repair a refrigerant leak. It also does not replace refrigerant recovery. The system must first be empty of recoverable refrigerant, because a standard shop vacuum pump is designed for vapor evacuation and can be damaged by liquid refrigerant or oil.
Moisture creates several problems inside an automotive refrigeration loop. Water can freeze at the expansion valve or orifice tube, react with refrigerant oil, and contribute to acid formation that attacks aluminum components. A receiver-drier or accumulator removes some moisture during normal operation, but it cannot compensate indefinitely for a system that was left open.
The practical objective is therefore twofold: remove contamination and verify that the repaired circuit can hold a vacuum. A clock provides a useful minimum duration, but the vacuum level and decay behavior provide better evidence.
How Long Should You Vacuum a Car AC System?
A standard car AC system usually receives 30-45 minutes of active pumping, while a system exposed to atmosphere for several days may need 60 minutes or more. The exact duration depends on internal moisture, ambient temperature, pump capacity, hose restrictions, system volume, and whether the pump can reach a genuinely deep vacuum.
| System condition | Typical active evacuation | Typical decay test | Practical total |
|---|---|---|---|
| Service port opened for under 30 minutes | 20-30 minutes | 15 minutes | 35-45 minutes |
| Hose or minor component replaced | 30-45 minutes | 15-30 minutes | 45-75 minutes |
| System open for several hours | 45-60 minutes | 20-30 minutes | 65-90 minutes |
| System open for several days | 60-90 minutes | 30 minutes | 90-120 minutes |
| Compressor, condenser, or evaporator replaced | 45-90 minutes | 20-30 minutes | 65-120 minutes |
These are typical field ranges, not universal manufacturer specifications. The vehicle service manual takes priority, especially for systems using R-1234yf, electrically driven compressors, unusual refrigerant circuits, or prescribed oil procedures.
A useful practitioner rule is to stop increasing pump time only after the system reaches a deep vacuum and the isolated reading remains stable. Running a weak pump for two hours does not compensate for a leaking hose connection.
Is 30 minutes enough?
Thirty minutes is often enough for a dry, properly sealed system with a healthy two-stage pump and short atmospheric exposure. Thirty minutes is not automatically enough after a component replacement, prolonged exposure, cold weather, or an evacuation that never reaches approximately 500 microns.
Temperature affects moisture removal. At lower ambient temperatures, water evaporates more slowly, so the same 30-minute cycle may remove less moisture than it would in a warm workshop. A system that was open in humid coastal air also carries a higher moisture burden than one opened briefly in a dry indoor bay.
What Vacuum Level Should a Car AC System Reach?
A professional evacuation target is commonly 500 microns or lower, followed by a stable decay test. An analog gauge should approach the maximum practical vacuum for the local altitude, but a reading near 29-30 inHg cannot distinguish 500 microns from several thousand microns.
At sea level, atmospheric pressure is approximately 29.92 inHg under standard conditions. A gauge displays vacuum relative to local atmospheric pressure, so a perfect sea-level reading is near 29.92 inHg. The value falls at altitude, and weather changes also affect the displayed maximum.
| Measurement method | Typical useful reading | What it can confirm | Main limitation |
|---|---|---|---|
| Low-side analog manifold | 28-30 inHg at low altitude | Large leaks and pump drawdown | Poor resolution below deep vacuum |
| Digital micron gauge | 500 microns or lower | Deep evacuation and decay trend | Requires clean placement and calibration |
| Two-stage pump specification | 15-50 microns ultimate vacuum | Pump capability under ideal conditions | Does not prove vehicle-system dryness |
| Vacuum decay test | Less than 100-200 micron rise in 10 minutes is a common shop rule | Relative stability | Threshold varies by system and procedure |
The 500-micron target is a practical industry benchmark, not a guarantee that every molecule of water has disappeared. A micron gauge should be connected to the system, preferably at a service port away from the pump, so the technician measures the vehicle circuit rather than the pump’s best laboratory reading.
Does altitude change the vacuum reading?
Altitude changes the maximum inHg reading because the surrounding atmospheric pressure is lower. At roughly 5,000 feet, a perfect vacuum may display close to 24-25 inHg rather than 29.92 inHg, although actual readings vary with local barometric pressure and gauge calibration.
Microns are generally easier to compare across locations because they describe absolute pressure. A technician in Denver should not reject a properly evacuated system simply because an analog gauge cannot reach 29.92 inHg.
Why Does Moisture Matter During Evacuation?
Moisture is harmful because water can freeze in restrictions, react with refrigerant oil, and promote corrosion inside the AC circuit. Lowering system pressure lowers water’s boiling point, allowing liquid moisture to change into vapor that the vacuum pump can remove.
The process is slower than the phrase “water boils instantly” suggests. Moisture trapped in oil, desiccant, rubber hoses, and component surfaces can continue to outgas after the initial pressure drop. A micron reading that falls, rises, and then gradually improves after more pumping often indicates moisture or outgassing rather than a large external leak.
Refrigerant oil is hygroscopic, meaning it absorbs water. PAG oil in many R-134a and R-1234yf systems can retain moisture after the circuit has been opened, which explains why a short evacuation may produce a temporarily acceptable pressure but poor long-term reliability.
A receiver-drier or accumulator should be replaced when the service procedure requires it or when the system has been open long enough to saturate the desiccant. Evacuation cannot restore desiccant capacity.
How Do You Evacuate a Car AC System?
Evacuate a car AC system in a controlled sequence: recover refrigerant, connect leak-free hoses, pull a deep vacuum, isolate the vehicle, perform a decay test, and charge the exact specified refrigerant mass. The most important success factor is a sealed connection between the pump, gauge set, and service ports.
Before You Start
| Requirement | Typical specification |
|---|---|
| Active work time | 45-90 minutes |
| Skill level | Intermediate mechanical and refrigerant-service skill |
| Vacuum pump | 3-5 CFM, preferably two-stage |
| Gauge equipment | Manifold set plus digital micron gauge |
| Safety equipment | Safety glasses, chemical-resistant gloves |
| Additional equipment | Refrigerant recovery machine, approved cylinder, scale |
| Vehicle information | Refrigerant type, charge mass, oil type, service procedure |
Do not vent refrigerant. In the United States, EPA Section 608 and Section 609 rules restrict refrigerant handling and prohibit intentional venting of automotive refrigerants. R-1234yf also requires equipment approved for that refrigerant, and refrigerant mixing can contaminate recovery machines and the vehicle.
Step 1: Recover the Existing Refrigerant
Recover all refrigerant with equipment rated for the vehicle’s refrigerant type before opening fittings or applying a vacuum. Confirm the recovery machine identifies R-134a or R-1234yf correctly, because the fittings, oil compatibility, and service equipment differ.
You will know this step worked when the recovery machine completes its cycle and the vehicle system no longer contains recoverable refrigerant. A common mistake is connecting a vacuum pump to a charged system, which can discharge refrigerant through pump exhaust and create a safety and compliance problem.
Step 2: Inspect and Connect the Service Equipment
Install the blue hose on the low-side service port, the red hose on the high-side port, and the yellow hose on the vacuum pump. Inspect hose seals, couplers, valve cores, and manifold fittings before opening the manifold valves.
A core-removal tool can improve evacuation speed by removing the Schrader valve cores, but the tool must be compatible with the refrigerant and used without contaminating the circuit. You will know the setup is sound when all fittings are tight and the gauge set itself has no obvious leak.
A common mistake is testing only the vehicle while leaving a leaking manifold or hose connected. The gauge may rise because the tool leaks, not because the repaired AC circuit leaks.
Step 3: Pull the Initial Vacuum
Open both manifold valves and start the vacuum pump with the correct oil level. Pull the system down until the analog gauge approaches its local maximum, then monitor the micron gauge as the reading continues to fall.
Run the pump for at least 30 minutes on a normally dry system. Use 45-90 minutes after prolonged atmospheric exposure, major component replacement, or a slow micron decline.
You will know the initial evacuation is progressing when pressure falls rapidly at first and then decreases more gradually. A common mistake is judging success by the analog needle alone, because that gauge can appear fully evacuated while the system still contains substantial moisture or trapped air.
Step 4: Isolate the Vehicle Before Shutting Down
Close both manifold valves before turning off the vacuum pump. If the pump has an isolation valve, close that valve as well, then switch off the pump and record the micron reading immediately.
This sequence reduces the chance of pump oil migrating backward through the hoses into the AC circuit. The exact manifold procedure varies by equipment design, so follow the gauge-set instructions when they differ from a generic valve sequence.
You will know the isolation step worked when the vehicle remains separated from atmospheric pressure and the pump stops without a pressure surge. A common mistake is switching off the pump first while the manifold remains open.
Step 5: Perform the Vacuum Decay Test
Leave the isolated system for 15-30 minutes and watch the micron gauge. A stable reading supports system integrity, while a rapid rise indicates a leak, a loose connection, or a valve problem; a slower rise may indicate moisture outgassing.
A common shop rule is to seek a low, stable micron reading with a modest rise during a 10-minute observation, but the vehicle manufacturer’s procedure controls. A gauge that rises from 400 to 900 microns and stabilizes tells a different story from one that rises continuously from 500 to 3,000 microns.
You will know the test is useful when the gauge is connected on the vehicle side of the manifold and the pump is fully isolated. A common mistake is treating a vacuum hold as a precise leak-rate measurement. Vacuum testing can miss some leaks that appear only under positive refrigerant pressure or when components heat and move.
Step 6: Charge by Specified Mass
Charge the system with the specified refrigerant type and exact mass shown on the under-hood label or service information. Use a calibrated scale rather than charging until a pressure gauge reaches a preferred number.
Pressure changes with ambient temperature, condenser airflow, compressor speed, and cabin load. Undercharging reduces cooling, while overcharging can raise discharge pressure and damage the compressor or relief system.
You will know charging is complete when the specified mass has entered and operating pressures, vent temperature, compressor command, and condenser performance are within the vehicle’s service range. A common mistake is mixing R-134a and R-1234yf or adding stop-leak without checking component and equipment compatibility.
Which Pump and Gauge Are Best?
A two-stage electric pump paired with a micron gauge provides the most dependable automotive evacuation results. A single-stage pump can work for occasional repairs when the system is tight and dry, while a Venturi pump is a poor choice for deep dehydration because its performance depends heavily on compressor capacity and air quality.
| Equipment option | Typical capacity or reading | Typical purchase or rental cost | Best application |
|---|---|---|---|
| Single-stage electric pump | 1.5-5 CFM, often 1,000-3,000 microns in use | $60-$120 purchase | Infrequent DIY service |
| Two-stage electric pump | 3-5 CFM, commonly below 500 microns with sound hoses | $130-$250 purchase | Repeated repairs and deep evacuation |
| Venturi air pump | 1-3 CFM practical automotive performance | $30-$90 purchase | Limited emergency use with a large compressor |
| Digital micron gauge | 0-9,999 micron display range | $80-$250 purchase | Verifying evacuation and decay |
| Analog manifold set | 0-30 inHg vacuum scale | $40-$100 purchase | Basic pressure and valve control |
Pump capacity affects initial drawdown speed, but capacity does not overcome a leak. A 5-CFM pump attached through restricted Schrader cores and narrow hoses may evacuate more slowly than a smaller pump using full-flow service tools.
A micron gauge is the more important upgrade for diagnosis. The analog manifold remains useful for identifying gross problems and controlling refrigerant flow, but its vacuum scale compresses the range where moisture removal and small leaks matter most.
What Are the Main Alternatives to DIY Evacuation?
A professional recovery, evacuation, and recharge service is the safest alternative when the system contains refrigerant, uses R-1234yf, has electrical compressor controls, or requires component replacement. A rental pump may reduce tool cost, but it does not remove the need for recovery equipment, correct refrigerant identification, leak diagnosis, and accurate charging.
| Service path | Typical customer cost | Typical time | Important limitation |
|---|---|---|---|
| DIY pump rental | $0-$50 deposit-based rental | 1.5-3 hours | Often lacks a micron gauge and recovery machine |
| DIY owned equipment | $180-$500 for pump, gauges, and gauge accessories | 1.5-3 hours | Refrigerant and recovery equipment remain separate costs |
| Independent repair shop | $150-$300 for evacuation and recharge | 1-1.5 hours | Leak repair may cost extra |
| Dealer or R-1234yf specialist | $200-$450 typical service range | 1-2 hours | Higher equipment and labor rates are common |
A shop may finish faster because it uses a dedicated service machine, full-flow hoses, a refrigerant scale, and established recovery procedures. The displayed service time still does not prove that the circuit was leak-tested correctly, so ask whether the invoice includes evacuation, decay testing, refrigerant mass, and leak inspection.
Why Does the Vacuum Rise After the Pump Stops?
A rising vacuum reading means system pressure is increasing, but the cause may be an external leak, moisture outgassing, trapped refrigerant, a leaking hose connection, or a faulty manifold valve. The speed and pattern of the rise provide the first diagnostic clue.
| Gauge behavior after isolation | Likely cause | Corrective action |
|---|---|---|
| Immediate rise toward atmospheric pressure | Large leak or disconnected fitting | Recheck couplers, hoses, service ports, and repaired components |
| Slow continuous rise | Small leak or hose-seat leakage | Test connections, fittings, O-rings, condenser, and evaporator |
| Rise that stabilizes at a higher vacuum | Moisture or component outgassing | Reopen pump, replace contaminated oil, evacuate longer |
| Cannot pass 20-25 inHg | Major leak, restriction, weak pump, or closed valve | Check valve positions, hose cores, pump oil, and circuit integrity |
| Micron reading fluctuates sharply | Gauge contamination, sensor location, or unstable connection | Clean sensor, relocate it, and isolate the manifold |
Vacuum testing is not a substitute for positive-pressure leak testing in every case. Nitrogen pressure testing, electronic leak detection, ultraviolet dye, or bubble solution may locate leaks that behave differently under positive pressure.
Can a vacuum hold test prove the system has no leak?
A stable vacuum hold indicates that the test arrangement did not admit a significant amount of gas during the observation period. It cannot guarantee that every refrigerant leak is absent, because seals may leak under positive pressure, heat, vibration, or compressor operation.
This limitation matters after evaporator replacement or intermittent leak complaints. A professional diagnosis may combine an evacuation test with dry nitrogen pressure testing and an electronic detector, following the vehicle and refrigerant manufacturer’s safety instructions.
What Common Mistakes Extend Evacuation Time?
The most common time-wasting mistake is pumping through leaking service equipment and assuming the vehicle is still wet. Other failures include using saturated pump oil, leaving valve cores installed with restricted hoses, overlooking a component that remained open, and charging a system without confirming refrigerant mass.
- Using dirty or low pump oil: Vacuum oil absorbs moisture and loses performance. Replace milky or contaminated oil before evaluating pump capability.
- Leaving a large leak unrepaired: The pump may run indefinitely while atmospheric moisture continues entering the circuit.
- Relying on 30 inHg: Near-maximum analog vacuum does not establish a 500-micron result.
- Ignoring the receiver-drier or accumulator: Saturated desiccant cannot be restored by longer pumping.
- Connecting the micron gauge at the pump: The reading can look better than the pressure inside the vehicle circuit.
- Charging by pressure alone: Correct refrigerant mass matters more than a generic low-side pressure target.
One counterintuitive service rule is that a slow rise that stabilizes can indicate moisture, while a rapid uninterrupted rise more strongly suggests a leak. The distinction prevents technicians from replacing sealed components when the real problem is wet oil or an open system.
Another practitioner rule is to change pump oil after a heavily contaminated evacuation rather than trusting the same oil for the next vehicle. Pump oil condition directly affects the final pressure and can produce misleading troubleshooting results.
How Should Different Situations Change the Vacuum Time?
System condition should determine evacuation time more than vehicle size. A compact sedan and a large SUV may both need 30-45 minutes when their circuits are sealed, while a small system left open for a week may require longer than a larger system opened briefly.
| Situation | Recommended approach | Reason |
|---|---|---|
| Refrigerant top-off without opening circuit | Do not evacuate automatically | Find and repair the leak first |
| Service hose disconnected briefly | 20-30 minutes, then decay test | Limited atmospheric exposure |
| Compressor replaced | Replace required oil and drier component, then 45-90 minutes | Larger moisture and oil-management risk |
| Evaporator replaced | 45-90 minutes plus positive-pressure leak testing | Long tubing and hidden cabin component |
| System open overnight in humid weather | At least 45-60 minutes | Increased absorbed moisture |
| Hybrid or electric vehicle compressor service | Follow manufacturer procedure exactly | High-voltage and oil-compatibility risks |
A system that merely lost refrigerant through a leak does not automatically need a longer vacuum. It needs leak repair, recovery of any remaining refrigerant, evacuation, and a charge by mass. Pulling a vacuum without fixing the leak only delays the same failure.
What Should You Check Before Recharging?
Before recharging, confirm the system passed the decay test, the correct refrigerant has been identified, required components were replaced, and the oil quantity is correct. Verify that service hoses are isolated properly and that no air entered the circuit during the charging connection.
Check the under-hood label for refrigerant type and charge mass. R-134a and R-1234yf are not interchangeable, and R-1234yf service equipment must be designed for that refrigerant’s properties. Hybrid and electric vehicles may require nonconductive compressor oil, so ordinary PAG oil can create an electrical safety hazard if the manufacturer specifies a different lubricant.
Do not add refrigerant stop-leak as a default repair. Sealants can obstruct recovery machines, contaminate service equipment, and interfere with future component replacement. Leak detection and mechanical repair provide a more reliable remedy.
FAQ
Can I vacuum a car AC system for only 10 minutes?
Ten minutes may remove some air from a recently opened circuit, but it is usually too short to establish adequate dehydration or a dependable decay test. Use at least 30 minutes for a typical repair unless the vehicle manufacturer specifies otherwise, then verify the result with a micron gauge and an isolated hold test.
Should the car engine run while pulling a vacuum?
The engine should remain off while the vacuum pump evacuates the system. The compressor does not need to operate during evacuation, and starting the engine with an empty or improperly connected AC circuit can damage the compressor or create unsafe operating conditions.
Can a vacuum pump remove refrigerant from a car?
A standard vacuum pump should not be used to recover refrigerant. Recovery requires equipment that captures and stores R-134a or R-1234yf, while a vacuum pump is intended to remove air and water vapor after the refrigerant has been recovered.
Do I need to vacuum an AC system after adding refrigerant?
Adding refrigerant without opening the circuit does not normally require evacuation, but low refrigerant indicates a leak that should be located and repaired. If the circuit was opened or completely discharged, recover remaining refrigerant, repair the fault, evacuate the system, and recharge by specified mass.
Is 500 microns always required for automotive AC?
Five hundred microns is a widely used professional target, but the vehicle manufacturer’s service procedure controls. The important principle is achieving a deep, stable vacuum and passing the decay test; an analog gauge alone cannot reliably verify either condition at fine resolution.
The Bottom Line
For the query how long to vacuum car AC system, plan on 30-45 minutes of active evacuation plus 15-30 minutes of vacuum decay testing. Use 45-90 minutes when the circuit was open for hours or days, but do not use time to hide a leak, contaminated pump oil, or restricted service equipment. Confirm a deep vacuum with a micron gauge, isolate the system before shutting down the pump, and charge the correct refrigerant by mass.