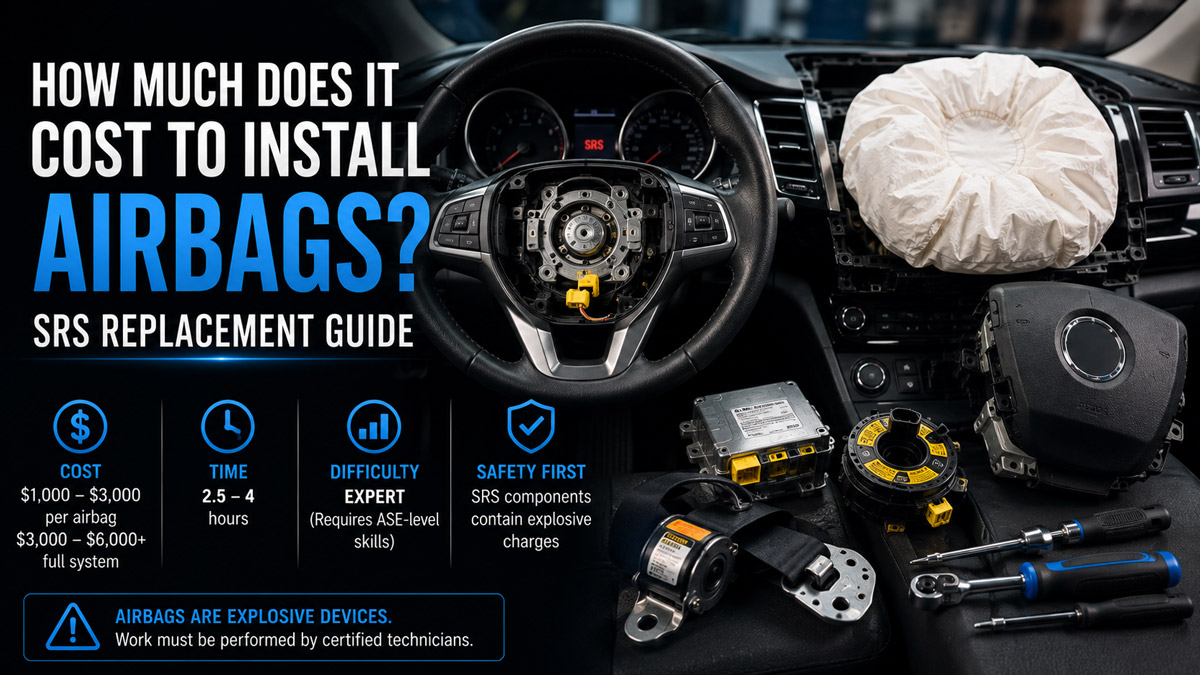
Wondering exactly how much does it cost to install airbags? Replacing a supplemental restraint system (SRS) involves running diagnostics, discharging backup power, removing deployed components, installing OEM modules, and reprogramming the computer. Expect 2.5 to 4 hours of precise labor, where success strictly depends on adhering to static discharge protocols.
Before You Start: Airbag Installation Prerequisites
- Cost: $1,000–$3,000 per airbag; $3,000–$6,000+ for full system replacement.
- Time Required: 2.5 to 4 hours.
- Difficulty: Expert (Requires ASE-level electrical diagnostic skills).
- Required Parts: 1x OEM Airbag Module per position, 1x SRS Control Module (if deployed), 1–2x Crash Sensors, 1x Clock Spring (for driver side), replacement seatbelt pretensioners.
- Hand Tools: 1/4″ and 3/8″ metric socket sets, T20–T30 Torx drivers, plastic trim removal tools.
- Safety Gear: High-voltage insulated gloves, ANSI safety glasses.
- Diagnostic Tech: High-impedance digital multimeter, bidirectional OBD2 scan tool with SRS flash-programming capability.
- Warning: SRS airbags contain explosive charges. Work must be performed by certified technicians. Unintentional deployment can cause severe injury or death.
Phase 1: Diagnostics and System Safe-ing
Step 1: Run Pre-Teardown SRS Diagnostics
Connect your bidirectional OBD2 scan tool to the vehicle’s diagnostic port to map every tripped sensor and deployed component before taking anything apart. Navigate to the SRS/Airbag module menu and pull all active and stored Diagnostic Trouble Codes (DTCs). Document every B-code (e.g., B1000 for internal module fault, B0011 for passenger circuit). This tells you exactly which hidden crash sensors and seatbelt pretensioners require replacement alongside the visible airbags.
- Success Checkpoint: You’ll know it worked when you have a complete, printed list of all tripped SRS components and active fault codes.
- Common Mistake: Skipping the pre-scan and only replacing the visible blown airbag, which leaves hidden tripped sensors in the system and triggers an immediate dashboard fault upon startup.
Step 2: Disconnect Power and Discharge the System
Isolate the vehicle’s power supply and drain the SRS module’s internal backup capacitors to prevent accidental deployment. Park on a level surface, put on your high-voltage insulated gloves, and use a 10mm socket to completely remove the negative battery terminal cable. Tuck the cable away from the battery post. Step on the brake pedal for 30 seconds to drain residual system voltage, then set a timer and wait a strict minimum of 30 minutes before touching any SRS components.
- Success Checkpoint: You’ll know it worked when the digital multimeter reads 0.00V across the chassis ground and the required 30-minute capacitor discharge window has elapsed.
- Common Mistake: Rushing the discharge window. Touching the SRS wiring harness immediately after disconnecting the battery can discharge the backup capacitor into the squib, triggering an accidental static deployment.
Phase 2: Component Teardown and Replacement
Step 3: Remove the Deployed Airbag Module
Unclip the deployed airbag assembly from the steering wheel or dashboard cavity. For a steering wheel airbag, locate the two access holes on the rear of the wheel housing. Insert a T30 Torx driver or a spring-release tool to press the internal retention springs inward, unseating the module. Gently pull the airbag forward by 2 to 3 inches. Using a small flathead screwdriver or plastic trim tool, gently lift the yellow or orange plastic locking tabs on the color-coded electrical squib connectors to unplug them from the inflator.
- Success Checkpoint: You’ll know it worked when the deployed module is completely free from the vehicle and the delicate wiring harness remains undamaged.
- Common Mistake: Forcing the delicate squib pins. Prying roughly will break the locking clips, forcing you to splice a completely new wiring harness into the steering column.
Step 4: Replace the Clock Spring and SRS Control Module
Swap out the secondary SRS components that permanently lock or short out during a deployment. Use a 19mm or 21mm socket to remove the center steering wheel bolt, mark the wheel’s alignment with a paint pen, and pull the wheel off. Remove the steering column shrouds and unclip the melted or damaged clock spring. Install the new OEM clock spring, leaving its plastic center alignment pin intact until it is securely bolted down. Next, access the center console to unbolt the tripped SRS Control Module and replace it with a virgin OEM unit.
- Success Checkpoint: You’ll know it worked when the new clock spring is seated flush on the column, fully plugged in, with the alignment pin still attached holding it precisely at top-dead-center.
- Common Mistake: Misaligning the clock spring. Rotating the inner hub of the clock spring out of its centered position before installing the wheel will instantly tear the inner ribbon cable on your first lock-to-lock turn.
Phase 3: Installation and Calibration
Step 5: Mount the New OEM Airbag Module
Connect the vehicle’s firing harness to the replacement airbag and secure it into the housing. First, touch a bare metal door striker to discharge any static electricity from your body. Bring the new OEM airbag close to the steering wheel. Carefully align the color-coded squib wiring connectors (usually one yellow, one orange) with their corresponding ports on the inflator. Push them straight down until they click, then press the plastic locking tabs completely flat to lock the circuit. Align the module with the steering wheel frame and firmly press it inward until the retention springs snap into place.
- Success Checkpoint: You’ll know it worked when the module sits perfectly flush with the steering wheel bezel and cannot be pulled forward by hand.
- Common Mistake: Installing unverified, salvaged, or used aftermarket modules. These often suffer from incompatible squib resistance, resulting in a persistent dashboard warning light and failure to inflate during an accident.
Step 6: Reconnect Power and Recalibrate the SRS
Restore vehicle power from a safe distance and flash-program the new modules to the vehicle’s computer. Ensure the cabin is entirely empty. Reach through the open driver’s window and turn the ignition switch to the “ON” position. Step away from the vehicle and reconnect the negative battery terminal. Plug your bidirectional OBD2 scanner into the port, input the new SRS module’s serial data, write the vehicle’s VIN to the module, and clear all historical crash codes to extinguish the dashboard warning light.
- Success Checkpoint: You’ll know it worked when the dashboard SRS airbag warning light illuminates for 5 to 7 seconds upon startup, then turns off permanently, indicating a flawless system self-check.
- Common Mistake: Reconnecting the battery with the key off, then sitting in the driver’s seat to turn the ignition on. If a wiring short causes an immediate deployment upon startup, sitting in the seat places you directly in the blast zone.
Common Mistakes and How to Fix Them
- Persistent “Open Circuit” DTC (Code B0011): This usually means a connector isn’t fully seated. How to fix it: Disconnect the battery, wait 30 minutes, remove the airbag, and verify the tiny yellow squib lock tabs are pushed completely flat. If a tab is broken, the harness pigtail must be replaced.
- Impact Sensor Grounding Faults: After replacing front crash sensors, a code indicating high resistance may appear. How to fix it: The sensors ground through their mounting bolts. Remove the sensor, use a wire brush to clean the chassis mounting point down to bare metal, and re-torque the bolt to 7–9 lb-ft.
- Flashing SRS Light After Module Replacement: The vehicle’s main computer does not recognize the new SRS module. How to fix it: You missed the calibration step. Use your bidirectional scanner to perform an “Occupant Classification System (OCS) Reset” and flash the vehicle’s VIN into the new SRS module.
- Horn Honks Continuously: The airbag module is seated incorrectly and is constantly pressing the horn contact plate. How to fix it: Remove the module and inspect the spring-loaded horn contacts inside the steering wheel cavity. Ensure no wires are pinched behind the airbag pushing it outward.
Process Variations
- Passenger Dashboard Airbags: Replacing a passenger-side airbag usually requires removing the entire upper dashboard assembly. This adds 3 to 5 hours of labor, requires extensive trim removal tools, and necessitates disconnecting the HVAC ducting.
- Side Curtain Airbags: Deployed side curtains require removing the A, B, and C pillar interior trims, as well as dropping the vehicle’s headliner. You must also replace the impact sensors located inside the B-pillars or lower door sills.
- Locked Seatbelt Pretensioners: If the airbags deploy, the seatbelts almost always fire their internal explosive charges to lock the occupants in place. You must unbolt the lower B-pillar trim, remove the locked retractor assemblies, and install brand-new OEM seatbelts.
Pricing Breakdown: The True Costs
If you are calculating exactly how much does it cost to install airbags, understand that the total is dictated by the severity of the deployment.
- Single Steering Wheel Airbag: $1,000 to $1,500. This includes a new OEM steering wheel module ($400–$800), a clock spring ($150–$300), and roughly 2 hours of labor.
- Driver and Passenger Front Setup: $2,500 to $4,000. Includes both airbags, dashboard repair/replacement, new seatbelt pretensioners, a new SRS control module, and 5+ hours of labor.
- Full System (Curtains, Seats, Front): $4,000 to $6,000+. Major collisions require stripping the entire interior, dropping headliners, replacing all modules and impact sensors, and professional recalibration.
Frequently Asked Questions
Can I legally install my own airbags? While no federal law prevents a private owner from working on their own vehicle’s SRS system, doing so voids insurance liability protections. Dealerships and insurance companies will not certify a vehicle as safe if the airbags were installed by an uncertified individual.
Why do I have to replace the SRS control module? In most modern vehicles, the SRS module permanently writes hard “crash data” to its internal EEPROM chip the moment an airbag fires. This data physically locks the module from ever deploying an airbag again, requiring complete replacement or professional bench-flashing.
Are aftermarket or junkyard airbags safe to use? No. Using salvaged or unverified aftermarket airbags introduces extreme risk. Junkyard airbags may have been exposed to moisture, degrading the chemical propellant, while cheap aftermarket units often fail to communicate with the OEM control module, preventing deployment in a crash.
How do I dispose of the blown airbag? Do not throw a deployed airbag into household trash. The chemical residue inside (often sodium azide) is hazardous. Place the deployed module in a heavy-duty plastic bag and drop it off at a certified local automotive recycling center or a municipal hazardous waste facility.
Understanding the diagnostic protocols, parts requirements, and labor intensity clarifies exactly how much does it cost to install airbags. By strictly adhering to power-down procedures, utilizing virgin OEM components, and executing proper bidirectional programming, technicians ensure the vehicle’s most critical safety net is fully restored.