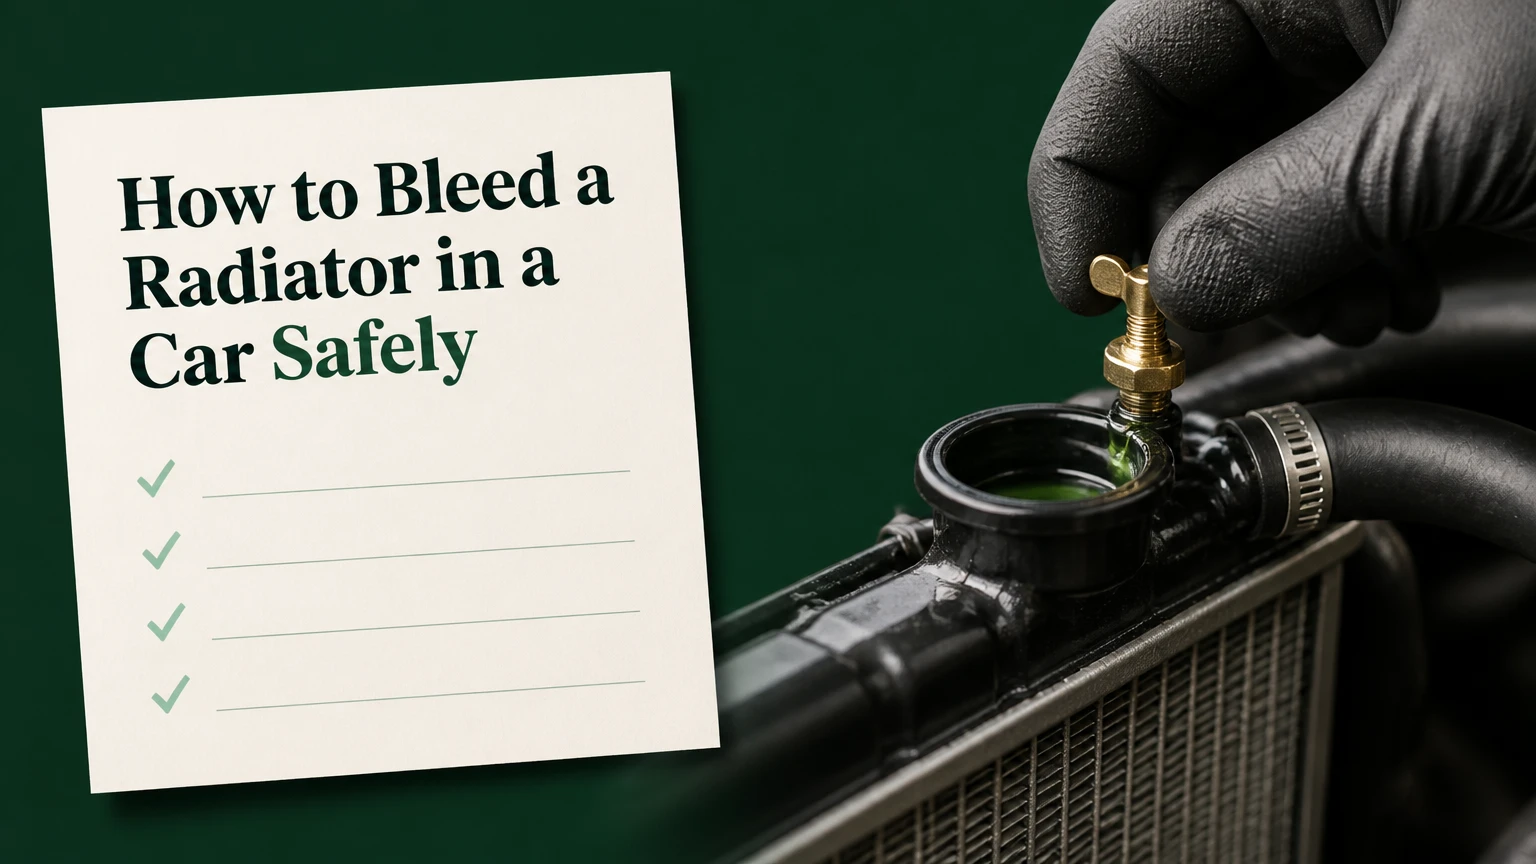
To bleed a radiator in a car, remove trapped air from the cooling system while the engine is completely cold, then refill and warm the system under controlled conditions. The usual home method uses a spill-free funnel, the manufacturer-specified coolant, maximum cabin heat, and repeated level checks until bubbles stop and the heater operates normally.
Key Facts
Cooling-system bleeding removes air; it does not repair a coolant leak, failed thermostat, blocked radiator, or blown head gasket.
A spill-free funnel typically takes 20-40 minutes and costs about $15-$40.
Never remove a radiator cap or expansion-tank cap from a hot, pressurized engine.
Maximum cabin temperature helps on systems with a coolant control valve, but many modern cars use blend doors and do not require that valve to open.
A radiator fan switching on does not prove that every air pocket has left the system.
The correct coolant specification matters more than a universal “50/50” rule; premixed coolant needs no added water.
What Does Bleeding a Car Radiator Mean?
Bleeding a car radiator means purging trapped air from the engine, radiator, heater core, hoses, and expansion tank. Mechanics also call the process cooling-system burping, air bleeding, or purging, although the radiator itself is only one part of the circuit.
A typical liquid-cooled engine circulates coolant through the water jacket, water pump, thermostat, radiator, heater core, hoses, and reservoir. During a coolant drain, hose replacement, thermostat repair, or radiator installation, air can enter spaces that were previously full of liquid.
Air is compressible and coolant is not. A water pump can move liquid efficiently, but an air pocket can interrupt circulation through a narrow heater core or high section of the cylinder head. The result may be a cold cabin heater, unstable temperature readings, gurgling behind the dashboard, or localized overheating.
Bleeding is therefore a refill procedure, not a general radiator repair. If the system repeatedly needs bleeding, find the reason air or coolant is entering.
Why Does Air Get Trapped in a Cooling System?
Air rises to high points in the cooling circuit, where it can block coolant flow and distort temperature readings. The highest point may be the radiator neck, expansion tank, thermostat housing, cylinder head, heater core, or a hose routed above the reservoir.
The cooling system normally operates as a sealed loop under pressure. When coolant heats, it expands into the reservoir; when the engine cools, the system draws coolant back through a small hose. A loose hose clamp, cracked tank, leaking water-pump seal, defective radiator cap, or failed head gasket can disrupt that cycle.
Common consequences include:
- A temperature gauge that rises and falls unexpectedly.
- Cabin heat that changes from hot to cold.
- Coolant gurgling after shutdown.
- An upper hose that remains unusually soft after warm-up.
- Coolant pushed from the reservoir.
- Overheating shortly after a coolant repair.
A temperature sensor surrounded by air may read cooler than the metal around it. That makes the gauge misleading. An apparently normal gauge does not always mean the engine is safe, especially after a major coolant loss.
Which Bleeding Method Fits Your Car?
The correct method depends on the vehicle’s fill point, bleeder design, and water-pump control. A spill-free funnel suits many conventional systems, a factory bleeder suits vehicles designed around a high-point screw, and a vacuum filler is usually best after a large drain or component replacement.
| Method | Typical time | Typical tool cost | Best application |
|---|---|---|---|
| Spill-free funnel | 20-40 minutes | $15-$40 | Radiator-cap systems and accessible expansion tanks |
| Factory bleeder screw | 15-30 minutes | $0-$15 | Vehicles with documented high-point bleed valves |
| Vacuum coolant filler | 5-15 minutes | $80-$200 | Large refills, workshops, and systems difficult to purge manually |
| Dealer or repair shop | 30-120 minutes | $100-$250 | Electronic pumps, inaccessible fillers, or unresolved overheating |
The service manual outranks generic instructions. Some vehicles require the front of the car level, while others specify a nose-up position. Some prohibit running the engine with the cap removed. Follow the manufacturer’s procedure whenever it differs.
A funnel is not universal. It cannot substitute for a scan-tool command, electric-pump routine, or special adapter on a sealed system.
Before You Start: Tools, Coolant, and Safety
Prepare a cold engine, the correct coolant, a spill-free funnel with the right adapter, a drain pan, gloves, eye protection, and a way to raise the vehicle only if the service information permits it. Allow about 45 minutes, including cooling and the final inspection.
| Item | Typical specification | Purpose |
|---|---|---|
| Coolant | Manufacturer-approved premix or 50/50 concentrate mixture | Replaces lost fluid |
| Spill-free funnel | Radiator or expansion-tank adapter matched to filler neck | Raises the visible fill point |
| Drain pan | 8-12 litre capacity | Catches overflow and spills |
| Hand protection | Nitrile gloves plus safety glasses | Limits skin and eye exposure |
| Jack stands | Rated above the vehicle’s curb weight | Securely raises the car when required |
Park on a stable surface, select Park or neutral as appropriate, apply the parking brake, and keep children and pets away. Coolant is toxic, and its sweet taste attracts animals. Collect it for proper recycling rather than pouring it onto soil or into a drain.
Do not open the system until the engine and upper hose are cool. Pressure can remain after the gauge drops, so loosen the cap slowly with a thick cloth if the manufacturer permits that inspection. Stop if coolant hisses forcefully from the cap.
Before bleeding, inspect the repair area. A wet hose connection or dripping water pump means bleeding alone will not solve the problem.
How to Bleed a Radiator in a Car: The Safe Method
Use the spill-free funnel method when the vehicle has an accessible radiator neck or expansion tank and the service manual permits manual bleeding. The process involves six stages: cold inspection, controlled filling, air release, thermostat opening, cool-down, and final level adjustment.
Step 1: Let the Engine Become Completely Cold
Park the car with the engine off for several hours, ideally overnight after an overheating event. Remove the radiator cap or expansion-tank cap only when the system feels cold and unpressurized.
Check the coolant level before disturbing anything. Look for oil-like contamination, rust-colored fluid, leaks, damaged hoses, and a reservoir below its minimum mark.
Success checkpoint: The cap turns without pressure release, and the upper radiator hose is pliable rather than rigid.
Common mistake: Starting the procedure on a warm engine because the dashboard temperature gauge appears normal.
Step 2: Select the Correct Coolant
Use the coolant chemistry and specification listed in the owner’s or repair manual. Organic-acid, hybrid-organic-acid, phosphate-free, and manufacturer-specific formulas are not automatically interchangeable because color is not a reliable compatibility standard.
Use premixed coolant exactly as supplied. Mix concentrate with distilled or deionized water according to the label, commonly 50/50 for moderate climates. Extremely cold conditions may require a different ratio, but exceeding the manufacturer’s antifreeze concentration can reduce heat-transfer performance.
Success checkpoint: The coolant in the funnel or container matches the required specification and concentration.
Common mistake: Topping up with an unrelated color because it looks similar.
Step 3: Attach and Prime the Spill-Free Funnel
Fit the funnel’s adapter firmly to the radiator neck or expansion tank. Add enough coolant to place approximately 100-200 millilitres in the funnel, or use the funnel manufacturer’s fill mark.
If the vehicle has a separate recovery reservoir, fill that tank to its cold mark. Do not fill every container to the brim because expanding coolant needs room.
Success checkpoint: The adapter seals without wobbling, and coolant does not leak around the filler neck.
Common mistake: Using a generic funnel that allows coolant to spill into the engine bay or leaves the adapter below the system’s highest point.
Step 4: Set the Cabin Heater
Set the climate control to maximum heat. Set the blower to low or medium so you can detect whether the air becomes consistently hot.
This setting opens a conventional heater-control valve on some vehicles. Many newer vehicles use a continuously circulating heater core with blend doors, electrically controlled valves, or automatic climate logic, so the cabin setting alone may not change coolant flow.
Success checkpoint: The heater-control setting agrees with the vehicle’s service instructions.
Common mistake: Assuming maximum heat alone can remove an air pocket from every heater core design.
Step 5: Warm the Engine at Idle
Start the engine and let it idle. Watch the funnel, coolant level, temperature gauge, and leak points. Small bubbles are common during the initial warm-up; a continuous stream of large bubbles is not.
Do not rev a cold engine aggressively. If the service manual allows hose manipulation, gently squeeze the upper radiator hose several times after it has warmed slightly. Keep hands, clothing, and tools away from belts, pulleys, fans, and the exhaust manifold.
Success checkpoint: The level settles, bubbles become smaller and less frequent, and no coolant escapes from a joint.
Common mistake: Adding cold coolant rapidly to a hot engine, which can create thermal shock and overflow.
Step 6: Confirm Coolant Circulation
Wait for the thermostat to open. On many vehicles, the upper hose becomes hot and coolant movement increases, but hose temperature is not a substitute for a specified diagnostic test.
The radiator fan may switch on later, especially when air conditioning is engaged or under high engine temperature. Fan operation indicates that the fan control circuit responded; it does not prove that the thermostat opened or that all air left the heater core.
Allow the engine to complete the manufacturer’s warm-up procedure. If the gauge rises rapidly, the heater remains cold, or coolant erupts from the funnel, shut the engine off.
Success checkpoint: The heater produces stable hot air, the temperature gauge remains in its normal range, and the coolant level stops falling.
Common mistake: Treating a single fan cycle as proof that bleeding is complete.
Step 7: Close the System and Recheck It Cold
With the engine still controlled and the bleeding procedure complete, use the funnel’s stopper or cap to transfer excess coolant back into a clean container. Remove the funnel without spilling fluid into the belt area.
Install the radiator cap or expansion-tank cap fully. Let the engine cool completely, then check the level again. Add coolant only to the specified cold mark.
Inspect the ground, hose joints, thermostat housing, radiator seams, water pump, and reservoir cap. Record the fluid level and temperature behavior during the next drive.
Success checkpoint: The cold level remains stable after one or two heat cycles, and the heater remains hot at idle.
Common mistake: Checking only immediately after shutdown, when expansion makes the level appear higher than the true cold level.
How Do You Use a Factory Bleeder Screw?
A factory bleeder screw removes air from a designated high point while coolant enters the radiator or expansion tank. Use this method only when the screw and opening sequence are identified for the exact vehicle, because plastic screws, sealing washers, and electronic pumps can require model-specific handling.
With the engine cold, open the bleeder one or two turns unless the manual specifies another amount. Do not remove it completely. Slowly add the specified coolant until the bleeder releases a steady, bubble-free stream, then tighten it to the manufacturer’s torque.
| Bleeder location | Typical material | Main risk | Correct control |
|---|---|---|---|
| Thermostat housing | Plastic or aluminium | Stripped or snapped screw | Use the specified tool and torque |
| Upper radiator hose junction | Plastic or brass | Damaged sealing seat | Replace washer or O-ring if required |
| Heater-core hose | Plastic fitting | Broken quick connector | Do not force a seized fitting |
| Cylinder-head high point | Steel or aluminium | Hot coolant exposure | Bleed only when cold |
Some systems require the bleeder open while the ignition is switched on, while others require the engine running. The service manual may also specify a particular reservoir level, pump speed, or cabin temperature.
A cracked bleeder screw can leak air during cool-down and recreate the original problem. If the screw will not close, stop driving until the seal is repaired.
What About Electronic Bleed Procedures?
Electronic bleed procedures operate an electric water pump without running the engine, which is common on some BMW, Mercedes-Benz, Volkswagen, and hybrid vehicles. The exact sequence varies by engine, model year, pump type, battery condition, and climate-control configuration.
For example, certain BMW procedures use a fully charged battery, ignition on, engine off, heater temperature set high, blower at its lowest setting, and an accelerator-pedal command to start a pump cycle. The cycle may last approximately 10-15 minutes, but that timing is not universal.
Do not apply a BMW procedure to another vehicle. Hybrid and electric vehicles may contain separate battery, inverter, or electronics cooling loops that require different coolant and bleed commands. A scan tool may be necessary to actuate valves or run the pump.
The correct electronic routine is the one published for the vehicle identification number. If the manual specifies vacuum filling after the electronic cycle, perform both steps.
Is a Vacuum Coolant Filler Better?
A vacuum coolant filler is usually better after a radiator, engine, heater core, or hose replacement because it fills the system with minimal introduced air. The tool draws a vacuum through an adapter, tests whether the system holds that vacuum, and then pulls premixed coolant into the empty circuit.
Typical shop procedures target approximately 24-26 inches of mercury, but the tool manufacturer’s instructions control. The vacuum should remain stable during the hold test. A falling gauge can indicate a leak, a poor adapter seal, or a connection that is not fully closed.
| Decision factor | Spill-free funnel | Factory bleeder | Vacuum filler |
|---|---|---|---|
| Typical refill time | 20-40 minutes | 15-30 minutes | 5-15 minutes |
| Air introduction during refill | Moderate | Moderate | Low |
| Leak pre-test | No | No | Yes |
| Compressor required | No | No | Yes |
| Best user | Home mechanic | Experienced owner | Workshop technician |
Vacuum filling does not diagnose every leak. A leak that opens only when hot, or a combustion leak that pressurizes the system, may pass a static vacuum test. A pressure test and combustion-gas test may still be required.
How Do You Verify the Repair?
Verify a successful bleed by checking stable cabin heat, normal temperature behavior, a consistent cold coolant level, and the absence of leaks over at least one complete heat cycle. The radiator fan cycling once is only one observation, not the acceptance test.
Use this sequence:
- Let the engine cool completely.
- Confirm the reservoir or radiator level at the cold mark.
- Start the engine and monitor the gauge.
- Confirm the heater remains hot at idle and during a short drive.
- Inspect hoses and joints for fresh coolant.
- Recheck the level after cooling.
- Repeat once if the level drops slightly without an external leak.
A small level change can result from the last air pocket leaving the reservoir. A repeated drop indicates coolant loss or an unresolved internal problem.
Do not continue driving if the gauge enters the red zone, the heater suddenly turns cold, steam appears, or the reservoir empties. Shut the engine down safely and arrange diagnosis.
Why Is the Heater Still Blowing Cold Air?
A cold heater after bleeding usually means coolant is not circulating through the heater core, the heater circuit still contains air, or the HVAC system is not commanding heat. A low coolant level, blocked heater core, failed control valve, water-pump problem, or blend-door fault can produce the same symptom.
First, allow the engine to cool and check the coolant level. Then confirm whether the two heater hoses become warm. One hot hose and one cold hose suggests restricted heater-core flow or a control-valve issue; two cold hoses suggest low coolant, trapped air, or a circulation problem.
If the service manual allows it, park with the front of the vehicle elevated, use the specified bleed point, and repeat the controlled fill. Gentle engine speed increases may help some systems, but do not hold 2,000 rpm while coolant is erupting or the temperature is rising.
| Symptom | Likely area | Immediate action |
|---|---|---|
| Cold heater, normal gauge | Air pocket or HVAC blend door | Check heater hoses and bleed procedure |
| Cold heater, rising gauge | Low coolant or blocked circulation | Shut down and inspect before driving |
| Gauge fluctuates, level falls | External leak or trapped air | Pressure-test the system |
| Gurgling after shutdown | Air entering or coolant boiling | Check cap, leaks, and combustion gases |
| Continuous bubbles from cold start | Possible combustion leak | Stop bleeding and perform a block test |
When Is Air Bleeding Not the Real Repair?
Air bleeding is not the correct repair when coolant continues to escape, combustion gases enter the system, the thermostat remains closed, the water pump fails, or the radiator cannot transfer heat. Repeating the bleed can temporarily hide these faults while the engine continues to overheat.
Stop immediately if coolant violently erupts from the filler neck, the upper hose becomes rock-hard within minutes of a cold start, or large bubbles continue without settling. Possible causes include a stuck thermostat, a failed radiator cap, an incorrectly installed gasket, a restricted radiator, or a head-gasket failure.
A cooling-system pressure test can locate many external leaks. A chemical block test can detect combustion gases in the coolant, although test accuracy depends on correct sampling and engine temperature. Compression and leak-down testing may provide further evidence.
White exhaust smoke with a sweet smell, unexplained coolant loss, milky engine oil, or repeated overheating requires diagnosis before another bleed.
Common Mistakes and How to Fix Them
| Mistake | Why it causes trouble | Recovery |
|---|---|---|
| Opening a hot cap | Pressurized coolant can flash into steam | Shut down and cool completely |
| Using the wrong coolant | Additives may react or reduce corrosion protection | Drain, flush, and refill to specification |
| Filling only the reservoir | Air may remain in the engine or radiator | Use the vehicle’s designated fill point |
| Overfilling the funnel | Expansion causes spills and false level readings | Use the funnel’s marked working volume |
| Squeezing hot hoses | Burns and moving-fan injuries can result | Handle only with safe clearance |
| Overtightening plastic bleeders | Housing threads or screw heads can break | Use the specified torque and replacement seal |
One counterintuitive rule matters: a low coolant reservoir does not prove that the radiator itself is full. The radiator may contain air while the reservoir still shows fluid, particularly after a hose failure or improper refill.
Another practitioner rule is to diagnose the cause of the low level before bleeding. Cooling-system air usually entered because coolant left or a component was opened. The opening event must be addressed.
How Much Time and Money Should You Allow?
A basic home bleed usually takes 20-40 minutes once the engine is cold, excluding cooling time. A shop may charge $100-$250, while a vacuum refill tool costs about $80-$200 and a spill-free funnel costs about $15-$40.
Coolant adds approximately $15-$40 for a typical 1-4 litre top-up, depending on vehicle specification and whether the product is premixed. A complete refill may require 5-12 litres, but capacity varies widely by engine and cooling-system design.
| Job situation | Typical coolant quantity | DIY time | Typical total DIY cost |
|---|---|---|---|
| Small top-up after hose replacement | 1-2 litres | 20-40 minutes | $20-$60 |
| Radiator replacement | 4-8 litres | 45-90 minutes | $50-$120 |
| Full cooling-system drain | 5-12 litres | 1-3 hours | $70-$160 |
| Electronic-pump procedure | 4-10 litres | 30-90 minutes | $40-$150 |
These are typical planning ranges, not fixed prices. Labour rates, coolant capacity, vehicle access, and required diagnostic equipment change the final cost.
Can You Bleed a Car Without a Radiator Cap?
You can bleed many cars without a traditional radiator cap because the expansion tank is the designated fill point. The expansion tank must be suitable for pressure and positioned according to the manufacturer’s procedure; a random overflow bottle is not an equivalent fill point.
Some modern systems use a pressurized expansion tank, remote bleed screws, electric pumps, or multiple cooling circuits. The tank may need a specific fill level, and the engine may need to remain off during an electronic pump routine.
Never remove hoses to create an improvised bleed point. A hose connection may sit below the trapped air, and opening it can introduce more air or damage a seal.
What Should You Do After an Overheating Event?
After overheating, do not assume bleeding alone will restore the engine. Let the vehicle cool, inspect the coolant level and leak source, and determine whether the gauge, warning light, heater behavior, or steam indicates continuing damage.
Check the engine oil for contamination and inspect the coolant for oil. A pressure test, combustion-gas test, thermostat check, radiator-flow test, or water-pump inspection may be necessary before refilling.
If the engine overheated severely, compression testing can help assess cylinder sealing. Driving again before identifying the cause can turn a hose or thermostat repair into cylinder-head or engine damage.
FAQ
How long should I wait before opening a radiator cap?
Wait until the engine is completely cold, usually several hours after normal operation and longer after severe overheating. The upper hose should no longer be hard or hot. Loosen the cap slowly with protection, and stop if pressure or forceful coolant release remains.
Should the car be level when bleeding coolant?
Use the position specified by the vehicle manufacturer. Level ground is safest by default, while some systems benefit from a raised front end because the radiator neck becomes higher than the heater core. Never raise a vehicle with a jack alone; use correctly rated jack stands.
Can trapped air damage an engine?
Trapped air can contribute to localized overheating because coolant cannot absorb and carry heat through the affected passage. Air may also make the temperature sensor report inaccurately. Continued overheating can damage gaskets, cylinder heads, pistons, and catalytic converters.
Do I need to bleed the system after adding a small amount of coolant?
A small top-up does not always require a full bleed if the level fell only slightly and no air entered the circuit. Bleed the system after a hose, radiator, thermostat, water pump, heater core, or major leak repair, then monitor the cold level.
Can tap water be used in car coolant?
Use distilled or deionized water when mixing coolant concentrate, unless the vehicle manufacturer specifies another method. Hard tap water can leave mineral deposits in narrow radiator and heater-core passages. Emergency water may prevent immediate damage, but replace it with the correct mixture soon.
Is it safe to drive immediately after bleeding?
Drive only after the engine has cooled, the cap is secure, the cold level is correct, the heater works, and the temperature remains normal at idle. Keep the first trip short, monitor the gauge, and recheck the coolant level after the engine cools.
The Bottom Line
To bleed a radiator in a car safely, begin with a completely cold engine, use the correct fill point and coolant specification, remove air with the funnel, bleeder screw, or electronic procedure intended for that vehicle, and verify the result after cooling. If the heater stays cold, coolant disappears, bubbles persist, or the engine overheats, stop bleeding and diagnose the underlying fault.