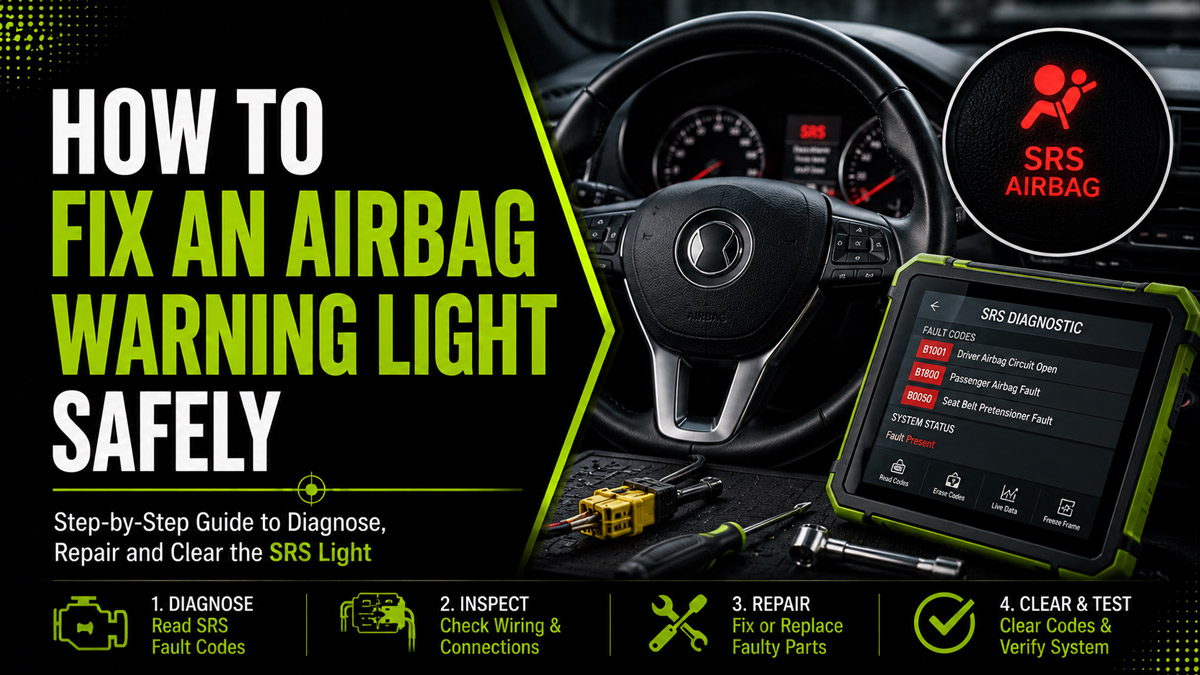
To fix an airbag warning light, verify the warning, check battery voltage, read the SRS fault code, disconnect the battery, inspect the indicated wiring or component, repair the underlying problem, clear the code, and complete a final self-test. Most diagnosis takes 30–60 minutes, but component replacement may take several hours. Accurate SRS code diagnosis determines success.
Safety warning: An illuminated airbag light usually means part or all of the Supplemental Restraint System may not operate correctly in a crash. Airbags and seat-belt pretensioners contain pyrotechnic devices. Do not probe airbag inflator terminals, apply external voltage, bypass the system, or install resistors to extinguish the light.
Before You Start
Time Required
- Initial diagnosis: 20–45 minutes
- Connector inspection and cleaning: 30–60 minutes
- Clockspring or sensor replacement: 1–3 hours
- Professional module or wiring repair: several hours to multiple days
Difficulty Level
- Code scanning: beginner
- Battery and connector inspection: intermediate
- Clockspring, pretensioner, module, or airbag replacement: advanced
- Collision-related SRS restoration: professional repair recommended
Typical Cost
- SRS-capable scan: $0–$150
- Connector or wiring repair: $20–$250
- Occupant sensor repair: $150–$600
- Clockspring replacement: $200–$700
- Impact sensor replacement: $150–$500
- Seat-belt pretensioner replacement: $200–$800
- Airbag module or deployed-system repair: $500–$5,000 or more
Vehicle make, labor rates, the number of deployed components, and programming requirements determine the final cost.
Tools and Materials
- OBD2 scanner explicitly supporting SRS or airbag modules
- Digital multimeter for battery and approved non-pyrotechnic circuit tests
- 8 mm, 10 mm, and 14 mm sockets
- Ratchet and extensions
- T20, T25, and T30 Torx drivers
- Plastic trim-removal tools
- Electrical contact cleaner
- Small nylon brush
- Three to five small zip ties
- Flashlight
- Safety glasses
- Vehicle-specific service manual or wiring diagram
Do not apply dielectric grease to electrical contact surfaces unless the vehicle manufacturer specifically permits it. A thin layer may sometimes be used around a connector’s weather seal, but coating the terminals can interfere with contact.
Phase 1: Confirm and Diagnose the Warning
Step 1: Verify the Airbag Light Is Abnormal
Turn the ignition on and observe the warning light through its complete startup sequence.
Most vehicles illuminate the airbag or SRS light for approximately four to eight seconds while the control module performs a self-test. The light should then turn off. A light that remains on, flashes repeatedly, reappears while driving, or never illuminates during startup requires diagnosis.
Also inspect the passenger-airbag status indicator. “Passenger Airbag Off” may be normal when the seat is empty or occupied by a lightweight passenger. It is not necessarily an SRS fault.
You’ll know this step worked when: You can distinguish a normal startup check from a persistent or intermittent warning.
Common mistake: Assuming every “Passenger Airbag Off” message indicates a malfunction. Consult the owner’s manual before treating it as a fault.
Step 2: Check Battery and Charging Voltage
Test system voltage before opening or disconnecting any SRS connector.
With the engine off, measure voltage directly across the battery terminals. A fully charged battery commonly reads approximately 12.6 volts. A reading near 12.2 volts indicates a partially discharged battery, while a reading below 12.0 volts is substantially low.
Start the engine and measure again. Many properly operating charging systems produce approximately 13.5–14.8 volts, although smart-charging vehicles may temporarily operate outside that range. Compare the reading with the manufacturer’s specification.
Charge or replace a weak battery and repair charging-system faults before continuing. Low voltage during engine starting can store communication or supply-voltage codes in several safety modules.
You’ll know this step worked when: Battery and charging voltage meet the vehicle manufacturer’s specifications.
Common mistake: Replacing an SRS component before correcting a weak battery. Low voltage can create misleading or intermittent fault codes.
Step 3: Retrieve the SRS Diagnostic Codes
Connect an SRS-capable scanner and record every fault code before clearing anything.
Locate the diagnostic port beneath the driver-side dashboard. Connect the scanner, turn the ignition to the ON position without starting the engine, and select the SRS, airbag, restraint, or Supplemental Restraint System module.
Record:
- The complete code, including letters and numbers
- The scanner’s description
- Whether the code is current, active, stored, history, or intermittent
- Freeze-frame or event data, when available
- The affected side and component
- Any communication or low-voltage codes
Codes such as B0001 or B0028 are manufacturer-dependent. A generic internet definition may not match your vehicle. Verify the code using service information for the exact year, make, model, and trim.
Do not clear the codes yet. Clearing them can erase information needed to identify an intermittent fault.
You’ll know this step worked when: You have a written record of all codes and know which circuit requires inspection.
Common mistake: Using a basic engine-code reader. A standard reader may access the powertrain module but not the SRS controller.
Phase 2: Make the Vehicle Safe
Step 4: Disconnect the Battery and Wait
Shut down the vehicle, disconnect the negative battery cable, and allow the restraint system’s reserve energy to discharge.
Park on a level surface, straighten the steering wheel, switch off the ignition, remove the key, and keep keyless-start transmitters away from the vehicle. Open a window before disconnecting power so you are not locked out.
Loosen the negative terminal with the appropriate socket, usually 10 mm, and isolate the cable so it cannot spring back onto the battery post.
Wait at least 15 minutes before touching SRS wiring. Some manufacturers specify a different waiting period, so use the service manual when available.
Never place your face or body directly in front of an airbag while working. Store a removed airbag module with its trim side facing upward on a stable surface.
You’ll know this step worked when: The negative cable is isolated and the manufacturer’s discharge period has elapsed.
Common mistake: Beginning work immediately after disconnecting the battery. The SRS module can retain enough reserve energy to activate a deployment circuit.
Phase 3: Repair the Code-Specific Fault
Step 5: Inspect Under-Seat Wiring and Connectors
Inspect only the connector and harness identified by the diagnostic code.
Move the seat only as needed before disconnecting the battery. After the discharge period, use a flashlight to inspect the yellow or orange SRS harness beneath the corresponding seat.
Look for:
- A partially disconnected locking tab
- Wiring stretched when the seat moves
- Harnesses trapped in the seat track
- Corroded, bent, recessed, or damaged terminals
- Liquid contamination
- Previous repairs or twisted wires
- Loose seat mounting points
- Objects pressing against the connector
Release the connector according to its locking design. Do not force it. Apply a small amount of electrical contact cleaner to the connector housing or approved terminals and allow it to dry completely. Do not scrape plated terminals aggressively.
Reconnect the plug until its secondary lock fully engages. Route the harness with enough slack for full seat travel, then secure it away from the track with manufacturer-style retainers or small zip ties. Do not pull the wiring tight.
Some manufacturers discourage repeated disconnection of SRS connectors or require replacement connectors for known under-seat faults. Follow the applicable service bulletin when one exists.
You’ll know this step worked when: The connector locks securely, the harness does not enter the seat track, and full seat travel does not stretch the wires.
Common mistake: Securing the harness so tightly that moving the seat pulls on the connector. Leave controlled slack through the seat’s entire range.
Step 6: Inspect the Component Identified by the Code
Follow vehicle-specific diagnostic procedures for the exact circuit instead of replacing parts by guesswork.
Clockspring Faults
A clockspring carries electrical signals through the rotating steering wheel. Possible clues include an SRS code involving the driver airbag circuit, an inoperative horn, or steering-wheel buttons that fail.
Replacing a clockspring normally requires removal of the driver airbag and steering wheel. The new clockspring must remain centered during installation. Turning it outside its designed range can break the ribbon cable when the steering wheel reaches full lock.
Because this repair involves the driver airbag and steering system, use a qualified technician unless you have the correct service information, torque specifications, puller, scan tool, and experience.
Seat-Belt Pretensioner Faults
A pretensioner may be integrated into the buckle, retractor, or seat assembly. Replace a deployed or internally failed pretensioner with the correct new or manufacturer-approved part.
Do not attempt to rebuild, bypass, or apply test voltage to a pretensioner. Some vehicles also require replacement of related bolts, trim retainers, or control-module data after deployment.
Impact Sensor Faults
Inspect the sensor mounting area for collision damage, water intrusion, corrosion, missing fasteners, and damaged wiring. Impact sensors must be installed in the correct location and orientation and tightened to the specified torque.
Never substitute a sensor with a similar-looking unit from another position or model.
Occupant Classification Faults
Passenger-seat occupancy systems may require seat-cushion sensor replacement, wiring repair, zero-point calibration, or weight classification initialization.
Remove all objects from the passenger seat and floor before calibration. Follow scanner prompts exactly. Placing tools, bags, or pressure on the seat can invalidate the procedure.
Control-Module or Crash-Data Faults
If airbags or pretensioners have deployed, simply clearing codes is usually insufficient. The repair may require replacement or manufacturer-approved resetting of the SRS module, deployed restraints, sensors, damaged wiring, steering-wheel trim, dashboard components, and seat-belt assemblies.
Collision-related repairs should be inspected by an SRS-qualified repair facility.
You’ll know this step worked when: The code-directed component passes the manufacturer’s test or has been correctly repaired, replaced, programmed, and calibrated.
Common mistake: Installing a component because the code mentions it. A code identifies a circuit or detected condition; damaged wiring, terminals, voltage supply, grounding, or module communication may be the actual cause.
Phase 4: Restore Power and Verify the Repair
Step 7: Reconnect the Battery Safely
Confirm all SRS connectors are locked, clear the cabin, and reconnect the negative battery cable.
Before reconnecting power, check that no tools remain near an airbag, no person is seated in the vehicle, and no body part is positioned in front of a deployment path.
Reconnect the negative terminal and tighten it to the manufacturer’s specification. Do not overtighten the terminal.
From outside the vehicle, reach in without leaning over the steering wheel and switch the ignition on. Observe the airbag warning light.
You’ll know this step worked when: The vehicle powers up normally without sparks, smoke, unusual sounds, or immediate electrical faults.
Common mistake: Sitting directly behind the steering wheel during the first power-up after SRS work.
Step 8: Clear the SRS Codes and Run a Self-Test
Clear the stored fault only after confirming the underlying problem has been corrected.
Reconnect the SRS scanner, select the restraint module, and review the codes again. If the repaired fault is no longer current, choose Clear Codes, Erase DTCs, or Reset Fault Memory.
Turn the ignition off for approximately 30 seconds. Restart the vehicle and watch the warning light. It should illuminate during the startup self-test and then turn off.
Move both front seats through their full travel, fasten and release the seat belts, turn the steering wheel gently from side to side, and recheck the module for returning codes. Do not road-test the vehicle if the airbag light remains illuminated.
You’ll know it worked when: The warning light completes its normal self-test, remains off, and the scanner shows no current SRS codes.
Common mistake: Clearing the code before the repair. A current fault will return immediately or during the next self-test.
Common Mistakes and How to Fix Them
Using an Engine-Only Scanner
A scanner that reads only powertrain codes cannot diagnose most airbag faults.
Fix: Use a scanner that explicitly lists SRS, airbag, restraint, or body-module coverage for your vehicle.
Probing Airbag Terminals With a Multimeter
A meter can apply a small test current. Directly probing an inflator or pretensioner circuit can be hazardous and may damage the system.
Fix: Never measure resistance across a pyrotechnic device. Use manufacturer-approved breakout leads, simulators, or diagnostic procedures only when properly trained.
Replacing Parts Without Testing the Circuit
A code for high resistance may come from a loose connector, broken wire, corroded terminal, or failed component.
Fix: Inspect the full circuit and verify power, ground, continuity, connector tension, and service bulletins according to approved procedures.
Ignoring Collision or Water Damage
Water intrusion and previous collision repairs can damage multiple SRS components.
Fix: Inspect carpets, seat connectors, pillars, front supports, module mounting locations, and wiring routes. A vehicle with deployed restraints needs a complete system assessment.
Installing Used Airbags or Pretensioners
Used restraint components may have unknown storage conditions, recalls, damage, or incompatible calibration.
Fix: Use new OEM or manufacturer-approved components that match the vehicle identification and part-number requirements.
Trying to Hide the Warning
Removing the bulb, covering the indicator, installing a resistor, or disconnecting the module does not repair the safety system.
Fix: Restore the original circuit and diagnose the actual code. Deliberately defeating an SRS system may be illegal and can create severe injury risk.
Troubleshooting a Light That Returns
The Light Returns Immediately
An immediate return normally indicates an active fault. Recheck the exact code and inspect the affected circuit for an unlocked connector, damaged terminal, incorrect part, calibration requirement, or open circuit.
The Light Returns When the Seat Moves
The under-seat harness is likely stretched, pinched, or internally broken.
Disconnect the battery, wait the specified period, inspect the harness through the seat’s entire range, and repair it using the manufacturer-approved connector or harness procedure.
The Light Returns While Turning
A driver-airbag code that changes with steering-wheel movement may indicate a damaged clockspring or steering-column connection.
Stop repeatedly turning the wheel and arrange proper diagnosis. A failing clockspring may also affect the horn or steering-wheel controls.
The Scanner Shows No Communication
Check that the scanner supports the vehicle and that battery voltage is adequate. Inspect the diagnostic connector and the relevant SRS fuse, commonly rated around 7.5 or 10 amps.
Replace a fuse only with the same rating. If it blows again, do not install a larger fuse. A shorted circuit requires professional diagnosis.
The Code Will Not Clear After a Crash
Deployment data or a permanent hardware fault may remain in the module.
The vehicle may require replacement or approved resetting of the controller, replacement of all deployed components, calibration, and verification that crash-damaged wiring and mounting structures have been restored.
Process Variations
Without an SRS Scanner
You cannot reliably fix a modern airbag warning light without reading the restraint-module codes.
Some older vehicles display flash codes, but procedures vary significantly. Do not repeatedly cycle the ignition or short diagnostic terminals based on a generic online method. Obtain an appropriate scanner or pay for a professional diagnostic scan.
After Seat Removal or Interior Work
Start by inspecting every connector disturbed during the work. Confirm that the ignition was not switched on while SRS connectors were unplugged.
After restoring the connections, clear the stored code with an SRS-capable scanner. Some vehicles store a fault merely because the module detected an open circuit while the seat was disconnected.
After Airbag Deployment
Treat the repair as a system restoration rather than a warning-light reset.
Replace all deployed airbags and pretensioners, inspect sensors and wiring, restore damaged interior structures, service the control module according to manufacturer rules, complete required programming or calibration, and verify the entire system with a compatible scan tool.
How Long Does It Take and What Does It Cost?
A diagnostic scan and basic voltage check generally take 20–45 minutes. Repairing a loose under-seat connection may take another 30–60 minutes. Replacing a clockspring, impact sensor, seat sensor, or pretensioner can take one to three hours.
A simple connector repair may cost less than $250. Sensor, clockspring, or pretensioner repairs commonly cost several hundred dollars. A deployed-airbag restoration can exceed several thousand dollars because multiple safety components, trim pieces, and control modules may require replacement.
The correct code, part availability, programming needs, interior disassembly, and collision damage determine where the repair falls within those ranges.
Frequently Asked Questions
Can I Drive With the Airbag Warning Light On?
The vehicle may still move normally, but one or more airbags or pretensioners may be disabled or unreliable. The system may also be unable to confirm occupant classification. Drive only as necessary to obtain diagnosis and repair, and avoid assuming the restraints will function correctly during a crash.
Will Disconnecting the Battery Reset the Airbag Light?
Usually not. Disconnecting the battery may temporarily interrupt power, but most SRS modules retain diagnostic codes in nonvolatile memory. The warning will return when the module detects the unresolved fault. Repair the problem first, then clear the code with a compatible SRS scanner.
Can a Weak Battery Turn On the Airbag Light?
Yes. Low voltage during startup, charging-system instability, or a recently discharged battery can generate supply-voltage and communication faults. Test the battery and charging system before replacing SRS parts. The code may still require scanner clearing after voltage has been restored.
Can I Clear the Light Without Fixing the Problem?
A scanner may erase a stored code, but an active fault normally returns immediately or during the next self-test. Clearing without repairing also removes useful diagnostic information. Never use a resistor, bypass, removed bulb, or disconnected module to hide the warning.
Is an Under-Seat Connector Always the Cause?
No. Under-seat wiring is common because seat movement stresses the harness, but the warning may also involve a clockspring, impact sensor, pretensioner, occupancy sensor, control module, power supply, ground, or collision damage. Let the exact SRS code guide the inspection.
When Should I Call a Professional?
Use an SRS-qualified technician when airbags have deployed, the code identifies a pyrotechnic device, steering-wheel removal is required, wiring diagrams are unavailable, the module will not communicate, water or collision damage exists, or programming and calibration are required.
Conclusion
The correct way to fix an airbag warning light is to diagnose the exact SRS code, verify battery voltage, discharge the system safely, inspect the specified circuit, repair or replace the failed component, and clear the code only after the fault is gone. Never bypass the warning or directly test an airbag inflator. A successful repair ends with a normal startup self-test and no current SRS codes.