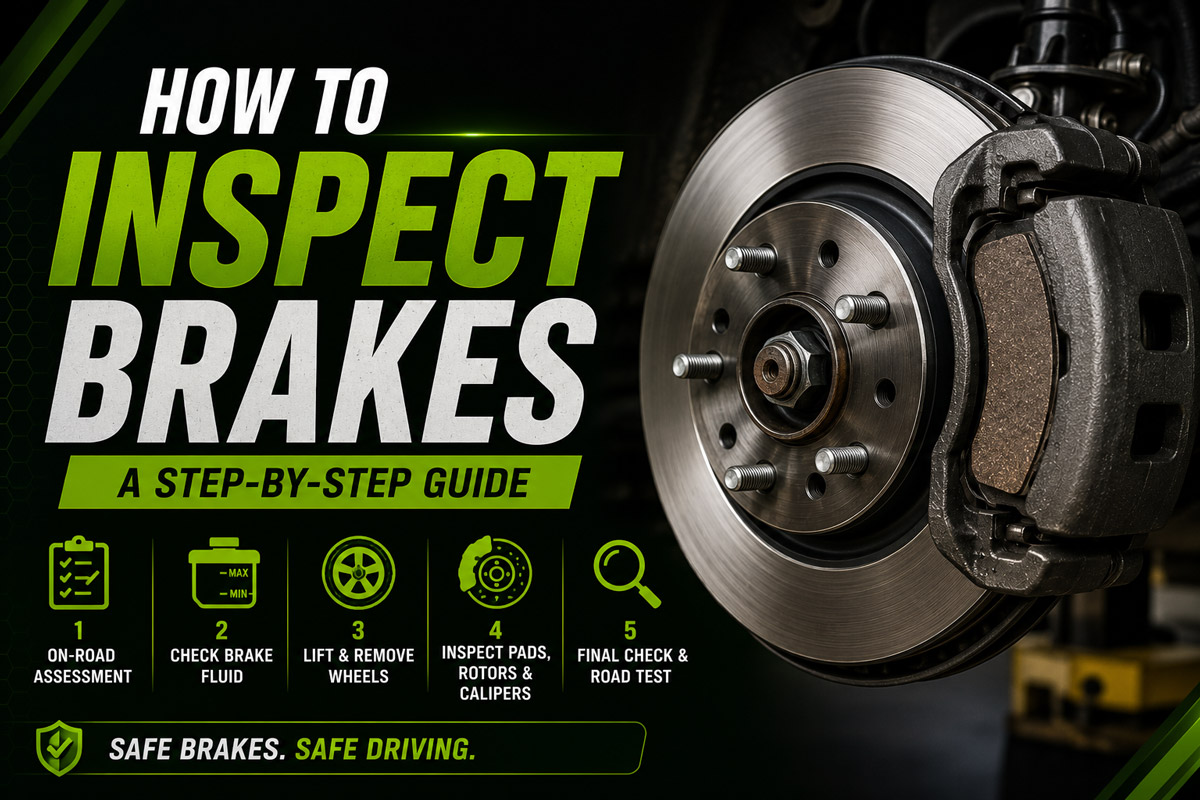
Inspecting brakes requires evaluating hydraulic fluid levels under the hood, conducting a dynamic test drive for noises or vibrations, and performing a wheel-off mechanical check of the pads, rotors, and calipers. A complete inspection ensures all mechanical, hydraulic, and friction components function safely within factory wear specifications.
Key Facts / At a Glance:
- Minimum Pad Thickness: 3.2 mm (1/8 inch) is the absolute replacement threshold.
- Minimum Shoe Thickness: 1.6 mm (1/16 inch) for rear drum brake linings.
- Brake Fluid Limit: Replace fluid immediately if water content exceeds 3%.
- Rotor Runout: Maximum allowable lateral wobble is typically 0.05 mm (0.002 inches).
- Safety Rule: Never work under a vehicle supported only by a hydraulic jack; always use rated jack stands.
Before You Start
- Total Time Required: 30 to 45 minutes for a complete four-wheel evaluation.
- Difficulty Level: Intermediate.
- Estimated Cost: Free to $50 (if done professionally). DIY tool investment is roughly $40–$60.
- Required Tools: Hydraulic floor jack, safety jack stands, lug wrench or breaker bar, brake pad measuring gauge, digital micrometer, electronic brake fluid moisture tester, flashlight.
- Prerequisites: A flat, level concrete surface and, for modern vehicles, knowledge of how to place your Electronic Parking Brake (EPB) into “service mode” via the dashboard menu or an OBD2 scanner.
How Does the Brake System Work?
Modern vehicles use hydraulic pressure to multiply foot force into massive clamping power. Pressing the brake pedal forces brake fluid from the master cylinder through high-pressure lines to the wheels. This fluid pressure forces calipers (on disc brakes) or wheel cylinders (on drum brakes) to compress against rotating components. The resulting friction converts the vehicle’s kinetic energy into thermal energy, safely bringing the car to a stop.
What Are the Main Types of Brakes?
Most modern vehicles use a split system, typically featuring disc brakes on the front axle and either disc or drum brakes on the rear axle.
| Brake Type | Primary Components | Key Mechanics | Pros | Cons |
| Disc Brakes | Caliper, Pads, Rotor | Caliper squeezes pads against an exposed, spinning disc. | Superior heat dissipation, better wet performance, easy to inspect visually. | Higher production cost, vulnerable to lateral warping, faster pad wear. |
| Drum Brakes | Wheel Cylinder, Shoes, Drum | Hydraulic cylinder pushes shoes outward against a hollow, spinning drum. | Lower replacement cost, highly efficient built-in mechanical parking brake. | Traps heat and water, prone to brake fade under heavy load, complex spring linkages. |
What Are the Critical Brake Specifications?
You must maintain precise engineering metrics during your inspection to guarantee stopping power.
- Pad and Shoe Thickness: New brake pads typically measure 10–12 mm thick. The replacement threshold is 3.2 mm (1/8 inch) for pads and 1.6 mm (1/16 inch) for drum shoes.
- Brake Fluid Moisture: Brake fluid is highly hygroscopic (it absorbs water). Water content exceeding 3% lowers the boiling point, risking brake fade and internal rust.
- Rotor Minimum Thickness: Rotors physically wear down over time. The “Minimum Thickness” is stamped directly onto the rotor hub; measuring below this requires immediate replacement, as the rotor can no longer absorb heat safely.
How to Inspect Brakes: The Step-by-Step Process
Follow this mechanical sequence for a complete, four-wheel brake evaluation.
Step 1: Perform an On-Road Dynamic Assessment
Drive the vehicle in a controlled environment to establish a diagnostic baseline. Turn off the radio, roll down the windows, and apply the brakes at varying speeds.
- Action: Listen for high-pitched squealing (indicating wear sensors are active) or harsh grinding (indicating metal-on-metal failure). Feel the steering wheel and brake pedal for vibrations. Monitor the vehicle for pulling to the left or right under hard braking.
- Success Checkpoint: You will know the baseline is established when you can accurately document any noises, pulls, or vibrations occurring specifically during pedal depression.
- Common Mistake: Ignoring a pull to one side. Drivers often blame alignment, but a vehicle pulling only while braking indicates a seized caliper or collapsed brake hose on the opposite side of the pull.
Step 2: Check Under-Hood Brake Fluid
Evaluate the hydraulic system at its source before lifting the vehicle. Locate the translucent master cylinder reservoir mounted to the firewall on the driver’s side.
- Action: Check the fluid level against the “Max” and “Min” lines cast into the plastic. Dip an electronic brake fluid tester into the reservoir to measure moisture content. Inspect the color: clear amber is healthy, while dark, murky fluid indicates rubber degradation and contamination.
- Success Checkpoint: You will know the fluid is acceptable if the tester reads under 3% moisture and the level sits cleanly between Min and Max.
- Common Mistake: Topping off brake fluid just because it sits near the “Min” line. Fluid drops naturally as brake pads wear and caliper pistons extend. Topping it off will cause the reservoir to overflow and spill highly corrosive fluid when new, thicker pads are eventually installed and the pistons are compressed.
Step 3: Secure the Vehicle and Remove Wheels
Elevate the vehicle safely to expose the mechanical components. Ensure the vehicle is on level ground and chock the wheels remaining on the ground.
- Action: Loosen the lug nuts slightly while the tires are grounded. Jack the vehicle up using factory-approved lift points. Lower the vehicle onto rated safety jack stands. Remove the lug nuts and slide the wheels off. If your car has an Electronic Parking Brake (EPB), disengage it and put it into service mode before touching the rear brakes.
- Success Checkpoint: The vehicle is completely stable on the stands and does not shift when leaned against, with the entire wheel well exposed.
- Common Mistake: Relying solely on a hydraulic floor jack. Hydraulic seals can fail instantly, leading to fatal crush injuries. Never inspect brakes without jack stands.
Step 4: Measure Brake Pad and Shoe Thickness
Quantify the remaining friction material using specialized measuring tools rather than relying on visual estimation.
- Action: Insert a color-coded brake pad thickness gauge through the caliper inspection window. Measure both the outer pad (visible against the wheel side) and the inner pad (closest to the suspension). For drum brakes, remove the drum cover and measure the friction lining on the shoes.
- Success Checkpoint: You have obtained exact millimeter measurements for all eight brake pads (or four pads and four shoes) on the vehicle.
- Common Mistake: Only checking the outer brake pad. Caliper slide pins frequently stick, causing the inner brake pad (which is pressed directly by the hydraulic piston) to wear out twice as fast as the outer pad.
Step 5: Evaluate Rotor and Caliper Condition
Inspect the structural integrity of the metal components that the brake pads grip.
- Action: Run your fingernail vertically across the rotor face; catch-points indicate deep scoring. Look for blue discoloration, which indicates extreme thermal stress. Grab the caliper body and attempt to wiggle it; floating calipers should have slight lateral movement on their slide pins. Finally, shine a flashlight along the flexible rubber brake hoses to check for dry rot, swelling, or wet fluid leaks.
- Success Checkpoint: You have verified that the rotors are smooth, the calipers slide freely, and the hydraulic lines are perfectly dry.
- Common Mistake: Leaving the fluid reservoir cap off during this mechanical check. Brake fluid absorbs atmospheric moisture rapidly; an open cap introduces water directly into the hydraulic system.
How to Troubleshoot Common Brake Symptoms?
Identify mechanical failures quickly by matching your test-drive symptoms to these diagnostic indicators:
- Spongy/Soft Pedal: Caused by air trapped in the hydraulic lines, a leaking master cylinder, or old, moisture-ridden fluid that is boiling under heat.
- Pulsing Pedal and Steering Wheel Shake: Caused by lateral rotor runout (warped rotors) or uneven pad material transfer baked onto the rotor face.
- Squealing Sound: Usually the active acoustic wear indicators (small metal tabs) touching the rotor, signaling the pads have reached 3.2 mm. It can also indicate missing anti-squeal shims.
- Harsh Grinding Noise: The friction material is completely depleted, and the steel pad backing plate is gouging the iron rotor. This requires immediate replacement of both components.
- Extremely Hard Pedal: Indicates a failure in the vacuum brake booster or a pinched/collapsed hydraulic line preventing fluid flow.
How Much Does a Brake Inspection Cost?
Plan your maintenance budget around these industry-standard benchmarks. Inspections should occur every 6 months or 10,000 to 12,000 miles.
- Professional Inspection Cost: Often free as a promotional loss-leader during tire rotations, or up to $50 at specialized diagnostic facilities.
- DIY Replacement Costs: $30–$80 per axle for quality ceramic brake pads; $60–$150 per axle for replacement rotors.
- Shop Replacement Costs: $150–$350 per axle for a pad slap (pads only); $350–$750 per axle for comprehensive pad and rotor replacement service.
Note on Rotor Resurfacing: While older vehicles frequently had rotors “turned” (machined flat) on a lathe, modern rotors are cast thinner to save weight. Most mechanics now replace rotors entirely rather than resurfacing them, as machining modern rotors often drops them below the minimum safe thickness.
Frequently Asked Questions
Do I need to remove the wheels to inspect my brakes?
A basic visual check of the outer pad can sometimes be done through the spokes of large alloy wheels using a flashlight. However, a proper, safe inspection requires wheel removal. Without taking the wheels off, you cannot measure the inner brake pad, inspect the caliper slide pins, or accurately check the inner face of the rotor for scoring.
How often should I check my brake fluid?
You should check your brake fluid level and color every time you change your oil (typically every 5,000 to 7,500 miles). You should test the fluid for moisture content every 12 months. Most manufacturers mandate completely flushing and replacing the brake fluid every two to three years, regardless of mileage.
What does a bad brake rotor look like?
A failing brake rotor exhibits deep concentric grooves (like a vinyl record) that catch your fingernail. You may also see a pronounced “rust lip” on the outer edge, blue or purple heat spots on the friction surface, or micro-cracking radiating from the center hub on high-performance drilled rotors.
Can I just replace the brake pads and leave the old rotors?
You can perform a “pad slap” only if the existing rotors are completely smooth, show zero signs of lateral runout (warping), and measure well above the minimum thickness specification stamped on the hub. If the rotors are grooved, they will rapidly destroy the new pads and reduce your braking efficiency by up to 30%.