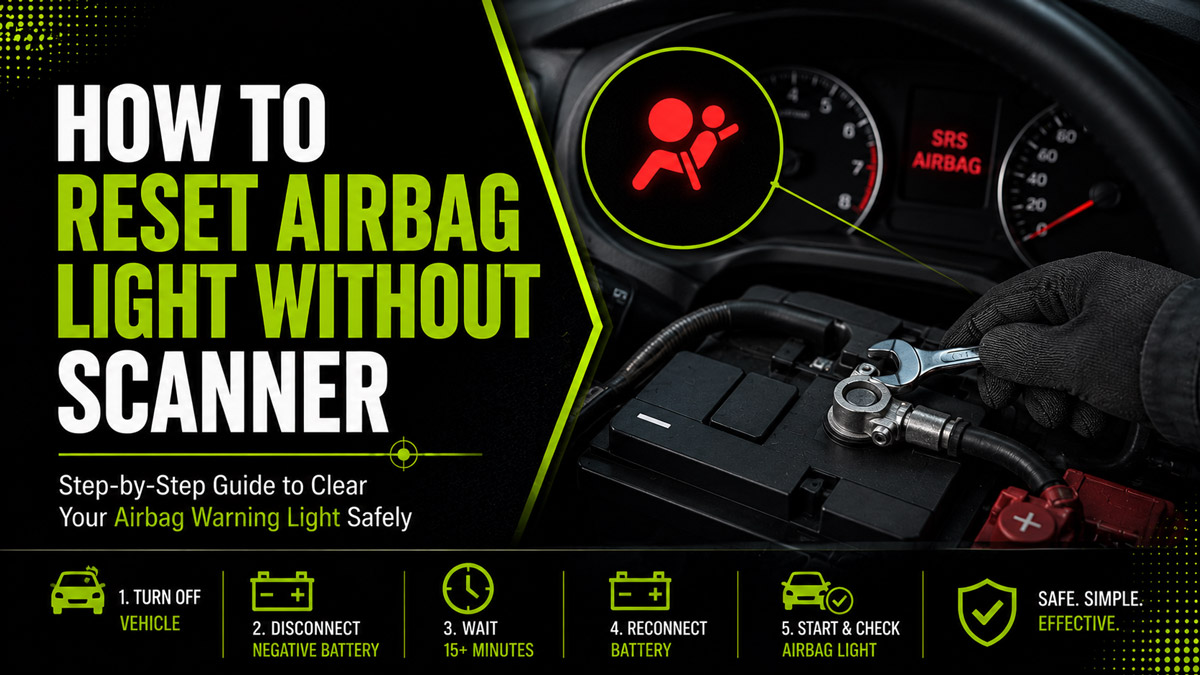
You may be able to reset an airbag light without a scanner by switching off the vehicle, disconnecting the negative battery terminal, draining residual electrical power, reconnecting the battery, and checking the SRS self-test. The process takes about 20–25 minutes and is relatively easy, but it only works when the warning was caused by a temporary electrical issue.
Important: Disconnecting the battery does not repair an airbag-system malfunction. If the warning returns, the Supplemental Restraint System, or SRS, still has an active fault that must be diagnosed and repaired.
Before You Start
Time, Difficulty, and Cost
- Total time: 20–25 minutes
- Active work: Approximately 5 minutes
- Waiting time: At least 15 minutes
- Difficulty: Low
- Estimated cost: $0–$20 if you already own basic hand tools
Tools and Materials
Prepare the following items:
- One 10 mm wrench or socket
- One pair of safety glasses
- One pair of insulated or mechanic’s gloves
- One dry rag or zip tie
- Vehicle owner’s manual
- Radio security code, when required by the manufacturer
The negative battery-terminal fastener is commonly 10 mm, but your vehicle may use another size.
Conditions Required
Attempt this procedure only when:
- The airbags have not deployed.
- The vehicle has not recently been in a collision.
- The battery is accessible and undamaged.
- There are no exposed or burned electrical wires.
- You know how to identify the negative battery terminal.
- The vehicle is not an electric or high-voltage hybrid requiring special isolation procedures.
Do not use this procedure to hide a warning before an inspection or vehicle sale. An illuminated airbag light means the restraint system may not protect occupants correctly during a crash.
What Battery Disconnection Can Reset
A complete power drain may clear a warning caused by:
- A temporary voltage interruption
- A recently discharged or replaced battery
- A loose connection that has already been corrected
- A temporary communication error between control modules
It normally will not clear a stored hard fault caused by:
- A failed crash sensor
- A damaged clockspring
- An open airbag circuit
- A faulty seat-belt pretensioner
- A deployed airbag
- Crash data stored in the SRS module
- A damaged airbag control module
Step 1: Park and Shut Down the Vehicle
Park the vehicle securely and turn every electrical system off.
Move an automatic transmission into Park. Put a manual transmission in Neutral or first gear and engage the parking brake firmly. Switch off the headlights, climate control, radio, interior lights, and accessories.
Turn the ignition completely off and remove the key. For a push-button vehicle, move the key fob several feet away so the vehicle cannot detect it and unexpectedly activate an electrical circuit.
Open the hood using the interior release and support it securely.
You’ll know it worked when the instrument panel and accessories are completely off and no ignition indicators remain illuminated.
Common mistake: Leaving the ignition in Accessory mode. Confirm that the radio, dashboard, and infotainment display have shut down before touching the battery.
Step 2: Identify the Negative Battery Terminal
Locate and confirm the negative battery terminal before loosening anything.
Find the battery under the hood, inside the trunk, or beneath an access panel. Consult the owner’s manual when its location is unclear.
The negative terminal is normally marked with:
- A minus symbol: –
- A black terminal cover
- A black cable connected to the body or chassis
The positive terminal is normally marked with a plus symbol and often has a red cover.
Do not continue until you have positively identified the negative terminal. Removing the negative connection first reduces the chance of creating a short circuit between the wrench and the vehicle body.
You’ll know it worked when you can trace the selected cable from the negative battery post toward a chassis or engine-ground connection.
Common mistake: Assuming cable color is always reliable. Use the plus and minus markings because replacement battery cables may not follow standard colors.
Step 3: Disconnect the Negative Battery Cable
Remove the negative battery cable and secure it away from the battery post.
Put on safety glasses and gloves. Place the correctly sized wrench or socket over the negative terminal-clamp nut. Turn the fastener counterclockwise until the clamp becomes loose.
You usually do not need to remove the nut completely. Twist the clamp gently while lifting it straight off the battery post.
Move the cable far enough away that it cannot spring back into contact with the terminal. Wrap the clamp in a dry rag or secure it using a zip tie.
Never allow a metal tool to bridge the positive terminal and any metal part of the vehicle. That can cause a high-current short circuit, severe sparks, burns, battery damage, or an electrical fire.
You’ll know it worked when the negative clamp is fully separated from the battery and cannot touch the post accidentally.
Common mistake: Pulling forcefully on the cable. Hold the terminal clamp, not the wire itself. Excessive pulling can damage the cable or internal connection.
Step 4: Drain Residual Electrical Power
Leave the battery disconnected for at least 15 minutes.
Airbag systems contain reserve-energy capacitors. These capacitors allow the restraint system to operate briefly if battery power is lost during a collision. Waiting gives the stored electrical charge time to dissipate.
Leave the disconnected cable secured for 15–20 minutes. Do not touch airbag modules, yellow SRS connectors, seat-belt pretensioners, crash sensors, or steering-wheel components during this period.
To help discharge ordinary vehicle circuits, you may press the brake pedal or switch the headlights on for approximately 30 seconds. Return the headlight switch to Off afterward.
Do not connect the positive and negative battery cables together. Do not place a jumper wire across either terminal.
You’ll know it worked when at least 15 uninterrupted minutes have passed with the negative terminal completely disconnected.
Common mistake: Reconnecting the battery after one or two minutes. SRS reserve power may remain available for several minutes, so follow the full waiting period.
Step 5: Reconnect the Negative Battery Cable
Reinstall the negative clamp and tighten it securely.
Confirm that the ignition and all electrical accessories remain off. Remove the rag or zip tie from the cable and position the clamp fully over the negative battery post.
Press the clamp downward until it is seated at the base of the post. Tighten the nut clockwise until the clamp cannot rotate or lift by hand.
The connection must be secure, but do not overtighten it. Excessive force can deform the clamp, strip the fastener, or damage the battery post.
You’ll know it worked when the clamp remains stationary when you attempt to twist it gently by hand.
Common mistake: Leaving the terminal slightly loose. A poor battery connection can cause low voltage, intermittent warning lights, starting problems, or new diagnostic codes.
Step 6: Check the Airbag-System Self-Test
Switch the ignition on and observe the airbag warning light.
Sit outside the direct deployment path of the steering-wheel and dashboard airbags whenever practical. Do not lean over the steering wheel.
Turn the ignition to the On position without starting the engine. Watch the airbag or SRS warning indicator.
During a normal self-test, the light should illuminate briefly—commonly for approximately three to seven seconds—and then switch off. Start the engine and confirm that the light remains off.
The exact self-test duration varies by manufacturer.
You’ll know it worked when the warning light completes its bulb check, turns off, and remains off while the engine runs.
Common mistake: Assuming the procedure failed because the light appears briefly. Initial illumination is normal. The concern is a light that stays on, flashes repeatedly, or returns after driving.
What to Do If the Airbag Light Returns
If the warning remains illuminated or returns after a short drive, the vehicle has probably detected an active SRS fault. Repeating the battery-disconnection process will not repair it.
The next step is to read the diagnostic trouble codes with a scanner that specifically supports the airbag or SRS system. A basic engine-code reader may communicate only with the powertrain module and may not access airbag codes.
Common causes include the following.
Inspect the Under-Seat Area
Switch the ignition off before looking beneath either front seat. Check for:
- Objects pressing against wiring
- Water or drink spills
- Harnesses pulled tight by seat movement
- Connectors that appear partially separated
- Damaged insulation or pinched wires
Yellow wiring and connectors commonly identify SRS circuits. Do not unplug, probe, clean, or repair them while the battery is connected.
A connector that looks loose should be inspected according to the manufacturer’s repair procedure. Some SRS connectors use secondary locks that can be damaged when forced.
Check the Seat-Belt Buckles
Dirt, coins, food, or other debris can interfere with the switch inside a seat-belt buckle. Examine the buckle opening and remove loose debris using low-pressure compressed air.
Do not insert screwdrivers, metal picks, lubricants, or cleaning liquids into the buckle. Replace a buckle that is damaged or does not latch correctly.
Look for Clockspring Symptoms
A clockspring maintains the electrical connection between the stationary steering column and the rotating steering wheel.
Possible clockspring symptoms include:
- Airbag warning light
- Inoperative horn
- Failed steering-wheel audio controls
- Failed cruise-control buttons
- Scraping or clicking while turning the wheel
A failed clockspring requires mechanical replacement. Removing a steering-wheel airbag involves deployment risk and should be handled by a qualified technician.
Test the Battery and Charging System
Low system voltage can trigger communication and restraint-system faults. Have the battery tested when the vehicle starts slowly, the battery was recently discharged, or several warning lights appeared together.
A healthy charging system commonly measures above resting battery voltage while the engine runs, but specifications vary. Use the manufacturer’s voltage requirements rather than relying on one universal number.
Consider Recent Repairs or Collisions
The warning may be connected to recent work involving:
- Front seats
- Steering column
- Dashboard
- Center console
- Door trim
- Battery replacement
- Body repairs
- Collision damage
Inform the technician about any recent repairs because disconnected sensors or disturbed wiring may narrow the diagnosis.
Common Mistakes and How to Fix Them
Disconnecting the Positive Terminal First
Removing the positive cable first increases short-circuit risk if the tool contacts the vehicle body.
Fix: Stop, remove metal jewelry, turn the ignition off, and follow the owner’s manual. Disconnect the negative terminal first unless the manufacturer specifies another sequence.
Leaving the Negative Cable Near the Post
A loose cable can spring back and restore power unexpectedly.
Fix: Move the cable completely away and secure it with a nonconductive rag or zip tie.
Reconnecting the Battery Too Soon
A short disconnection may not allow the reserve capacitors and other modules to power down.
Fix: Disconnect the terminal again and wait at least 15 minutes before reconnecting it.
Erasing the Warning Without Repairing the Fault
A reset may temporarily remove a warning, but an active fault will be detected again.
Fix: Read the SRS codes, repair the reported circuit or component, and clear the code using approved diagnostic equipment.
Probing Yellow SRS Connectors
A test light, jumper wire, or ordinary multimeter can send current into an airbag circuit.
Fix: Do not probe SRS terminals unless you have manufacturer-approved test equipment and service instructions.
Ignoring Lost Vehicle Settings
Battery disconnection can reset clocks, radio presets, idle adaptation, automatic windows, steering-angle calibration, or security functions.
Fix: Review the owner’s manual before beginning and complete any required relearn procedures afterward.
Variations for Different Vehicles
Push-Button Start Vehicles
Turn the vehicle fully off and move the key fob away from the car. Some vehicles remain awake for several minutes after shutdown. Wait until interior displays and control modules have gone dark before disconnecting the battery.
Vehicles With Battery-Monitoring Sensors
Some modern vehicles have a battery-current sensor attached to the negative terminal. Avoid twisting, striking, or placing excessive force on this sensor.
Battery replacement may require registration or adaptation using a diagnostic tool. A simple disconnection does not perform that registration.
Hybrid and Electric Vehicles
Do not treat a hybrid or electric vehicle like a conventional gasoline vehicle. It may contain a 12-volt battery plus a high-voltage traction system.
Follow the manufacturer’s isolation procedure or use a qualified technician. Never touch orange high-voltage cables, service disconnects, or damaged electrical components.
Vehicles With Manual Flashing Sequences
A few vehicles have model-specific ignition sequences that can display or clear certain restraint codes. These procedures are not universal and should not be guessed.
Use only a sequence documented in the factory service information for the exact make, model, and year.
How Long Does the Reset Take?
The complete procedure generally takes 20–25 minutes:
- Parking and shutdown: 1–2 minutes
- Disconnecting the battery: 2–3 minutes
- Residual-power drain: 15–20 minutes
- Reconnection and verification: 2–3 minutes
Troubleshooting can take longer because the fault may require wiring inspection, code scanning, component testing, or professional repair.
How Much Does It Cost?
A manual battery reset may cost nothing when you already own a wrench and protective equipment. Purchasing basic supplies may cost approximately $10–$20.
Professional diagnostic costs vary by location and vehicle. Repair costs depend on the failed component. A loose connection may be inexpensive, while a clockspring, pretensioner, control module, crash sensor, or deployed airbag can cost substantially more.
Request a code report and written estimate before authorizing repairs.
Frequently Asked Questions
Can disconnecting the battery permanently reset an airbag light?
Only when the light resulted from a temporary electrical or low-voltage condition and no active fault remains. Most modern SRS modules store diagnostic codes in nonvolatile memory. Those codes remain after battery power is removed and require an SRS-capable scanner after the underlying problem is repaired.
Will touching the battery cables together reset the system?
Do not touch disconnected battery cables together unless the vehicle manufacturer explicitly requires it. This technique can damage sensitive electronics when performed incorrectly. The safer general method is to disconnect the negative terminal, secure it away from the battery, and wait at least 15 minutes.
Can I drive with the airbag light on?
The vehicle may still move normally, but one or more airbags or seat-belt pretensioners may be disabled. Occupants could receive less protection during a collision. Arrange diagnosis promptly and avoid treating the warning as a cosmetic dashboard issue.
Can a basic OBD2 reader clear an airbag code?
Many inexpensive OBD2 readers access only engine and emissions codes. To diagnose an airbag warning, the tool must specifically support the vehicle’s SRS or airbag control module. Confirm compatibility with the exact make, model, and year before purchasing or borrowing a scanner.
Why did the light return after the battery reset?
The SRS control module detected the fault again during its self-test. Common causes include damaged under-seat wiring, a loose connector, a failed clockspring, a seat-belt buckle fault, low voltage, a crash sensor problem, or stored collision data.
Is it safe to remove an airbag fuse instead?
No. Removing a fuse does not repair the fault and may disable additional restraint-system functions. It can also create new trouble codes. Keep the correct fuse installed and diagnose the reason the warning light is illuminated.
Conclusion
To reset an airbag light without a scanner, turn the vehicle off, disconnect and secure the negative battery cable, wait at least 15 minutes, reconnect the terminal, and observe the SRS self-test. This may clear a temporary electrical warning, but it cannot repair a failed component or erase many permanent airbag codes.
When the light stays on or returns, stop repeating the reset. Use an SRS-capable diagnostic scanner or have a qualified technician inspect the restraint system before relying on it for crash protection.