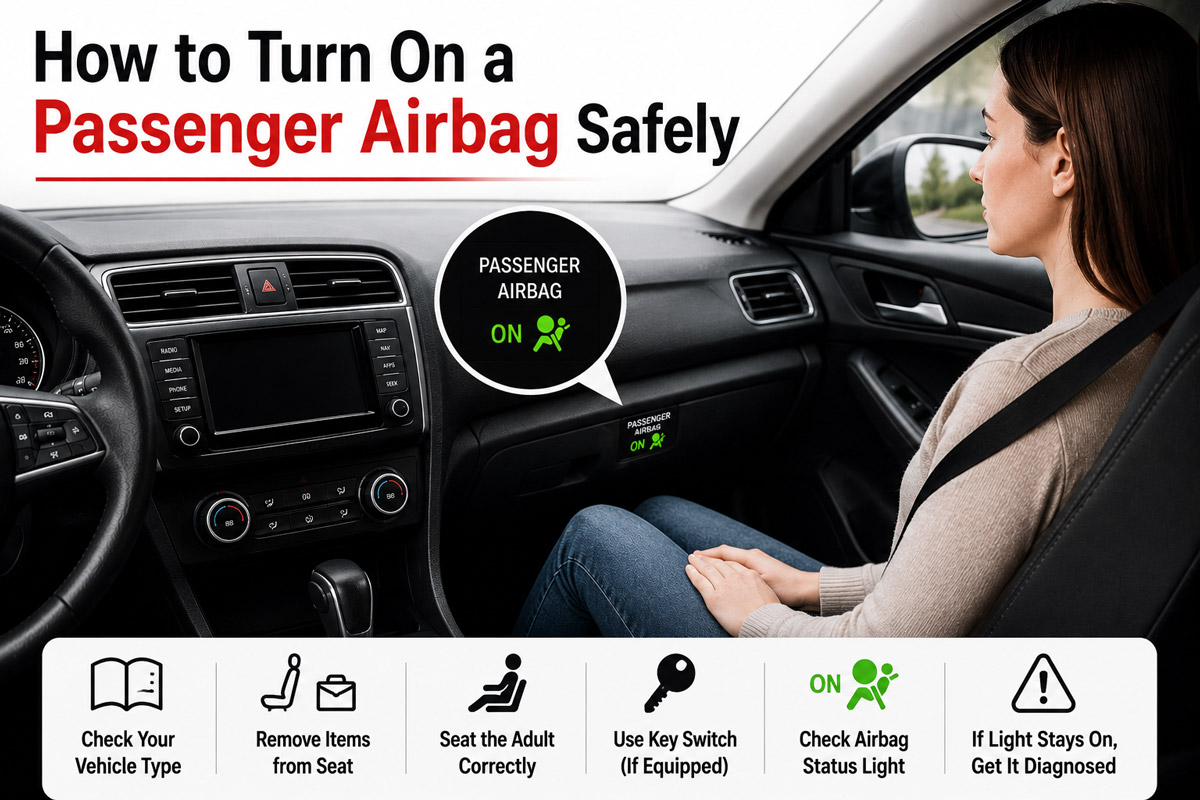
To turn on a passenger airbag, first identify whether the vehicle uses an automatic occupant-classification system or a manual airbag key switch. In most modern vehicles, an adult must sit upright in the passenger seat while the vehicle automatically enables the airbag; the system cannot safely be forced on through a dashboard setting.
Key Facts at a Glance
- Most modern passenger airbags turn on automatically when the seat sensors recognize an adult occupant.
- A “Passenger Airbag OFF” indicator is different from the main SRS or airbag warning light.
- There is no universal passenger-weight threshold that applies to every vehicle.
- A rear-facing child restraint must never be placed in front of an active frontal airbag.
- Disconnecting the battery does not repair a failed occupant sensor or airbag circuit.
- A persistent SRS warning requires diagnosis with equipment capable of accessing the airbag control module.
Before You Start
Time: 5–10 minutes for a status check; 30–90 minutes for professional diagnosis
Difficulty: Easy for normal activation; advanced and hazardous for electrical repair
User cost: Usually $0 for normal activation
Typical diagnostic cost: About $100–$250, depending on location and vehicle
Tools: Owner’s manual, ignition key if the vehicle has a keyed switch, and an SRS-capable scan tool only when diagnosing a fault
Do not disconnect yellow airbag connectors, probe SRS wiring with a test light, measure an inflator circuit with an ordinary multimeter, or install a resistor to imitate an airbag. Airbag circuits can contain reserve electrical energy, and improper testing can cause deployment, component damage, or loss of crash protection.
Step 1: Identify the Passenger-Airbag System
Determine whether the vehicle uses automatic occupant detection, a manual ON/OFF switch, or a professionally installed deactivation system. The correct activation procedure depends entirely on this system type.
Look in the owner’s manual under terms such as:
- Passenger sensing system
- Occupant classification system
- Front passenger airbag
- Passenger airbag status indicator
- Airbag deactivation switch
- Supplemental Restraint System or SRS
Automatic Occupant-Classification System
Most late-model passenger vehicles use sensors in or around the front passenger seat. The system evaluates factors such as seat loading, occupant position, seatbelt use, and internal diagnostic status before deciding whether the passenger frontal airbag should be enabled.
There is normally no menu command or physical button that allows the driver to override this decision.
Manual Key Switch
Some regular-cab trucks, two-seat vehicles, commercial vehicles, and vehicles sold in certain markets have a key-operated passenger-airbag switch. Common locations include:
- Inside the glove compartment
- On the passenger-side dashboard end panel
- On the center console
- Near the passenger door opening
Ford owner documentation, for example, shows vehicle-specific key switches that must be placed in the enabled position and verified through the corresponding status indicator.
Authorized Retrofitted Switch
A retrofitted switch is not a generic do-it-yourself accessory. In the United States, airbag deactivation modifications have historically been restricted to qualifying circumstances, and approval or documentation may be required. NHTSA advises that children should ride in the rear seat and provides specific guidance concerning authorized on-off switches.
Success checkpoint: You have found either a manual switch or language confirming that the vehicle controls the passenger airbag automatically.
Common mistake: Assuming every “Passenger Airbag OFF” light means a switch was manually turned off.
Step 2: Remove Objects That Can Affect Seat Detection
Clear the entire passenger seat, seatback pocket, footwell, and area beneath the seat. A passenger-sensing system needs the seat to carry the occupant normally without additional loads or mechanical interference.
Remove:
- Bags, boxes, groceries, laptops, and tools
- Child restraints when testing adult recognition
- Thick blankets or cushions
- Aftermarket seat pads
- Unapproved seat covers
- Objects wedged beneath the seat
- Items hanging from or pulling on the seatbelt
- Charging cables caught in seat tracks
Cargo can create two different problems. A moderately heavy object may cause the status indicator to change even though no person is present, while an object beneath the seat can interfere with a sensor, wiring harness, or seat-track mechanism.
A phone or laptop does not universally “confuse” the system through electromagnetic emissions, as the AI Overview suggests. The more common concern is physical loading, improper seating surfaces, wiring interference, or manufacturer-specific sensor technology.
Success checkpoint: The original seat surface is unobstructed, nothing is beneath the seat, and the seat moves freely on its tracks.
Common mistake: Testing the system while a handbag rests against the passenger’s legs or on the outer edge of the cushion.
Step 3: Seat the Adult Passenger Correctly
Have the adult passenger sit centered on the seat with their back against the seatback. Correct posture allows the occupant-classification system to measure the passenger under the conditions for which it was calibrated.
The passenger should:
- Sit fully on the seat cushion rather than its front edge.
- Keep their torso upright and centered.
- Place both feet on the floor.
- Avoid leaning against the door or center console.
- Avoid lifting their body with the armrests.
- Keep their feet off the dashboard.
- Remain still during the system check.
A small adult may be classified differently depending on body size, posture, seat position, and vehicle calibration. Honda explicitly notes that a small adult near the system’s cutoff boundary may not always be recognized as an adult and that the OFF indicator can cycle when seat loading is close to the classification threshold.
There is no reliable universal rule such as “100 pounds turns the airbag on.” Manufacturer thresholds and classification logic vary, and many owner manuals intentionally describe status conditions rather than publish a single activation weight.
Success checkpoint: The passenger is seated naturally, upright, centered, and not shifting weight away from the cushion.
Common mistake: Asking the passenger to press down artificially or hold a heavy object. That does not create a safe or valid occupant classification.
Step 4: Fasten the Seatbelt Normally
Route the lap-and-shoulder belt across the passenger exactly as designed. The lap portion should sit low across the hips, and the shoulder portion should cross the chest without passing behind the passenger’s back or under an arm.
The seatbelt does not necessarily “switch on” the airbag by itself. However, advanced restraint systems may use buckle status, belt tension, occupant position, and crash severity when selecting restraint strategies.
Do not attach seatbelt extenders unless they are manufacturer-approved and genuinely needed. An incompatible extender can alter buckle status, belt geometry, or tension measurements.
Success checkpoint: The belt is buckled, untwisted, and positioned normally across the passenger.
Common mistake: Buckling the belt behind the passenger merely to silence the belt reminder.
Step 5: Start the Vehicle and Allow the Self-Test
Turn the ignition on or start the engine, then leave the passenger seated and still while the restraint system completes its initial check. The indicator may illuminate temporarily during bulb verification before displaying the final passenger-airbag status.
Allow approximately 10–30 seconds unless the owner’s manual specifies a different procedure. Some systems update quickly, while others need a stable passenger position before changing state.
Do not repeatedly cycle the ignition in rapid succession. One normal start and a brief period of stable seating provide a more meaningful test.
Success checkpoint: The passenger-airbag indicator settles into the manufacturer-defined status without a main SRS warning.
Common mistake: Judging the status from the first second of the ignition self-test.
Step 6: Read the Correct Indicator
Verify the airbag using the passenger-status indicator, not solely the red or amber SRS warning in the instrument cluster. These lights report different conditions.
Indicator logic varies. Some vehicles illuminate an ON lamp continuously, some illuminate only an OFF lamp when suppression occurs, and others briefly display both during startup.
Toyota manuals, for example, describe separate passenger-airbag ON and OFF indicators as part of the occupant-classification system.
Success checkpoint: The indicator behavior matches the owner’s manual for an adult occupant.
Common mistake: Assuming a dark OFF light proves the whole SRS is healthy while the main airbag warning remains illuminated.
Step 7: Turn a Manual Switch to ON, If Equipped
For a factory manual switch, stop the vehicle, switch off the ignition, and follow the owner’s manual before changing the switch position. Never guess which symbol or direction represents ON.
The typical procedure is:
- Park the vehicle and switch off the ignition.
- Remove any child restraint from the front seat.
- Locate the passenger-airbag switch.
- Insert the mechanical ignition key or key blade.
- Rotate the switch to ON, Enabled, or the corresponding airbag symbol.
- Remove the key if instructed.
- Start the vehicle.
- Confirm that the ON indicator illuminates or the OFF indicator extinguishes, according to the manual.
Ford documentation warns that a failure of the expected ON or OFF indicator to illuminate can indicate a malfunction requiring service.
Success checkpoint: The switch is mechanically in the enabled position and the correct indicator confirms that position after startup.
Common mistake: Turning the key switch while the ignition is on or relying on the switch position without checking the indicator.
Step 8: Recheck the Status After the Passenger Settles
Drive only after the passenger has settled into a stable, normal seating position and the status remains correct. Movement immediately after startup can change the system’s classification.
Ask the passenger not to:
- Sit cross-legged
- Curl up against the door
- Place both feet on the dashboard
- Lean forward for long periods
- Sit on a cushion or folded blanket
- Hold a heavy object on their lap
- Slide far forward toward the dashboard
If the OFF light appears only when the passenger changes posture, return the passenger to the recommended position. If it remains unstable during ordinary seating, the vehicle may require inspection or occupant-classification calibration.
Success checkpoint: The enabled status remains stable with the passenger in a normal travel position.
Common mistake: Treating intermittent ON/OFF changes with an adult passenger as normal without consulting the vehicle manual.
Can You Force an Automatic Passenger Airbag On?
No safe user procedure can force an automatic passenger airbag on when the occupant-classification module has chosen to suppress it. The system is part of the certified restraint strategy, and bypassing its input can create incorrect deployment behavior.
Do not attempt to activate the system with:
- Sandbags or weighted objects
- Resistors in seat-sensor circuits
- Passenger-seat occupancy emulators
- Jumpered connectors
- Altered buckle switches
- Coding software not approved for the vehicle
- Replacement seats from a different trim or model
- Removal of an airbag warning bulb
A bypass can cause the airbag to deploy for a child, fail to deploy for an adult, deploy with an incorrect restraint strategy, or store faults that disable other SRS components.
The correct solution is to identify why the system is suppressing the airbag and repair that cause.
Why Does the Passenger Airbag OFF Light Stay On?
The passenger-airbag OFF light commonly stays on because the seat is empty, the occupant is being classified as a child or small passenger, the passenger is sitting improperly, or the system has detected a sensor condition that prevents normal classification.
The Passenger Is Small or Sitting Incorrectly
A petite adult can fall near a vehicle’s classification boundary, especially when leaning, perching on the front edge, or shifting weight onto the door or center console. Repositioning the passenger may restore correct classification, but a persistent problem warrants service.
An Object Is Affecting the Seat
A cushion, seat cover, bag, blanket, child restraint, or object under the seat can change how force reaches the sensing system. Remove everything and retest using the original seating surface.
The Seat or Interior Was Recently Repaired
Seat removal, upholstery replacement, collision repair, carpet work, water-damage repair, or installation of audio equipment can disturb:
- Seat wiring connectors
- Occupant-detection sensor mats
- Seat-track position sensors
- Seatbelt buckle switches
- Seatbelt tension sensors
- Module grounds
Some vehicles require a zero-point reset, occupant-detection initialization, or calibration after seat or sensor work. Installing the part without completing the required calibration may leave the classification inaccurate.
The Seat Became Wet
Liquid can affect electrical connectors, sensor mats, upholstery pressure, or classification values. Do not assume that drying the seat for 24–48 hours will automatically make the system safe.
Switch off the vehicle, follow the manufacturer’s spill instructions, and obtain an inspection if the indicator becomes erratic or an SRS code appears. Sugary drinks, saltwater, cleaning chemicals, and floodwater can leave conductive or corrosive residue after the fabric feels dry.
Wiring Under the Seat Is Damaged
Seat movement can pull, pinch, or loosen wiring beneath the cushion. A stored code may identify excessive resistance, an open circuit, a short, lost module communication, or an implausible sensor value.
Do not unplug or reconnect visible yellow SRS connectors without following the factory depowering procedure.
What Does the Main SRS Warning Light Mean?
A main SRS or airbag warning that stays illuminated means the restraint controller has detected a fault. Depending on the vehicle and code, one or more airbags, pretensioners, occupant sensors, or crash-sensing functions may be unavailable.
The warning can result from:
- Occupant-classification sensor failure
- Loose or damaged seat wiring
- Failed seatbelt buckle or pretensioner circuit
- Low-voltage event
- Airbag control-module fault
- Previous crash data
- Incorrect replacement seat
- Steering-wheel clockspring failure
- Side-impact sensor fault
- Water or corrosion damage
- Uncompleted calibration
- Active recall or defective component
The main warning is more serious than a normal passenger-airbag OFF indication. The vehicle may still run and drive, but normal drivability does not prove the restraint system will operate correctly in a crash.
Will Disconnecting the Battery Turn the Airbag On?
Disconnecting the battery will not repair a sensor, wiring, calibration, or control-module fault. It may temporarily clear volatile conditions in some vehicles, but most SRS diagnostic codes remain stored or return as soon as the system detects the same fault.
Battery disconnection also introduces additional concerns:
- SRS reserve power can remain for a specified period.
- Radio, window, steering-angle, and powertrain settings may be lost.
- Low voltage during reconnection can create additional codes.
- Improper procedures can damage connectors or electronics.
- A cleared light can create false confidence before the fault returns.
Use the manufacturer’s depowering process only when performing an approved repair procedure.
Can a Standard OBD-II Scanner Diagnose the Problem?
A basic engine-code reader usually cannot access the airbag control module. Passenger-airbag diagnosis generally requires a scan tool that explicitly supports SRS, restraint, body, and occupant-classification modules for the vehicle’s make and model.
A capable scan tool may display:
- SRS diagnostic trouble codes
- Passenger-seat occupancy status
- Classification state
- Buckle-switch status
- Seat-position data
- Sensor calibration status
- Module voltage
- Crash-event data
- Initialization procedures
Reading and erasing a code is not the same as repairing it. Many airbag codes will not clear until the circuit passes a complete self-test.
Common Mistakes and How to Fix Them
Passenger-Airbag Rules for Children
Children under 13 should normally ride properly restrained in the rear seat. NHTSA specifically states that rear-facing child restraints should not be placed in front of an active frontal airbag and recommends rear seating for children under 13.
Rear-Facing Child Restraint
Never place a rear-facing infant seat in front of an active passenger airbag. The child’s head is positioned too close to the airbag cover, and deployment can cause fatal injury.
Even when a vehicle has an OFF switch, the rear seat remains the preferred location whenever an appropriate rear seating position exists.
Forward-Facing Child Restraint
A forward-facing child should also ride in the rear seat whenever possible. When front-seat use is unavoidable and legally permitted, follow all three sources of instructions:
- The vehicle owner’s manual
- The child-restraint manufacturer’s manual
- Applicable local laws
Move the passenger seat as far rearward as permitted without compromising correct child-restraint installation.
Booster Seat
A booster does not make a young child equivalent to an adult occupant for airbag classification. The system may suppress or enable the airbag according to vehicle-specific logic, so front-seat placement should not be used merely to make the status light change.
How Long Does Diagnosis and Repair Take?
A passenger-airbag status check takes about 5–10 minutes, while professional diagnosis commonly takes 30–90 minutes. Repairs can range from a connector correction completed in under an hour to seat-cushion or sensor replacement requiring several hours.
Typical time ranges are:
Labor time depends heavily on whether the sensor is separately serviceable. Some manufacturers integrate the sensing mat or classification components into a complete cushion, seat frame, or calibrated assembly.
How Much Does Passenger-Airbag Repair Cost?
Passenger-airbag diagnosis typically costs about $100–$250, while repair can range from less than $200 for a minor wiring issue to more than $1,500 for a seat-integrated sensor assembly, module, upholstery work, and calibration.
Typical North American ranges are:
These are planning ranges, not quotes. Luxury seats with heating, ventilation, power bolsters, memory functions, integrated side airbags, or special upholstery can cost substantially more.
Before paying for replacement, check for open recalls, warranty extensions, manufacturer service campaigns, and model-specific technical service bulletins.
When Should You Stop Troubleshooting?
Stop user-level troubleshooting and arrange professional service when the main SRS warning remains on, the passenger status changes unpredictably with a normally seated adult, the seat has flood or collision damage, or restraint-system wiring has been disturbed.
Immediate inspection is also appropriate when:
- The vehicle previously had airbags deploy
- The passenger seat came from another vehicle
- The OFF indicator appeared after seat removal
- A scan reports an occupant-classification calibration fault
- The seat frame is bent
- The floor or seat connectors are corroded
- A previous owner installed bypass devices
- The airbag cover, dashboard, seatbelt, or pretensioner has been modified
- The indicator does not perform its expected startup test
An ordinary mechanical shop may not have model-specific calibration equipment. A dealership, certified collision center, or technician experienced with restraint systems is often the appropriate choice.
Expert Insights That Prevent Misdiagnosis
“Airbag On” Does Not Mean It Will Always Deploy
An enabled passenger airbag is available for deployment, but the control module still evaluates crash direction, deceleration, timing, restraint status, and system design. Minor impacts and many side or rear crashes do not command the passenger frontal airbag.
The OFF Indicator Can Be Normal
A passenger-airbag OFF light with an empty seat or a properly recognized child restraint may indicate that the system is working exactly as designed. The concern is a status that conflicts with the actual occupant and the owner’s manual.
Seat Replacement Is Not Always Plug-and-Play
A replacement seat can physically fit while having different sensors, wiring resistance, module programming, upholstery loading, or calibration data. Matching connector shape alone does not establish compatibility.
Airbag Chemistry Is Vehicle-Specific
The AI Overview’s suggestion that passenger airbags typically use sodium azide is outdated as a general description. Modern inflator technologies and propellant formulations vary by manufacturer and generation; a driver does not need to identify the propellant to activate or diagnose the passenger-airbag system.
Limitations of At-Home Checks
At-home checks can confirm normal seating, remove interference, identify a manual switch, and compare indicators with the owner’s manual. They cannot certify inflator integrity, sensor calibration, wiring resistance, deployment readiness, crash-data status, or module programming.
A status light is one source of information, not a complete restraint-system test. When the displayed status conflicts with the occupant or a main SRS warning is present, professional diagnosis is the responsible limit of do-it-yourself work.
FAQ
Should the passenger-airbag ON light remain on continuously?
Some vehicles illuminate the passenger-airbag ON indicator continuously, while others illuminate only an OFF indicator when the airbag is suppressed. A dark ON lamp is therefore not automatically a fault. Compare the startup sequence and occupied-seat behavior with the exact model-year owner’s manual.
Is the passenger airbag active when nobody is sitting there?
Many vehicles suppress the passenger frontal airbag when the seat is empty, although the exact indicator behavior varies. This reduces unnecessary deployment and repair during a crash. Do not place cargo on the seat merely to change the indicator because the system may classify the load unpredictably.
Can a very light adult sit safely in the front seat?
A light adult should sit upright, centered, belted, and as far from the dashboard as practical while maintaining normal seating. If the vehicle repeatedly classifies the adult as too small for activation, consult the owner’s manual and arrange a system inspection rather than adding artificial weight.
Can I drive while the passenger-airbag OFF light is on?
Driving may be normal when the seat is empty or occupied by someone the system is designed to classify for suppression. Driving an adult passenger while the airbag remains unexpectedly off is not advisable until seating interference and system faults have been addressed.
Will clearing an SRS code reactivate the passenger airbag?
Clearing a code may turn off a warning only if the underlying condition no longer exists. A failed sensor, damaged circuit, incorrect seat, or missing calibration will usually cause the code to return. Record the code, repair the cause, complete required calibration, and then verify the system.
Can an aftermarket seat cover affect the passenger airbag?
An aftermarket seat cover can affect passenger classification, side-airbag deployment, seat-sensor loading, or wiring access when the manufacturer has not approved it. Remove the cover during diagnosis and use only products explicitly compatible with the vehicle’s occupant sensors and seat-mounted airbags.
The Bottom Line
The correct way to learn how to turn on a passenger airbag is to identify the vehicle’s activation system first. Use the factory key switch when one exists; otherwise, clear the seat, position and belt the adult passenger correctly, start the vehicle, and verify the manufacturer-defined indicator status.
An automatic occupant-classification system cannot safely be forced on. When the passenger-airbag OFF indicator conflicts with a properly seated adult, or the main SRS warning remains illuminated, the vehicle needs SRS-capable diagnosis and possibly sensor calibration or repair—not added weight, disconnected wiring, battery resets, or bypass devices.