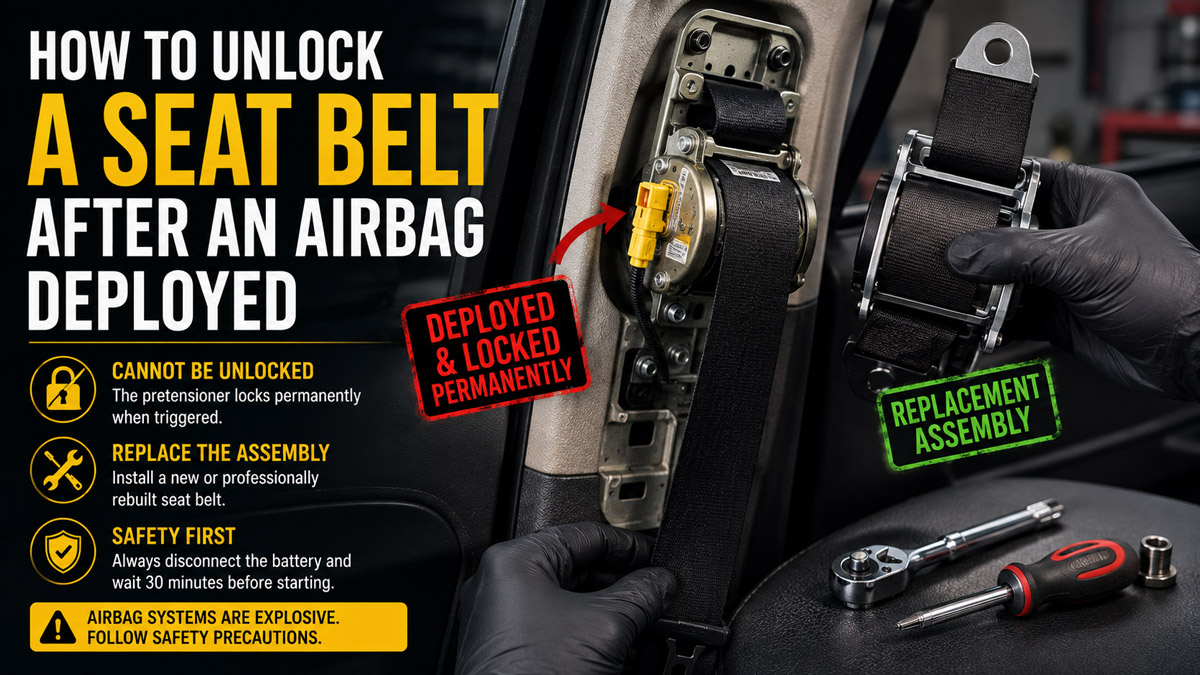
You cannot manually unlock a seat belt after an airbag deploys. The deployment triggers a pyrotechnic explosive device inside the seat belt pretensioner that permanently fuses the internal mechanical gears. To restore functionality and vehicle safety, you must completely replace the seat belt assembly or send it to a certified facility for a professional rebuild.
Key Facts / At a Glance:
- Mechanism: Pyrotechnic seat belt pretensioners lock permanently upon deployment and cannot be mechanically reset or bypassed.
- Deployment Speed: The system activates in 10 to 15 milliseconds, exerting up to 3,000 Newtons of retraction force.
- Repair Options: Mail-in rebuilding services cost $65 to $100 per belt, while brand-new OEM replacements cost $200 to $600.
- Time Requirement: DIY removal and replacement takes 1 to 2 hours, plus 3 to 5 business days for mail-in rebuild services.
- Mandatory Safety Step: Disconnecting the vehicle battery and waiting 30 minutes to discharge SRS capacitors is strictly required before starting repairs.
Why You Cannot Mechanically Unlock a Deployed Seat Belt
A deployed seat belt cannot be unlocked because the internal mechanism is intentionally destroyed during an accident to save your life. Modern vehicles use pyrotechnic seat belt pretensioners. When crash sensors detect an impact, an electronic signal from the Supplemental Restraint System (SRS) module ignites a small gas generator inside the seat belt housing.
The expanding gas drives a piston down a tube, rapidly turning the spool to retract up to six inches of seat belt slack in 10 to 15 milliseconds. Immediately after this retraction, a mechanical clutch permanently locks the gears into place to hold your body against the seat as the airbag deploys. Because this relies on a single-use explosive charge and physically deformed metal locking pawls, there is no release latch, reset button, or mechanical override available. Attempting to pry the gears apart will only compromise the structural integrity of the housing.
How to Replace a Deployed Seat Belt: Step-by-Step Guide
Replacing a deployed seat belt requires removing the locked unit and installing a rebuilt or brand-new OEM assembly. The entire process takes roughly 1 to 2 hours, involves intermediate DIY skills, and relies entirely on safely discharging the vehicle’s electrical system before unbolting any components.
Before You Start
- Total Time: 1 to 2 hours
- Difficulty: Intermediate
- Cost: $65 to $600 (depending on rebuild vs. OEM)
- Tools Required: Socket set (10mm to 17mm), Torx bit set (T45/T50 commonly used for anchor bolts), plastic interior trim removal tools, flathead screwdriver, SRS-capable bidirectional OBD2 scanner.
- Prerequisites: You must have your replacement or rebuilt seat belt ready to install.
Step 1: Disconnect the Battery and Discharge the SRS System
Locate your vehicle’s main battery and completely disconnect the negative (black) terminal. Isolate the terminal so it cannot accidentally touch the battery post. You must wait a minimum of 30 minutes before proceeding. This waiting period allows the capacitors inside the SRS module to completely drain, eliminating the risk of accidental airbag deployment or electrical shock while handling the pyrotechnic connections.
- Success Checkpoint: The dashboard should be completely dead, the horn should not work, and the dome lights should not turn on.
- Common Mistake: Proceeding immediately after disconnecting the battery. Capacitors hold enough charge to fire a pretensioner for up to 20 minutes after power loss.
Step 2: Remove the B-Pillar Interior Trim Panels
Use a plastic trim removal tool to pry off the B-pillar trim panels (the plastic covering the pillar between your front and rear doors). Start from the top or bottom edges, applying steady pressure to pop the retaining clips free without snapping the plastic. Depending on your vehicle, you may need to remove the door sill plates first to access the bottom edge of the B-pillar trim.
- Success Checkpoint: The seat belt retractor mechanism (the spool at the bottom) and the upper height-adjuster anchor should be fully visible and accessible.
Step 3: Unbolt the Seat Belt Retractor and Anchor
Use a heavy-duty socket or Torx bit to remove the large bolts securing the seat belt to the vehicle frame. There is typically one large bolt at the bottom holding the retractor spool, one holding the end-strap to the floor or seat rail, and one at the top D-ring guide. Keep these specific bolts organized; they are high-strength steel designed specifically for crash loads and must be reused in their exact locations.
- Success Checkpoint: The mechanical belt assembly should be completely detached from the metal frame of the car.
Step 4: Disconnect the SRS Wiring Harness
Locate the electrical connector plugged into the side of the seat belt retractor. SRS connectors are universally color-coded bright yellow. They feature a secondary locking clip that must be released before the plug will pull out. Use a small flathead screwdriver to carefully pop up the locking tab, then slide the connector out of the pyrotechnic charge housing.
- Common Mistake: Yanking on the yellow wires. The connectors are fragile and replacing a damaged vehicle-side SRS harness costs hundreds of dollars in labor alone.
Step 5: Install the New or Rebuilt Seat Belt Assembly
Place your new or freshly rebuilt seat belt assembly into position. Reconnect the yellow SRS wiring harness first, ensuring the locking clip clicks down securely. Hand-thread the anchor bolts into the frame to prevent cross-threading, then tighten them to the manufacturer’s exact torque specifications (typically 30 to 40 ft-lbs, or 40 to 55 Nm). Reinstall the plastic B-pillar trim panels.
- Success Checkpoint: The seat belt should pull out smoothly and retract tightly without sagging, and all trim panels should sit flush against the weatherstripping.
Step 6: Reconnect the Battery and Clear the Airbag Module
Reconnect the negative battery terminal. Turn the ignition to the “ON” position. Your airbag light will likely still be illuminated. You must plug an SRS-capable OBD2 scanner into your diagnostic port under the dashboard to clear the seat belt deployment codes. If the crash was severe enough to trigger airbags, your central SRS airbag control module will have stored “hard” crash data. In this scenario, simply clearing codes will not turn off the light; you must remove the SRS module and send it out for a professional crash data reset, or buy a new module.
Which Replacement Option Should You Choose?
When dealing with a deployed seat belt, you have two primary methods for restoring the vehicle to a safe, drivable condition.
Repair Option Comparison
| Feature | Certified Rebuild Service | Brand New OEM Replacement | Used / Salvage Yard Belt |
|---|---|---|---|
| Average Cost | $65 – $100 | $200 – $600 | $40 – $80 |
| Turnaround Time | 3 to 5 business days | Immediate (if in stock) | Immediate |
| Safety Standard | Meets factory specifications | 100% Factory Guaranteed | Dangerous / Unsafe |
| Color Matching | Exact (uses your original belt) | Varies (older colors discontinued) | Poor (faded or mismatched) |
Option A: Professional Rebuilding Service
Mail your locked, deployed seat belt assembly to a specialized, certified repair laboratory. Technicians drill out the deployed explosive charge, replace the gas generator and locking pawls with OEM-equivalent parts, and reset the internal spool.
- Choose this if: You are on a budget, you are restoring an older car where new OEM parts are discontinued, or your vehicle has a unique custom webbing color you wish to keep.
Option B: Brand New OEM Replacement
Purchase a completely new seat belt assembly directly from a dealership parts department or authorized OEM online vendor.
- Choose this if: You want zero downtime for mailing parts, you demand maximum peace of mind regarding structural integrity, and your budget allows for the highest-tier repair.
Common Mistakes and How to Fix Them
Attempting to bypass safety protocols after an airbag deployment usually results in ruined hardware and persistent dashboard warning lights. Avoid these specific errors:
- Mistake: Cutting the webbing to free a trapped object or passenger.
- The Fix: If you have already cut the belt, you can no longer use a standard rebuild service for $65. You must pay an additional fee (usually $40 to $70) for the rebuild facility to replace the entire webbing strap.
- Mistake: Buying a replacement seat belt from a salvage yard.
- The Fix: Never install junkyard seat belts. Even if a salvage vehicle was not in an accident, environmental exposure weakens the webbing, and you cannot verify if the belt’s torsion bar suffered micro-fractures in a previous collision. Stick to OEM new or your own rebuilt unit.
- Mistake: Using a cheap $15 OBD2 scanner to clear the airbag light.
- The Fix: Standard engine code readers cannot communicate with the SRS module. You must purchase or rent a scanner explicitly advertised as “Bidirectional” or “ABS/SRS capable” (typically costing $100 or more) to read and clear pretensioner deployment codes.
Frequently Asked Questions
Can I drive my car with a deployed seat belt?
No. It is extremely dangerous and illegal in most jurisdictions to drive a vehicle with a deployed seat belt. Because the belt is locked in a fixed position or entirely slack, it cannot secure your body during a secondary collision, drastically increasing the risk of fatal injury.
Will replacing the seat belt turn off my airbag light automatically?
No. Replacing the physical seat belt assembly fixes the hardware, but the vehicle’s computer still remembers the crash event. You must use an SRS-capable diagnostic scanner to clear the specific pretensioner resistance codes from the computer system.
Do seat belt pretensioners deploy if the seat is empty?
It depends on the vehicle’s weight sensors. In most modern cars, the Passenger Occupant Detection System (PODS) disables the passenger airbag and passenger pretensioner if the seat is empty. However, the driver’s side seat belt will deploy in any severe collision.
How do I know if my seat belt buckle pretensioner also deployed?
Many modern cars feature dual-stage pretensioners: one in the retractor spool, and one in the buckle mechanism next to your hip. If the buckle is suddenly sitting two to three inches lower than normal, or the accordion-style plastic sheath around the buckle stalk is compressed and wrinkled, the buckle pretensioner has fired and must also be replaced.
How long does an airbag control module reset take?
If you choose to have your SRS module reset rather than buying a new one, the mail-in process typically takes 2 to 4 business days. Technicians must open the module, connect directly to the EEPROM chip on the circuit board, and flash the hard-coded crash data back to the factory baseline.
Understanding exactly how to unlock a seat belt after an airbag deployed requires accepting that “unlocking” is not the goal—restoring the pyrotechnic safety system is. By systematically replacing or rebuilding the pretensioners, you guarantee the vehicle will properly protect occupants in the event of a future collision.