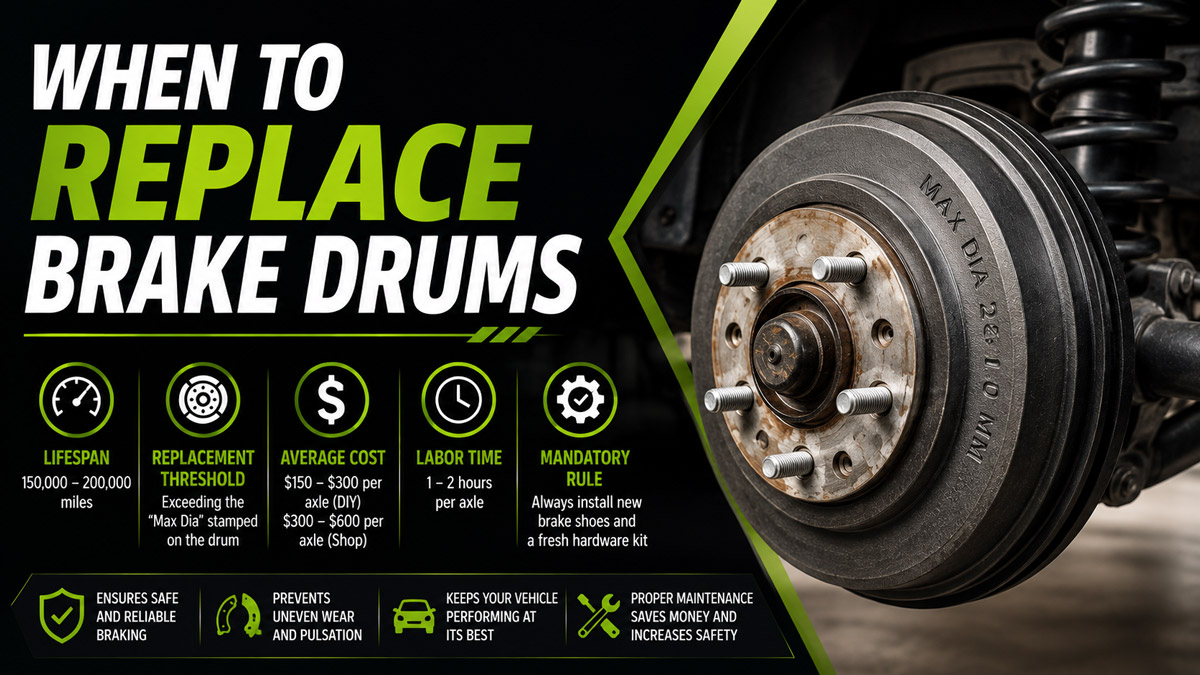
You should replace brake drums when they reach their maximum stamped diameter, show severe scoring or heat cracks, or when you experience a pulsating brake pedal and metal-on-metal scraping. While typical lifespans range from 150,000 to 200,000 miles, environmental corrosion or heavily worn brake shoes can force premature replacement long before you hit that mileage.
Key Facts / At a Glance:
- Average Lifespan: 150,000 to 200,000 miles (roughly double the lifespan of brake shoes).
- Replacement Threshold: Exceeding the “Max Dia” (Maximum Diameter) measurement stamped on the outside of the drum.
- Average Cost: $150 to $300 per axle for DIY; $300 to $600 per axle at a professional shop.
- Labor Time: 1 to 2 hours per axle for a qualified mechanic.
- Mandatory Rule: Always install brand-new brake shoes and a fresh hardware kit when replacing brake drums to prevent uneven wear.
How Long Do Brake Drums Last?
Brake drums typically last between 150,000 and 200,000 miles under normal driving conditions. Because most vehicles utilize a front-biased braking system—where the front disc brakes handle 60% to 70% of the stopping force—the rear brake drums endure significantly less friction and heat. Consequently, a single set of brake drums usually outlasts two to three sets of brake shoes.
However, mileage is not the only determining factor. In regions heavily treated with winter road salts (the “Rust Belt”), cast iron brake drums often succumb to severe exterior corrosion before the inner friction surface wears out. Rust can cause the drum to scale, expand, and fuse to the wheel hub, requiring replacement based on structural integrity rather than friction wear.
What Are the Critical Symptoms of a Failing Brake Drum?
You must inspect or replace your brake drums immediately if you experience pedal pulsation, metal-on-metal grinding, a loose parking brake, or visible structural damage. Identifying the exact symptom dictates whether the drum can be machined or must be discarded.
- Pulsating Brake Pedal: A shuddering or vibrating sensation felt in the brake pedal (or the entire vehicle cabin, rather than just the steering wheel) indicates an out-of-round or warped rear drum.
- Harsh Scraping Noise: A distinct metal-on-metal grinding sound occurs when the friction material on the brake shoes has completely worn away. The bare metal shoe rivets gouge deep grooves into the drum’s surface.
- Loose Parking Brake: If your parking brake requires excessive pulling or fails to hold the vehicle on an incline, the drum’s inner diameter has likely worn beyond operational limits, preventing the shoes from making sufficient contact.
- Visible Damage & Blue Spots: Deep scoring, severe lips on the outer edge, or blue heat spots indicate extreme thermal distress. Blue spots permanently alter the metallurgy of the cast iron, rendering the drum unsafe for continued use.
Expert Insight: Before condemning a brake drum for poor braking performance, check the wheel cylinders. Leaking brake fluid from a blown wheel cylinder will saturate the brake shoes and pool inside the drum. This creates a highly unsafe “grabby” brake pedal that mimics a warped drum, but requires replacing the cylinder and shoes rather than the drum itself.
Can You Machine a Brake Drum Instead of Replacing It?
You can machine (turn) a brake drum on a brake lathe if the deep scoring or out-of-roundness can be completely smoothed out without exceeding the drum’s maximum safe diameter. Machining shaves off a microscopic layer of metal to restore a perfectly flat friction surface.
However, machining is becoming less common. Because modern aftermarket cast iron drums are relatively inexpensive ($40 to $80 each), the labor cost for a mechanic to set up and turn an old drum often exceeds the price of simply buying a brand-new, structurally superior part. Furthermore, turning a drum reduces its mass, making it more prone to overheating and warping in the future.
How Do You Measure a Brake Drum’s Maximum Diameter?
To determine if a brake drum is safe to use, you must measure its inner diameter using a specialized brake drum micrometer and compare it to the “Max Dia” stamped on the drum’s exterior. You cannot accurately measure drum wear with a standard tape measure.
Place the brake drum micrometer inside the drum and expand it until the anvils touch the friction surface. Take measurements at three different points across the diameter (12 o’clock, 4 o’clock, and 8 o’clock) to check for an out-of-round condition. If any single measurement exceeds the stamped maximum diameter—for example, “Max Dia 201mm”—the drum is too thin to safely dissipate heat or contain the outward pressure of the brake shoes. It must be thrown away.
What Are the Steps to Replace Brake Drums?
Replacing brake drums requires safely elevating the vehicle, removing the old components, meticulously cleaning the new hardware, and calibrating the star-wheel adjuster. This process takes a professional 1 to 2 hours per axle.
Phase 1: Removal and Inspection
- Secure the Vehicle: Park on a level surface, chock the front wheels, loosen the rear lug nuts, jack up the rear axle, and lower the vehicle onto jack stands.
- Remove the Drum: Release the parking brake inside the cabin. Pull the drum straight off the hub. Troubleshooting: If rust has fused the drum to the hub, spray penetrating fluid around the center hole. Thread two M8 bolts into the factory release holes on the drum face and tighten them evenly to press the drum off the hub.
- Clean the Assembly: Spray the backing plate, wheel cylinder, and internal hardware thoroughly with brake cleaner to eliminate toxic brake dust.
Phase 2: Installation and Adjustment
- Prepare the New Drum: Brand-new drums are shipped in an oily anti-rust coating. You must wash the entire inside of the new drum with brake cleaner. Failing to do so will permanently ruin your new brake shoes.
- Replace Wear Items: Always install new brake shoes and a new spring hardware kit. Reusing old, uneven shoes will instantly score your new drum.
- Adjust the Star-Wheel: Turn the manual star-wheel adjuster to push the new shoes outward. The adjustment is correct when the new drum slides over the shoes with a faint, momentary whisper of drag when spun by hand.
- Test the System: Reinstall the wheels, lower the vehicle, and pump the brake pedal several times to seat the shoes before performing a low-speed test drive.
What Are the Different Types of Replacement Brake Drums?
When selecting replacement brake drums, standard cast iron is the most common, but heavier-duty vehicles benefit from composite or fin-cooled options.
| Drum Type | Material & Construction | Best Used For | Average Cost (Per Drum) |
| Standard Cast Iron | Single-piece solid iron. Heavy, highly durable, but prone to exterior surface rust. | Daily commuters, standard passenger vehicles, budget DIYers. | $40 – $80 |
| Composite / Aluminum | Aluminum exterior housing with a cast iron inner friction sleeve. Lightweight. | Performance vehicles, reducing unsprung weight. | $90 – $150 |
| Fin-Cooled | Cast iron with exterior cooling fins machined into the circumference. | Heavy-duty trucks, towing vehicles facing long descents. | $70 – $120 |
What Common Mistakes Should You Avoid During Replacement?
DIY mechanics frequently compromise their braking systems by ignoring basic preparation and adjustment protocols when dealing with new drums.
- Forgetting to Clean Factory Oil: Installing a new drum without stripping the protective shipping oil will contaminate the porous brake shoes. This completely eliminates friction and destroys your stopping power.
- Reusing Old Brake Shoes: Old brake shoes develop a unique wear pattern matching the old drum. Placing them inside a brand-new drum will rapidly score the new drum’s perfectly flat surface.
- Neglecting the Star Adjuster: Failing to pre-adjust the star-wheel mechanism leaves too much space between the shoes and the drum. This results in a terrifyingly low, mushy brake pedal the first time you try to stop.
- Ignoring the Backing Plate: The metal backing plate has small raised pads where the brake shoes slide. If you fail to clean and apply a dab of high-temp brake grease to these specific contact points, the brakes will squeak continuously.
FAQ
Do you have to replace both brake drums at the same time?
Yes. You must always replace brake drums and brake shoes in pairs across the same axle. Replacing only one side creates a severe braking imbalance that will cause the vehicle to pull violently to one side during an emergency stop.
How do I know if my brake drum is warped?
A warped or out-of-round brake drum causes a distinct pulsing or surging sensation in the brake pedal as you slow down. Unlike a warped front rotor, which vibrates the steering wheel, a warped rear drum typically vibrates the seat or the entire cabin.
Why does my brake drum get stuck during removal?
Brake drums get stuck for two reasons: severe rust binding the drum to the center wheel hub, or brake shoes that have worn a deep groove into the drum and expanded into it. You must either use the threaded extraction holes to break the rust or manually back off the star-adjuster through the access port to retract the shoes.
Are brake drums worse than disc brakes?
Brake drums are less efficient at dissipating heat and shedding water than modern disc brakes, making them more susceptible to “brake fade” under heavy use. However, they are highly durable, cheaper to manufacture, and easily integrate a mechanical parking brake, which is why they remain common on the rear axles of modern economy cars and trucks.