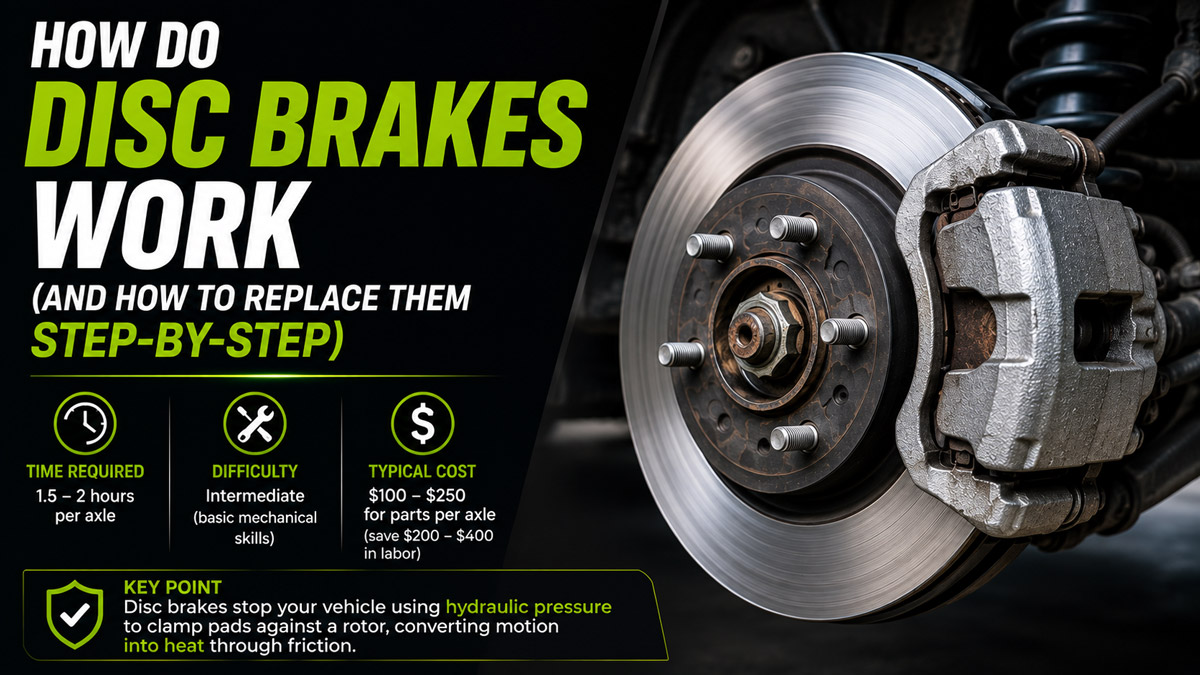
Disc brakes work by converting a vehicle’s kinetic energy into thermal energy through hydraulic friction. To safely replace them, you must lift the vehicle, remove the caliper assemblies, extract the rotors, reset the hydraulic pistons, install clean components, torque the hardware, and bed the new pads. This 90-minute process requires basic hand tools and relies entirely on absolute cleanliness for success.
Before You Start
- Time Required: 1.5 to 2 hours per axle.
- Difficulty: Intermediate (requires basic mechanical comfort and physical strength).
- Typical Cost: $100–$250 for parts per axle (saving $200–$400 in labor).
- Tools & Materials Checklist:
- [ ] New Brake Pads (1 set per axle, including new abutment hardware)
- [ ] New Rotors (2 rotors per axle)
- [ ] Brake Caliper Piston Compression Tool (1)
- [ ] DOT 3, 4, or 5.1 Brake Fluid (1 sealed bottle, matching your cap’s specification)
- [ ] Aerosol Brake Cleaner (1–2 cans)
- [ ] Silicone Ceramic Brake Grease (1 packet/tube)
- [ ] Turkey baster or fluid syringe (for removing old fluid)
- [ ] Wire brush and emery cloth
- [ ] Metric socket set and open-end wrenches
- [ ] 1/2-inch drive Torque Wrench (capable of 20–150 lb-ft)
- [ ] Bungee cord or stiff mechanic’s wire
- [ ] Safety equipment: Floor jack, 2 rated jack stands, wheel chocks, safety glasses.
Phase 1: Teardown and Component Removal
Step 1: Lift and Secure the Vehicle
Park the vehicle on flat, level ground, chock the rear wheels, and secure the front chassis on jack stands before removing the wheels. Using a breaker bar, crack the wheel lug nuts loose by one half-turn while the tires are still touching the ground. Position your hydraulic floor jack under the manufacturer’s designated front lift point, raise the vehicle, and slide two jack stands under the reinforced pinch welds. Lower the jack so the vehicle’s weight rests fully on the stands, then remove the lug nuts and pull the wheels off.
- Success Checkpoint: You’ll know it worked when you can firmly push the vehicle’s fender and it remains entirely stable on the stands without swaying.
- Common Mistake: Relying solely on the hydraulic floor jack. Hydraulic seals can blow without warning, dropping the vehicle instantly. Never place a body part under a car unsupported by mechanical jack stands.
Step 2: Remove the Brake Caliper Body
Unbolt the two caliper slide pins using a socket wrench and hang the caliper assembly from the suspension coil using a bungee cord. The slide pin bolts are the smaller bolts (usually 12mm to 14mm) located at the top and bottom rear of the caliper body. Once removed, pry the caliper body away from the brake pads. Immediately hook a bungee cord through the caliper’s bolt hole and hang it from the heavy metal coil spring above.
- Success Checkpoint: You’ll know it worked when the caliper is suspended securely with the black rubber hydraulic brake hose exhibiting zero tension.
- Common Mistake: Letting the caliper dangle by its rubber brake hose. This internal tears the hose layers, leading to a collapsed line and catastrophic brake failure later.
Step 3: Extract the Pads, Bracket, and Rotor
Pull the old brake pads out of the mounting bracket, unbolt the massive bracket bolts, and pull the rotor off the wheel hub. First, slide the old brake pads out of their metal tracks. Next, locate the two large bracket mounting bolts (usually 17mm to 19mm) located further back on the steering knuckle. These are tight; you may need a breaker bar. Once the bracket is off, pull the metal rotor straight toward you off the threaded wheel studs. If the rotor is rusted to the hub, thread two M8 bolts into the small threaded holes on the rotor hat and tighten them evenly to pop the rotor off.
- Success Checkpoint: You’ll know it worked when you are left staring at a bare, flat, rusty wheel hub with five threaded studs pointing at you.
- Common Mistake: Attempting to force the rotor off with a hammer without removing the caliper mounting bracket first. The rotor cannot physically bypass the bracket.
Phase 2: Preparation and Component Installation
Step 4: Clean the Hub and Mount the New Rotor
Scrub the bare wheel hub fiercely with a wire brush until raw metal shines, spray the new rotor with brake cleaner, and slide it onto the studs. Rust buildup on the hub face prevents the new rotor from sitting perfectly flat. Scrub it with a wire brush and wipe it clean. Next, take your new rotor—which is coated in sticky rust-preventative shipping oil—and spray both sides heavily with aerosol brake cleaner, wiping it dry with a clean microfiber towel. Slide the clean rotor onto the wheel studs and thread one lug nut on temporarily to hold it tight against the hub.
- Success Checkpoint: You’ll know it worked when the new rotor spins perfectly true without wobbling, and you feel no oily residue on its surface.
- Common Mistake: Skipping the hub wire-brushing. Even 1 millimeter of rust on the hub translates to significant lateral runout at the edge of the rotor, causing violent steering wheel vibration when braking.
Step 5: Reset the Caliper Piston
Siphon one ounce of fluid from the master cylinder reservoir under the hood, place an old pad against the caliper piston, and compress it flush using your caliper tool. Because the new pads are vastly thicker than the worn ones, the caliper’s hydraulic piston must be pushed back into its bore to make room. Open the hood, locate the brake fluid reservoir, and use a syringe to remove a small amount of fluid so it doesn’t overflow. Place one of your old, discarded brake pads flat against the hollow steel piston on the hanging caliper. Insert the compression tool and slowly twist clockwise to push the piston completely flush with the caliper housing.
- Success Checkpoint: You’ll know it worked when the metal piston is fully retracted and flush with the rubber dust boot surrounding it.
- Common Mistake: Rushing the compression. Pushing the fluid backward too fast can flip the seals inside the ABS module. Turn the tool slowly.
Step 6: Install Hardware and Lubricate the Pads
Reinstall the heavy caliper bracket, snap in the new stainless abutment clips, and apply silicone grease strictly to the metal backing plates of the new pads before slotting them in. Bolt the caliper bracket back over the new rotor (see Step 7 for torque specs). Remove the old, crusty tin clips from the bracket and press the shiny new ones (included with your pads) into place. Dab a pea-sized amount of high-temp silicone ceramic grease onto the “ears” of the new brake pads and across the back metal shim where the piston will touch. Slide the pads securely into the bracket’s clips.
- Success Checkpoint: You’ll know it worked when the pads sit parallel to the rotor with about 1mm of clearance, and you can slide them slightly inward and outward with your thumbs.
- Common Mistake: Getting grease on the rotor face or the friction material of the pad. Lubricant on friction surfaces instantly destroys the pad’s stopping power.
Phase 3: Reassembly and Bedding
Step 7: Torque the Hardware and Wheels
Slide the caliper body over the new pads and tighten the bracket bolts, slide pins, and wheel lug nuts to their exact manufacturer torque specifications. Slide the retracted caliper body over the new pads. Using your torque wrench, tighten the large bracket bolts (typically 70–100 lb-ft) and the smaller slide pin bolts (typically 25–35 lb-ft). Verify exact specs for your make and model. Remove the temporary lug nut holding the rotor, mount the wheel, and hand-thread all lug nuts. Lower the vehicle to the ground and tighten the lug nuts in a crisscross “star” pattern to 80–100 lb-ft.
- Success Checkpoint: You’ll know it worked when the torque wrench “clicks” at the specified setting for every single bolt on the assembly.
- Common Mistake: Using an impact gun to blindly hammer the lug nuts on, which warps the new rotors before you even drive the car.
Step 8: Pump the Brakes and Bed the Pads
Pump the brake pedal firmly before starting the engine, top off the under-hood fluid, and execute five rolling slowdowns to transfer pad material to the rotor. Sit in the driver’s seat (engine off) and press the brake pedal 5 to 10 times. It will initially fall to the floor—this is normal. Keep pumping until it becomes rock hard. Check the fluid reservoir under the hood and top it up to the “MAX” line. Finally, drive to a safe road and accelerate to 40 mph, then brake firmly down to 10 mph. Do not come to a complete stop. Repeat this 5 times in a row, then drive normally for 5 minutes to let the brakes cool.
- Success Checkpoint: You’ll know it worked when the brakes smell slightly hot, but the pedal feels highly responsive and stops the car smoothly without squealing.
- Common Mistake: Forgetting to pump the pedal before shifting into drive. The retracted pistons need several pumps to reach the new pads; skipping this means you will have zero brakes on your first stop.
Common Mistakes and How to Fix Them
- Spongy or Soft Brake Pedal:
- Cause: You accidentally opened a bleeder valve or a line, introducing air into the sealed hydraulic system.
- Fix: You must bleed the brake lines at all four wheels using fresh fluid until it runs completely clear and bubble-free.
- Squealing at Low Speeds:
- Cause: You forgot to apply silicone grease to the pad backing plates, causing high-frequency metal-on-metal vibration.
- Fix: Remove the caliper and apply grease to the back of the pads (never the front) and the abutment clips.
- Vehicle Pulls to One Side When Braking:
- Cause: A seized caliper slide pin or a stuck piston is causing only one side of the vehicle to clamp down.
- Fix: Pull the slide pins out, clean them, and heavily re-grease them. If the piston itself is seized, the caliper must be replaced.
- Violent Steering Wheel Shake:
- Cause: Rust was left on the hub, or you sat at a dead stop with a hot brake pedal during the bedding process, imprinting a localized pad deposit on the rotor.
- Fix: Remove the rotor, wire-brush the hub properly, and resurface (machine) or replace the rotor.
Variations in the Process
- Rear Brakes with Integrated Parking Brakes: If you are working on rear disc brakes, you generally cannot use a standard C-clamp compression tool. The pistons require a specialized “cube” or twist-in tool that simultaneously rotates and compresses the piston to reset the parking brake ratcheting mechanism.
- Fixed vs. Floating Calipers: The guide above details standard “floating” calipers (with slide pins). If you have high-performance “fixed” calipers (like Brembos), there is no bracket to remove. You simply punch out the retaining pins holding the pads from the top, slide the old pads out, and compress the dual pistons simultaneously.
- Electronic Parking Brakes (EPB): Modern vehicles with an electric parking brake switch often require a scan tool to put the rear calipers into “Service Mode” before you can manually push the piston back.
How Long Does It Take & What Does It Cost?
- Time: A first-timer should budget exactly 2 hours per axle (front or rear). An experienced DIYer can do an axle in about 45 minutes.
- Cost: Dealerships charge between $400 and $600 per axle for a pad and rotor replacement. Buying the parts yourself costs around $100 to $250 per axle depending on the vehicle size and pad compound (ceramic vs. semi-metallic). The required tools will cost a first-timer roughly $100, which pays for itself on the first job.
Frequently Asked Questions
How long do disc brake pads typically last? Front brake pads typically last between 30,000 and 50,000 miles, while rear pads (which handle less braking force) often last 60,000 miles or more. Heavy stop-and-go city driving will drastically reduce this lifespan compared to highway driving.
Can I just replace the pads and leave the old rotors? It is highly discouraged. Old rotors develop microscopic grooves matching the old pads. Slapping flat new pads onto grooved rotors severely reduces braking efficiency and almost always causes squeaking. Always replace or professionally resurface rotors when changing pads.
What happens if I don’t bed the new brakes? Failing to bed the brakes prevents a thin, even layer of friction material from transferring to the bare steel rotor. This usually results in permanently squeaky brakes and uneven wear, which feels like a warped rotor after a few thousand miles.
Can I mix DOT 3 and DOT 4 brake fluid? Yes. DOT 3 and DOT 4 are both glycol-based and completely miscible (blendable). DOT 4 simply has a higher boiling point. However, never mix DOT 5 (silicone-based) with DOT 3, 4, or 5.1, as it will coagulate and destroy the hydraulic system.