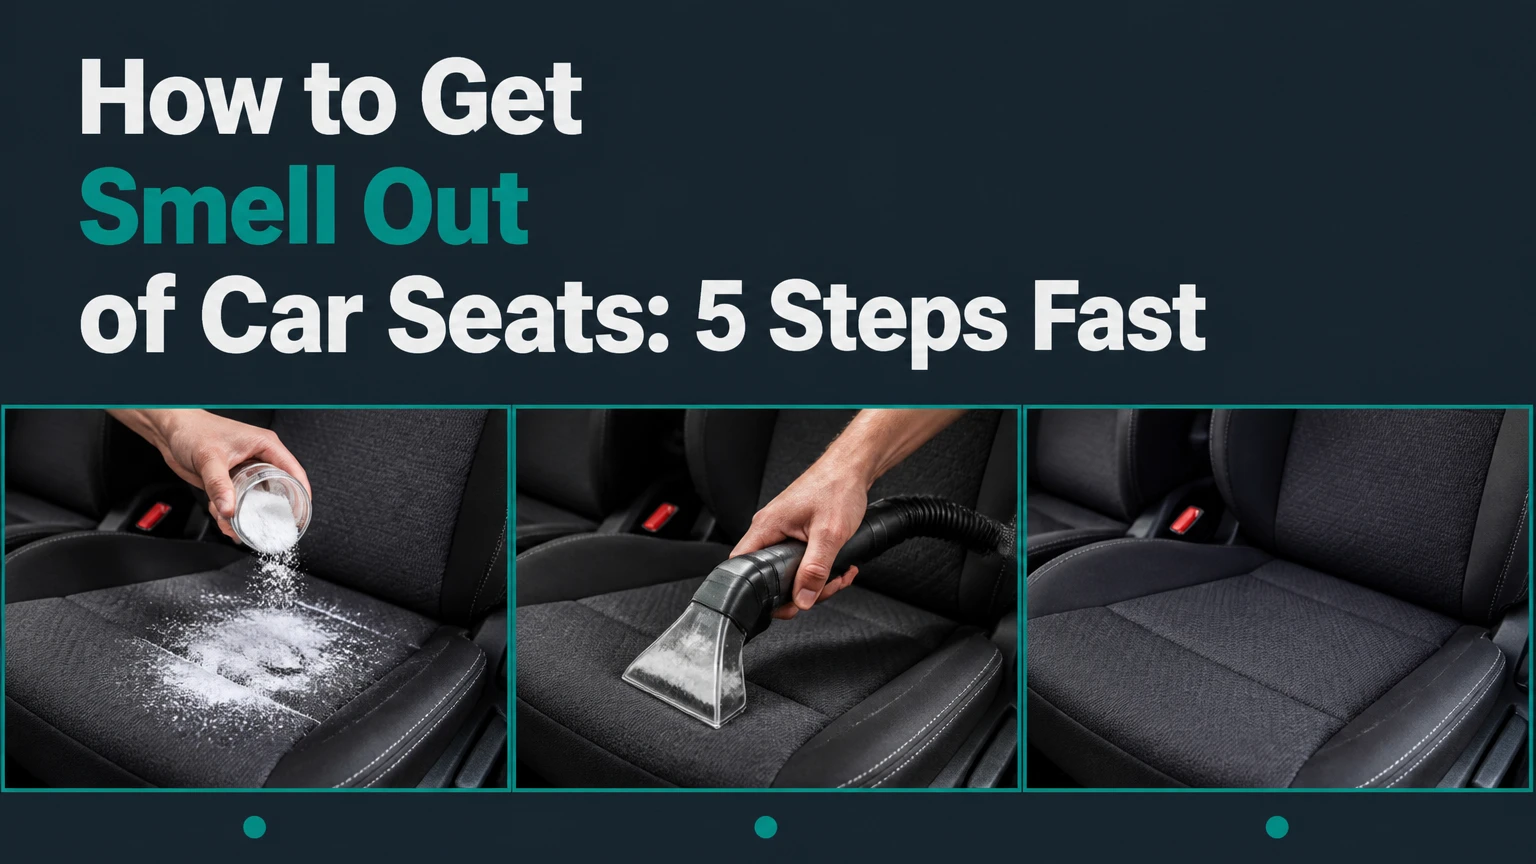
To get smell out of car seats, remove the odor source, clean the affected upholstery with a material-safe product, extract dissolved residue, and dry the cushion completely. Fabric seats usually need an enzyme cleaner for milk, urine, vomit, or pet odor, while leather seats need low-moisture leather cleaner and careful drying.
Key Facts
Odor returns when bacteria, spilled liquid, smoke residue, or mold remains in the seat fabric or foam.
Enzyme cleaner is the most suitable first treatment for protein-rich odors from milk, urine, vomit, sweat, and pets.
Baking soda absorbs some surface moisture and odor but cannot reliably clean contaminated cushion foam.
Vinegar should not be mixed with bleach, ammonia, or other cleaning chemicals.
A wet-dry vacuum removes more odor-causing residue than wiping alone, but excessive water can trap moisture inside polyurethane foam.
A completely dry seat usually requires 4-12 hours of airflow, and heavily wetted foam may need 24 hours.
What Actually Removes Car Seat Odors?
Car seat odor removal requires source removal, chemical breakdown, or physical extraction. Air freshener sprays mainly mask volatile compounds, whereas vacuuming, enzyme treatment, upholstery cleaning, and extraction remove or alter the material producing the smell.
Odor can exist in several layers: loose debris on the surface, residue in the upholstery fibers, liquid inside the foam, and contamination on seat belts, mats, door pockets, or the HVAC system. Cleaning only the visible seat often produces a temporary improvement because heat and humidity bring trapped compounds back into the air.
The most reliable sequence is mechanical removal first, targeted chemistry second, extraction third, and drying last. Deodorizing powder or charcoal has a limited supporting role after cleaning.
How does odor become trapped?
Fabric absorbs liquid through capillary action, allowing milk, sweat, urine, and vomit to travel beyond the visible stain. Polyurethane foam then holds the liquid in its open cells, where bacteria can continue breaking down organic material and releasing malodorous compounds.
Smoke behaves differently. Tobacco and cannabis smoke leave tar, oils, and fine particles on fabric, headliners, plastic trim, carpets, and ventilation components. A seat-only treatment cannot remove smoke from the rest of the cabin.
Mold or mildew odor indicates a moisture problem rather than an ordinary stain. Water leaks, wet floor insulation, blocked sunroof drains, and damp seat foam require diagnosis before deodorizing.
Which Cleaner Fits the Odor and Seat Material?
The best cleaner depends on the odor molecule, contamination depth, and upholstery material. Use an enzyme cleaner for biological spills on fabric, a pH-neutral upholstery cleaner for general grime, and a dedicated leather cleaner for coated leather.
| Odor or contamination | Best first treatment | Typical dwell time | Avoid |
|---|---|---|---|
| Milk, formula, vomit | Enzyme upholstery cleaner | 15-30 minutes | Perfume before cleaning |
| Urine or pet accident | Enzyme cleaner with extraction | 30-60 minutes | Ammonia-based cleaner |
| Sweat and body odor | Upholstery cleaner, then extraction | 5-15 minutes | Flooding the foam |
| Cigarette or cannabis smoke | Vacuum, low-moisture cleaner, cabin cleaning | 10-20 minutes per surface | Fragrance-only sprays |
| Mold or mildew | Moisture-source repair and professional cleaning | 24-48 hours for inspection and drying | Sealing damp material |
| Gasoline or solvent | Ventilation and professional assessment | Do not soak | Ozone, bleach, heat, or ignition sources |
A bio-enzymatic product works on organic residues because enzymes break down proteins, fats, and carbohydrates. It does not neutralize gasoline, motor oil, melted plastic, or every smoke compound. Always test a hidden area because dyes, protective coatings, and aftermarket upholstery vary.
Baking soda is useful after the seat has been cleaned and dried. Vinegar can reduce some alkaline odors, but its own acetic smell may linger, and it is not a substitute for extraction. Never mix vinegar with chlorine bleach because the combination can release chlorine gas.
Fabric, vinyl, leather, and perforated leather
Fabric seats tolerate more water than leather, but fabric still needs controlled application. Spray the product onto the affected area until evenly damp, not until liquid runs into the cushion.
Coated automotive leather has a protective finish that should be cleaned with a leather-specific product and a lightly damp microfiber cloth. Do not scrub aggressively, use household degreaser, or leave liquid sitting on the surface.
Perforated leather requires extra control. Liquid can pass through the holes into foam, so apply cleaner to the cloth rather than pouring it onto the seat. Avoid inserting brushes or tools into seat perforations.
Heated seats and seats containing side airbags need special caution. Do not remove upholstery, disconnect wiring, or inject liquid near electrical connectors unless the vehicle service information specifically permits it.
Before You Start
| Requirement | Typical specification | Practical target |
|---|---|---|
| Working time | 45-90 minutes | One or two seats |
| Drying time | 4-12 hours | 24 hours for saturated foam |
| DIY cost | $10-$35 | Cleaner, towels, brush |
| Extraction option | $40-$80 rental per day | Portable carpet extractor |
| Air movement | 1 fan or air mover | Open windows 2-5 cm |
| Basic tools | Vacuum, microfiber cloths, brush | Crevice and upholstery attachments |
Work outdoors or in a well-ventilated covered area. Read the vehicle owner’s manual and the cleaner label before applying liquid, especially if the seat has heating elements, ventilation, Alcantara, suede, or a side airbag.
Remove child seats before cleaning the vehicle seat. Clean the child restraint only according to its manufacturer’s instructions; many harnesses must not be soaked, bleached, or machine-washed because treatment can weaken the webbing.
How to Get Smell Out of Car Seats
The complete process takes about 45-90 minutes of active work and 4-12 hours of drying. Success depends more on finding the original spill and keeping foam moisture under control than on using the strongest-smelling product.
Step 1: Find and Remove the Odor Source
Remove rubbish, food, floor mats, seat covers, and child restraints before cleaning. Inspect the seat seams, the gap between the backrest and cushion, under the seat, seat rails, belt buckles, carpet edges, and nearby door pockets.
Use a flashlight rather than relying only on smell. A UV light can sometimes reveal older urine or organic residue, but it does not identify every stain and can produce false positives from detergent, fabric brighteners, or adhesives.
Vacuum slowly with a crevice tool. Run the nozzle along stitching and press the upholstery gently to release loose particles without damaging the fabric.
You’ll know it worked when: loose crumbs, hair, dust, and visible residue are gone, and the smell does not intensify when you move the seat forward and backward.
Common mistake: Cleaning the seat while the contaminated floor mat or child-seat cover remains in the cabin.
Step 2: Match the Seat Material
Check whether the surface is cloth, vinyl, coated leather, suede, or synthetic microfiber. Apply a small amount of product to a hidden area and wait until it dries before treating the visible seat.
For cloth, use an automotive upholstery cleaner or enzyme cleaner selected for the odor source. For leather, use a leather cleaner on a microfiber towel, then wipe with a separate lightly damp cloth. For vinyl, use a mild interior cleaner that does not leave an oily dressing.
Keep liquid away from seat controls, wiring, belt pretensioners, heating switches, and airbag seams. Automotive side airbags commonly deploy from the seat side, so avoid aggressive scrubbing or soaking around labeled airbag panels.
You’ll know it worked when: the test area has no dye transfer, whitening, tackiness, swelling, or change in gloss.
Common mistake: Treating leather like fabric by spraying a large quantity directly onto the cushion.
Step 3: Treat the Odor Source
Apply enzyme cleaner to organic contamination on fabric, covering the affected fibers evenly. Typical dwell time is 15-30 minutes, although a severe urine or vomit spill may require the longer period stated on the product label.
Keep the treatment damp during the dwell period, because dried residue limits enzyme activity. Do not combine enzyme cleaner with disinfectant, bleach, vinegar, or another chemical unless the manufacturer explicitly confirms compatibility.
For general sweat or food grime, use a diluted upholstery cleaner according to its label. For smoke, clean the seat surface with a low-residue upholstery product, but plan to treat the headliner, carpets, trim, and cabin air filter as well.
For gasoline, diesel, paint thinner, or solvent odor, do not add water or heat. Remove ignition sources, ventilate the vehicle, and arrange professional cleaning if fuel entered the foam or carpet underlay.
You’ll know it worked when: the odor is weaker before extraction and no visible residue spreads beyond the original treatment area.
Common mistake: Pouring cleaner directly into the cushion to reach deep contamination. Controlled reapplication is safer than one heavy soak.
Step 4: Agitate and Extract Without Flooding the Foam
Agitate fabric with a soft or medium nylon upholstery brush using short overlapping strokes. Work one section at a time, typically 30 by 30 cm, so the cleaner does not dry before extraction.
Use a portable extractor or wet-dry vacuum to remove the dissolved residue. If using an extractor, make one controlled spray pass followed by three or more vacuum-only passes. Vacuum-only passes remove moisture without adding more water.
A steam cleaner can loosen grime, but steam does not automatically remove odor. Excessive heat and moisture can drive contamination deeper, damage adhesives, distort synthetic fibers, or leave foam damp for too long.
Leather generally needs wiping rather than hot-water extraction. Remove cleaner residue with a barely damp cloth, then dry the surface with a clean towel.
You’ll know it worked when: the extracted liquid becomes clearer, the fabric feels damp rather than wet, and no liquid pools when you press a dry towel against the cushion.
Common mistake: Continuing to spray because the seat still smells while wet. Wet upholstery often smells stronger temporarily, so judge the result only after drying.
Step 5: Absorb Residual Surface Odor
Apply a thin, even layer of baking soda only after the fabric is nearly dry. Leave it for 4-12 hours, then vacuum slowly with an upholstery or brush attachment.
Baking soda can absorb some moisture and reduce surface odor, but it cannot digest urine proteins or remove contamination deep inside foam. A thick layer may also lodge in seams, seat tracks, and perforations.
Activated charcoal bags can help with residual airborne odor inside a closed, dry vehicle. Charcoal adsorbs gas molecules on its porous surface, but it does not clean a stained seat and works slowly compared with source removal.
You’ll know it worked when: the seat has no powder residue, feels dry, and produces little or no odor when warmed by sunlight or cabin heat.
Common mistake: Using baking soda as the first and only treatment for a soaked milk, urine, or vomit spill.
Step 6: Dry the Seat Completely
Open the windows 2-5 cm and place a fan or air mover so air crosses the seat surface. Use towels to blot first, then continue airflow for at least 4-8 hours after moderate cleaning.
In cool or humid weather, drying may take 12-24 hours. A dehumidifier placed outside the vehicle with air ducted safely toward an open window can reduce humidity, but never operate a fuel-burning appliance inside the car.
Press a clean, dry towel into the cushion at several points. If the towel feels damp or the foam feels cool and spongy, continue drying. Do not reinstall a child restraint until the vehicle seat and the restraint contact surfaces are completely dry.
You’ll know it worked when: the cushion feels firm and dry, the windows show no persistent condensation, and the smell does not return after the cabin warms.
Common mistake: Closing the vehicle immediately after cleaning. Trapped humidity can create a musty odor and prolong foam drying.
Which Odor-Removal Method Is Best?
Enzyme treatment plus controlled extraction is the best DIY method for organic spills on fabric seats. Professional low-moisture cleaning is preferable for smoke, repeated contamination, mold, or odor that has penetrated multiple interior surfaces.
| Method | Best use | Active time | Typical total cost | Main limitation |
|---|---|---|---|---|
| Baking soda | Dry surface odor | 10 minutes | $2-$8 | Does not clean deep foam |
| Vinegar solution | Some alkaline surface odors | 10-20 minutes | $2-$6 | Residual vinegar smell and limited penetration |
| Enzyme cleaner | Milk, urine, vomit, pets | 30-60 minutes | $8-$20 | Poor choice for fuel or solvent odor |
| Upholstery extractor | Dirt and dissolved residue | 45-90 minutes | $40-$80 rental | Can over-wet foam |
| Steam cleaner | Light grime and crevices | 30-60 minutes | $30-$100 rental | Heat does not replace extraction |
| Professional detailing | Severe or widespread odor | 2-8 hours | $100-$350 typical | Higher cost and vehicle downtime |
Ozone and chlorine dioxide are oxidation treatments, not substitutes for cleaning. They can reach vents and hidden cavities, but they do not remove the physical spill, and concentrated oxidizers can irritate lungs and damage rubber, coatings, dyes, or leather.
Never occupy a vehicle during ozone or chlorine dioxide treatment. Remove people, pets, and plants, follow the equipment instructions, ventilate thoroughly afterward, and use a professional when the source is unknown. The United States Environmental Protection Agency warns that ozone is a lung irritant and that indoor ozone generators are not a dependable solution for contaminant removal.
Why Does the Smell Return?
A returning odor usually means the contamination remains in foam, carpeting, a seat cover, or the HVAC system. Heat and humidity increase evaporation, so a seat may smell clean in the morning and offensive after several hours in a warm parked car.
| Returning odor pattern | Likely source | Next diagnostic step | Suitable response |
|---|---|---|---|
| Stronger on hot days | Organic residue in foam | Press dry towel into cushion | Repeat enzyme treatment and extract |
| Smell returns with fan on | Cabin filter or HVAC evaporator | Replace filter and inspect intake | Clean HVAC system professionally |
| Musty smell after washing | Damp foam or carpet | Check under mats and carpet edges | Forced drying and moisture repair |
| Smoke odor everywhere | Headliner, carpet, trim | Smell each cabin zone separately | Whole-interior cleaning |
| Sharp fuel smell | Fuel spill or leak | Stop driving if odor is intense | Mechanical inspection and remediation |
A cabin air filter can spread odor through the ventilation system, although changing the filter alone will not remove a contaminated seat. If odor changes when the fan switches on, inspect the filter housing, air intake, evaporator area, and nearby carpet.
How do you handle mold or mildew odor?
Mold odor requires moisture-source correction before deodorizing. Check door seals, windshield seals, sunroof drains, trunk wells, air-conditioning drainage, and wet carpet beneath the seat.
Do not simply mask visible mold with fragrance or baking soda. Small surface contamination may be professionally cleaned, but extensive growth, repeated dampness, or contaminated foam warrants an automotive restoration specialist because porous foam may not be reliably salvageable.
How do you remove smoke odor?
Smoke removal requires cleaning all exposed cabin surfaces, not only the seats. Vacuum fabric, clean the headliner with minimal moisture, wipe plastic and glass, wash floor mats, replace the cabin air filter, and inspect the trunk and spare-wheel well.
Avoid saturating the headliner because adhesive failure can cause sagging. Ozone may be a final professional step after physical cleaning, but using it first often leaves smoke residue in place and can conceal the remaining source.
Common Mistakes and How to Fix Them
- Spraying perfume before cleaning: Remove fragrance with ventilation and clean the source. Fragrance molecules combine with organic odor and make diagnosis harder.
- Mixing cleaning chemicals: Stop immediately, ventilate the car, and do not add another product. Bleach and ammonia can create dangerous gases.
- Flooding the cushion: Extract repeatedly, use fans, and check beneath the seat. Persistent dampness needs professional drying.
- Using household leather products: Remove oily residue with a compatible leather cleaner and test a hidden area before further treatment.
- Scrubbing a stain outward: Work from the outside edge toward the center to reduce spreading.
- Ignoring the underside: Inspect seat rails, carpet seams, mats, and the area beneath child restraints because spills often travel downward.
One practitioner rule is to use the least liquid that can complete the job. More product does not equal deeper cleaning when the extractor cannot recover the added moisture.
Another rule is to separate cleaning from deodorizing. A seat that smells better because it is covered in fragrance has not necessarily been cleaned.
When Should You Hire a Professional?
Professional detailing is justified when odor persists after two controlled treatments, contamination reaches foam, smoke affects the headliner and HVAC, or mold follows a leak. Typical professional interior odor remediation costs $100-$350, while severe flood, sewage, or biological contamination can cost substantially more because seats, carpet, and trim may require removal.
Professional service should include source inspection, material identification, vacuuming, appropriate cleaner selection, extraction or low-moisture cleaning, forced drying, and a recurrence check. Ask whether the quoted service includes the cabin air filter and moisture diagnosis.
Do not accept a gas treatment as the entire solution for milk, urine, vomit, or mold. Oxidation can reduce airborne odor while contaminated porous material remains inside the vehicle.
Situational Variations
Milk or formula spill
Blot fresh liquid with towels, remove solid residue, apply enzyme cleaner to fabric, allow 15-30 minutes of dwell time, and extract. Repeat after drying if the smell returns in warm weather.
Pet odor
Vacuum hair first because hair retains skin oils and dander. Treat the exact accident area with enzyme cleaner, including nearby carpet, then use an upholstery extractor and dry for 12-24 hours if the cushion was heavily affected.
Vomit odor
Remove solids with disposable tools, ventilate, and use enzyme cleaner after blotting. Check the seat belt, buckle receiver, floor mat, and door sill because splatter commonly extends beyond the seat.
Cigarette smell
Clean every porous surface, replace the cabin air filter, and inspect the headliner and trunk. A seat-only treatment cannot remove smoke odor distributed through the cabin.
Leather seat odor
Wipe with a leather-safe cleaner, avoid soaking perforations, dry with airflow, and apply conditioner only after the surface is clean and dry. Conditioner can reduce drying of finished leather but will not remove contamination trapped below perforations.
How Much Time and Money Should You Expect?
A minor surface odor usually takes 20-40 minutes of work and $5-$15 in supplies. A biological spill requiring enzyme treatment and extraction takes 45-90 minutes of work plus 4-24 hours of drying, with typical DIY costs of $15-$80 depending on equipment.
| Job size | DIY active time | Drying time | Typical DIY cost | Professional range |
|---|---|---|---|---|
| One small fabric spot | 20-40 minutes | 4-8 hours | $5-$15 | $50-$100 |
| One soaked seat | 45-90 minutes | 12-24 hours | $15-$80 | $100-$200 |
| Two or more contaminated seats | 1.5-3 hours | 12-24 hours | $25-$100 | $150-$300 |
| Smoke throughout cabin | 3-6 hours | 8-24 hours | $40-$120 | $200-$500 |
| Mold after water leak | 2-6 hours inspection | 24-48 hours | Varies widely | $250-$1,000+ |
These are typical consumer and detailing ranges, not fixed prices. Vehicle size, local labor rates, seat construction, contamination depth, and whether components must be removed determine the final cost.
FAQ
Can I use dish soap on car seats?
Use dish soap only for a small, compatible fabric spot and dilute it heavily, because concentrated dish detergent can leave surfactant residue that attracts soil. Automotive upholstery cleaner is safer for larger areas, while leather requires a leather-specific product.
How do I remove a wet smell from car upholstery?
Extract as much water as possible with a wet-dry vacuum, make several vacuum-only passes, open the windows, and direct a fan across the seat. Drying commonly takes 4-12 hours, but foam soaked through to its core may require 24 hours or professional equipment.
Does sunlight remove car seat odor?
Sunlight can warm and dry upholstery, which may reduce odor temporarily, but ultraviolet exposure does not remove a hidden spill. Limit prolonged direct sun on leather because heat and UV can accelerate fading, drying, and finish damage.
Can I spray disinfectant on fabric car seats?
Only use a disinfectant labeled for automotive upholstery and follow its required wet contact time. Disinfectant may reduce certain microorganisms, but it does not remove the proteins, fats, or residue that produce many seat odors.
Should I remove the car seat to clean underneath it?
Remove the vehicle’s child restraint and movable seat covers before cleaning, but do not remove a powered vehicle seat unless you understand the wiring and airbag system. Inspect underneath with the seat adjusted forward and backward, then have a technician remove it if deep contamination requires access.
Why does my car seat smell worse after cleaning?
A stronger odor immediately after cleaning commonly comes from wet foam releasing volatile compounds. Continue extraction and forced drying; if the smell remains after 24 hours, inspect for hidden organic residue, mold, a dirty cabin filter, or a leak.
The Bottom Line
The safest way to get smell out of car seats is to identify the source, vacuum debris, match the cleaner to the upholstery and odor, extract without flooding the foam, and dry the seat completely. Use enzyme cleaner for milk, urine, vomit, and pet contamination; use low-moisture cleaning for leather; and reserve ozone or chlorine dioxide for carefully controlled professional work after physical cleaning.