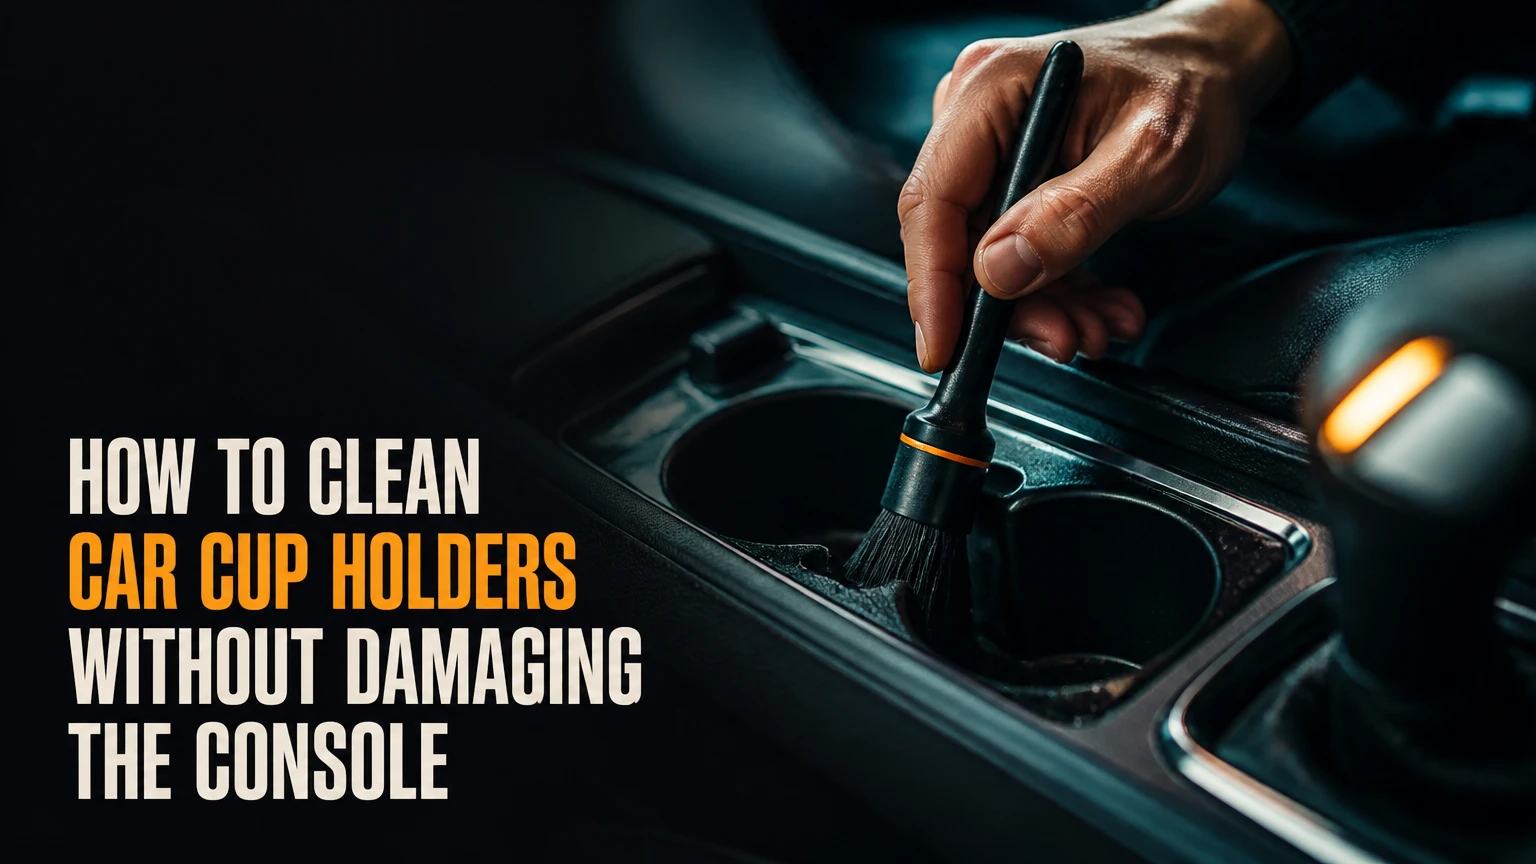
To clean car cup holders, remove loose debris, vacuum, soften residue with a barely damp cleaner, scrub with a soft brush, wipe with microfiber, detail the seams, and dry completely. The full process takes about 5 minutes for routine dirt or 15-20 minutes for dried soda, with the main safety rule being to prevent liquid from pooling inside the console.
Key Facts
A removable rubber or silicone insert can usually be washed separately with warm water and dish soap.
Fixed cup holders should be cleaned with a damp cloth or brush, never by pouring liquid directly into the console.
Detailing gel removes dry crumbs and dust, but it does not dissolve cured soda, coffee, milk, or syrup.
A 1:10 dilution of automotive all-purpose cleaner is a typical starting point for durable plastic, subject to the product label.
Routine cleaning takes about 5 minutes; heavily dried residue commonly requires 15-20 minutes and several dampening cycles.
Metal tools, abrasive pads, and uncontrolled steam can permanently scratch, discolor, or deform interior materials.
What Makes Car Cup Holders Difficult to Clean?
Car cup holders become difficult to clean when sweet drinks, coffee oils, milk proteins, dust, and condensation combine in a confined space. Sugar dries into a hard, glass-like film, while oils create a tacky layer that traps crumbs along the bottom edge, spring tabs, and perimeter seam.
Cup holders also vary in construction. A removable thermoplastic elastomer liner can be rinsed in a sink, but a molded console may sit above wiring, a USB module, a wireless charging pad, a shifter mechanism, or window-switch electronics. The same amount of water that is harmless in a loose insert can cause trouble in a fixed console.
The correct cleaning method therefore depends on three attributes: material, access, and contamination. Plastic and rubber tolerate different chemicals, an open removable insert tolerates more water than a fixed holder, and dry crumbs need a different tool than hardened syrup.
Identify the Material Before Applying Cleaner
| Surface or part | Typical appearance | Safest first cleaner | Main risk |
|---|---|---|---|
| Removable rubber liner | Black, flexible, textured | Warm water plus dish soap | Excess heat can warp soft rubber |
| Hard molded plastic | Rigid, colored, lightly textured | Damp microfiber plus diluted interior cleaner | Whitening from harsh solvent |
| Soft-touch coating | Satin, slightly rubbery finish | Water-damp microfiber only at first | Coating can become tacky or peel |
| Leather or vinyl trim | Grain pattern, stitched or padded | Manufacturer-approved leather or vinyl cleaner | Dye transfer or finish damage |
| Gloss-black trim | Reflective, smooth surface | Clean microfiber and mild interior cleaner | Fine scratches and swirl marks |
Owner-manual instructions override generic advice, particularly for soft-touch coatings, Alcantara-like materials, leather, and specialty finishes. Test any unfamiliar product on a hidden area for 10 minutes, then inspect for color change, tackiness, or dullness.
What Do You Need Before You Start?
A basic car cup holder cleaning kit needs one vacuum with a crevice attachment, two microfiber cloths, a soft detailing brush or old toothbrush, cotton swabs, and a small amount of cleaner. Add warm water, a plastic pick, and a dry towel for dried spills, but do not prepare a bucket of water for a fixed center console.
Before You Start
| Requirement | Typical specification | Why it matters |
|---|---|---|
| Time | 5 minutes routine, 15-20 minutes deep clean | Allows residue-softening time |
| Cost | $0-$15 with household supplies | Dish soap and cloths often suffice |
| Vacuum | Crevice nozzle, dry setting | Removes grit before wiping |
| Cleaner | 2-4 drops dish soap in 250 ml water, or APC at label dilution | Limits residue and chemical exposure |
| Brushes | Soft nylon or horsehair, 15-25 mm head | Reaches texture without scratching |
| Cloths | Two clean, low-lint microfiber towels | Separates dirty wiping from drying |
| Detail tools | Cotton swabs and wood or plastic pick | Cleans seams without gouging plastic |
Switch the vehicle off, remove the key or turn off the start system, and park on a level surface. Remove coins, bottle caps, trash, loose change, and detachable dividers before cleaning so small objects do not become trapped beneath a damp cloth.
How to Clean Car Cup Holders Safely
The safest seven-step method is dry removal, controlled dampening, soft agitation, microfiber extraction, seam detailing, and complete drying. The sequence matters because wiping wet grit across plastic can create scratches, while excessive liquid can travel below a fixed console.
Step 1: Empty and Inspect the Holder
Remove every loose object, then use a phone light to inspect the bottom, inner wall, spring fingers, drain holes, and perimeter seam. Look for coins wedged under a liner, a cracked insert, exposed wiring, or a nearby USB port before applying any moisture.
Place removable liners on a towel rather than directly on a hot dashboard. If a spill is fresh, blot it with a dry microfiber cloth first; rubbing spreads sugary liquid into the seam.
You will know this step worked when: no loose objects remain and the entire holder is visible.
Common mistake: starting with spray cleaner while coins and crumbs are still inside.
Step 2: Vacuum Dry Debris
Use a dry vacuum with a crevice tool for 20-30 seconds per holder. Hold the nozzle just above the surface around flexible tabs and textured corners instead of dragging the nozzle across glossy plastic.
For fine dust, tap the side of the console gently while vacuuming. Do not use compressed air first, because air pressure can drive crumbs beneath the insert or into a switch gap.
You will know this step worked when: the vacuum no longer lifts visible crumbs from the bottom and corners.
Common mistake: wetting crumbs before vacuuming, which turns loose debris into paste.
Step 3: Soften Dried Residue
Prepare either 250 ml of warm water with 2-4 drops of dish soap or an automotive interior cleaner diluted according to its label. Dip a microfiber corner into the solution, wring it until damp rather than dripping, and press it against dried residue for 3-5 minutes.
For a removable insert, place the insert in a sink and use more water. For a fixed holder, never pour the mixture directly into the cavity, because liquid can run beneath the console before the residue softens.
White vinegar diluted 1:1 with water is sometimes suggested for mineral deposits, but it is not the universal choice. Vinegar can leave odor, may dull sensitive finishes, and does little to improve a sugary spill compared with warm water and mild detergent.
You will know this step worked when: a fingernail covered by microfiber can move the residue without force.
Common mistake: using boiling water, which can deform plastic, soften adhesives, or damage nearby coatings.
Step 4: Agitate the Surface
Work a soft nylon detailing brush around the bottom edge, side wall, cup-support fingers, and textured grooves. Use short strokes with light pressure for 20-40 seconds, adding only a few drops of cleaner to the brush when the surface begins to dry.
An old toothbrush works for narrow holders, while a horsehair brush is gentler on delicate trim. Avoid green scouring pads, melamine foam, steel wool, and stiff wire brushes because their abrasive action can permanently change the sheen of plastic.
You will know this step worked when: the brush lifts residue into visible foam or slurry and the texture looks uniformly clean.
Common mistake: pressing harder when the residue is still hard; repeat the dampening cycle instead.
Step 5: Extract Grime With Microfiber
Wrap a clean microfiber cloth around a small tumbler, travel mug, or similarly sized cylindrical object. The covered object should fit firmly without stretching the holder, and the cloth should remain thick enough to absorb residue rather than push it into the seam.
Twist the cloth-covered object slowly inside the holder, then lift it straight out. Refold to a clean section after each pass. This technique provides even contact around the side wall and reaches farther than a flat cloth.
You will know this step worked when: the cloth picks up brown, gray, or sticky transfer and the wall feels smooth.
Common mistake: using a bare metal or hard plastic object that can scuff the holder.
Step 6: Detail Seams and Tight Edges
Use a cotton swab for damp residue and a wood or plastic detailing pick for hardened material in the perimeter seam. Cover the tip with a thin microfiber strand when working beside a soft-touch coating.
Pull debris outward toward the opening rather than pushing it beneath the trim. Check spring-loaded fingers, drain channels, retaining tabs, and the underside of a removable liner, because those locations often retain the last visible residue.
You will know this step worked when: a white cotton swab stays clean after one complete pass around the seam.
Common mistake: using a knife, screwdriver, or metal pick that leaves permanent gouges.
Step 7: Dry the Entire Area
Wipe the holder with a fresh, dry microfiber cloth, then leave the console open to air-dry for 5-10 minutes. A fan or low-pressure air stream can help, but keep air away from openings that lead to electronics.
Reinstall a removable liner only when both the liner and its recess are dry. Moisture trapped below rubber can create odor and make the insert difficult to remove later.
You will know this step worked when: no dampness transfers to a dry cloth and no water remains around tabs or seams.
Common mistake: closing the vehicle immediately after cleaning, which traps humidity in the holder.
How Should You Clean Removable Cup Holder Inserts?
Removable rubber or silicone cup holder inserts can be cleaned more thoroughly in a sink than a fixed console. Remove the insert by its tab or approved lifting point, wash it with warm water and mild dish soap, rinse away detergent, and dry both sides before replacement.
Inspect the owner’s manual before using a dishwasher. Some factory rubber liners are top-rack safe, but aftermarket silicone cups, textured rubber, printed surfaces, and inserts with glued feet may warp, discolor, or lose adhesion. A dishwasher cycle also may not remove residue trapped beneath a raised lip.
For stubborn odor, soak a rubber insert for 10-15 minutes in warm soapy water, then brush the underside and drain channels. Do not use undiluted bleach, petroleum solvent, or concentrated degreaser, since these can weaken elastomers and leave residues that contact drink containers.
How Do You Clean a Fixed Plastic Cup Holder?
A fixed plastic cup holder requires a low-moisture method: vacuum first, apply cleaner to the brush or cloth instead of the console, scrub small sections, and wipe each section dry immediately. Keep liquid at least several centimeters from USB ports, gear selectors, switches, wireless charging pads, and visible seams.
Use a folded microfiber cloth to form a barrier around nearby controls. If the holder has a removable bottom pad, lift only the part the vehicle design clearly allows; forcing a clipped panel can break retaining tabs or expose wiring.
A fixed holder is clean when the surface no longer feels tacky and a dry white cloth shows no transfer. If liquid disappears into a gap, stop cleaning, blot the area, and allow it to dry fully before operating nearby electronics.
Which Cleaner Should You Use?
Mild dish soap diluted in warm water is the best first cleaner for most hard plastic and rubber cup holders because it breaks down sugar and oil without leaving a strong solvent film. Automotive interior cleaner is useful for broader detailing, while alcohol and vinegar require narrower use cases.
| Cleaner | Typical use | Contact approach | Avoid on |
|---|---|---|---|
| Dish soap solution | Soda, juice, coffee film | Damp cloth or brush, 3-5 minutes | Unsealed leather and absorbent trim |
| Automotive interior cleaner | Routine plastic cleaning | Product label dilution, immediate wipe | Unapproved soft-touch coatings |
| Isopropyl alcohol wipe | Small adhesive or ink spot | Brief spot test, then wipe dry | Leather, vinyl dye, glossy coatings |
| White vinegar solution | Mineral or water-scale residue | Diluted spot application, rinse wipe | Sensitive finishes and lingering odor |
| Steam | Deep residue on durable hard plastic | Short bursts from a distance | Soft-touch coating, adhesives, thin trim |
| Detailing gel | Dry dust and crumbs | Press, lift, and fold clean section | Wet, oily, or cured sticky residue |
Never mix vinegar with bleach, ammonia, or other cleaners. Product labels control dilution, dwell time, ventilation, and material compatibility, particularly for concentrated automotive all-purpose cleaners.
Which Cup Holder Cleaning Method Fits the Mess?
Warm soapy water and a brush provide the broadest solution for sticky food and drink residue, while detailing gel is faster for dry crumbs. Steam can soften difficult deposits on robust plastic, but its heat and moisture make it less forgiving near electronics or soft-touch surfaces.
| Method | Best soil type | Typical time | Main limitation |
|---|---|---|---|
| Vacuum plus microfiber | Dust and loose crumbs | 2-5 minutes | Does not dissolve sticky film |
| Dish soap solution | Soda, juice, coffee, oil | 5-15 minutes | Requires moisture control |
| Detailing gel | Dry crumbs and grit | 1-3 minutes | Poor against dried sugar |
| Steam cleaner | Hardened residue on hard plastic | 3-8 minutes | Heat can damage trim |
| Professional extraction | Deep spill or odor below trim | 30-90 minutes for interior service | Typical cost is $75-$150 or more |
Detailing gel should be pressed down and lifted, not rubbed repeatedly across the surface. Gel that becomes cloudy, oily, or degraded should be discarded according to its product instructions, because old compound can redeposit grime.
Steam should be treated as a controlled softening tool, not a sanitizing shortcut. Use brief bursts of about 1-2 seconds, keep the nozzle moving, and wipe immediately; the five-second direct blast sometimes recommended for cup holders is too aggressive for unknown plastics and nearby adhesives.
How Do You Remove Dried Soda or Coffee?
Dried soda and coffee should be softened repeatedly with a warm, damp microfiber cloth rather than scraped aggressively. Cover the residue for 3-5 minutes, brush lightly, wipe away the loosened film, and repeat two or three times until the surface stops transferring color.
A cured spill may look like a transparent lacquer, but stronger chemicals are not automatically safer. Isopropyl alcohol can help with a small spot on compatible hard plastic after a hidden-area test, while alcohol can damage soft-touch coatings, printed markings, leather finishes, and some vinyl surfaces.
For milk or protein-based drinks, remove all visible residue with mild detergent and inspect the seam closely. A persistent smell after surface cleaning may indicate liquid below the insert or console, where a surface spray cannot reach.
Practitioner rule: if a plastic pick cannot lift the edge after the second dampening cycle, stop increasing force. More pressure raises the chance of a gouge, while another controlled dwell period usually improves removal.
What If the Cup Holder Still Smells?
A remaining odor after cleaning usually means residue remains in a seam, under a removable liner, or beneath the console. Remove and wash every accessible insert, wipe the recess, dry it for 10 minutes, and inspect the underside before using an odor product.
An enzyme cleaner may help with milk, food, or other organic residue, but it must be labeled for the specific automotive material and used sparingly. Apply it to a cloth or swab rather than flooding the holder. Follow the label’s dwell time and wipe away residue afterward.
Do not spray ozone products into a vehicle casually. Ozone treatment is a professional process requiring an unoccupied vehicle, ventilation, and material compatibility considerations; it does not remove the spill source and can degrade some rubber and plastics with repeated exposure.
If the smell returns after two cleanings, the liquid may have traveled beneath the console. A detailer may need to remove trim panels and use controlled extraction, especially when the spill involved milk, alcohol, or a large sugary drink.
What Are the Most Common Cleaning Mistakes?
The most damaging mistakes are flooding a fixed console, using abrasive or metal tools, applying incompatible solvents, and leaving moisture beneath an insert. Each failure has a safer recovery method, but prevention costs less than replacing stained trim or an electronic module.
| Mistake | Likely result | Safer correction | Stop condition |
|---|---|---|---|
| Pouring cleaner into holder | Liquid reaches wiring or switches | Apply cleaner to cloth or brush | Liquid enters a gap |
| Scraping with metal | Gouges and bright scratches | Use wood or plastic | Residue will not soften |
| Using melamine foam | Dull or uneven finish | Use soft microfiber | Finish changes visibly |
| Applying undiluted APC | Whitening or tackiness | Rinse-wipe and follow label | Coating feels sticky |
| Using boiling water | Warped insert or trim | Use comfortably warm water | Plastic begins deforming |
| Leaving liner damp | Odor and trapped moisture | Dry both sides before refitting | Smell returns |
Abrasive damage is often mistaken for dirt because a bright scratch catches light in the same area that previously looked dull. Additional cleaning cannot restore removed texture or coating; only replacement or professional refinishing may correct it.
How Do You Clean Cup Holders Near Electronics?
Use no-pool cleaning near electronics: vacuum dry, dampen a brush outside the vehicle or over a towel, scrub a small area, and immediately blot with a separate microfiber. Keep spray bottles pointed away from the console and never mist directly beside a USB port, shifter, button, or charging pad.
If a spill has already entered a control gap, turn off the vehicle and avoid repeatedly pressing the affected switch. Blot visible liquid without forcing it deeper, then consult the owner’s manual or a technician if the control behaves abnormally.
How Often Should Cup Holders Be Cleaned?
Most drivers benefit from a quick crumb removal once a week and a damp deep clean every 2-4 weeks. Clean immediately after a drink spill, especially when the liquid contains sugar, dairy, syrup, or alcohol, because drying makes residue harder to remove and increases odor risk.
| Use pattern | Quick-clean interval | Deep-clean interval | Preventive insert |
|---|---|---|---|
| Occasional adult use | Every 2 weeks | Every 6-8 weeks | Optional silicone liner |
| Daily commuting | Weekly | Every 2-4 weeks | Silicone or rubber insert |
| Children or frequent snacks | 2-3 times weekly | Every 1-2 weeks | Removable washable liner |
| Worksite or outdoor use | After dusty trips | Weekly | Heavy-duty removable liner |
The best maintenance is immediate blotting. A 30-second response after a spill can remove liquid before it reaches the seam, while a week-old spill may require repeated softening and professional trim access.
How Much Time and Money Does Cleaning Take?
A routine car cup holder cleaning costs $0-$15 and takes about 5 minutes when household supplies are available. A heavily soiled holder generally takes 15-20 minutes, while a professional interior detail typically costs $75-$150 or more because the service includes the rest of the cabin.
| Service or approach | Typical material cost | Typical time | Suitable situation |
|---|---|---|---|
| Household soap and cloth | $0-$5 | 5-15 minutes | Normal dust or drink film |
| Detailing gel | $6-$10 | 1-3 minutes | Dry crumbs in tight texture |
| Automotive cleaner and brushes | $10-$30 | 10-20 minutes | Repeated interior maintenance |
| Handheld steam cleaning | $40-$150 tool cost | 3-8 minutes | Durable hard-plastic residue |
| Professional interior detail | $75-$150+ | 30-90 minutes | Odor, deep spills, full cabin |
Prices vary by region, vehicle size, soil level, and whether a detailer removes console panels. A cup-holder-only visit may not be available, so ask whether the quoted service includes extraction, odor treatment, trim removal, or only surface wiping.
How Can You Prevent Future Cup Holder Messes?
A removable silicone or rubber liner reduces cleanup time by containing crumbs and allowing the insert to be washed separately. Choose a liner that fits without interfering with retention tabs, drainage, adjustable cup supports, or the diameter of the containers you regularly carry.
Silicone baking cups can work as inexpensive liners when their diameter and height fit the holder, but they are not universal automotive parts. A loose cup can fold, trap liquid below itself, or block a drainage feature, so check the fit after inserting a full beverage container.
A sock placed over the bottom of a travel mug can act as a temporary cleaning sleeve. Use a clean, lint-free sock and a dampened cloth, not a chemical-soaked fabric that may transfer dye or cleaner to the console.
Keep a small kit in the vehicle containing two microfiber cloths, cotton swabs, a sealable waste bag, and a few paper towels. Do not store an unsealed liquid cleaner where heat can cause leakage.
FAQ
Can I Clean a Car Cup Holder Without Water?
Yes, dry vacuuming followed by detailing gel can remove dust, crumbs, and loose grit without water. Water-free methods cannot dissolve dried soda, coffee oils, milk residue, or syrup, so use a barely damp microfiber or brush for those soils while keeping liquid away from console openings.
Is Windex Safe for Car Cup Holders?
Glass cleaner may be acceptable on some hard plastic surfaces, but it is not the safest universal choice for automotive interiors. Ammonia, alcohol, fragrance, or surfactants can affect soft-touch coatings, leather, vinyl, and glossy trim. Use a label-approved interior cleaner or diluted dish soap first.
Can I Put Rubber Cup Holder Inserts in the Dishwasher?
Some factory rubber inserts are top-rack dishwasher safe, but the vehicle manufacturer’s instructions determine whether that applies to a particular part. Hand washing with warm water and dish soap is the lower-risk option for aftermarket silicone, printed liners, glued feet, and thin inserts.
How Do I Remove Crumbs From a Deep Cup Holder?
Use a vacuum crevice tool for 20-30 seconds, then loosen corner debris with a soft detailing brush. A detailing gel can lift particles from textured grooves after vacuuming, but press and lift the gel instead of rubbing it into the surface or seam.
Should I Use Bleach to Sanitize a Car Cup Holder?
No, household bleach is unnecessary for normal cup-holder cleaning and can discolor plastic, damage coatings, corrode metal, and create hazardous fumes when mixed with other products. Washing with mild detergent, wiping residue away, and drying completely provides the appropriate routine treatment.
When Should a Detailer Clean the Cup Holder?
Contact a detailer when odor returns after accessible surfaces and inserts are cleaned, when a large dairy or sugary spill entered the console, or when liquid reached switches and wiring. Professional service may include trim removal and extraction that household wiping cannot accomplish.
The Bottom Line
To clean car cup holders, vacuum first, soften residue with a controlled amount of warm soapy water, scrub gently, extract grime with microfiber, clean the seams, and dry every surface before replacing the insert. Use detailing gel for dry crumbs, reserve steam for durable hard plastic, and never flood a fixed console near electronics.