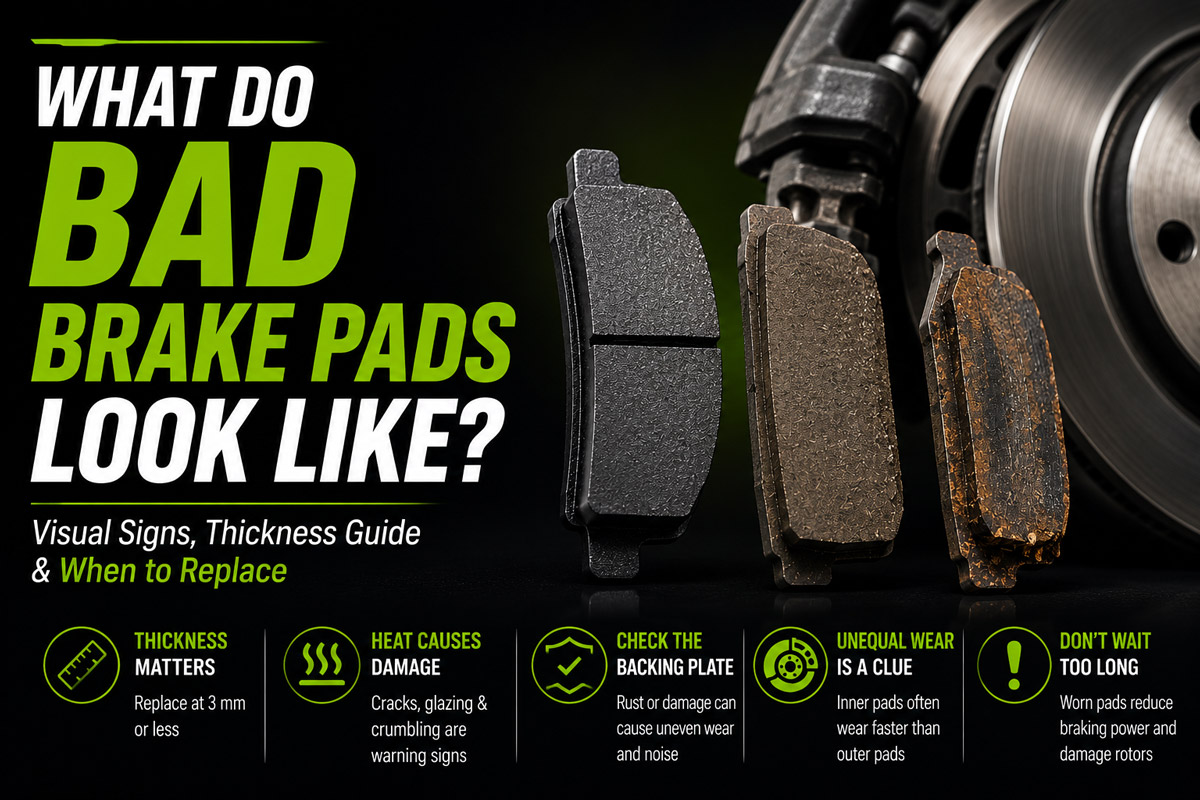
Bad brake pads look visibly deteriorated, featuring less than 4 millimeters of remaining friction material, deep heat-induced surface cracks, shiny crystallized glazing, or wedge-shaped tapered wear. In severe cases, the friction block crumbles at the edges, delaminates from rust jacking, or wears completely flat, exposing bare steel backing plates to the brake rotor.
At a Glance
- Brand-new automotive brake pads measure 10 to 12 millimeters in friction material thickness across most passenger vehicles.
- Friction material worn to 3 millimeters or less violates safety inspection limits in most jurisdictions and requires immediate replacement.
- Shiny or mirrored pad surfaces indicate thermal glazing from temperatures exceeding 600°F (315°C), which causes persistent brake squeal and loss of friction.
- Tapered or wedge-shaped pad wear signals a binding caliper slide pin or twisted caliper hardware rather than normal friction wear.
- Rust jacking can secretly delaminate thick friction material from the steel backing plate, causing sudden block separation during emergency braking.
How Thick Should a Healthy Brake Pad Be?
A healthy brake pad must have at least 4 to 5 millimeters of usable friction material remaining above the steel backing plate. Thickness measurements directly dictate whether a brake pad is safe for continued driving or requires immediate disposal.
Automotive brake pads transition through four standardized thickness thresholds during their service life:
| Wear Stage | Friction Thickness | Operational Status | Action Required |
| New Pad | 10 mm – 12 mm | 100% Service Life | None; normal braking performance. |
| Caution Zone | 4 mm – 5 mm | ~30% Service Life | Schedule pad replacement within 3,000 to 5,000 miles. |
| Legal Minimum | 3 mm | ~10% Service Life | Replace immediately; fails state safety inspections. |
| Critical Danger | 1 mm – 2 mm | 0% Service Life | Stop driving; backing plate metal contact is imminent. |
A pad measuring 3 millimeters or less cannot adequately dissipate kinetic heat. When friction material thins below this critical threshold, thermal transfer into the brake caliper fluid increases by up to 40%, creating a severe risk of brake fluid boiling and pedal fade during downhill descents.
What Are the Visible Signs of Pad Failure?
Visible signs of brake pad failure include paper-thin friction material flush with the backing plate, deep surface fissures, mirror-like glazing, wedge-shaped tapering, and broken or crumbled edges. Identifying these five physical abnormalities on the pad’s friction block confirms structural exhaustion.
- Paper-Thin Friction Material: The composite friction block appears almost level with the dark steel backing plate, leaving less than 2 millimeters of usable compound.
- Heat-Induced Cracking: Fissures wider than 0.5 millimeters cross-cut the center of the pad face, indicating thermal shock from repeated panic stops.
- Glazed or Mirrored Finish: The friction surface looks reflective, smooth, and crystallized instead of dull and porous.
- Uneven Wedge Wear: One side of the pad measures 5 millimeters while the opposite edge measures 2 millimeters, creating a visible slope.
- Chipped or Crumbling Edges: Chunks of the friction compound are missing along the perimeter where the pad meets the rotor lip.
Why Do Brake Pads Crack, Glaze, or Crumble?
Brake pads crack, glaze, or crumble because sustained braking temperatures exceed the thermal breakdown limit of the pad’s phenolic resin binder. When friction face temperatures surpass 600°F (315°C) during heavy towing, mountain descents, or aggressive driving, the binding agents inside the friction compound vaporize and fail.
Glazing occurs when trapped heat melts the metallic or organic fibers on the pad surface, transforming a high-friction compound into a slick, crystallized mirror. Cracking develops when rapid heating and cooling cycles cause the compound to expand and contract at a different rate than the underlying steel plate. Chipped edges occur when mechanical vibration rattles a loose pad within a corroded caliper bracket, hammering the brittle friction material against the stainless steel abutment clips until outer chunks break off.
How Does Rust or Damage Affect the Backing Plate?
Rust and physical distortion on the steel backing plate compromise structural rigidity and prevent the brake pad from sliding smoothly inside the caliper bracket. A brake pad is only as structurally sound as the 5-millimeter stamped steel plate that supports its composite friction block.
Inspect the backing plate for three distinct modes of mechanical deterioration:
- Flaking Iron Oxide: Heavy surface rust on the ears (the sliding tabs of the backing plate) increases dimensions, causing the pad to bind and jam inside the caliper bracket.
- Bending or Warping: A backing plate that deviates from flat by more than 0.010 inches indicates extreme clamping force from a misaligned caliper piston, which distributes braking force unevenly across the rotor.
- Shim Separation: Noise-damping shims glued or riveted to the rear of the backing plate can rust and peel away, allowing the bare piston to hammer against the backing plate and produce metallic clacking noises over bumps.
Why Do Inner Pads Wear Out Faster Than Outer Pads?
Inner brake pads wear out faster than outer pads because floating brake calipers apply direct hydraulic piston pressure to the inner pad first before pulling the outer pad against the rotor. When caliper slide pins corrode or seize, the caliper cannot slide to release pressure on the inboard side.
This mechanical trap—known as the Inboard Pad Trap—deceives drivers and technicians during casual visual inspections. Looking through the wheel spokes only reveals the outer pad, which may look healthy at 6 millimeters of thickness. Meanwhile, a seized guide pin traps the inner pad continuously against the spinning rotor, grinding the unseen inboard friction material down to bare metal. Professional inspections require checking both pads on every wheel, as a thickness difference greater than 2 millimeters between inner and outer pads confirms slide pin seizure.
What Is Rust Jacking and How Does It Cause Failure?
Rust jacking is a structural failure where iron oxide grows between the steel backing plate and the composite friction material, prying the friction block away from the steel base. This silent mechanism causes seemingly thick brake pads to delaminate and shear off instantly during braking.
Road salt, winter moisture, and acidic wheel cleaners penetrate the adhesive bond layer separating the friction compound from the steel plate. Because iron oxide occupies up to six times the volume of uncorroded steel, the expanding rust creates thousands of pounds of upward pressure under the friction block. Visually, a rust-jacked pad exhibits a swollen, cracked perimeter adhesive line or a visible air gap between the backing plate and the pad material. When the driver applies hard braking force, the delaminated friction block shears off its retaining pins and ejects from the caliper, dropping braking power on that wheel to zero immediately.
How Do Caliper Problems Cause Tapered Pad Wear?
Caliper hardware problems cause tapered pad wear by forcing the brake pad to strike the rotor at an angle rather than parallel to the braking face. Tapered wear—where the pad is thicker at one end or top-to-bottom—proves that clamping forces are unevenly distributed across the caliper.
Two distinct mechanical failures produce tapered wedge wear:
- Guide Pin Binding: In a single-piston floating caliper, one lubricated slide pin can dry out or seize while the other moves freely. The caliper pivots around the seized pin like a door hinge, crushing the leading edge of the brake pad while leaving the trailing edge lightly worn.
- Caliper Twist: Under heavy hydraulic pressure, a worn caliper bracket or weakened slider bushing allows the entire caliper body to flex and twist. This structural deflection drives the bottom edge of the pad into the rotor while pulling the top edge away, creating a vertical taper that destroys rotor alignment.
How Can You Check Brake Pads Without Wheel Removal?
You can check brake pad thickness without removing the wheels by illuminating the caliper assembly through the alloy wheel spokes using a high-output flashlight. This rapid preliminary inspection allows vehicle owners to verify outer pad condition in less than two minutes.
- Park on a Level Surface: Engage the parking brake and turn the steering wheel fully to the left or right to expose the front brake caliper through the wheel well.
- Locate the Outer Brake Pad: Shine a flashlight between the wheel spokes and look through the inspection window on the outer edge of the metal caliper body.
- Identify the Three Layers: Distinguish between the shiny steel brake rotor disc, the dark stamped steel backing plate (outermost layer), and the textured friction material sandwiched between them.
- Estimate Friction Block Thickness: Visually compare the thickness of the composite friction material against the backing plate; a healthy pad’s friction material should be thicker than its steel backing plate (approx. 5 millimeters).
Note: This visual check only confirms the condition of the outer pad. Always remove the road wheel if you suspect an Inboard Pad Trap or slide pin failure.
How Do You Accurately Measure Brake Pad Thickness?
You accurately measure brake pad thickness by using a color-coded automotive brake pad gauge or a digital Vernier caliper applied directly to the friction material edge. Guessing thickness by eye often leads to premature replacement or missed safety violations.
- Remove the Road Wheel: Lift the vehicle safely on jack stands and remove the wheel assembly to gain unobstructed access to the brake caliper.
- Select a Manual Brake Gauge: Use a standardized 8-blade automotive thickness gauge, which features green (8–12 mm), yellow (4–6 mm), and red (2–3 mm) anodized blades.
- Insert the Gauge Blade: Slide the gauge blades between the brake rotor face and the steel backing plate until you find the blade that fits snugly against the friction material without forcing it.
- Measure Both Pads Individually: Record measurements for both the inboard and outboard pads independently. If using a Vernier caliper, measure total pad thickness and subtract 5 millimeters (standard passenger car backing plate thickness) to isolate true friction material depth.
How Far Can You Drive After a Wear Sensor Trigger?
You can safely drive between 200 and 500 miles of normal commuting once an electronic wear sensor or mechanical scratcher squeaks before reaching catastrophic metal-on-metal contact. Driving beyond this safety buffer risks destroying the brake rotor and causing brake system failure.
Automotive brake pads use two distinct warning mechanisms to alert drivers to low compound thickness:
- Mechanical Scratchers: Small spring-steel tabs riveted to the backing plate designed to contact the spinning rotor when 2 to 3 millimeters of friction material remain. They produce a high-pitched metallic squeal when the vehicle is moving.
- Electronic Wear Sensors: Single-wire loops embedded inside the friction compound at the 3-millimeter mark. When the rotor wears through the wire, it breaks the electrical circuit and illuminates the amber brake warning indicator on the dashboard.
Once triggered, high-speed interstate stops or stop-and-go city delivery cycles will consume the remaining 2 millimeters of compound in fewer than 150 miles.
Why Do Thick Brake Pads Make Squealing Noises?
Thick brake pads make squealing noises because thermal glazing, hard metallic friction compounds, or missing hardware shims create high-frequency micro-vibrations against the rotor face. Squealing does not always indicate a worn-out pad; it frequently signals resonance problems within the caliper assembly.
Budget semi-metallic brake pads contain high percentages of steel fibers that act like phonograph needles against the cast-iron rotor, generating high-frequency squeaks even when measuring 10 millimeters thick. Thermal glazing also creates a glass-smooth surface that chitters and squeals under light pedal application. Furthermore, if a technician omits stainless steel abutment clips, anti-squeal backing shims, or high-temperature silicone brake lubricant during installation, normal friction pulses amplify through the suspension steering knuckle as audible squeals.
Can You Pad-Slap Without Replacing the Rotors?
You can install new brake pads without replacing or resurfacing the rotors only if the existing rotors measure above factory minimum discard thickness, show zero lateral runout, and remain completely free of grooves or heat spots. Installing fresh pads onto damaged rotors wastes money and degrades stopping power.
A “pad-slap” (replacing friction pads while leaving old rotors untouched) succeeds only when the rotor meets three strict physical criteria:
- Minimum Thickness Compliance: Rotor thickness must exceed the manufacturer’s stamped “MIN THICK” specification by at least 1.5 millimeters to safely absorb heat from the new pads.
- Flatness and Runout: Total lateral runout measured with a dial indicator must not exceed 0.002 inches (0.05 mm), or the new pads will develop uneven wear and cause steering wheel judder.
- Surface Integrity: The braking face must be free of deep phonograph-groove scoring, raised rust lips along the outer perimeter, and blue hardened cementite heat spots caused by localized overheating.
How Does Worn Pad Appearance Differ by Material?
Worn pad appearance differs by material formulation because ceramic, semi-metallic, and organic compounds degrade under distinct physical and thermal breakdown patterns. Accurately diagnosing a failing pad requires recognizing how different friction materials react to age and heat.
| Friction Material | Visual Wear Appearance | Dust & Debris Profile | Typical Failure Mode |
| Ceramic | Clean, pale gray or tan surface; sharp edges with minimal surface grooving. | Extremely fine, white or light tan dust that does not stick to wheels. | Thermal glazing and crystallization under repeated heavy towing loads. |
| Semi-Metallic | Dark, abrasive surface with visible metallic flakes and surface oxidation. | Heavy, dark grey metallic soot that corrodes wheel clear-coats. | Chipped edges, rust jacking, and aggressive rotor scoring. |
| Non-Asbestos Organic (NAO) | Dull, charred black or dark brown appearance; soft, rounded pad edges. | Moderate amounts of powdery black dust. | Rapid structural thinning and crumbling under high-heat mountain driving. |
The Bottom Line
Bad brake pads visually present as friction blocks worn below 4 millimeters, glazed to a crystallized shine, cracked by extreme heat, or tapered into wedge shapes by binding caliper hardware. Never rely solely on an external check through wheel spokes—hidden slide pin corrosion and rust jacking frequently destroy inboard pads while outer pads look brand new. For optimal safety and rotor longevity, measure both pads on every wheel with a gauge and replace any pad set immediately once friction thickness drops to 3 millimeters.